
Common Causes of CPU Fan Error
A CPU fan error is a common issue that computer users encounter. This error message typically appears when the CPU fan fails to function properly or when the system fails to detect the fan’s presence. This error is important to address promptly, as it helps maintain the optimal temperature of the CPU and prevent overheating. In this article, we will explore the most common causes of CPU fan errors and discuss how to fix them.
1. Loose or Disconnected Fan Connection:
One of the primary causes of a CPU fan error is a loose or disconnected fan connection. Over time, the connection between the fan and the motherboard can become loose, resulting in an interruption in the fan’s operation. To fix this issue, ensure that the fan is securely connected to the appropriate fan header on the motherboard.
2. Dust and Debris Build-up:
Dust and debris can accumulate on the fan blades and heat sink, hindering proper air circulation and causing the fan to work harder than necessary. Cleaning the fan and heat sink regularly can help prevent overheating and reduce the occurrence of CPU fan errors. Use compressed air or a soft brush to gently remove any accumulated dust or debris.
3. Fan Speed Settings:
Improper fan speed settings can trigger a CPU fan error. Check the BIOS settings to ensure that the fan speed is correctly configured. You can adjust the fan speed settings to either automatic or manual, depending on your preference and the requirements of your system.
4. Outdated Motherboard BIOS:
An outdated or incompatible motherboard BIOS can also lead to a CPU fan error. Make sure you have the latest version of the BIOS installed on your motherboard. Check the manufacturer’s website for any available updates, and follow the instructions to update the BIOS if necessary.
5. Faulty Fan:
If none of the aforementioned steps resolve the CPU fan error, it is possible that the fan itself is faulty. In this case, replacing the fan with a new one is the best solution. Make sure to choose a fan that is compatible with your motherboard and meets the necessary specifications.
6. Seek Professional Assistance:
If you are unsure about any of the troubleshooting steps mentioned above or are unable to fix the CPU fan error on your own, it is recommended to seek professional assistance. A computer technician or an expert in hardware-related issues will be able to diagnose the problem accurately and provide the appropriate solution.
Remember, ignoring a CPU fan error can lead to serious consequences, such as system instability or even permanent damage to the CPU. Addressing the issue promptly and taking the necessary steps to fix it will help ensure the smooth operation and longevity of your computer system.
By following the steps outlined above, you can effectively troubleshoot and resolve common causes of CPU fan errors. Take the time to maintain your computer’s cooling system, and your CPU will thank you with years of reliable performance.
Checking and Reconnecting the Fan Connection
One of the most common causes of a CPU fan error is a loose or disconnected fan connection. If the connection between the fan and the motherboard is not secure, the system may fail to detect the fan, resulting in the fan error message. In this section, we will discuss how to check and reconnect the fan connection to resolve this issue.
Before proceeding, ensure that your computer is powered off and unplugged. This will prevent any potential damage to hardware components during the troubleshooting process.
1. Locate the Fan Connector:
Open your computer case and locate the CPU fan. The fan is usually positioned on top of the heat sink, which is attached to the CPU. The fan will have a cable connected to it, leading to the fan header on the motherboard. Take note of the fan connector and its position for reference during the reconnection process.
2. Check the Fan Connector:
Inspect the fan connector to ensure that it is securely attached to the fan header on the motherboard. Gently wiggle the connector to see if it is loose. If the connection is loose, it may need to be tightened or reinserted to establish a secure connection.
3. Disconnect and Reconnect the Fan:
If the fan connector is loose, disconnect it from the fan header by gently pulling it straight out. Take care not to pull on the wires, as this may damage the connector or the motherboard. Once disconnected, inspect the connector for any dust or debris and clean it if necessary.
Next, line up the connector with the fan header on the motherboard and firmly push it in until it clicks into place. Ensure that both ends of the connector are securely connected and that there is no visible gap between the connector and the fan header.
4. Test the Fan:
Once the fan is reconnected, close the computer case and plug in the power cable. Power on the computer and enter the BIOS to check if the CPU fan error message still appears. If the error is resolved and the fan is detected by the system, you have successfully fixed the fan connection issue.
If the CPU fan error persists, repeat the process of checking and reconnecting the fan connection to ensure that it is properly secured. If the issue still persists after multiple attempts, it is recommended to move on to the next troubleshooting step or seek professional assistance.
Checking and reconnecting the fan connection is a straightforward and effective method to resolve a CPU fan error. By ensuring a secure and stable connection between the fan and the motherboard, you can prevent the occurrence of the error and maintain proper cooling for your CPU. Remember to take precautionary measures when working with computer hardware and consult the manufacturer’s documentation or seek professional assistance if you are unsure about any step of the process.
Cleaning the Fan and Heat Sink
Dust and debris accumulation on the CPU fan and heat sink can impede proper airflow, causing the fan to work harder and potentially trigger a CPU fan error. Regularly cleaning the fan and heat sink can help prevent overheating and resolve this issue. In this section, we will discuss how to clean the fan and heat sink effectively.
Before you begin, ensure that your computer is turned off and unplugged. This will prevent any electrical accidents or damage to system components.
1. Open the Computer Case:
Start by opening the computer case to access the internal components. Refer to the manufacturer’s documentation for the specific steps to open your computer case, as this may vary depending on the model and design of your computer.
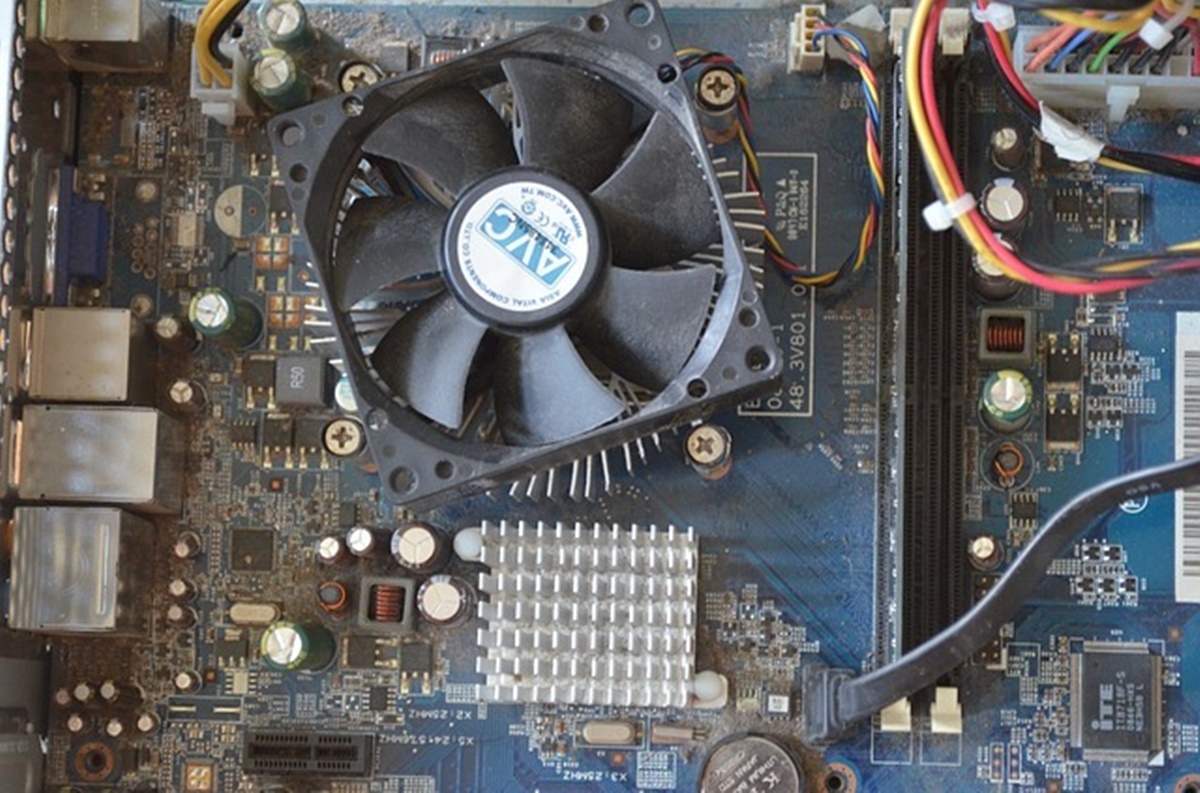
2. Locate the CPU Fan and Heat Sink:
Locate the CPU fan, which is typically positioned on top of the heat sink. The heat sink is a metal component that serves as a cooling apparatus for the CPU. Take note of the fan blades and the fins on the heat sink for reference during the cleaning process.
3. Use Compressed Air:
Take a can of compressed air and carefully blow air onto the fan blades and the heat sink fins. Hold the can upright and use short bursts of air to dislodge any dust or debris that may have accumulated. Be cautious not to hold the can too close to the components, as this may damage the fan blades or bend the fins on the heat sink.
4. Remove Stubborn Debris:
If there are any stubborn dust particles or debris that cannot be removed by air pressure alone, you can use a soft brush or toothbrush to gently brush them away. Ensure that the bristles are clean and free from any moisture or residue. Be gentle to avoid damaging any delicate components.
5. Clean the Fan Blades and Heat Sink Fins:
Once the loose dust and debris have been removed, you may notice that there is still some residue on the fan blades and heat sink fins. Dampen a lint-free cloth or cotton swab with isopropyl alcohol (rubbing alcohol) and carefully wipe the surfaces of the fan blades and fins. This will help remove any remaining dirt or grime. Allow the alcohol to evaporate completely before reassembling the computer.
6. Reassemble the Computer:
Once the cleaning process is complete and all components are dry, carefully reassemble the computer case. Ensure that all connections are secure and that there are no loose cables or components. Plug in the power cord and power on the computer to check if the CPU fan error message still appears.
Regularly cleaning the fan and heat sink can help maintain optimal cooling performance and prevent CPU fan errors. Aim to clean these components every few months or as needed, depending on the environment and usage conditions of your computer. By keeping the fan and heat sink free from dust and debris, you can prolong the life of your CPU and ensure reliable system performance.
Adjusting Fan Speed Settings in BIOS
Incorrect fan speed settings in the BIOS can lead to a CPU fan error. The fan may not be running at the appropriate speed, causing the system to detect an abnormal fan operation. Adjusting the fan speed settings in the BIOS can help resolve this issue. In this section, we will discuss how to access and adjust the fan speed settings in the BIOS.
1. Restart the Computer and Access BIOS:
Start by restarting your computer. As the computer boots up, look for a message indicating which key to press to access the BIOS. This key is usually displayed on the screen for a few seconds during the boot process. Common keys to access the BIOS include Del, F2, F10, or Esc.
2. Enter BIOS Setup:
Once you have identified the correct key, press it repeatedly during the startup process. This will bring you to the BIOS setup utility. The specific layout and options may vary depending on the manufacturer and model of your motherboard.
3. Navigate to Fan Settings:
Use the arrow keys on your keyboard to navigate through the BIOS menu. Look for a section related to fan control or hardware monitoring. The exact location and name of this section may differ between BIOS versions.
4. Adjust Fan Speed:
Within the fan settings section, you should see options to adjust the fan speed. The options may include “Auto,” “Smart Fan,” or “Manual.” Select the desired option based on your preference and system requirements.
If available, the “Auto” option allows the system to automatically control the fan speed based on the CPU temperature. This is generally a recommended setting for most users.
The “Smart Fan” option adjusts the fan speed based on predefined temperature thresholds. This setting can help balance cooling performance and noise levels.
The “Manual” option enables you to set a specific fan speed percentage. Use caution when choosing this option, as setting the fan speed too low may result in insufficient cooling, while setting it too high may lead to increased noise levels. Consult your motherboard’s manual or manufacturer’s website for recommended fan speed settings.
5. Save and Exit:
Once you have adjusted the fan speed settings, navigate to the exit menu in the BIOS and save your changes. Choose the option to save and exit, allowing the computer to reboot with the new settings in place.
Upon reboot, check if the CPU fan error message still appears. If the error is resolved and the fan is running at the desired speed, you have successfully adjusted the fan speed settings in the BIOS.
It is important to note that not all motherboards have advanced fan speed control options in the BIOS. If you cannot find the fan speed settings or if adjusting them does not resolve the CPU fan error, consider updating your motherboard’s BIOS to the latest version. Consult the manufacturer’s website for instructions on how to perform a BIOS update.
By adjusting the fan speed settings in the BIOS, you can optimize the cooling performance of your computer and potentially resolve any CPU fan errors. Remember to take caution when making changes in the BIOS and follow the manufacturer’s instructions to ensure proper configuration.
Updating Motherboard BIOS
An outdated or incompatible motherboard BIOS can contribute to a CPU fan error. Updating the BIOS to the latest version can resolve compatibility issues, improve system stability, and potentially fix the CPU fan error. In this section, we will discuss how to update the motherboard BIOS.
Before proceeding with a BIOS update, it is essential to backup any important data and ensure that your computer is connected to a reliable power source. A loss of power or an interruption during the BIOS update process can result in permanent damage to the motherboard.
1. Identify the Motherboard Model:
Start by identifying the model of your motherboard. This information is typically printed on the motherboard itself, or you can refer to the documentation or packaging that came with your computer. Alternatively, you can use system information software or utility programs to identify the motherboard model.
2. Visit the Manufacturer’s Website:
Once you have determined the motherboard model, visit the manufacturer’s website. Look for the support or downloads section, and search for the drivers or firmware updates related to your specific motherboard model.
3. Download the Latest BIOS Update:
Within the driver or firmware updates section, locate the latest BIOS update for your motherboard model. Take note of the version number and any specific instructions provided by the manufacturer.
4. Prepare a Bootable USB Drive:
In most cases, a BIOS update requires a bootable USB drive to execute the update process. You will need a blank USB drive with sufficient storage capacity. Format the USB drive as FAT32 and ensure that it is empty before proceeding.
5. Flash the BIOS:
Follow the manufacturer’s instructions for flashing the BIOS using the bootable USB drive. This typically involves copying the BIOS update files to the USB drive and then rebooting the computer with the USB drive inserted.
Enter the BIOS setup utility by pressing the designated key during startup (refer to the motherboard manual for the correct key). From within the BIOS, locate the option to update or flash the BIOS. Select the appropriate option and choose the USB drive as the source for the update.
Follow the on-screen instructions to initiate the BIOS update process. Be patient, as the update may take several minutes to complete. Do not power off the computer during the update process.
6. Reboot and Verify:
Once the BIOS update process is complete, the computer will automatically reboot. Check the BIOS version displayed on the startup screen or within the BIOS setup utility to confirm that the update was successful.
After updating the BIOS, check if the CPU fan error message still persists. If the error is resolved, the update was successful. However, if the error continues to occur, consider seeking professional assistance or exploring other troubleshooting options.
It is worth noting that updating the motherboard BIOS carries some risks, and improper execution can damage the motherboard or render the computer inoperable. If you are not confident in performing a BIOS update, it is recommended to seek professional assistance.
Updating the motherboard BIOS can be an effective solution for resolving compatibility issues and CPU fan errors. Follow the manufacturer’s instructions carefully to ensure a successful update and enhance the performance and stability of your computer system.
Replacing the Faulty Fan
If none of the previous troubleshooting methods have resolved the CPU fan error, it is likely that the fan itself is faulty. A malfunctioning fan can lead to inadequate cooling and trigger the fan error message. In this section, we will discuss how to replace a faulty fan to resolve the issue.
Before proceeding, ensure that your computer is turned off and unplugged. This will prevent any electrical accidents during the replacement process.
1. Identify the Fan Type:
Start by identifying the type of fan that needs to be replaced. Is it the CPU fan or another fan within the computer? Knowing the specific fan type will help determine the appropriate replacement part.
2. Find a Compatible Replacement Fan:
Refer to the fan’s documentation or consult the manufacturer’s website to find a compatible replacement fan. Look for a fan that matches the specifications of the faulty fan, such as the size, connector type, and airflow requirements.
3. Remove the Faulty Fan:
Open your computer case and locate the faulty fan. Depending on the fan’s placement, it may be secured with screws or clips. Unscrew or unclip the fan from its mounting point and disconnect any cables attached to it. Take note of the orientation of the fan as you will need to install the replacement fan in the same manner.
4. Install the Replacement Fan:
Align the replacement fan with the mounting points and carefully secure it in place using the appropriate screws or clips. Ensure that the fan is oriented correctly, with the airflow direction matching the original fan. Reconnect any cables to the new fan, ensuring a secure connection.
5. Test the Replacement Fan:
Close the computer case and plug in the power cable. Power on the computer and check if the CPU fan error message still appears. Listen for the sound of the new fan functioning and monitor the CPU temperature to ensure that the replacement fan is providing adequate cooling.
If the CPU fan error persists even after replacing the faulty fan, there may be an underlying issue with the motherboard or another component. In such cases, it is recommended to seek professional assistance or consult with the manufacturer for further troubleshooting options.
Replacing a faulty fan can be a straightforward solution to resolve a CPU fan error. Be sure to choose a replacement fan that is compatible with your system and follow the proper installation procedure. With a new fan in place, your computer can regain optimal cooling performance and prevent any further CPU fan errors.
Seeking Professional Assistance
If you have tried all of the previous troubleshooting steps and are still experiencing a CPU fan error, it may be time to seek professional assistance. Sometimes, underlying hardware issues or complex technical problems require the expertise of a skilled technician or computer hardware specialist. In this section, we will discuss the benefits of seeking professional assistance and how it can help resolve the CPU fan error.
1. Diagnostic Expertise:
A professional technician has the knowledge and experience to diagnose the root cause of the CPU fan error accurately. They have access to specialized tools and resources that can identify any underlying hardware issues contributing to the problem. By pinpointing the exact cause of the error, they can provide an effective solution.
2. Professional Guidance:
When you seek professional assistance, you gain access to expert guidance tailored to your specific situation. The technician can explain the problem in simple terms and provide you with a clear understanding of the necessary repairs or upgrades. They can also offer advice on preventative measures to avoid similar issues in the future.
3. Hardware Repair or Replacement:
If the CPU fan error is caused by a faulty component or requires a hardware repair, a professional technician is equipped to handle the task. They have the necessary tools and expertise to either repair the faulty hardware or replace it with new components. This ensures that the repairs are done safely and effectively.
4. Warranty Considerations:
If your computer or its components are still under warranty, seeking professional assistance can ensure that repairs or replacements are carried out in compliance with the warranty terms. Attempting to fix the issue on your own or by an unauthorized technician may void the warranty, potentially leading to additional costs.
5. Time and Cost Efficiency:
While seeking professional assistance may incur a cost, it can ultimately save you time and money in the long run. Instead of spending valuable time troubleshooting unsuccessfully or risking further damage by attempting complex repairs on your own, a professional can quickly identify and resolve the issue. They can also recommend cost-effective solutions that fit within your budget.
Remember, a CPU fan error is an indicator of a potential cooling issue that should not be ignored. Overheating can cause damage to your CPU and other components, leading to performance issues or even system failure. Taking timely action and seeking professional assistance ensures the longevity and optimal performance of your computer.
If you decide to seek professional assistance, do thorough research and choose a reputable and reliable service provider or technician. Read customer reviews, check their qualifications, and inquire about their experience with similar issues. Don’t hesitate to ask questions and discuss the details to ensure that you are comfortable entrusting them with your computer.
By seeking professional assistance, you can gain peace of mind knowing that your CPU fan error will be properly addressed by experts, allowing you to get back to using your computer without any worries.