
Check the Fan
If your computer is making a high-pitched noise, one of the potential culprits could be a malfunctioning fan. Fans are crucial components of a computer as they help keep the internal components cool. When a fan starts to wear out or become dusty, it can generate a high-pitched whirring or squealing sound. Here are some steps to check and fix the fan:
- Listen for the noise: Pay close attention to where the noise is coming from in your computer. Is it near the front, the back, or somewhere in between? Identifying the location of the noise can give you a clue as to which fan might be the culprit.
- Open up your computer: Before opening your computer, make sure it is turned off and unplugged. Once you have done that, carefully remove the side panel or access door to gain access to the internal components.
- Locate the fan: Take a look inside your computer and locate the fan that corresponds to the area where you heard the noise. Most computers have multiple fans, including the CPU fan, case fan, and power supply fan.
- Inspect the fan: Give the fan a visual inspection to see if there are any visible signs of damage, such as broken blades or excessive dust build-up. If you notice any issues, it’s a good idea to replace the fan.
- Clean the fan: If the fan appears to be in good condition, it may just need a good cleaning. Use a can of compressed air to blow away any dust or debris that may have accumulated on the fan blades.
- Replace the fan: If cleaning the fan doesn’t solve the problem, you may need to replace it. Fans are relatively inexpensive and can be found at most computer hardware stores. Consult your computer’s manual or search online for instructions on how to safely remove and replace the fan.
By following these steps, you should be able to identify and fix any issues related to a noisy fan. If the noise persists even after cleaning or replacing the fan, there may be other hardware-related problems causing the high-pitched noise. In such cases, it’s recommended to seek professional assistance or contact the computer manufacturer for further guidance.
Clean the Computer
Keeping your computer clean and free from dust and debris is essential for its optimal performance and longevity. If your computer is making a high-pitched noise, it’s possible that a buildup of dirt and dust is causing the issue. Here’s how you can properly clean your computer:
- Power off and unplug the computer: Before cleaning your computer, ensure it is turned off and unplugged from the power source. This is crucial for your safety and to prevent any damage to the components.
- Remove external debris: Use a soft, lint-free cloth or compressed air to gently remove any dust and dirt from the external parts of the computer, such as the casing, keyboard, and mouse.
- Open the case: Depending on your computer’s make and model, you may need to remove screws or release latches to access the internal components. Consult your computer’s manual or manufacturer’s website for specific instructions.
- Use compressed air to clean internals: With the case open, use a can of compressed air to blow away any dust that has accumulated on the internal components. Pay special attention to areas around fans, heat sinks, and vents.
- Clean the fan blades: If the fan is easily accessible, use a small brush or cotton swabs to gently clean the blades. Be careful not to apply too much pressure or damage the blades.
- Check the heat sinks: Heat sinks are responsible for dissipating heat from the computer’s components. Ensure they are free from dust and debris, as a blockage can lead to overheating and increased fan noise.
- Reassemble the computer: Once you have finished cleaning, carefully reattach any components that you removed and secure the case back in place.
Regularly cleaning your computer is recommended at least every six months or whenever you notice a buildup of dust. By keeping your computer clean, you can reduce the risk of overheating, improve performance, and minimize high-pitched noise caused by fan issues. Remember, if you are not comfortable cleaning your computer yourself, it is always best to seek professional assistance to avoid causing further damage.
Replace the Power Supply
If your computer is emitting a high-pitched noise that persists even after checking the fan and cleaning the internals, it might be time to consider replacing the power supply unit (PSU). The power supply is responsible for providing the necessary electricity to all components of your computer. Over time, power supplies can wear out and start producing noise. Here’s what you need to know about replacing the power supply:
- Determine compatibility: Before purchasing a new power supply, ensure it is compatible with your computer’s hardware and form factor. Check the wattage, connectors, and dimensions to match your computer’s requirements.
- Power down and disconnect: As with any hardware replacement, shut down your computer completely and unplug it from the power source. This is crucial for your safety and to prevent any damage to the components.
- Open the case: Depending on your computer’s make and model, you may need to remove screws or release latches to access the internal components. Consult your computer’s manual or manufacturer’s website for specific instructions.
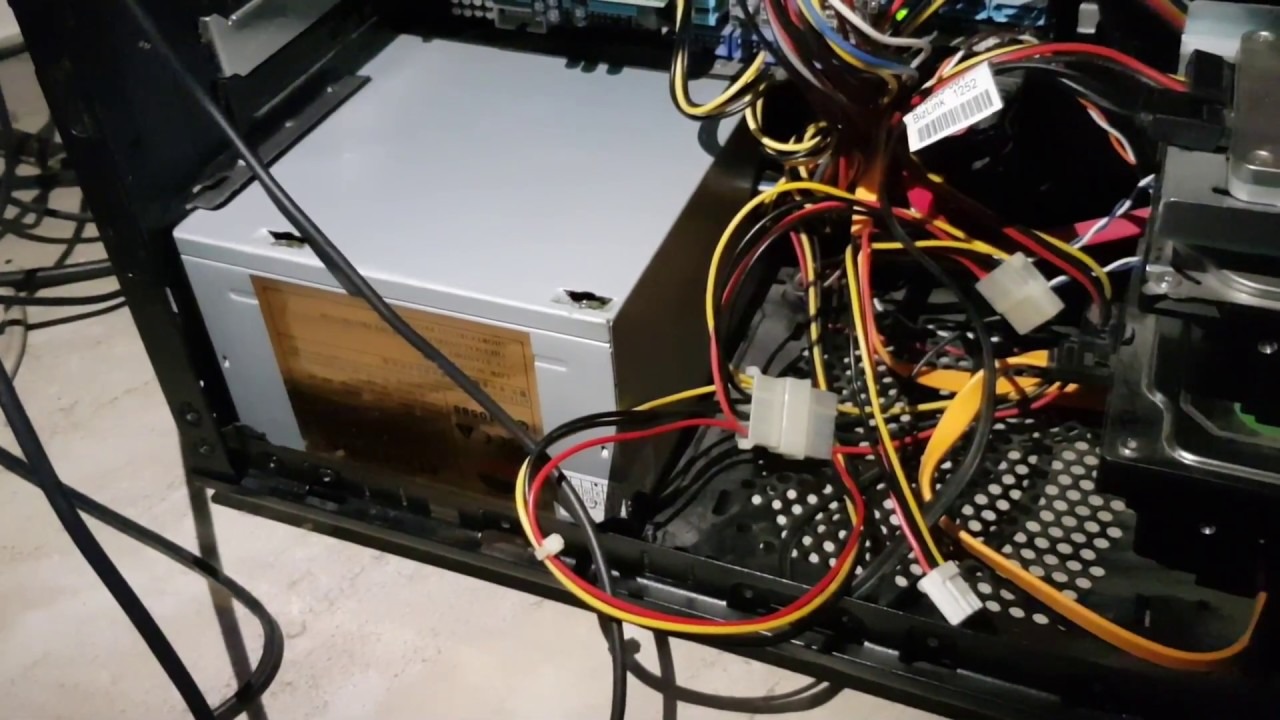
- Identify the power supply: Locate the power supply in your computer case. It is typically a rectangular metal box with cables connected to various components, including the motherboard, drives, and graphics card.
- Disconnect cables: Carefully disconnect the cables connected to the power supply. Take note of the connections and their corresponding locations to ensure proper reinstallation of the new power supply.
- Remove the power supply: Unscrew and remove the power supply from the case. Pay attention to the mounting brackets or screws that hold it in place.
- Install the new power supply: Place the new power supply in the vacant spot and secure it with the appropriate screws or brackets. Connect the cables to their respective components, ensuring a snug fit.
- Close the case: Once the new power supply is installed and all cables are securely connected, close the computer case, reattach any removed panels or covers, and tighten any screws or latches.
- Test the computer: Plug in the power cord and turn on your computer. Ensure that it boots up properly and that the high-pitched noise is no longer present. If everything appears normal, congratulations, you have successfully replaced the power supply!
Replacing the power supply can be a bit more complex compared to other troubleshooting steps, especially if you’re not familiar with computer hardware. If you’re uncomfortable performing this task yourself, it’s recommended to seek assistance from a professional technician to ensure proper installation and functionality of the new power supply.
Update the Drivers
If your computer is making a high-pitched noise, it could be a sign that certain drivers in your system are outdated or incompatible. Drivers are software programs that help your computer communicate with its hardware components. Updating these drivers can often resolve issues and improve overall system performance. Here’s how you can update your drivers:
- Identify the drivers: Start by identifying which drivers might be causing the issue. Pay close attention to the components in your computer that are producing the high-pitched noise. It could be the audio driver, graphics card driver, or any other driver associated with the specific hardware.
- Access the manufacturer’s website: Visit the website of the manufacturer responsible for your computer or the particular hardware component. Look for their support or downloads section to find the latest driver updates.
- Find the correct driver: Search for the appropriate driver based on your computer’s make, model, and operating system. Make sure to download the driver that matches your hardware and software specifications.
- Uninstall the old driver: Before installing the new driver, it’s generally recommended to uninstall the old driver first. This can be done through the Device Manager on Windows or the System Preferences on macOS.
- Install the new driver: Once the old driver is uninstalled, run the installer for the new driver that you downloaded. Follow the on-screen instructions provided by the manufacturer to complete the installation process.
- Restart your computer: After the installation is complete, restart your computer to ensure that the new driver is properly applied and functioning as intended.
- Test for improvements: Once your computer has restarted, check if the high-pitched noise has been resolved. Test the affected hardware components to see if the noise persists or if it has been eliminated.
Updating drivers is an important maintenance task that should be done regularly to ensure optimal performance and compatibility with the latest software updates. Many driver update tools are also available that can simplify the process by automatically scanning your system for outdated drivers and providing the necessary updates. However, exercise caution and only download drivers from reputable sources to avoid any potential security risks or compatibility issues.
Check for Hardware Issues
If your computer is producing a high-pitched noise that persists despite checking the fan, cleaning the internals, updating the drivers, and replacing the power supply, it’s important to investigate potential hardware issues. Hardware problems can cause various types of noise in a computer. Here are some steps to help you check for hardware issues:
- Run hardware diagnostics: Many computer manufacturers provide built-in diagnostic tools that can help identify hardware problems. These tools can check the health of your hardware components such as the CPU, RAM, hard drive, and graphics card. Run these diagnostics to uncover potential issues.
- Test the RAM: Faulty RAM modules can cause a variety of issues, including high-pitched noises. Try removing and reseating the RAM modules one by one to see if the noise disappears. If the noise continues, consider running a third-party RAM diagnostic tool to identify any errors.
- Check the hard drive: A failing hard drive can generate unusual noises, including high-pitched sounds. Use a disk utility program to check the health of your hard drive and look for any indications of imminent failure. If necessary, back up your data and consider replacing the drive.
- Inspect the motherboard: Visually inspect the motherboard for any signs of damage, such as bulging or leaking capacitors. Faulty capacitors can lead to noise issues and other hardware malfunctions. If you notice any physical damage, it may be necessary to replace the motherboard.
- Test with a different power outlet: Electrical issues can sometimes manifest as high-pitched noises in computers. Try connecting your computer to a different power outlet, preferably in a different room or location, to rule out any issues with the electrical supply.
- Monitor the temperature: Excessive heat can cause components to malfunction and produce noise. Install software to monitor the temperature of your CPU and graphics card. If temperatures are consistently high, consider improving the cooling system or reapplying thermal paste.
- Consult with a professional: If you have exhausted all troubleshooting steps and the high-pitched noise still persists, it may be time to seek assistance from a professional technician. They will have the expertise and tools necessary to diagnose and repair any advanced hardware issues.
Identifying and resolving hardware issues can sometimes be challenging, especially for those with limited technical knowledge. If you’re uncertain about any of the steps or uncomfortable working with computer hardware, it’s best to consult a professional technician to avoid further damage to your computer.
Remove Dust from the Inside
Dust buildup inside your computer can not only hinder its performance but also contribute to the production of a high-pitched noise. Dust can clog fans, obstruct airflow, and cause components to overheat. Regularly removing dust from the inside of your computer is crucial for maintaining optimal performance. Here’s how you can do it:
- Power off and unplug the computer: Before cleaning the inside of your computer, ensure it is completely powered off and unplugged from the electrical outlet. This is important for your safety as well as to prevent any damage to the components.
- Open the computer case: Depending on your computer’s make and model, you may need to remove screws or release latches to access the internal components. Refer to your computer’s manual or the manufacturer’s website for specific instructions on opening the case.
- Locate the dust-prone areas: Dust tends to accumulate in areas such as the fans, heat sinks, and vents. Take note of the locations where you should focus your cleaning efforts.
- Use compressed air: With the case open, use a can of compressed air to blow away the dust from the inside of your computer. Hold the can upright and use short bursts of air to prevent moisture from accumulating. Be careful not to tilt the can upside down as this can release freezing liquid.
- Pay attention to fans and heat sinks: Give extra attention to the fans and heat sinks as these are crucial for cooling the components. Hold the fans still with your finger while blowing the air to prevent them from spinning too fast, potentially damaging the components.
- Clean the filters and vents: Some computers have dust filters or removable panels that can be cleaned separately. Remove them and gently wipe away the dust with a soft cloth or rinse it with water if applicable. Ensure they are completely dry before reinstalling them.
- Reassemble the computer: Once you have finished cleaning, carefully reattach any components you removed and secure the case back in place. Make sure all the screws are tightened properly.
Regularly cleaning the inside of your computer will not only help reduce the high-pitched noise but also extend the lifespan of its components. Aim to clean your computer every three to six months, or more frequently if you live in a particularly dusty environment. If you are uncomfortable cleaning the insides of your computer yourself, consider seeking assistance from a professional technician to ensure proper cleaning and prevent any accidental damage.
Reduce CPU Usage
If your computer is consistently running at a high CPU usage, it can lead to increased heat generation and potentially contribute to a high-pitched noise. High CPU usage often occurs when multiple processes or applications are running simultaneously, overwhelming the computer’s processing capabilities. Here are some steps to help reduce CPU usage:
- Identify resource-intensive processes: Open your Task Manager or Activity Monitor to identify the processes that are consuming the most CPU resources. Look for applications or background processes that are taking up a significant amount of CPU power.
- Close unnecessary applications: Close any unnecessary applications or processes that are running in the background. This will free up CPU resources for other tasks and help reduce CPU usage.
- Update or uninstall problematic software: Outdated or poorly optimized software can cause high CPU usage. Make sure all your installed applications are up to date. If you notice that a specific application consistently causes high CPU usage, consider uninstalling it or finding an alternative.
- Limit startup programs: Some applications automatically start when you boot your computer, consuming valuable CPU resources. Use the Task Manager or System Preferences to disable unnecessary startup programs and free up CPU usage.
- Scan for malware: Malware or viruses can significantly impact your computer’s performance and result in high CPU usage. Run a full system scan using reliable antivirus software to detect and remove any malicious programs.
- Manage background processes: Some background processes, such as system updates or file indexing, can consume considerable CPU resources. Adjust the settings for these processes to reduce their impact on CPU usage or schedule them to run during periods of low activity.
- Upgrade hardware: If your computer consistently struggles with high CPU usage even after following the above steps, it may be time to consider upgrading your hardware. Adding more memory (RAM) or upgrading to a faster processor can help alleviate the strain on the CPU and improve overall performance.
By implementing these measures, you can significantly reduce CPU usage and mitigate the risk of a high-pitched noise caused by excessive processing load. Regularly monitor your CPU usage to ensure optimal performance and address any potential issues promptly. If you’re unsure about making any changes or need assistance optimizing your computer’s performance, consider consulting with a professional technician.
Inspect the Hard Drive
A malfunctioning or failing hard drive can cause various issues, including high-pitched noises. If you suspect that the hard drive is the source of the noise, it’s essential to inspect it for any potential problems. Here’s how you can inspect your hard drive:
- Listen for abnormal noise: Pay close attention to the sounds coming from your computer. If you hear clicking, grinding, or other unusual noises coming from the hard drive, it could indicate a mechanical issue.
- Check the SMART status: SMART (Self-Monitoring, Analysis, and Reporting Technology) is a feature present in most modern hard drives. It provides valuable information about the health of the drive. Use a SMART monitoring utility to check the status of your hard drive and look for any warning signs or errors.
- Inspect for physical damage: Carefully examine the physical condition of the hard drive. Look for any visible signs of damage, such as dents, scratches, or loose connections. Physical damage can lead to mechanical issues and cause high-pitched noises.
- Run disk error checking: Use the built-in disk error checking tool provided by your operating system to scan the hard drive for any errors or bad sectors. This tool can help identify and repair issues that may be causing the noise.
- Backup your data: If you suspect that your hard drive is failing, it’s crucial to backup your important data immediately. Create a full backup of all your files to an external storage device to prevent any potential loss.
- Check for firmware updates: Check the manufacturer’s website for any available firmware updates for your hard drive. Updating the firmware can sometimes help resolve compatibility issues or bugs that may contribute to the noise.
If, after inspecting the hard drive, you determine that it is indeed faulty or failing, it’s recommended to replace it as soon as possible. Continuing to use a failing hard drive can result in data loss or further damage to the drive. Consider consulting with a professional technician or contacting the manufacturer for assistance in replacing the hard drive.
Note that hard drive inspection and replacement may require advanced technical knowledge or professional assistance. If you’re unsure about performing these tasks yourself, it’s always best to seek the help of a qualified technician to ensure proper handling and avoid any potential damage to your computer or data.
Replace the Hard Drive
If you have determined that your hard drive is malfunctioning or failing after inspecting it for issues, replacing it is the next step to resolve the high-pitched noise and ensure the integrity of your data. Here’s a guide on how to replace the hard drive:
- Backup your data: Before proceeding with any hardware replacement, it is crucial to backup all your important data. Copy your files to an external storage device or use a cloud-based backup service to ensure you don’t lose any valuable information.
- Purchase a new hard drive: Research and purchase a new hard drive that is compatible with your computer and meets your storage needs. Consider factors such as capacity, speed, and interface type (e.g., SATA or NVMe).
- Power off and unplug your computer: Completely power off your computer and unplug it from the power source. This step is essential for your safety and to prevent any electrical damage during the replacement process.
- Open the computer case: Depending on your computer’s make and model, you may need to remove screws or release latches to access the internal components. Refer to the manual or manufacturer’s instructions for guidance.
- Locate and disconnect the old hard drive: Identify the existing hard drive inside your computer. Carefully disconnect the cables connected to it, including the data and power cables. Take note of the connections and their corresponding locations.
- Install the new hard drive: Place the new hard drive in the same slot as the old one. Connect the necessary cables, ensuring a secure fit. Use screws or brackets to secure the drive in place if required.
- Close the computer case: Once the new hard drive is installed, close the computer case and secure any panels or covers using screws or latches.
- Install the operating system: If your new hard drive is empty, you’ll need to install an operating system on it. Insert the installation media, such as a bootable USB drive or DVD, and follow the instructions to install the operating system.
- Restore your data: After the operating system is installed, restore your backed-up data to the new hard drive. Copy your files from the external storage device or download them from the cloud backup service.
- Test the new hard drive: Power on your computer and ensure that the new hard drive is detected correctly. Verify that the high-pitched noise is no longer present and that the computer functions properly with the replaced hard drive.
Replacing a hard drive requires a certain level of technical expertise. If you are not comfortable performing the replacement yourself, it is advisable to seek professional assistance to ensure a smooth and successful installation. Professional technicians can also help with data migration if needed.
Remember to handle the old hard drive responsibly. If it contains sensitive information, consider securely wiping or physically destroying it to protect your privacy.
Adjust the Sound Settings
If your computer is making a high-pitched noise, it’s worth exploring the sound settings as a potential solution. Some sound-related settings or configurations can contribute to audio issues, including high-pitched noises. Here’s how you can adjust the sound settings on your computer:
- Access the sound settings: Depending on your operating system, access the sound settings through the control panel, system preferences, or notification area. Look for the audio or sound-related settings.
- Adjust the volume level: Check the volume level and make sure it is not set too high. High volume levels can cause distortion and potentially produce a high-pitched noise. Gradually lower the volume to see if it reduces or eliminates the noise.
- Disable audio enhancements: Some sound settings or audio enhancement features can interfere with the audio output and introduce noise. Disable any such enhancements, such as equalizers, sound effects, or virtual surround sound, to see if it resolves the high-pitched noise.
- Switch audio playback devices: If you have multiple audio playback devices connected to your computer, such as speakers, headphones, or external monitors with built-in speakers, try switching to a different device. Sometimes, a particular device may be the source of the high-pitched noise.
- Update audio drivers: Outdated or incompatible audio drivers can contribute to audio-related issues. Visit the website of your computer manufacturer or the sound card manufacturer to download and install the latest audio drivers for your hardware. Updated drivers may help resolve any software-related audio problems.
- Check audio cables: Ensure that all audio cables are securely connected to the correct ports on your computer and audio devices. Loose or improperly connected cables can cause noise interference. Consider using different cables or connectors to rule out any cable-related issues.
- Try a different audio player or application: If the high-pitched noise occurs only when playing specific audio files or using certain applications, try using a different audio player or application. It could be a compatibility issue with a particular program or file format.
By adjusting the sound settings and exploring different audio configurations, you may be able to identify and troubleshoot the cause of the high-pitched noise. If the issue persists even after adjusting the settings, it is recommended to seek further assistance from a professional technician or the manufacturer’s support team to ensure a thorough diagnosis and resolution.