Why Use Flowcharts in Excel?
Flowcharts are powerful visual tools that allow users to represent processes, workflows, and decision-making paths in a clear and structured manner. When it comes to working with data and spreadsheets, using flowcharts in Excel can offer a range of benefits.
First and foremost, flowcharts provide a visual representation of complex data and processes, making it easier to understand and analyze the information at hand. Excel’s free flowchart templates come with various shapes and symbols that can be customized to represent different steps, actions, decisions, and outcomes. This visual representation helps to simplify the complexity of the data and enhance comprehension.
Furthermore, flowcharts enable users to identify bottlenecks and inefficiencies in their workflows. By visualizing the flow of tasks, users can easily identify any areas where processes may be getting slowed down or hindering productivity. This allows for more targeted improvements to be made, resulting in streamlined and more efficient operations.
Another advantage of using flowcharts in Excel is that they facilitate effective communication and collaboration. Flowcharts offer a common language for conveying information, making it easier for team members to understand and contribute to the process. This is particularly beneficial in cross-functional projects or when dealing with complex data sets that involve multiple stakeholders.
Additionally, flowcharts in Excel are highly flexible and can be easily modified or updated as needed. By using Excel’s free flowchart templates, users can customize the layout, shapes, colors, and connectors to suit their specific requirements. This allows for seamless adaptability to changes in processes or project requirements, ensuring that the flowchart remains up-to-date and relevant.
Finally, flowcharts in Excel act as a valuable documentation tool. They provide a visual representation of processes and workflows, serving as a reference guide for current and future team members. This documentation can aid in training new employees, troubleshooting issues, or simply ensuring consistency in operations.
Overall, utilizing flowcharts in Excel offers a range of benefits, from simplifying complex data to facilitating effective communication and enhancing process optimization. By leveraging Excel’s free flowchart templates, users can unlock the power of visual representation and improve decision-making, collaboration, and efficiency in their work.
Finding Excel’s Free Flowchart Templates
If you’re looking to use flowcharts in Excel, you’ll be pleased to know that Excel provides a range of free flowchart templates that you can easily access. Here’s how to find them:
1. Open Excel: Launch Microsoft Excel on your computer and create a new workbook or open an existing one.
2. Click on the “File” tab: Located at the top left corner of the Excel window, the “File” tab will open a drop-down menu.
3. Select “New” from the menu: Clicking on “New” will take you to the template selection screen.
4. Search for “Flowchart templates”: In the search bar, type “flowchart templates” or simply “flowcharts” and hit Enter. Excel will display a list of available templates related to flowcharts.
5. Browse the templates: Take a look at the various flowchart templates that Excel offers. You’ll find templates for different types of flowcharts, including process flowcharts, swimlane flowcharts, decision flowcharts, and more.
6. Select a template: Choose the flowchart template that best suits your needs and click on it to open a preview.
7. Click “Create”: If you’re satisfied with the template, click on the “Create” button to create a new workbook using that template. You can then start customizing the flowchart to fit your specific requirements.
8. Explore other template sources: If you can’t find the ideal flowchart template within Excel, you can explore other template sources online. Many websites offer free flowchart templates that can be downloaded and imported into Excel.
By following these steps, you will be able to find Excel’s free flowchart templates and access a wide range of options. Whether you’re a beginner or an experienced Excel user, these templates provide a convenient starting point for creating professional-looking flowcharts.
Installing the Flowchart Templates
Once you have found the desired flowchart template in Excel, installing it is a straightforward process. Here are the steps to install the flowchart templates:
1. Open Excel: Launch Microsoft Excel and create a new workbook or open an existing one.
2. Click on the “File” tab: Located at the top left corner of the Excel window, click on the “File” tab to open the drop-down menu.
3. Select “Options”: From the drop-down menu, choose “Options.” This will open the Excel Options dialog box.
4. Go to “Add-Ins”: In the Excel Options dialog box, locate and click on “Add-Ins” in the left-hand sidebar.
5. Choose “Excel Add-ins”: Under the “Manage” dropdown menu in the bottom section of the dialog box, select “Excel Add-ins” and click on the “Go” button.
6. Check the box for “Templates”: In the Add-Ins dialog box that appears, scroll through the list of add-ins and check the box next to “Templates.” Then, click on the “OK” button.
7. Access the installed templates: With the templates add-in enabled, you can now access the installed flowchart templates. Go back to the “File” tab and select “New” to open the template selection screen.
8. Choose a flowchart template: Locate the “Flowchart” category or search for specific flowchart templates using the search bar. Click on the desired template to open a preview.
9. Create a new workbook using the template: If you’re satisfied with the template, click on the “Create” button to create a new workbook based on the chosen flowchart template.
By following these steps, you can easily install the flowchart templates in Excel and start utilizing them for your projects. These installed templates provide a convenient and efficient way to create professional-looking flowcharts without the need for extensive design skills or starting from scratch.
Exploring the Different Flowchart Templates Available
Excel’s free flowchart templates offer a diverse range of options to cater to various flowcharting needs. Let’s explore some of the different templates available and their key features:
1. Process Flowchart: This template is ideal for visualizing and documenting a step-by-step process. It uses standard flowchart symbols to represent different tasks, decisions, and outcomes. The template allows you to easily map out the flow of a process from start to finish.
2. Swimlane Flowchart: This template is designed to illustrate workflows that involve multiple individuals or departments. The swimlane flowchart assigns each step or activity to a specific “lane” to indicate the responsible party. This template helps in clarifying roles and responsibilities within a process.
3. Decision Flowchart: This template focuses on representing decision-making processes. It uses decision diamonds to showcase different choices or options and the corresponding actions or outcomes. The decision flowchart template is a handy tool for analyzing and communicating complex decision trees.
4. Workflow Diagram: This template is useful for visualizing and managing workflows in a clear and organized manner. It allows you to outline the sequence of tasks, dependencies, and milestones within a project or process. The workflow diagram template aids in optimizing workflows for efficiency and productivity.
5. Data Flow Diagram: This template is specifically designed for illustrating the flow of data within a system or process. It helps to identify the sources, transformations, storage, and destinations of data. The data flow diagram template is invaluable for understanding data movement and identifying potential bottlenecks or inefficiencies.
6. Value Stream Mapping: This template is suitable for analyzing and improving manufacturing or service delivery processes. It maps the entire value stream, from raw materials to the end product or service. The value stream mapping template helps identify waste, delays, and opportunities for streamlining operations.
7. Cross-Functional Flowchart: This template provides a comprehensive view of a process that involves multiple departments or functions. It visualizes the interaction and handoff points between different teams or individuals. The cross-functional flowchart template promotes collaboration and coordination among various stakeholders.
8. Audit Flowchart: This template is specifically designed for auditing processes. It helps in outlining the steps involved in auditing financial statements, compliance procedures, or operational processes. The audit flowchart template enhances transparency and accountability in auditing practices.
These are just a few examples of the different flowchart templates available in Excel. Each template is customizable, allowing you to adapt it to your specific requirements. By exploring the different templates, you can select the one that best suits your needs and effortlessly create informative and visually appealing flowcharts.
Creating a New Flowchart
Creating a new flowchart in Excel is a simple process. Whether you are starting from scratch or using one of Excel’s free flowchart templates as a basis, here’s how to create a new flowchart:
1. Open Excel: Launch Microsoft Excel and create a new workbook or open an existing one.
2. Access the flowchart template: If you’re using an Excel flowchart template, follow the steps outlined in the previous section to locate and select the desired template. If you prefer to start from scratch, you can begin by selecting a blank worksheet.
3. Enable the “Shapes” menu: In Excel, the “Shapes” menu offers a wide range of shapes and symbols that you can use to build your flowchart. To enable the “Shapes” menu, go to the “Insert” tab in the Excel toolbar and click on the “Shapes” button.
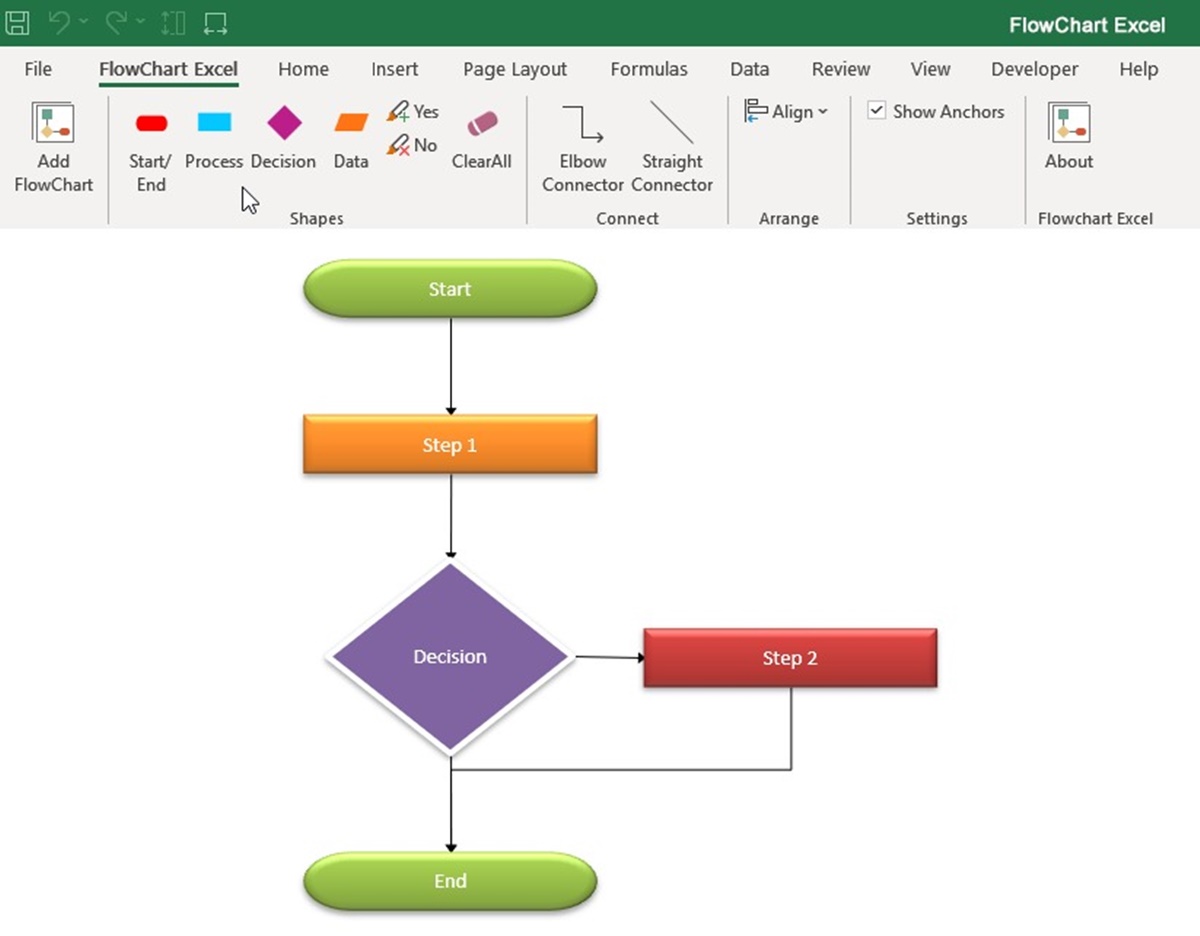
4. Select the flowchart shape: In the “Shapes” menu, choose the appropriate shape to represent the first step or task in your flowchart. Common flowchart shapes include rectangles (for processes or tasks), diamonds (for decisions), and arrows (for connectors or flows).
5. Place the shape on the worksheet: Click and drag the selected shape onto the worksheet to place it in the desired location. Repeat this step for each step or task in your flowchart.
6. Connect the shapes: Use the arrow shapes from the “Shapes” menu to create connectors between the flowchart shapes. Click on the starting point of the arrow and drag it to the ending point, creating a flow from one shape to another. This represents the sequence of steps in your process.
7. Customize the flowchart: Format the shapes and connectors according to your preference. You can change the size, color, and style of the shapes. Additionally, you can adjust the thickness and color of the connectors to enhance the overall appearance of the flowchart.
8. Add text and labels: Include text within the shapes to describe each step or decision. You can also add labels near the connectors to provide additional context or information. Excel allows you to customize the font, size, and alignment of the text to ensure clarity and consistency.
9. Review and refine: Take a step back and review your flowchart. Ensure that the sequence and logical flow make sense. Make any necessary adjustments or refinements to improve the clarity and accuracy of the flowchart.
10. Save your flowchart: Once you are satisfied with your flowchart, save the Excel worksheet or template as a separate file to preserve your work. It is recommended to save it in a location that is easily accessible for future reference.
By following these steps, you can create a new flowchart in Excel, whether from scratch or using a template. Excel provides a user-friendly interface and a vast array of customization options to help you create clear, visually appealing, and informative flowcharts for your projects.
Adding Shapes and Connectors to the Flowchart
When creating a flowchart in Excel, adding shapes and connectors is crucial for visually representing the steps and relationships within your process. The following steps outline how to add shapes and connectors to your flowchart:
1. Open Excel: Launch Microsoft Excel and either create a new workbook or open an existing one.
2. Access the flowchart template: If you’re using an Excel flowchart template, follow the steps provided earlier to locate and select the desired template. If you are starting from scratch, begin with a blank worksheet.
3. Enable the “Shapes” menu: Go to the “Insert” tab in the Excel toolbar and click on the “Shapes” button. This will open the “Shapes” menu, which contains various shapes that you can use in your flowchart.
4. Select a shape: Choose the appropriate shape from the “Shapes” menu to represent a specific step or action in your flowchart. Common flowchart shapes include rectangles (for processes or tasks), diamonds (for decisions), and arrows (for connectors or flows).
5. Place the shape on the worksheet: Click and drag the selected shape onto the worksheet to position it in the desired location. Repeat this step for each step or action in your flowchart.
6. Connect the shapes with connectors: To connect the shapes and represent the flow of the process, select the arrow shape from the “Shapes” menu. Click on the starting point of the arrow shape and drag it to the ending point of the next shape, creating a connection between them. Repeat this step for each step or action in your flowchart.
7. Customize the shapes: Excel allows you to customize the shapes to suit your specific requirements. Right-click on a shape and select “Format Shape” to change its size, color, style, and other visual properties. This customization helps in differentiating between different types of steps or actions in your flowchart.
8. Format the connectors: Similarly, the connectors can also be customized to enhance the visual clarity of your flowchart. Right-click on a connector and select “Format Shape” to modify its thickness, color, style, and other formatting options.
9. Add text and labels: Insert text within the shapes to describe each step or action in your flowchart. You can also add labels near the connectors to provide additional context or information. Customize the font, size, alignment, and formatting of the text to ensure readability.
10. Review and refine: Take a step back, review your flowchart, and ensure that the shapes and connectors accurately represent the desired flow of your process. Make any necessary adjustments or refinements to improve the clarity and logical flow of your flowchart.
11. Save your flowchart: Once you are satisfied with your flowchart, remember to save the Excel worksheet or template as a separate file to preserve your work. Choose a location that is easily accessible, allowing you to access and modify the flowchart as needed.
By following these steps, you can easily add shapes and connectors to your flowchart in Excel. This allows for a clear and visually engaging representation of the steps and relationships within your process or workflow.
Formatting the Flowchart
Formatting is crucial in creating a visually appealing and comprehensible flowchart in Excel. By effectively formatting your flowchart, you can enhance clarity, emphasize key elements, and improve the overall aesthetics. Follow these steps to format your flowchart effectively:
1. Select and group shapes: Begin by selecting multiple shapes that you want to format together. Hold down the Ctrl key while clicking on each shape to select multiple shapes. Then, right-click on one of the selected shapes and choose “Group” from the context menu. This allows you to format the grouped shapes as a single entity.
2. Resize and align shapes: Use the sizing handles on the edges or corners of the selected shapes to resize them as needed. You can also align shapes by selecting them and clicking on the appropriate alignment options, such as “Align Left” or “Align Center,” found in the “Format” or “Drawing Tools” tab.
3. Modify shape properties: Right-click on a shape and choose “Format Shape” to access various properties that can be modified. This includes changing the fill color, line color, line weight, and adding effects such as shadows or 3D formatting. Modify the properties to achieve the desired visual style for your flowchart.
4. Format connectors: Click on a connector to select it and then right-click to access formatting options. Here, you can modify the line style, line weight, and arrowhead style. Changing the color of connectors can also help differentiate different paths or segments within your flowchart.
5. Apply consistent formatting: Maintain consistency throughout your flowchart by applying the same formatting across similar shapes or connectors. This helps create a cohesive and professional look. You can use the “Format Painter” tool to quickly copy formatting from one shape to another.
6. Use colors and fonts: Employ colors to distinguish between different elements, such as processes, decisions, or connectors. Ensure that the color choices are visually appealing and make the flowchart easy to read. Additionally, use fonts that are clear and legible, ensuring that the text within the shapes is easily readable.
7. Implement spacing and layout: Proper spacing and layout play a vital role in making your flowchart organized and visually appealing. Adjust the spacing between shapes and connectors to create a balanced and well-structured flowchart. Use grids and guidelines available in Excel to align components accurately.
8. Add visual cues: Incorporate visual cues, such as icons or symbols, to represent specific actions, decisions, or outcomes. These additional visual elements can enhance understanding and help communicate information more effectively within the flowchart.
9. Review and refine: Regularly review your formatted flowchart for clarity and readability. Make any necessary adjustments to ensure that the formatting choices align with the purpose and audience of your flowchart.
10. Save your formatted flowchart: Save your flowchart as a separate file, ensuring that your work is preserved. This allows you to easily access and share the formatted flowchart whenever needed.
By following these steps, you can effectively format your flowchart in Excel, making it visually appealing and easy to understand. Proper formatting allows your flowchart to convey information clearly and efficiently, promoting better communication and comprehension.
Adding Text and Labels to the Flowchart
Adding text and labels to your flowchart in Excel is essential for providing clear explanations and enhancing understanding. Text and labels help to identify steps, decisions, outcomes, and connectors within the flowchart. Here’s how to add text and labels to your flowchart:
1. Select a shape: Begin by selecting the shape to which you want to add text. Click on the shape to highlight it.
2. Enter the text: Double-click inside the shape or select the shape and then click on the “Formula Bar” at the top of the Excel window. Type the desired text directly into the shape or the “Formula Bar.”
3. Format the text: With the text selected, you can format it using the options available in the Excel toolbar. You can change the font, font size, font color, alignment, and other formatting properties to ensure readability and consistency.
4. Label connectors: To add labels to connectors, click on the connector you want to label. Right-click and select “Add Text” or “Add Text to Connector.” A text box will appear attached to the connector, allowing you to type the label or description.
5. Position and format the labels: Adjust the position of the labels by clicking and dragging them to the desired location along the connector. To format the labels, repeat the steps from the previous section to modify font properties, alignment, and other formatting options.
6. Adjust text box properties: To customize the appearance of the text boxes, right-click on a shape or connector with a text box, and select “Format Shape” or “Format Text Box.” From there, you can modify properties such as fill color, border style, and text direction.
7. Add callouts or annotations: Callouts or annotations can provide additional explanations or clarify specific parts of the flowchart. Go to the “Insert” tab and click on the “Shapes” button. Choose a callout shape, such as a speech bubble or rectangular callout, and position it near the relevant step or connector. Enter the desired text inside the callout shape.
8. Review and refine: Regularly review the flowchart with the added text and labels to ensure clarity and accuracy. Make any necessary adjustments to the positioning, formatting, or language of the text to improve overall readability and understanding.
9. Save your flowchart: Save your flowchart as a separate file to preserve your work and allow for easy access and sharing when needed.
By following these steps, you can effectively add text and labels to your flowchart in Excel. Clear and concise explanations provided by the text and labels enhance the communication and understanding of the flowchart’s components and the overall process.
Organizing and Arranging the Flowchart
Organizing and arranging the elements of your flowchart in Excel is essential for creating a well-structured and easily understandable representation of your process. Proper organization and arrangement can help improve clarity, readability, and the overall flow of your flowchart. Here are some steps to effectively organize and arrange your flowchart:
1. Group related shapes: Identify groups of shapes that are associated with each other or represent a specific section of your process. Select these shapes by clicking and dragging to create a bounding box around them. Right-click on any of the selected shapes and choose “Group” from the context menu to group them together. This allows you to move and format them as a single entity.
2. Use alignment and distribution tools: Excel provides alignment and distribution tools that can help you arrange the shapes in your flowchart. Select the shapes you want to align, go to the “Format” or “Drawing Tools” tab, and click on various alignment options such as “Align Left,” “Align Center,” or “Distribute Vertically.” These tools ensure that the shapes are evenly spaced and aligned properly.
3. Snap to grid or guides: Enable the “Snap to Grid” or “Snap to Guides” option from the “View” tab in Excel. This feature helps align shapes and connectors with the gridlines or guides on the worksheet, making it easier to organize and arrange the flowchart elements in a neat and structured manner.
4. Adjust spacing: Control the spacing between shapes and connectors to enhance readability and overall aesthetics. Click and drag the shapes or connectors to create proper spacing between them. Excel also provides a ruler and gridlines that can assist you in maintaining consistent spacing throughout the flowchart.
5. Reorder shapes and connectors: Rearrange the order of shapes and connectors in your flowchart to ensure a logical flow. Click and drag a shape or connector to a new position to change its location in the flowchart. This allows you to sequence steps and actions in a way that makes sense to readers.
6. Use color and formatting to differentiate elements: Apply different colors, fonts, or formatting styles to distinguish between different types of shapes, connectors, or sections within your flowchart. This helps guide the reader’s attention and provides visual cues for understanding the flow and importance of each element.
7. Consider the reading direction: Depending on the culture or language, adjust the reading direction of your flowchart. For left-to-right languages, such as English, arrange the flowchart in a left-to-right fashion. For right-to-left languages, ensure the flowchart is organized accordingly.
8. Continuously review and refine: Regularly review your organized flowchart to ensure coherence and readability. Make any necessary adjustments or refinements to improve the logical flow and visual appearance of your flowchart. Seek feedback from others to gain different perspectives and ensure clarity.
9. Save your organized flowchart: Save your flowchart as a separate file to preserve your work. This allows you to easily access and share your organized flowchart whenever needed and track any changes made over time.
By following these steps, you can effectively organize and arrange the elements of your flowchart in Excel. A well-organized flowchart enhances the understanding of your process and facilitates the communication of information to your audience.
Modifying and Editing the Flowchart Elements
Modifying and editing the elements of your flowchart in Excel allows you to refine and adjust your flowchart as needed. Whether you need to make changes to shapes, connectors, text, or other aspects, Excel provides several tools and features to help you modify and edit your flowchart elements. Here are some steps to effectively modify and edit the elements of your flowchart:
1. Select the element to be modified: Click on the shape, connector, or text box that you want to modify in your flowchart. It will become highlighted or show selection handles, indicating that it is selected and ready for editing.
2. Resize and reshape shapes: To resize a shape in your flowchart, click and drag one of the sizing handles located on the edges or corners of the shape. To reshape a shape, right-click on it and choose “Edit Points” from the context menu. This allows you to adjust the shape’s outline by manipulating its individual points.
3. Move and rearrange elements: Click and drag shapes, connectors, or text boxes to move them to new locations within your flowchart. This is helpful for optimizing the arrangement, organization, and logical flow of your flowchart.
4. Change the style or formatting: Right-click on a shape, connector, or text box and select “Format Shape” or “Format Autoshape” to access the formatting options. Here, you can modify the fill color, line color, line style, font, font color, and other formatting properties to match your preferences or to create visual differentiation between elements.
5. Modify text and labels: Double-click on a shape or text box to directly edit the text it contains. You can also select the text and make changes using the formatting options in the Excel toolbar. To modify a label on a connector, click on the label to select it, and then make the desired changes.
6. Add or delete elements: To add new shapes, connectors, or text boxes to your flowchart, go to the “Insert” tab in the Excel toolbar, click on the “Shapes” button, and choose the desired shape. Position the new element in the flowchart by clicking and dragging it to the desired location. To delete an element, simply select it and press the “Delete” key on your keyboard.
7. Adjust connector routing: Excel automatically determines the routing or path of connectors in your flowchart. However, if you want to adjust the routing of a connector, click on the connector to select it, and then click and drag the yellow diamond-shaped handles that appear. This allows you to change the shape or direction of the connector.
8. Undo and redo changes: If you make a mistake or want to revert to a previous state, use the “Undo” and “Redo” buttons in the Excel toolbar or use the keyboard shortcuts (Ctrl+Z for Undo, Ctrl+Y for Redo) to undo or redo your modifications.
9. Review and refine: Continuously review your flowchart as you modify and edit its elements. Ensure that the modifications align with your intended flow and improve overall comprehension. Make any necessary adjustments or refinements to maintain clarity and readability.
10. Save your modified flowchart: Save your flowchart as a separate file to preserve your work. This ensures that your modifications are saved and can be easily accessed and shared when needed.
By following these steps, you can effectively modify and edit the elements of your flowchart in Excel. This allows you to refine and tailor your flowchart to accurately represent your process and provide clear visual communication.
Saving and Sharing the Flowchart
Once you have created and finalized your flowchart in Excel, it is important to save and share it effectively so that others can access and benefit from your work. Follow these steps to save and share your flowchart:
1. Save your flowchart: Click on the “File” tab in the Excel toolbar and choose “Save As.” Select a location on your computer or cloud storage to save the flowchart file. Give it a descriptive name that reflects the content and purpose of the flowchart.
2. Choose the file format: Excel offers various file formats to save your flowchart. The default format is likely “.xlsx” (Excel Workbook). However, you may consider saving it as a PDF (.pdf) to preserve the formatting and make it easily accessible across different platforms. Alternatively, you can save it as an image file (.PNG, .JPEG) to embed or insert in other documents.
3. Verify the saved flowchart: After saving, double-click the saved file to ensure it opens correctly and retains all the elements, formatting, and information within the flowchart. This verification step ensures that the flowchart is saved accurately and can be accessed again later.
4. Share the flowchart: Depending on your needs and the intended audience, there are several ways to share your flowchart:
- Email: Attach the flowchart file to an email and send it to the recipients. Provide a brief explanation or context for the flowchart in the email body.
- Cloud Storage: Upload the flowchart file to a cloud storage service (e.g., Google Drive, Dropbox, OneDrive). Share the file by generating and sending a sharing link to the recipients.
- Collaboration Tools: If you are working collaboratively, consider using project management or collaboration tools that allow team members to access and collaborate on the flowchart in real-time.
- Presentation or Documentation: Insert or embed the flowchart into a presentation or documentation software (e.g., PowerPoint, Word) and share the resulting file with others.
- Print: If a physical copy is needed, print the flowchart directly from Excel or convert it to a high-resolution image file and print it from an image viewer or editing software.
5. Provide instructions or explanations: When sharing the flowchart, include any necessary instructions or explanations to help the recipients understand and interpret the flowchart effectively. If applicable, provide additional context or documentation to support the flowchart.
6. Regularly update and version control: If you anticipate the need for future updates or revisions, establish a system to keep track of changes and maintain version control. This ensures that your flowchart remains accurate and up-to-date.
7. Back up your flowchart: To protect your flowchart from potential loss or damage, make regular backups of the file. This can be done by creating copies in different locations or using backup software or services.
8. Respect privacy and data security: Be mindful of any sensitive or confidential information included in your flowchart, and take appropriate measures to ensure that only authorized individuals have access to it.
By following these steps, you can effectively save and share your flowchart in Excel, ensuring that the information is accessible and comprehensible to the intended audience.
Tips and Tricks for Using Excel’s Free Flowchart Templates
Excel’s free flowchart templates are a powerful tool for creating professional-looking flowcharts. To help you make the most of these templates and create impressive flowcharts in Excel, here are some tips and tricks:
1. Customize the template: While Excel’s flowchart templates provide a convenient starting point, don’t hesitate to customize them according to your specific needs. Adjust the shapes, colors, and labeling to match your process requirements and visual preferences.
2. Plan before starting: Before diving into creating your flowchart, take some time to plan and outline your process or workflow. Identify the steps, decisions, and connections that need to be represented in the flowchart. This planning will help ensure that your flowchart accurately captures your intended process flow.
3. Use connector lines effectively: Pay attention to how connector lines are used in your flowchart. Make sure they are clearly labeled and properly aligned to represent the flow of the process accurately. Utilize different line styles or arrowhead options to differentiate between different types of connectors.
4. Group related shapes: If your flowchart has multiple steps or actions that are part of the same category or phase, consider grouping them together. Grouping related shapes improves visual organization and keeps the flowchart easy to follow.
5. Utilize layers: Excel allows you to layer shapes and connectors, which can make your flowchart more visually appealing and organized. Layering can help distinguish different sections or levels of your process, making it easier for readers to understand the flow and hierarchy.
6. Take advantage of Excel’s drawing tools: Excel offers a range of drawing tools that can enhance the look and functionality of your flowchart. Experiment with features like shadows, 3D effects, gradient fills, and transparency settings to add depth and visual interest to your flowchart.
7. Utilize gridlines or guides: To ensure consistent alignment and spacing within your flowchart, enable gridlines or use guides in Excel. The gridlines and guides help you maintain a well-structured and organized flowchart.
8. Keep it concise: Remember that flowcharts are meant to provide a concise representation of a process. Avoid overcrowding your flowchart with excessive detail or unnecessary shapes. Focus on capturing the essential steps and decisions required to understand the process.
9. Test and review: After creating your flowchart, take the time to test it by following the flow and verifying its accuracy. Make sure all steps and connections make sense and reflect the intended process. Seek input and feedback from others to ensure clarity and identify any areas that may need improvement.
10. Update and revise as needed: Processes and workflows can evolve over time. Be prepared to update and revise your flowchart accordingly. Keep track of any changes made and maintain version control to ensure that the flowchart remains up-to-date and accurate.
By implementing these tips and tricks, you can effectively leverage Excel’s free flowchart templates to create visually appealing, accurate, and informative flowcharts that effectively communicate your processes and workflows.