
Understanding AutoCorrect in Microsoft Word
AutoCorrect is a handy feature in Microsoft Word that automatically corrects common spelling and typing errors as you type. It helps improve your overall typing efficiency and reduces the need for manual proofreading. AutoCorrect is built-in and offers a wide range of default corrections, but you can also customize it according to your specific needs.
When you make a mistake while typing, such as typing “teh” instead of “the,” AutoCorrect will automatically replace it with the correct spelling. This feature not only saves you time but also ensures that your documents are error-free. AutoCorrect can also fix common capitalization errors, punctuation mistakes, and formatting inconsistencies.
To access AutoCorrect settings in Microsoft Word, you can navigate to the “File” tab, select “Options,” and then choose “Proofing.” From there, click on the “AutoCorrect Options” button. This will open a dialog box where you can make changes to the default settings.
Within the AutoCorrect settings, you have the option to add or remove corrections, customize existing entries, manage exceptions, and even create shortcuts. These options allow you to fine-tune AutoCorrect to fit your writing style and preferences.
If there are certain words or phrases that you frequently mistype, you can easily create a custom AutoCorrect entry. For example, if you frequently type “adn” instead of “and,” you can add this as a custom correction in the AutoCorrect settings. This way, every time you type “adn,” it will automatically be replaced with “and.”
On the other hand, if there are certain corrections that you find unnecessary or annoying, you have the flexibility to delete them. For instance, if AutoCorrect always corrects your intentional use of abbreviations or acronyms, you can remove that specific correction.
AutoCorrect also allows you to manage exceptions. There may be instances where you want Word to ignore a particular correction. You can add such exceptions in the AutoCorrect settings so that Word doesn’t automatically correct them. This is especially useful for specialized terminology or proper nouns.
Additionally, AutoCorrect can be utilized to create shortcuts. For example, if you often type out lengthy phrases like “Best regards” at the end of your emails, you can create a shortcut like “br” that will automatically expand to the full phrase when typed.
If you ever want to revert back to the default AutoCorrect settings, you have the option to restore the defaults. This can be useful if you have made several changes and want to start fresh.
Understanding the capabilities and options available in AutoCorrect can greatly enhance your productivity and accuracy when working in Microsoft Word. By mastering these settings, you can customize Word to suit your writing style and eliminate common typing errors effortlessly.
Accessing the AutoCorrect settings
Accessing the AutoCorrect settings in Microsoft Word is a straightforward process. By following a few simple steps, you can customize the AutoCorrect options to suit your specific needs. Here’s how you can easily access the AutoCorrect settings:
- Open Microsoft Word on your computer. If you already have a document open, click on the “File” tab located in the top left corner of the Word interface.
- In the drop-down menu, select “Options.” This will open the Word Options dialog box.
- From the left-hand side menu, click on “Proofing.” This will display the options related to proofing and autocorrect.
- In the Proofing options section, click on the “AutoCorrect Options” button. A new dialog box titled “AutoCorrect” will appear.
Alternatively, you can also access the AutoCorrect settings from within the Word document by using the keyboard shortcut “Alt + F + T.” This will directly open the Word Options dialog box to the “Proofing” section. From there, you can click on “AutoCorrect Options” to access the AutoCorrect settings.
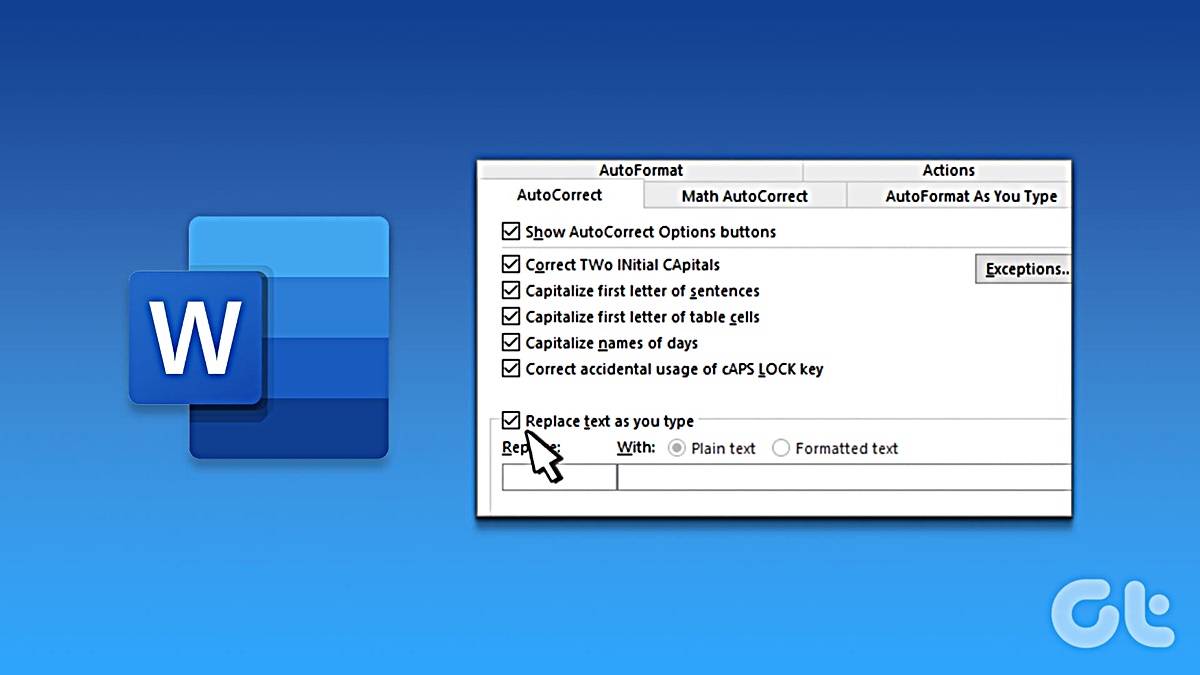
Once you have opened the AutoCorrect dialog box, you will see several tabs with different options. The “AutoCorrect” tab is where you can manage the default AutoCorrect options, including the automatic correction of common spelling and typing errors.
The “AutoFormat As You Type” tab allows you to control automatic formatting options such as the automatic capitalization of the first letter of sentences and the conversion of quotation marks into smart quotes.
The “Exceptions” tab is where you can add specific words or phrases that you want Word to ignore when it comes to autocorrect or any other proofing options. This is useful for specialized terms or proper nouns that Word might otherwise try to correct.
The “Replace” tab allows you to create custom replacements. You can specify a specific text string to watch for, and when it is typed, Word will automatically replace it with a designated replacement text. This can be handy for quickly expanding certain abbreviations or frequently used phrases.
By accessing the AutoCorrect settings in Microsoft Word, you gain control over the automatic corrections, formatting, and custom replacements. This enables you to customize Word’s behavior to match your writing style and preferences, making your overall experience more efficient and tailored to your needs.
Editing AutoCorrect options
Microsoft Word provides the flexibility to edit the AutoCorrect options, allowing you to customize the way Word corrects and handles various typing errors. The ability to edit these options gives you greater control over how Word handles automatic corrections. Here’s how you can edit the AutoCorrect options in Microsoft Word:
- Open Microsoft Word and go to the “File” tab located in the top left corner of the Word interface.
- In the drop-down menu, select “Options” to open the Word Options dialog box.
- From the left-hand side menu, click on “Proofing.”
- In the Proofing options section, click on the “AutoCorrect Options” button. The AutoCorrect dialog box will appear.
- Within the AutoCorrect dialog box, you will find several tabs that allow you to edit different aspects of the AutoCorrect options.
- On the “AutoCorrect” tab, you can edit the default AutoCorrect options provided by Word, including common spelling corrections. You can add or remove words and phrases as needed.
- The “AutoFormat As You Type” tab offers options to control automatic formatting, such as the capitalization of the first letter of sentences, automatic bulleted or numbered lists, and the conversion of hyphens to dashes.
- Navigate to the “Exceptions” tab, where you can specify exceptions for certain words or phrases that should not be automatically corrected by Word. This is particularly useful for specialized vocabulary or technical terms.
- Visit the “Replace” tab, which enables you to create custom replacements. Here, you can define a specific text string to look for, and when it’s typed, Word will automatically replace it with a designated replacement text. This feature is handy for expanding abbreviations or frequently used phrases.
- After making the desired changes, click “OK” to save your edits and close the AutoCorrect dialog box.
Editing the AutoCorrect options allows you to personalize Word’s behavior to match your writing style and preferences. By customizing the autocorrection, automatic formatting, exceptions, and custom replacements, you can ensure that Word accurately reflects your intended content without unnecessary interruptions or corrections. This helps you save time and maintain consistency while working with Microsoft Word.
Customizing AutoCorrect entries
The AutoCorrect feature in Microsoft Word offers the ability to customize entries, allowing you to tailor the autocorrections to your specific needs and preferences. By adding, modifying, or removing entries, you can make AutoCorrect work more effectively for your writing style. Here’s how you can customize AutoCorrect entries in Microsoft Word:
- Open Microsoft Word and navigate to the “File” tab in the top-left corner of the interface.
- Select “Options” from the drop-down menu to open the Word Options dialog box.
- From the left-hand side menu, click on “Proofing.”
- In the Proofing options section, click the “AutoCorrect Options” button. The AutoCorrect dialog box will appear.
- In the AutoCorrect dialog box, go to the “AutoCorrect” tab where you can find the existing AutoCorrect entries.
- To add a new entry, type the incorrect word or phrase in the “Replace” field and the correct version in the “With” field. Click “Add” to save the new entry.
- To modify an existing entry, locate the entry in the list, make the necessary changes in the “Replace” or “With” field, and click “Replace” to update the entry.
- To remove an entry, select the entry from the list and click “Delete.”
- After making the desired changes, click “OK” to save your modifications and close the AutoCorrect dialog box.
By customizing AutoCorrect entries, you can improve the accuracy and efficiency of Word’s autocorrection feature. This allows you to create tailored corrections for words or phrases that you frequently mistype, ensuring that Word automatically replaces the incorrect input with the correct version.
Customizing AutoCorrect entries also enables you to implement specific formatting or stylistic preferences. For example, you can create a custom entry that expands an abbreviation into its full form or capitalizes specific words or phrases in a consistent manner.
Additionally, you can use AutoCorrect to automatically insert frequently used text or symbols. For instance, you can create an AutoCorrect entry that, when you type a specific shortcut or keyword, inserts your email signature or a copyright symbol into the document.
By taking advantage of the customizable nature of AutoCorrect entries, you can enhance your writing experience in Microsoft Word, reduce the chances of errors, and streamline your workflow. Make sure to review and update your custom entries periodically based on your evolving writing needs.
Deleting AutoCorrect entries
In Microsoft Word, you have the ability to delete AutoCorrect entries that you no longer need or find relevant. Deleting unnecessary AutoCorrect entries helps streamline the autocorrection process and ensures that Word applies corrections only when necessary. Here’s how you can delete AutoCorrect entries in Microsoft Word:
- Open Microsoft Word and go to the “File” tab located in the top left corner of the Word interface.
- In the drop-down menu, select “Options” to open the Word Options dialog box.
- From the left-hand side menu, click on “Proofing.”
- In the Proofing options section, click on the “AutoCorrect Options” button. The AutoCorrect dialog box will appear.
- In the AutoCorrect dialog box, navigate to the “AutoCorrect” tab where you can find the list of existing AutoCorrect entries.
- Select the entry you wish to delete from the list.
- Click the “Delete” button to remove the selected AutoCorrect entry from the list.
- Repeat the deletion process for any other entries you want to remove.
- Once you have deleted the desired entries, click “OK” to save your changes and close the AutoCorrect dialog box.
Deleting AutoCorrect entries allows you to keep your autocorrection list relevant and free of unnecessary or outdated corrections. By removing entries that no longer serve a purpose, you can ensure that Word accurately corrects your typing errors without applying unwanted changes to your text.
You may want to delete AutoCorrect entries that don’t align with your writing style or frequently interfere with your intended content. For example, if Word consistently corrects abbreviations or specialized terminology that you intentionally use, deleting those specific AutoCorrect entries can prevent unnecessary changes and interruptions in your writing.
Furthermore, deleting AutoCorrect entries gives you more control over your autocorrection experience in Word. By maintaining a clean and concise list, you can easily manage and customize the corrections to better suit your needs and improve your overall productivity.
Regularly reviewing and deleting unwanted AutoCorrect entries ensures that the autocorrection feature remains effective and beneficial for your workflow in Microsoft Word.
Managing AutoCorrect exceptions
In Microsoft Word, AutoCorrect exceptions allow you to specify words or phrases that you want Word to ignore when applying automatic corrections. Managing AutoCorrect exceptions enables you to ensure that specific terms, acronyms, or specialized vocabulary are not accidentally altered by the autocorrect feature. Here’s how you can manage AutoCorrect exceptions in Microsoft Word:
- Open Microsoft Word and navigate to the “File” tab located in the top left corner of the Word interface.
- In the drop-down menu, select “Options” to open the Word Options dialog box.
- From the left-hand side menu, click on “Proofing.”
- In the Proofing options section, click on the “AutoCorrect Options” button. The AutoCorrect dialog box will appear.
- Within the AutoCorrect dialog box, go to the “Exceptions” tab.
- In the “Exceptions” tab, you will find two options: “First letter” and “All in Caps.” You can choose the appropriate option based on how you want Word to handle exceptions.
- Click on “First letter” if you want Word to ignore any word where the first letter is not capitalized. This is useful for acronyms or proper nouns that should remain in lowercase.
- Select “All in Caps” if you want Word to ignore any word where the letters are all in uppercase. This is helpful for abbreviations or terms that are commonly written in uppercase.
- After selecting the desired option, click “OK” to save your changes and close the AutoCorrect dialog box.
Managing AutoCorrect exceptions ensures that Word does not automatically correct specific words or phrases. By exempting certain terms from autocorrection, you can prevent unintended changes to your text and maintain the desired formatting or spelling of those exceptions.
AutoCorrect exceptions are particularly beneficial for specialized terminology, acronyms, or proper nouns. For example, if you work in a field that frequently uses technical terms or jargon, using AutoCorrect exceptions can prevent Word from incorrectly changing those terms to their perceived correct spellings.
Similarly, if you often use ALL-CAPS abbreviations or specific uppercase styles for branding purposes, setting an exception based on the “All in Caps” option will ensure that Word doesn’t automatically capitalize such abbreviations, preserving the desired formatting.
Managing AutoCorrect exceptions enhances the accuracy and reliability of Word’s autocorrection feature, as it allows you to define certain words or phrases that should be exempted from the automatic corrections. By customizing Word’s behavior, you can maintain consistency and retain the intended format of specialized terms or specific writing styles.
Using AutoCorrect to create shortcuts
AutoCorrect in Microsoft Word not only corrects spelling errors but also allows you to create shortcuts for frequently used words, phrases, or symbols. This feature can significantly improve your efficiency and productivity by reducing keystrokes. Here’s how you can use AutoCorrect to create shortcuts in Microsoft Word:
- Open Microsoft Word and go to the “File” tab located in the top left corner of the Word interface.
- In the drop-down menu, select “Options” to open the Word Options dialog box.
- From the left-hand side menu, click on “Proofing.”
- In the Proofing options section, click on the “AutoCorrect Options” button. The AutoCorrect dialog box will appear.
- On the “AutoCorrect” tab, find the “Replace” column.
- In the “Replace” column, type the shortcut or abbreviation you want to use.
- In the “With” column, enter the full word, phrase, or symbol you want the shortcut to expand to.
- Click “Add” to save your new AutoCorrect entry.
- Repeat the process to create more shortcuts as needed.
- Finally, click “OK” to save your changes and close the AutoCorrect dialog box.
By utilizing AutoCorrect to create shortcuts, you can save time and effort when typing long words, phrases, or commonly used symbols. For example, you can set a shortcut such as “btw” to automatically expand to “by the way” or “sig” to expand to your email signature.
Shortcuts can be particularly useful for repetitive tasks, complex terms, or industry-specific phrases. For instance, if you frequently need to type your company’s full legal name, you can create a shortcut like “compname” to quickly insert it.
AutoCorrect also allows you to use shortcuts to insert special characters or symbols. For example, you can set a shortcut like “frac12” to automatically insert the fraction “½” or “cright” to insert the copyright symbol “©”.
Using AutoCorrect to create shortcuts gives you the convenience of easily expanding frequently used words, phrases, or symbols with just a few keystrokes. This feature eliminates the need to repeatedly type or copy-paste complex or lengthy text, allowing you to work more efficiently and with greater ease in Microsoft Word.
Restoring defaults in AutoCorrect settings
If you have made several changes to the AutoCorrect settings in Microsoft Word and want to revert back to the original default settings, you can easily restore the defaults. Restoring defaults can be helpful if you feel that your custom changes have become too complex or if you simply want to start fresh. Here’s how you can restore defaults in the AutoCorrect settings:
- Open Microsoft Word and go to the “File” tab located in the top left corner of the Word interface.
- In the drop-down menu, select “Options” to open the Word Options dialog box.
- From the left-hand side menu, click on “Proofing.”
- In the Proofing options section, click on the “AutoCorrect Options” button. The AutoCorrect dialog box will appear.
- In the AutoCorrect dialog box, click on the “AutoCorrect” tab.
- At the bottom of the dialog box, you will find the “Reset AutoCorrect Options” button.
- Click on “Reset AutoCorrect Options” to restore the default AutoCorrect settings.
- A confirmation dialog box will appear asking if you want to reset the AutoCorrect settings. Click “OK” to proceed.
- Once the reset is complete, click “OK” to save your changes and close the AutoCorrect dialog box.
Restoring defaults in the AutoCorrect settings will undo any custom changes you have made and revert the settings back to their original state. This includes removing any custom entries, exceptions, or formatting changes you have applied.
By restoring the default settings, you can eliminate any complexities or errors that may have occurred due to manual changes. It allows you to start with a clean slate and benefit from the standardized AutoCorrect settings provided by Microsoft Word.
However, keep in mind that restoring defaults will remove any personalized customizations you have made. It is important to carefully consider if resetting is necessary and ensure that you have a backup of any custom AutoCorrect entries or other modifications you want to keep.
Restoring defaults in AutoCorrect settings is a useful option to simplify and streamline your typing experience, ensuring that Word applies automatic corrections and formatting according to its default behavior.
Troubleshooting common issues with AutoCorrect
While the AutoCorrect feature in Microsoft Word is designed to enhance your typing experience, you may encounter certain issues or challenges that can affect its functionality. Understanding and troubleshooting these common issues can help you resolve any problems and ensure that AutoCorrect works smoothly. Here are some common issues with AutoCorrect and how to troubleshoot them:
Incorrect or unwanted autocorrections: Sometimes, AutoCorrect may incorrectly correct words or phrases that you want to remain as they are. To troubleshoot this issue, you can add the word or phrase to the AutoCorrect exceptions list. Navigate to the AutoCorrect dialog box, select the “Exceptions” tab, and specify the word or phrase you want to exclude from autocorrections. This way, Word will no longer automatically correct that particular entry.
Missing autocorrections: If you find that AutoCorrect is not correcting certain words or phrases as expected, check your AutoCorrect settings to ensure that the entry is correctly listed. Verify that the correct replacement word or phrase is entered in the “With” field in the AutoCorrect dialog box. If the entry is missing, add it manually to ensure future autocorrections.
Inconsistent autocorrections: AutoCorrect may sometimes inconsistently apply corrections, leading to variations in spelling or formatting within your document. To resolve this issue, review your AutoCorrect entries for duplicates or conflicting entries. Delete any duplicate entries or entries with conflicting replacements to ensure consistent autocorrections throughout your document.
Autocorrect not working: If the AutoCorrect feature is not working at all, check that the “Replace text as you type” option is enabled in the AutoCorrect options. Go to the AutoCorrect dialog box, select the “AutoCorrect” tab, and ensure that the option is checked. If it is unchecked, enable it and click “OK” to save the changes and activate AutoCorrect.
Custom entries not working: If you have created custom AutoCorrect entries but they are not working, double-check the spelling of both the incorrect and correct versions in your entries. Ensure that both the “Replace” and “With” fields are correctly entered. Also, make sure that there are no conflicting entries or duplications that might be causing conflicts. Adjust the entries as needed and test them again to ensure they work properly.
By troubleshooting these common issues with AutoCorrect, you can ensure that the feature functions correctly and provides the desired autocorrections in Microsoft Word. Identifying and resolving these issues will help you maintain accuracy and efficiency in your typing, improving the overall quality of your documents.