
How to Open the Maps App
Are you ready to explore the world and navigate your way to exciting destinations? The first step is to open the Maps app on your iPhone. With its user-friendly interface and intuitive features, the Maps app is a powerful tool for discovering new places and finding your way around. Here’s how you can quickly access the Maps app on your iPhone:
- Unlock your iPhone by entering your passcode or using Face ID or Touch ID.
- Once you’re on the home screen, locate the Maps app icon. It’s usually found on the main screen, but may be in a different location if you have customized your app layout.
- Tap on the Maps app icon to launch the application.
Once the Maps app is open, you’ll be greeted with a map interface displaying your current location or the last location you viewed. Now you’re ready to start exploring and searching for your desired destinations.
Whether you’re planning a road trip, looking for a nearby coffee shop, or trying to navigate unfamiliar streets, the Maps app has got you covered. With its advanced features and accurate mapping data, you can trust the app to provide you with the information you need to get to your destination smoothly.
Now that you know how to open the Maps app on your iPhone, the world is at your fingertips. Get ready to embark on exciting adventures and discover new places with the help of this powerful navigation tool.
How to Search for a Location
Searching for a specific location within the Maps app is a breeze. Whether you’re looking for a restaurant, a park, or a landmark, the search feature allows you to quickly find the information you need. Here’s how you can search for a location using the Maps app on your iPhone:
- Open the Maps app on your iPhone using the steps mentioned earlier.
- At the top of the screen, you’ll see a search bar. Tap on it to activate the keyboard and enter the name of the location you’re searching for.
- As you type, the Maps app will start providing suggestions based on the characters you’ve entered. Tap on the suggestion that matches your desired location to proceed with the search.
- The app will then display the search results, showing the location on the map along with additional information such as the address, contact details, and user reviews.
- If the search results display multiple locations that match your query, you can scroll through the list or use the map to visually identify the correct location.
- Tap on a specific search result to view more details or get directions to that location.
With the search feature in the Maps app, you can effortlessly find any location you’re looking for. Whether it’s a specific address, a business, or a point of interest, the app will provide you with the relevant information in just a few taps.
Explore new cities, plan your travels, or simply find your way around town with ease by utilizing the search functionality in the Maps app. It’s a convenient and reliable tool that ensures you never get lost and always find what you’re looking for.
How to Switch to Satellite View
When using the Maps app, sometimes you may want a different perspective of the world. The satellite view in the Maps app allows you to see real satellite imagery of locations, giving you a more detailed and realistic view. Here’s how you can switch to satellite view on your iPhone:
- Open the Maps app on your iPhone as mentioned earlier.
- At the bottom-right corner of the screen, you’ll see an icon resembling three stacked layers. Tap on this icon to access the map layers.
- A menu will appear, presenting you with various map view options like Standard, Hybrid, and Satellite. Tap on the “Satellite” option.
- After selecting the Satellite view, the map will switch to display real satellite imagery of the locations. You can zoom in and explore with incredible detail.
Switching to satellite view can be especially helpful when you want to get a visual representation of an area or a specific location. Whether you’re exploring a mountain range, planning a hiking trip, or simply curious about the surroundings, the satellite view provides a unique perspective.
By switching to satellite view, you can get a better understanding of the terrain, see landmarks and natural features, and make more informed decisions when navigating. It adds a new layer of depth and detail to your navigation experience.
So, don’t hesitate to switch to satellite view whenever you feel the need for a closer look at the world around you. It’s a powerful feature in the Maps app that opens up new possibilities for exploration and discovery.
How to Zoom In and Out on the Map
Zooming in and out on the map is a fundamental feature of the Maps app that allows you to adjust the level of detail according to your needs. Whether you want to explore a specific area or get a broader view, zooming in and out on the map is simple and easy. Here’s how you can do it on your iPhone:
- Launch the Maps app and navigate to the desired location using the search feature or by manually panning and scrolling on the map.
- To zoom in on the map, place two fingers close together on the screen and spread them apart. You can also double-tap the screen with one finger to quickly zoom in.
- To zoom out on the map, pinch the screen with two fingers or double-tap the screen with two fingers simultaneously.
- Continue zooming in or out until you reach the desired level of detail.
The ability to zoom in and out on the map gives you greater control over the visualization of the area you’re exploring. It allows you to focus on specific streets, buildings, or points of interest, or get a broader perspective of the surrounding area.
Zooming in is particularly useful when you’re navigating through a crowded city or trying to locate a specific address. On the other hand, zooming out helps you get an overview of the area, plan your route, or identify landmarks in the vicinity.
Remember that the Maps app offers smooth and fluid zooming, allowing you to adjust the zoom level seamlessly. Experiment with different zoom levels to find the one that best suits your needs in any given situation.
So, whether you’re closely examining a neighborhood or exploring new territories from afar, zooming in and out on the map is a versatile feature that enhances your mapping experience and makes navigation even more convenient.
How to Drop a Pin on the Map
Dropping a pin on the map is an essential feature of the Maps app that allows you to mark specific locations for future reference or to share with others. Whether you want to remember a favorite spot, keep track of important places, or provide directions, dropping a pin is a simple and effective way to do it. Here’s how you can drop a pin on the map using your iPhone:
- Open the Maps app on your iPhone and navigate to the desired location using the search feature or by manually panning and scrolling on the map.
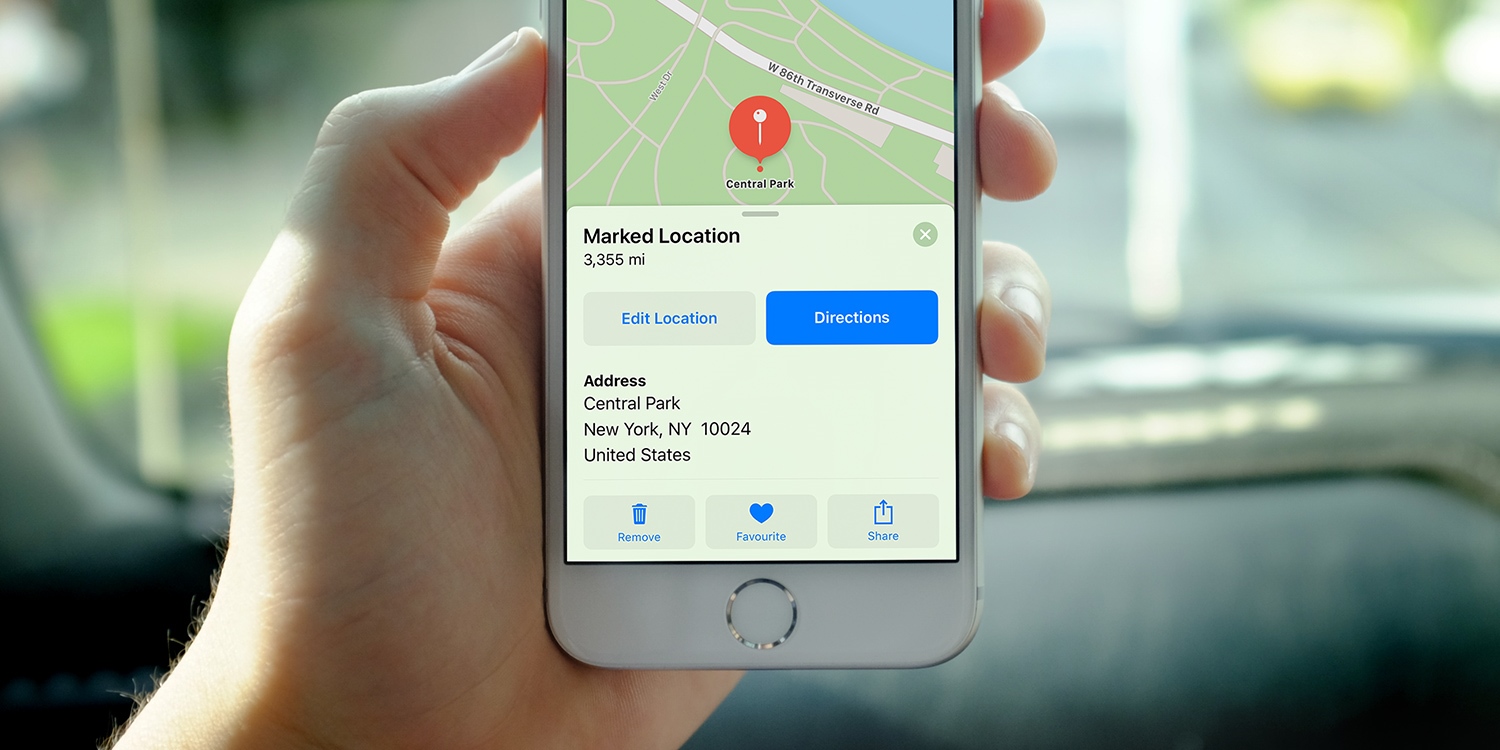
- Once you’ve arrived at the desired location, tap and hold your finger on the screen at the specific spot where you want to drop the pin. A red pin will appear at that location.
- The pin will display the address of the location at the bottom of the screen along with options to get directions, save the location, or share it with others.
Dropping a pin on the map allows you to mark points of interest, important landmarks, or even your own current location. It serves as a reference point that you can easily return to whenever needed.
Furthermore, you can customize the pin by adding a label, notes, or even a photo to provide more context or information about the location. This can be especially useful when planning trips or collaborating with others.
So, whether you want to save a hidden gem you stumbled across, mark the location of a meeting point, or simply want a way to remember a specific place, dropping a pin on the map is an invaluable tool in the Maps app that ensures you never forget important locations.
How to Move the Pin to a Different Location
When using the Maps app, you may find the need to adjust the position of a dropped pin to a more accurate or desired location. Fortunately, the Maps app allows you to easily move a pin to a different spot on the map. Here’s how you can do it on your iPhone:
- Open the Maps app and locate the pin you want to move on the map.
- Tap and hold the pin until it becomes draggable. You will see the pin and the location information at the bottom of the screen.
- While still holding the pin, drag it to the desired location on the map. As you move the pin, the address and coordinates will automatically update to reflect the new position.
- Release your finger to drop the pin at its new location.
Moving the pin to a different location allows you to fine-tune the accuracy of your marked spot. It can be particularly useful when the initial location is slightly off or when you want to adjust the pin to a specific point of interest within a larger area.
Whether you’re using the pin to mark a meeting point, a parking spot, or a hidden gem you want to remember, being able to move the pin ensures that you have full control over its placement on the map.
Once you’ve moved the pin to the desired location, you can save the updated pin, get directions to or from it, or share the new location with others.
So, don’t hesitate to utilize the ability to move pins on the Maps app to ensure that your marked locations accurately reflect the spots you want to remember or share with others. It’s a simple yet powerful feature that enhances the flexibility and usability of the app.
How to Save a Dropped Pin
After dropping a pin on the map, you may want to save it for future reference or to easily access it again later. Fortunately, the Maps app allows you to save your dropped pins so that you can quickly find and navigate to them whenever needed. Here’s how you can save a dropped pin on your iPhone:
- Open the Maps app on your iPhone and navigate to the location where you have dropped the pin.
- Tap on the dropped pin to open the information card at the bottom of the screen.
- In the information card, you’ll see a “Save” button. Tap on this button to save the pin.
- A dialog box will appear, allowing you to choose a collection in which to save the pin. You can save it in an existing collection or create a new one by tapping on “New Collection” and entering a name.
- Once you’ve selected or created the desired collection, tap on “Save” to save the pin.
Saving a dropped pin allows you to create your own personalized collection of favorite locations, important landmarks, or places you frequently visit. It provides quick access to those locations and eliminates the need for manual searching every time.
In addition to saving the pin, you can also add notes, labels, or photos to provide further context or reminder about the location. This can be especially useful for trip planning, organizing your destinations, or collaborating with others.
To access your saved pins, simply open the Maps app and tap on the “Saved” tab at the bottom of the screen. From there, you can view, manage, and get directions to your saved pins.
So, take advantage of the ability to save dropped pins in the Maps app to create your own personalized collection of important and favorite locations. It’s a practical feature that enhances your navigation experience and keeps your important spots just a tap away.
How to Share a Dropped Pin
Sharing a dropped pin with others can be incredibly useful, whether you’re planning a meet-up, providing directions, or simply sharing an interesting location. The Maps app on your iPhone allows you to easily share dropped pins with friends, family, or colleagues. Here’s how you can share a dropped pin:
- Open the Maps app on your iPhone and navigate to the location where you have dropped the pin.
- Tap on the dropped pin to open the information card at the bottom of the screen.
- In the information card, you’ll see a sharing button represented by a square with an arrow pointing up. Tap on this button.
- A share sheet will appear, offering various sharing options. You can choose to share the dropped pin via Messages, Mail, or through third-party apps like WhatsApp or social media platforms.
- Select the sharing method of your choice, and a new message or a sharing interface will open with the dropped pin attached.
- Compose your message or choose the recipient(s), and tap on the send button to share the dropped pin.
Sharing a dropped pin enables you to communicate specific locations effectively and accurately. It eliminates the possibility of confusion or misinterpretation when giving directions or indicating a meeting point.
Furthermore, the recipient of the shared pin can seamlessly open it in their own Maps app, which allows them to navigate to the exact location with ease.
Whether you’re coordinating plans with friends, sharing a hidden gem with fellow travelers, or providing a precise location for a business meeting, the ability to share dropped pins simplifies the process and ensures clear communication.
So, the next time you need to share a specific location, don’t forget to take advantage of the sharing feature in the Maps app. It’s a convenient and efficient method of communicating locations and facilitating seamless navigation for others.