
Overview of Automations in (platform name)
Automations play a crucial role in streamlining processes and saving time in (platform name). With its robust automation features, users can automate repetitive tasks, create personalized workflows, and enhance efficiency within the platform.
An automation in (platform name) consists of a series of predefined actions that are triggered by specific events or conditions. By creating automations, users can simplify complex workflows, reduce manual effort, and ensure consistent execution of tasks.
Automations in (platform name) offer a wide range of capabilities to cater to different needs and scenarios. Some of the common automation options include:
- Event-based automations: These automations are triggered by specific events, such as when a contact fills out a form, makes a purchase, or registers for an event. Event-based automations allow users to automate follow-ups, send confirmation emails, or add contacts to specific lists.
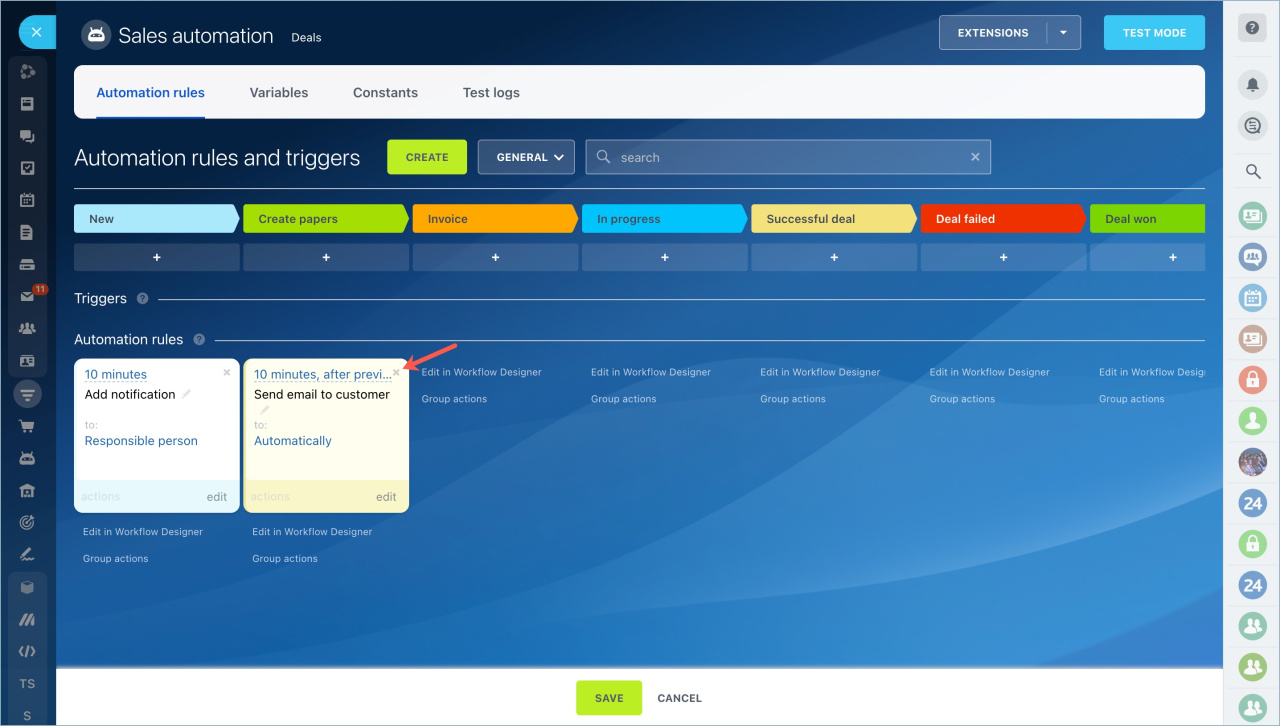
- Time-based automations: Time-based automations can be triggered after a specific period, such as sending a reminder email to customers who have abandoned their shopping carts after 24 hours. These automations help in nurturing leads, delivering timely notifications, or scheduling tasks.
- Conditional automations: Conditional automations allow users to set specific conditions that must be met for the automation to trigger. For example, an automation can be configured to send a discount code to customers who have made a purchase of a certain value or to send a different email based on customers’ preferences.
(platform name) also offers integration with external tools and services, enabling users to create automations that span across different platforms. This integration capability extends the functionality of automations and opens up endless possibilities for process optimization.
Whether you are a small business owner, a marketer, or a customer support specialist, leveraging automations in (platform name) can greatly improve your productivity and effectiveness. By automating repetitive tasks, you can focus on more strategic activities and provide a seamless experience for your customers.
In the following sections, we will guide you through the process of deleting an automation in (platform name), allowing you to modify your automations as your needs evolve.
Step 1: Accessing the Automation Menu
In order to delete an automation in (platform name), you first need to access the automation menu. Follow these steps to navigate to the correct location:
- Log in to your (platform name) account using your credentials. Once logged in, you will be taken to the platform’s dashboard.
- Look for the navigation menu, usually located on the left-hand side of the dashboard. Scan the menu options for one that mentions or relates to automations. Common names for this menu item may include “Automations,” “Workflows,” or “Automation Center.”
- Click on the automation menu item. This action will open a new page or dropdown menu specifically dedicated to managing automations within (platform name).
Once you have successfully accessed the automation menu, you are ready to proceed to the next step of deleting an automation.
Note: The exact steps to access the automation menu may vary slightly depending on the version and customization of (platform name). If you are having trouble locating the automation menu, refer to the platform’s documentation or contact their customer support for assistance.
Step 2: Finding the Automation to Delete
Once you have accessed the automation menu in (platform name), the next step is to locate the specific automation that you want to delete. Follow these instructions to find the automation:
- Take a moment to familiarize yourself with the layout of the automation menu. Look for any search or filter options that can help you narrow down the list of automations.
- If there are many automations listed, you may need to use the search or filter functionality to find the one you want to delete. Use keywords, such as the automation’s name or a relevant part of the workflow, to refine your search.
- Review the list of automations and look for the one that matches the criteria you set. Pay attention to details such as the automation’s name, description, or any defining features you remember.
- If your search or filtering yields no results, double-check that you are in the correct location. It’s possible that the automation is located in a different section of the platform or you may have entered incorrect search criteria.
Once you have successfully located the automation you wish to delete, you are ready to proceed to the next step.
Note: If you have a large number of automations and struggle to find the specific one you want to delete, it may be helpful to organize your automations with appropriate naming conventions or categorization. This can make it easier to locate and manage automations in the future.
Step 3: Opening the Automation
After locating the automation you wish to delete in (platform name), the next step is to open the automation to access its settings and details. Follow these steps to proceed:
- From the automation menu, identify the specific automation that you want to delete. Usually, automations are displayed in a list or grid format.
- Click on the name or title of the automation to open it. This action will navigate you to a page or a pop-up window dedicated to that particular automation.
- Depending on the platform, the process of opening the automation may slightly differ. Some platforms may require you to double-click on the automation, while others may provide an “Edit” or “Open” button or link next to each automation.
- Once you have successfully opened the automation, you should be able to view and modify its settings, triggers, actions, and any other relevant details.
By opening the automation, you gain access to the inner workings and configuration of the automation, which will be necessary in the next steps when deleting it. Take note of any settings or triggers that are currently active, as you may need this information during the deletion process.
Note: Some platforms may have additional options available when opening an automation, such as duplicating or editing the automation. Make sure to only proceed with deleting the automation if that is your intended action.
Step 4: Reviewing the Automation’s Settings and Triggers
After opening the automation you wish to delete in (platform name), it is important to carefully review its settings and triggers. This step will ensure that you have a clear understanding of the automation’s functionality and any potential dependencies before proceeding with the deletion. Follow these instructions to review the automation’s settings:
- Once the automation is open, take a few moments to familiarize yourself with its interface. Look for sections or tabs that display the automation’s settings, triggers, actions, and any other relevant details.
- Review the settings of the automation to understand what it is designed to do. Pay attention to elements such as the automation’s name, description, audience, filters, and any conditional logic that may be in place.
- Examine the triggers set for the automation. Triggers are the specific events or conditions that activate the automation. Make a note of the trigger(s) being used, such as email opens, form submissions, specific dates, or other user actions.
- If the automation includes multiple steps or actions, ensure you are aware of what each action does and how they are sequenced. This will help you evaluate any potential dependencies or cascading effects of deleting the automation.
By thoroughly reviewing the automation’s settings and triggers, you can make informed decisions regarding its deletion. Take note of any important details or dependencies that you may need to consider or address before proceeding to the next steps.
Note: If you are unsure about any aspect of the automation’s settings or triggers, refer to the platform’s documentation or contact their customer support for assistance. It’s better to seek clarification and avoid accidentally affecting other processes or data in your (platform name) account.
Step 5: Clicking on the Delete Option
After reviewing the settings and triggers of the automation in (platform name), you are now ready to proceed with deleting it. Follow these steps to click on the delete option:
- Ensure you are still on the page or interface where the automation’s settings are displayed.
- Look for an option or button that indicates the ability to delete the automation. This option is typically labeled as “Delete,” “Remove,” or may be represented by a trash bin or similar icon.
- Click on the delete option. Depending on the platform, you may be prompted with a confirmation message before the deletion is final. Read any confirmation message carefully and follow the instructions provided.
By clicking on the delete option, you are initiating the process of removing the automation from your (platform name) account. It is important to double-check your decision and ensure that you are deleting the correct automation, as this action cannot be undone.
Note: Some platforms may have additional steps or precautions in place to prevent accidental deletions of automations. If you encounter any additional prompts, follow the instructions provided to proceed with the deletion.
Proceed to the next step to confirm the deletion of the automation in (platform name).
Step 6: Confirming the Deletion
After initiating the deletion of the automation in (platform name), the next step is to confirm the deletion. This step ensures that you are intentionally removing the automation from your account. Follow these instructions to confirm the deletion:
- Once you click on the delete option, a confirmation message or pop-up window will typically appear.
- Read the confirmation message carefully to ensure that it mentions the correct automation that you want to delete.
- If the confirmation message includes additional information or warnings regarding the deletion, take a moment to review and understand them. This may include information about the potential impact on other connected automations or data.
- If you are certain that you want to proceed with the deletion, confirm by clicking on the appropriate option, such as “Confirm” or “Yes, Delete.”
By confirming the deletion, you finalize the removal of the automation from your (platform name) account. The automation and all associated settings, triggers, and actions will be permanently deleted, so ensure that you have made the correct decision.
Note: If you have any doubts or are unsure about deleting the automation, you may choose to cancel the deletion at this stage. Look for an option to cancel or go back, typically labeled as “Cancel,” “No,” or an “X” icon.
Once you have confirmed the deletion, proceed to the next step to verify that the automation has been successfully removed from your (platform name) account.
Step 7: Verifying the Automation is Deleted
After confirming the deletion of the automation in (platform name), it is important to verify that the automation has been successfully removed from your account. Follow these steps to ensure the automation is deleted:
- Return to the automation menu or the main dashboard of (platform name).
- Scan the list of automations to locate the one that you have deleted.
- If you no longer see the deleted automation in the list, it indicates that the deletion was successful and the automation has been removed from your account.
- Double-check any associated sections or categories where the automation may have appeared to confirm its absence.
By verifying the deletion of the automation, you can ensure that it will no longer be active or impact any processes within (platform name). This step provides confirmation that the desired automation has been successfully removed and is no longer accessible.
Note: It may take some time for the deletion to be fully processed and reflected in all areas of (platform name). If you still see the deleted automation after completing the verification step, try refreshing the page or waiting for a few minutes before checking again.
Congratulations! You have successfully completed the process of deleting an automation in (platform name). The removed automation will no longer execute actions, trigger events, or appear in your account.
Troubleshooting: Automation Deletion Errors
While deleting an automation in (platform name) is usually a straightforward process, there may be instances where you encounter errors or face challenges. Here are some common troubleshooting steps to help you address automation deletion errors:
- Double-check the permissions: Ensure that you have the necessary permissions to delete automations in your (platform name) account. Some platforms have role-based access controls that restrict certain actions to specific user roles.
- Check for dependencies: If the automation is connected to other processes, such as email campaigns or integrations, it may cause errors when attempting to delete it. Make sure to review and resolve any dependencies before deleting the automation.
- Clear cache and refresh: In some cases, errors may occur due to temporary glitches or outdated information. Clear your browser cache and refresh the page to see if the automation deletion error persists.
- Contact customer support: If you are still experiencing difficulties deleting the automation, reach out to (platform name)’s customer support for assistance. They can provide specific guidance or troubleshoot any technical issues related to the deletion process.
- Document the error: If you encounter an error message or code during the deletion process, make a note of it. This information can be helpful when communicating with customer support or searching for solutions in (platform name)’s documentation or community forums.
By following these troubleshooting steps, you can overcome common errors or challenges that may arise when attempting to delete an automation in (platform name). Remember to be patient and thorough in your approach, and seek assistance if needed.
Note: If you are deleting a critical automation or one that impacts important processes, it is recommended to have a backup or alternative plan in place before proceeding with the deletion. This will help mitigate any potential disruptions or loss of data.