
Why Delete a Folder in iOS Mail?
The iOS Mail app offers a convenient way to manage your email accounts on your iPhone or iPad. With its intuitive interface and robust features, you can effortlessly organize your messages into folders, allowing for easier navigation and retrieval. However, there may come a time when you need to delete a folder for various reasons. Here are a few common scenarios where deleting a folder can be necessary:
- Simplify and declutter: Over time, you may accumulate numerous folders that are no longer useful or relevant. Deleting these unnecessary folders can help streamline your mailbox, making it easier to locate important emails.
- Reorganize your email structure: Your email needs and preferences may change over time. Deleting folders allows you to start fresh and reorganize your mailbox to better suit your current needs.
- Resolve syncing issues: At times, you may encounter syncing issues between the iOS Mail app and your email server. Deleting and recreating a folder can help resolve sync problems and ensure that your emails are properly reflected.
- Merge duplicate folders: If you accidentally created duplicate folders or have multiple folders serving the same purpose, deleting the duplicates can help avoid confusion and simplify your email organization.
Regardless of the reason, deleting a folder in the iOS Mail app is a straightforward process. Following a few simple steps, you can remove unwanted folders and keep your mailbox organized and efficient. Let’s explore how to delete a folder in the iOS Mail app.
Step 1: Open the iOS Mail App
Before we can proceed with deleting a folder in the iOS Mail app, the first step is to open the app on your iPhone or iPad. Locate the Mail app icon on your device’s home screen, which resembles an envelope, and tap on it to launch the app.
Once the Mail app is open, you will be presented with your email accounts. The app supports multiple accounts, so if you have more than one email account set up on your device, you will see each account listed.
If you’re using multiple email accounts and want to delete a folder from a specific account, make sure to navigate to that account by tapping on its name. This will open the mailbox associated with that particular account.
It’s worth mentioning that the iOS Mail app is compatible with various email service providers, including iCloud, Gmail, Yahoo Mail, Outlook, and others. Regardless of the email provider you’re using, the process of deleting a folder remains the same within the iOS Mail app.
Now that you have successfully opened the iOS Mail app, let’s proceed to the next step to navigate to the folders screen, where we can locate the folder you want to delete.
Step 2: Navigate to the Folders Screen
Once you have opened the iOS Mail app and accessed the mailbox of the desired email account, the next step is to navigate to the Folders screen. This screen displays all the folders associated with the selected email account.
To access the Folders screen, look for the “Mailboxes” button located at the bottom of the Mail app interface. It is represented by a small rectangle with three horizontal lines inside. Tap on this button to proceed.
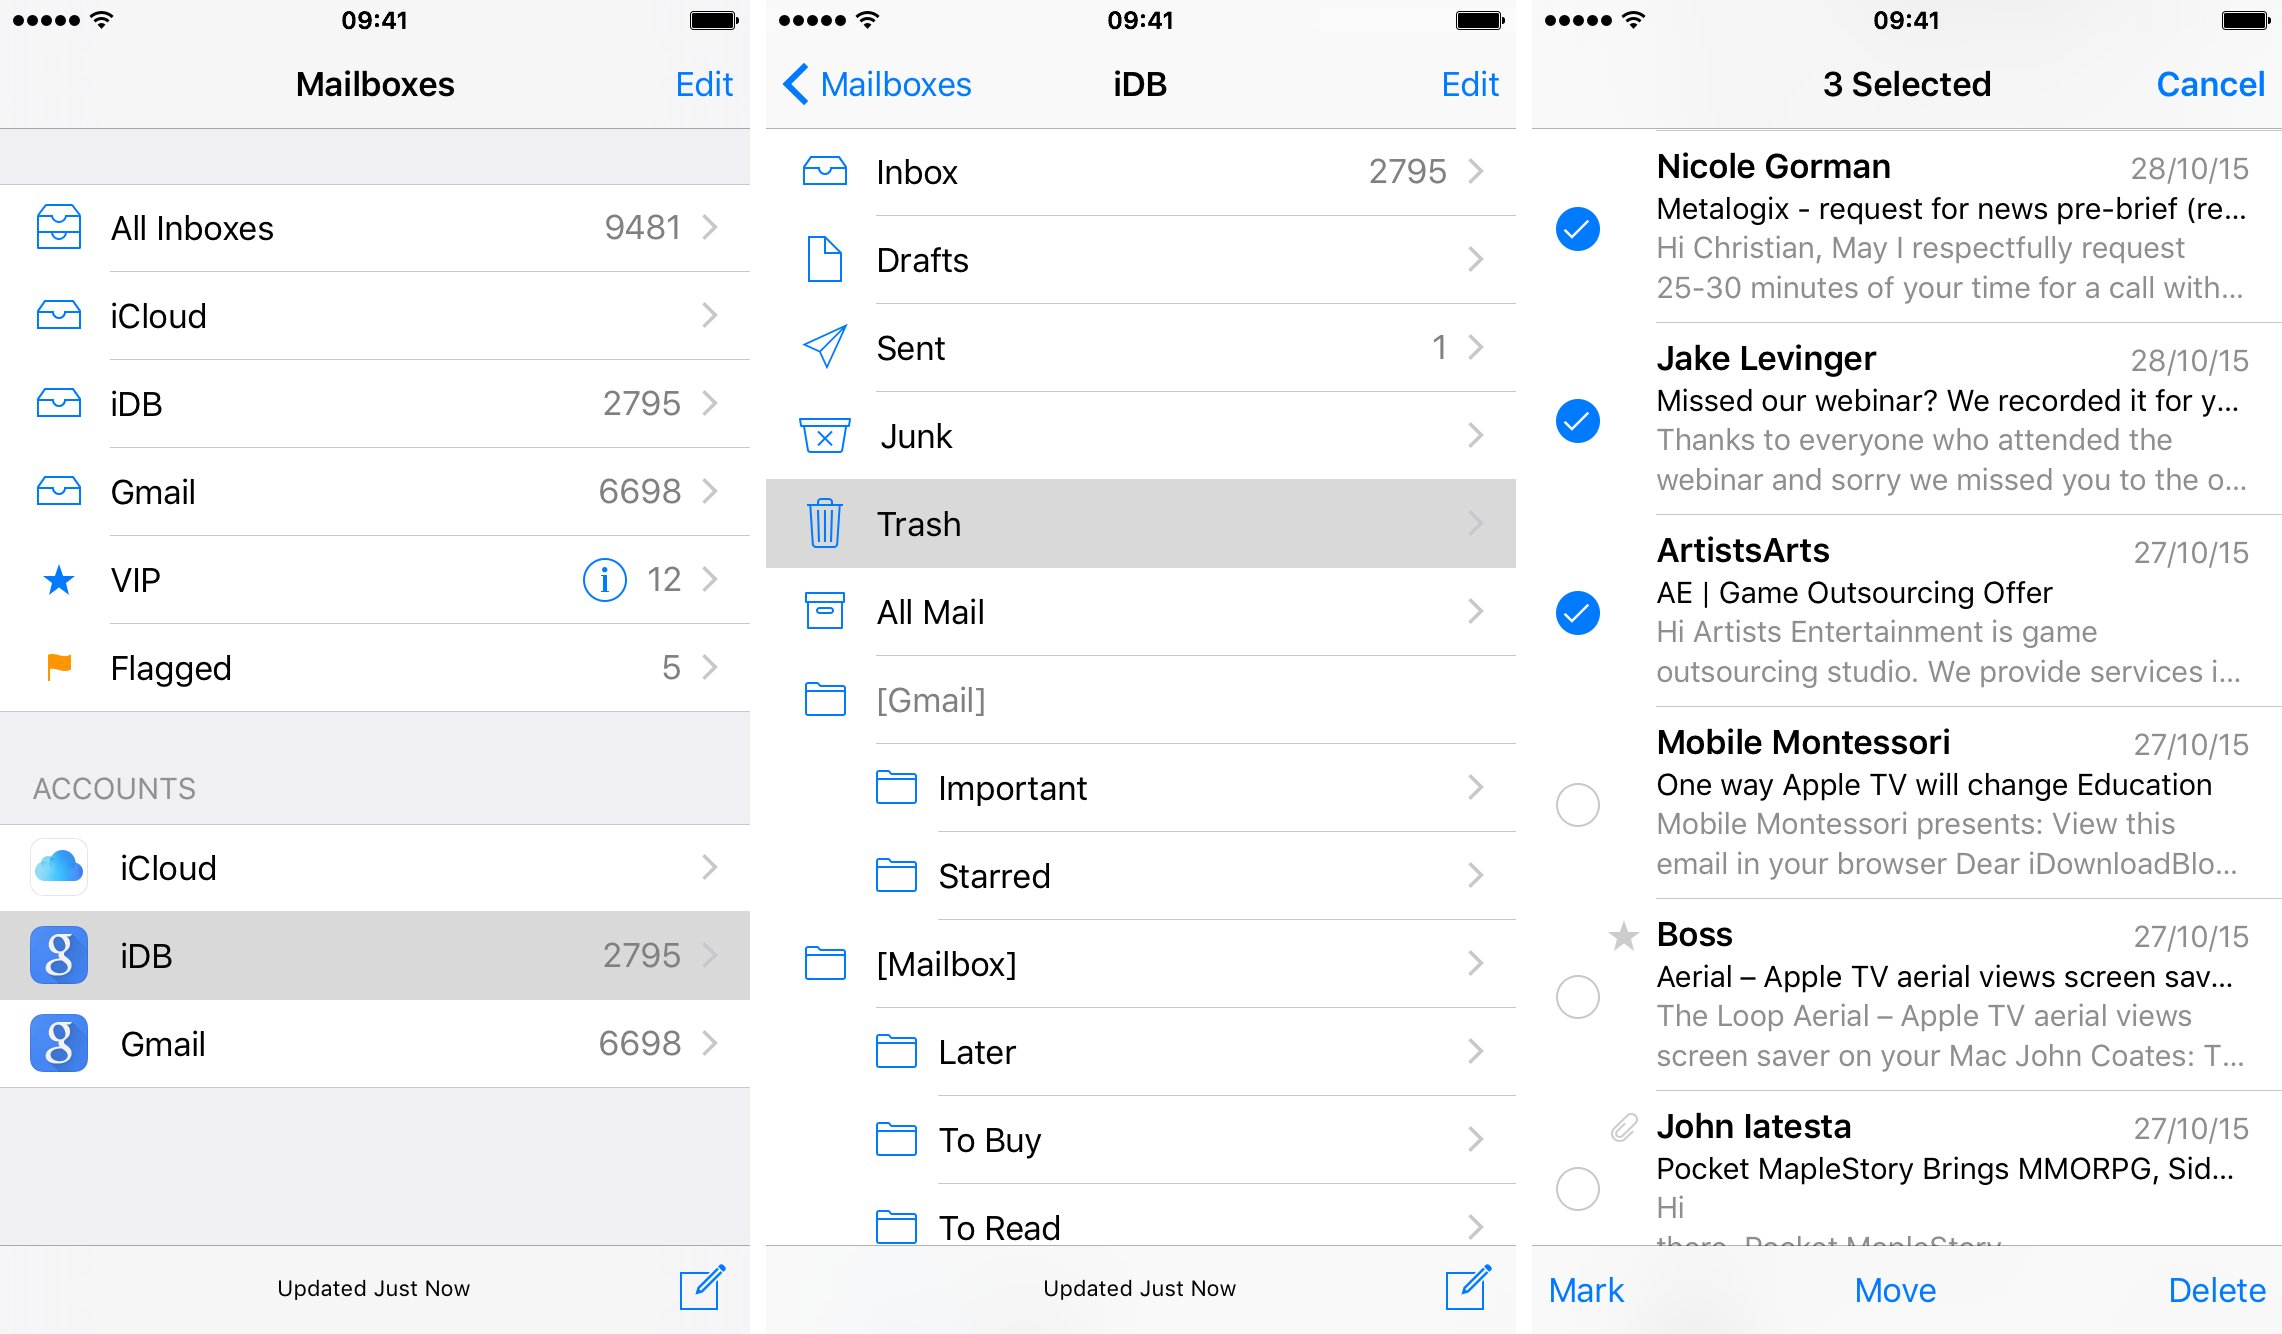
Upon tapping the “Mailboxes” button, you will be directed to a new screen that showcases different categories and folders. Here, you can view your inbox, sent items, drafts, trash, and other default folders. Additionally, you can see any custom folders you may have created to organize your emails.
Scroll through the list to find the section labeled “Folders” or “Custom Folders.” This section will display all the custom folders you have created. Tap on it to expand and reveal the list of custom folders associated with the selected email account.
If you have a large number of custom folders, you may need to scroll through the list to locate the specific folder you want to delete. Alternatively, you can use the search function by tapping the magnifying glass icon and typing in the name of the folder to quickly locate it.
Once you have located the folders screen and identified the folder you wish to delete, you are ready to proceed to the next step: swiping left on the folder to reveal the deletion options.
Step 3: Locate the Folder You Want to Delete
After navigating to the Folders screen in the iOS Mail app, the next step is to locate the specific folder you want to delete. This is an essential step to ensure that you delete the correct folder from your mailbox.
Scroll through the list of custom folders displayed on the Folders screen. Take your time to carefully review the names of the folders and choose the one you wish to remove. If you have a large number of folders, you may need to use the search function to quickly locate the desired folder.
As you locate the folder, pay attention to its name and any distinguishing characteristics to confirm that it is indeed the folder you want to delete. Be cautious not to accidentally select the wrong folder, as the deletion process is irreversible.
If you can’t find the folder you are looking for, double-check that you are on the correct email account’s Folders screen. It’s possible that the folder may be located under a different email account if you have multiple accounts set up in the iOS Mail app.
Once you have located the folder you want to delete and verified its name and details, you are now ready to proceed with the deletion process. In the next step, we will explore how to swipe left on the folder to reveal the deletion options.
Step 4: Swipe left on the Folder to Reveal Options
Once you have located the folder you want to delete in the iOS Mail app, the next step is to swipe left on the folder to reveal the options available for that specific folder.
To swipe left on the folder, place your finger on the folder and swipe to the left in a horizontal motion. This action will trigger a set of options to appear on the right side of the folder.
Keep in mind that the swipe gesture may require a bit of practice, especially if you are new to using iOS devices. Take your time and ensure that you swipe directly on the folder rather than accidentally swiping on another area of the screen.
When you successfully swipe left on the folder, you will see a list of options appear next to the folder. These options typically include options like “More”, “Flag”, “Mark as Read/Unread”, and more.
It’s important to note that the availability of options may vary depending on the email service provider you are using. Some providers may offer additional actions or customization options for folders.
In the next step, we will explore how to tap the “More” option to access further options, including the option to delete the folder.
Step 5: Tap the “More” Option
After swiping left on the folder in the iOS Mail app, the next step is to tap the “More” option that appears on the right side of the folder. Tapping this option will reveal further actions and settings for the selected folder, including the option to delete the folder.
When you see the “More” option next to the folder, simply tap on it to continue with the deletion process. By tapping this option, you are indicating your intention to perform additional actions on the folder.
Keep in mind that if you tap on any other option that appears on the right side of the folder, it will trigger a different action or command. Therefore, it is important to specifically tap on the “More” option to access the folder’s settings and actions.
Once you have tapped on the “More” option, you will be presented with a list of further options for the folder. These options typically include the ability to move the folder, mark it as read or unread, flag it, or delete it.
Now that you have tapped on the “More” option and accessed the additional options for the folder, let’s proceed to the next step to select the “Delete” option and initiate the folder deletion process.
Step 6: Select the “Delete” Option
After tapping the “More” option on the right side of the folder in the iOS Mail app, the next step is to select the “Delete” option from the list of available actions for the folder. This will initiate the deletion process for the selected folder.
Scroll through the list of options that appear after tapping “More” and look for the “Delete” option. It is often represented by a trash can icon or a similar symbol, indicating the action to remove the folder.
Once you have located the “Delete” option, tap on it to select it as the desired action for the folder. This will prompt the iOS Mail app to proceed with deleting the selected folder from your mailbox.
Before proceeding with the deletion, it’s essential to double-check and ensure that you have selected the correct folder. Deleting a folder will also delete all the emails contained within it, so it is crucial to exercise caution to avoid accidental and irreversible deletions.
After selecting the “Delete” option, a confirmation message may appear to confirm your intention to delete the folder. This serves as an additional measure to prevent accidental deletions. Review the confirmation message and proceed to the next step to complete the folder deletion process.
Step 7: Confirm the Deletion
After selecting the “Delete” option for the folder in the iOS Mail app, the next step is to confirm the deletion. This confirmation step ensures that you intentionally want to proceed with deleting the selected folder and all its contents.
When you tap on the “Delete” option, a confirmation dialog box or message will typically appear on the screen. This message will ask you to confirm your decision to delete the folder.
Read the confirmation message carefully to ensure that you have selected the correct folder for deletion. Take note that deleting the folder will also delete all the emails and subfolders contained within it.
If the confirmation message includes additional information or warnings, make sure to review them to understand any potential consequences of deleting the folder.
To confirm the deletion, follow the on-screen prompt or tap the confirmation button provided in the dialog box. This action will initiate the deletion process for the selected folder.
If you realize that you have selected the wrong folder or decide not to proceed with the deletion, you can typically tap on the “Cancel” or “Go Back” option in the confirmation message. This will prevent the folder from being deleted and return you to the previous screen without any changes made.
Once the deletion is confirmed, the folder and its contents will be permanently removed from your mailbox. Proceed to the next step to verify that the folder has been successfully deleted.
Step 8: Verify the Folder is Deleted
After confirming the deletion of a folder in the iOS Mail app, the final step is to verify that the folder has been successfully deleted from your mailbox.
Return to the main Mail app interface by tapping the back button or navigating to the desired section, such as the inbox or the main folder list.
Once you are back in the main interface, check if the deleted folder is no longer visible. The folder should be removed from the list of folders and no longer present in the folder hierarchy.
Take a moment to browse through your mailbox and confirm that any emails or subfolders that were previously associated with the deleted folder are now gone. If you had any emails stored within the deleted folder, they should no longer be accessible.
Additionally, you can use the search function within the Mail app to search for specific emails or subfolders that were previously part of the deleted folder. If the search does not yield any results related to the deleted folder, it confirms that the folder has been successfully deleted.
If you encounter any issues or inconsistencies after deleting the folder, such as the folder reappearing or emails still being present, try closing the Mail app and reopening it. This may help refresh the app and ensure that the changes are properly reflected in your mailbox.
With the deletion successfully confirmed and the absence of the folder and its associated items, you can now consider the folder fully deleted from your iOS Mail app. Congratulations on successfully removing the folder to keep your mailbox organized and streamlined!