
Why Do You Need an iTunes Account?
An iTunes account is essential for anyone who wants to access and enjoy the wide array of content available on the iTunes Store, including music, movies, TV shows, books, and apps. Whether you own an iPhone, iPad, Mac, or PC, having an iTunes account will enable you to explore and download a wealth of entertainment and functionality.
With an iTunes account, you can easily purchase and download your favorite songs from a vast collection of music spanning various genres, artists, and eras. You can also rent or buy movies and TV shows, allowing you to enjoy the latest blockbusters or binge-watch your favorite series. Furthermore, you can discover and download a plethora of apps and games, transforming your device into a hub of productivity, creativity, and entertainment.
Aside from media content, an iTunes account provides access to a vast library of books, allowing you to dive into captivating stories, educational resources, and informative publications. Whether you prefer fiction, non-fiction, or academic literature, the iTunes Store offers a wide selection to cater to every interest and preference.
Moreover, having an iTunes account allows you to take advantage of various features and services offered by Apple. For instance, you can easily sync your devices to seamlessly transfer content and settings, ensuring a consistent and personalized experience across all your Apple devices. You can also utilize iCloud to back up your data, securely store files, and access them from anywhere via the cloud.
By creating an iTunes account, you gain access to a world of entertainment, convenience, and functionality. Whether you’re a music lover, movie enthusiast, avid reader, or app aficionado, having an iTunes account opens up a realm of possibilities and enhances your overall digital experience. So, if you haven’t already, it’s time to create your iTunes account and start exploring the immense catalog of content and services available to you.
Step 1: Launch iTunes and go to the App Store
The first step in creating an iTunes account without a credit card is to launch the iTunes application on your device. iTunes is available for both Windows and macOS, so regardless of your operating system, you can easily follow along.
Once you have launched iTunes, navigate to the App Store by clicking on the “App Store” tab located at the top of the window. This will take you to the App Store homepage, where you can explore and download a vast collection of apps for your device.
In the App Store, you will find a wide range of categories to choose from, including productivity, entertainment, education, gaming, and more. You can browse through the featured apps or use the search bar to find a specific app that you are interested in.
Take your time to explore the App Store and discover the apps that best suit your needs and preferences. Whether you’re looking for social media apps, photo editing tools, fitness trackers, or language learning apps, the App Store has you covered.
Once you have found an app that you would like to download, proceed to the next step to continue the process of creating your iTunes account without a credit card.
Step 2: Find a Free App to Download
In order to create an iTunes account without a credit card, you’ll need to start by finding a free app to download. The App Store offers a wide range of free apps across various categories, from games to productivity tools to social media platforms.
Start by browsing the App Store and exploring different app categories to find something that interests you. You can either click on the featured apps or use the search bar to look for a specific type of app. For example, if you’re interested in photography, you can search for “photo editing app” to find a variety of options.
When searching for a free app, keep in mind that the App Store often highlights top free apps in different categories. These are typically popular apps that have garnered positive reviews and high ratings from users. Checking out these top free apps can be a good starting point in finding reliable and quality apps without any cost.
Once you find a free app that catches your attention, click on its icon or name to view the app details. Here, you can read the description, check the ratings and reviews, and see screenshots or videos of the app in action. This will help you determine whether the app meets your needs and expectations.
Remember, the purpose of downloading a free app is to initiate the account creation process without requiring a credit card. So, choose an app that you’re genuinely interested in, as you’ll need to go through the installation process to proceed with creating your iTunes account.
After you’ve selected the app you want to download, you’re ready to proceed to the next step in creating your iTunes account without a credit card.
Step 3: Click on the “Get” button
After finding a free app that you would like to download from the App Store, the next step in creating an iTunes account without a credit card is to click on the “Get” button. This button is typically located near the app’s icon or on the app’s detail page.
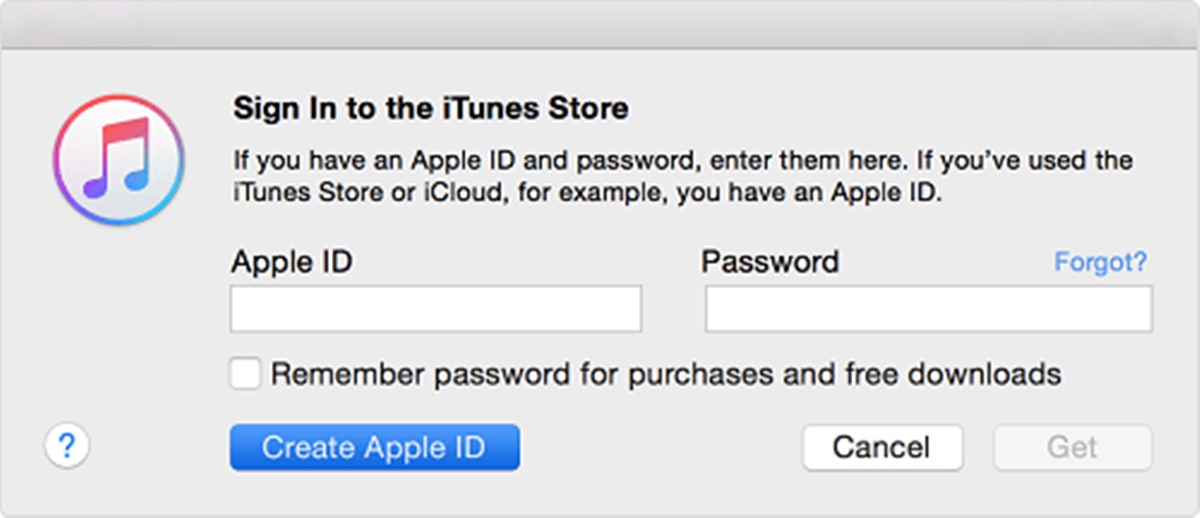
Clicking on the “Get” button will trigger the download process for the selected app. You may be prompted to sign in with your Apple ID or create a new Apple ID if you don’t have one already. Since you’re creating a new iTunes account, click on the “Create Apple ID” option to proceed.
Follow the on-screen instructions to provide the necessary information for creating your new Apple ID. This includes entering your email address, password, and security questions. Make sure to choose a strong password to protect your account.
Additionally, you will be asked to provide some personal information, such as your name, date of birth, and country or region. Fill in the required fields accurately, as this information will be associated with your iTunes account.
Once you have filled in all the required information, review the terms and conditions and Apple’s privacy policy. If you agree to the terms, check the box next to “Agree to Terms and Conditions” and click on the “Next” button to proceed.
At this point, Apple may require you to verify your Apple ID by email. Check your email inbox for a verification email from Apple and follow the instructions provided to confirm your account.
Once you have successfully completed the verification process, you can move on to the next step in creating your iTunes account without a credit card.
Step 4: Sign in to your Apple ID
After creating your Apple ID, the next step in creating an iTunes account without a credit card is to sign in to your newly created Apple ID. This will allow you to associate your Apple ID with your iTunes account and gain access to all the features and content available.
To sign in to your Apple ID, open the App Store on your device and locate the “Sign In” option. This is typically found at the top of the App Store interface or in the account settings section.
Click on the “Sign In” option, and a login prompt will appear on the screen. Enter the email address and password associated with your Apple ID that you set up in the previous step.
If you are signing in on a device that was not previously associated with your Apple ID, you may need to enter a verification code that is sent to your trusted device or phone number. This is an added security measure to protect your account.
After successfully signing in to your Apple ID, you will have access to your iTunes account and be able to explore and download all the content available on the iTunes Store.
You can now proceed to browse through the extensive selection of music, movies, TV shows, books, and apps, and start enjoying the incredible variety of entertainment and functionality that iTunes has to offer.
Signing in to your Apple ID is an important step in creating your iTunes account as it ensures that you have a secure and personalized experience while accessing and managing your content on Apple devices.
Once you have successfully signed in to your Apple ID, you can move on to the next step in the process of creating your iTunes account without a credit card.
Step 5: Click on “None” as the payment type
When creating an iTunes account without a credit card, it’s essential to select the “None” option as the payment type. This allows you to bypass the requirement of adding credit card information and proceed with creating your iTunes account.
After signing in to your Apple ID in the previous step, navigate to the account settings or payment information section within your iTunes account. This can usually be found by clicking on your profile icon or name at the top of the App Store interface and selecting the appropriate option.
Once you’ve accessed the payment information section, you’ll see a list of payment methods available. Look for the option that says “None” and click on it to select it as your preferred payment type.
By selecting “None,” you are indicating that you do not wish to associate any credit card or payment method with your iTunes account. This allows you to proceed without any financial obligation or requirement to provide credit card details.
If the “None” option is not visible or unavailable, it may be because you have an existing payment method associated with your Apple ID. In this case, you’ll need to remove the existing payment method before being able to select “None.” Follow the on-screen instructions to remove the existing payment method and then proceed to select “None.”
After successfully selecting “None” as the payment type, you can move on to the next step in creating your iTunes account without a credit card.
Choosing “None” as the payment type is crucial in ensuring that you’re not required to provide credit card information and can enjoy the benefits of your iTunes account without any financial commitment or obligation.
Step 6: Fill in the billing address
After selecting “None” as the payment type in the previous step, the next step in creating an iTunes account without a credit card is to fill in the billing address associated with your account. Even though you won’t be providing any payment details, Apple still requires a billing address for account verification purposes.
To fill in the billing address, navigate to the account settings or payment information section within your iTunes account, similar to the previous step. Look for the billing address option and click on it to enter the required information.
Provide your full name, street address, city, state/province, postal code, and country in the respective fields. Make sure to accurately enter the information to ensure the successful creation of your iTunes account.
If you have trouble finding the billing address section or need assistance in determining what to enter, consult Apple’s support documentation or reach out to their customer support for guidance.
It’s important to note that the billing address you provide doesn’t need to be linked to any credit card or payment method. You can enter your personal address or any valid address that you have access to for account verification purposes.
After filling in the billing address, review the information to ensure its accuracy. Click on the appropriate button to save the address and proceed to the next step in creating your iTunes account.
Filling in the billing address is a necessary step in the account creation process, as it helps verify your identity and location. Although no payment is required, providing a billing address is a standard procedure to maintain the integrity and security of iTunes accounts.
Once you have successfully filled in the billing address, you can move on to the next step to complete the setup of your iTunes account without a credit card.
Step 7: Fill in the required information
After providing the billing address in the previous step, the next step in creating an iTunes account without a credit card is to fill in the remaining required information. This includes entering your personal details and creating security questions that help secure your account.
Start by navigating to the account settings or personal information section within your iTunes account. Look for the fields where you can enter your personal details such as your full name, date of birth, and email address.
Provide your full name exactly as you want it to appear on your iTunes account. Make sure to enter your date of birth accurately, as this information may be used for age verification purposes or personalizing content recommendations.
Next, enter an email address that will be associated with your iTunes account. If you don’t have an email address yet, you may need to create one prior to this step. Ensure that the email address is valid and accessible, as you may receive important account-related notifications to this address.
Additionally, you will be asked to create security questions and provide their respective answers. These security questions are used to verify your identity and protect your account from unauthorized access. Choose questions that you can easily remember the answers to but are not publicly known. This adds an additional layer of security.
Take your time to carefully answer the security questions. It’s important to choose answers that only you would know or that are unique to you. Avoid common or easily guessable answers, as these can compromise the security of your iTunes account.
Once you have filled in all the required information and answered the security questions, review it to ensure accuracy. Double-check that your email address is correct and that your answers to the security questions are clear and memorable.
After reviewing the information, click on the appropriate button to save and proceed to the next step in the process of creating your iTunes account without a credit card.
Filling in the required information is crucial in establishing your iTunes account and ensuring that it is associated with accurate and valid details. By providing this information, you can personalize your iTunes experience and ensure the security of your account.
Once you have successfully filled in the required information, you can move on to the next step to complete the setup of your iTunes account.
Step 8: Verification process
After filling in the required information in the previous step, the next crucial step in creating an iTunes account without a credit card is the verification process. This process ensures the authenticity and security of your iTunes account.
Once you have saved the required information, Apple may require you to verify your account to confirm your identity. The verification process typically involves receiving a verification code through email or text message.
If you chose to receive the verification code via email, check your inbox for an email from Apple. Open the email and click on the verification link provided. This will authenticate your iTunes account and complete the verification process.
If you opted to receive the verification code via text message, ensure that your phone number is correct and accessible. You will receive a text message containing the verification code. Enter this code in the provided field to validate your iTunes account.
It’s important to complete the verification process promptly to ensure that your iTunes account is fully functional and secure. Failure to complete the verification within the specified time may result in a temporary hold or suspension of your account.
If you encounter any issues during the verification process or do not receive the verification code, consult Apple’s support documentation or contact their customer support for assistance. They will be able to guide you through the process and resolve any issues that may arise.
Once you have successfully verified your iTunes account, you can proceed to the final step in this process and complete the setup of your iTunes account without a credit card.
The verification process is a crucial step that ensures the security and integrity of your iTunes account. By confirming your identity, Apple can provide you with a safe and reliable platform to access and enjoy a wide range of content and services.
Step 9: Complete the setup process
After successfully completing the verification process, you are now ready to finalize the setup of your iTunes account without a credit card. This step involves reviewing your account settings, preferences, and ensuring that everything is in order.
Start by accessing the account settings or preferences section within your iTunes account. Take some time to review the various options and settings available to customize your iTunes experience.
Check your notification preferences and adjust them according to your preferences. You can choose to receive email notifications about new app releases, promotions, or updates. Customize these settings to ensure that you receive the information that matters to you.
Explore the privacy settings and make any necessary adjustments to meet your privacy preferences. Apple provides robust privacy controls, allowing you to determine what information is shared and with whom. Ensure that your privacy settings align with your comfort level.
If you have any specific preferences for music, movies, TV shows, or book genres, take the time to customize your recommendations. By indicating your preferences, Apple can provide personalized recommendations tailored to your interests.
In addition, explore the various sections of the iTunes Store, such as the music, movies, TV shows, and books categories. Familiarize yourself with the navigation and layout of each section so that you can easily explore and discover new content.
Lastly, you may want to download a few free apps or songs to get a feel for using your new iTunes account. Browse through the App Store or iTunes Store and select items that catch your interest. Click on the “Get” or “Download” button to initiate the download process.
Completing the setup process ensures that your iTunes account is fully functional and tailored to your preferences. By reviewing and customizing your settings, you can optimize your iTunes experience and make the most of the content and features available.
Once you have completed the setup process, you are all set to enjoy the vast world of entertainment and functionality offered by iTunes without the need for a credit card.
Step 10: Enjoy your new iTunes account!
Congratulations! You have successfully created your iTunes account without a credit card and completed the setup process. Now, it’s time to sit back and enjoy all the benefits and entertainment opportunities that your new iTunes account has to offer.
With your iTunes account, you have access to a vast library of music, movies, TV shows, books, and apps. Explore the iTunes Store and discover new music from your favorite artists, catch up on the latest movies and TV shows, dive into captivating books, and enhance your device’s functionality with useful and engaging apps.
Whether you’re a music enthusiast, a movie buff, an avid reader, or someone looking to enhance productivity, iTunes has something for everyone. You can create playlists of your favorite songs, build a personal movie library, bookmark pages in books for easy access, and discover new apps that cater to your interests and needs.
Stay connected and up-to-date by checking the App Store frequently for new app releases, updates, and special promotions. Take advantage of iTunes’ extensive collection of free apps and games, allowing you to try out new experiences without any financial commitment.
Keep your iTunes account secure by regularly reviewing and updating your account information, especially the password and security questions. This will help safeguard your account and ensure that only you have access to it.
Remember to always follow Apple’s guidelines and terms of service when using your iTunes account. Familiarize yourself with the rules and regulations to ensure a positive and enjoyable experience within the iTunes ecosystem.
Whether you’re using iTunes on your iPhone, iPad, Mac, or PC, your new iTunes account opens up a world of entertainment and functionality. Take the time to explore and discover the vast array of content available, and make the most out of your digital experience with iTunes.
So, sit back, relax, and enjoy your new iTunes account! Music, movies, TV shows, books, and apps are just a click away, providing endless hours of entertainment and enjoyment.