
What is a query in Microsoft Access?
A query in Microsoft Access is a powerful feature that allows users to retrieve specific information from a database. It enables you to ask questions and extract data based on certain criteria, making it easier to find and analyze the information you need. Queries can be simple, retrieving data from a single table, or complex, involving multiple tables and advanced criteria.
By using queries, you can save time and effort by avoiding manual searching and filtering of data. Instead, you can create a query that specifies the criteria you want to apply, and Access will do the rest, returning the results that meet your requirements. This makes it an essential tool for data analysis, reporting, and decision-making.
Queries operate by selecting records from one or more tables in a database and applying filters or conditions to narrow down the results. These filters can include comparison operators such as “equal to,” “greater than,” or “less than,” as well as logical operators like “and” and “or.” The queries can also include sorting options to arrange the data in a specific order.
Additionally, queries can perform calculations, aggregate data, and even join tables to combine related information. This flexibility allows you to retrieve and manipulate data in various ways, making it a versatile tool for managing and analyzing your database.
Overall, queries in Microsoft Access provide an efficient and efficient method of retrieving and working with data. Whether you need to extract specific information, perform calculations, or generate reports, queries can simplify the process and allow you to gain valuable insights from your database.
Step 1: Open Microsoft Access
The first step in creating a query in Microsoft Access is to open the program itself. Microsoft Access is part of the Microsoft Office suite and is commonly used for managing and manipulating databases.
To open Microsoft Access, follow these simple steps:
- Click on the “Start” button on your computer’s taskbar.
- Scroll through the list of programs until you find the “Microsoft Office” folder.
- Click on the folder to expand it, and then click on the “Microsoft Access” icon.
Alternatively, you can also search for “Microsoft Access” in the search bar located next to the Start button.
Once you have clicked on the Microsoft Access icon, the program will start up and open a new Access window. You are now ready to begin working with databases and creating queries to retrieve and manipulate data.
Microsoft Access provides a user-friendly interface that allows you to easily navigate and interact with your databases. The main window of Access consists of a variety of tabs and menus, providing quick access to different features and functionalities.
As you progress through the steps of creating a query, you’ll discover the various options and tools available in Microsoft Access to customize and refine your queries.
Now that you have successfully opened Microsoft Access, you can move on to the next step of creating a query in Access – opening a database.
Step 2: Open a database
Once you have opened Microsoft Access, the next step is to open the database that contains the table or tables from which you want to create your query. A database in Access is a file that organizes and stores your data in a structured manner.
To open a database in Microsoft Access, follow these steps:
- In the Microsoft Access window, click on the “File” tab located in the top-left corner of the screen.
- A drop-down menu will appear. Click on the “Open” option.
- Navigate to the location where your database file is saved. This could be on your local machine, a network drive, or a cloud storage service.
- Select the database file by clicking on it once, and then click the “Open” button.
Alternatively, you can open a recently accessed database by clicking the “File” tab and selecting the database from the list of recent files.
Once you have successfully opened the database, Access will display the database window, which lists all the tables, queries, forms, reports, and other objects contained within the database.
From the database window, you can easily navigate to the specific table or tables that you want to include in your query.
It is important to note that you must have the necessary permissions and access rights to open the database. If you encounter any issues opening the database, ensure that you have the appropriate privileges or contact your system administrator for assistance.
With the database open, you are now ready to proceed to the next step, where you will start creating your query in Microsoft Access.
Step 3: Click the “Create” tab
After opening Microsoft Access and selecting the appropriate database, the next step in creating a query is to navigate to the “Create” tab. The “Create” tab contains various tools and options that allow you to create and customize different objects in Access, including queries.
To access the “Create” tab in Microsoft Access, follow these steps:
- In the Access window, locate and click on the “Create” tab located in the ribbon at the top of the screen.
Once you click on the “Create” tab, you will see a range of options and tools related to creating different database objects. These options may vary depending on the version of Microsoft Access you are using, but there are a few key features you can expect to find:
- Table: Allows you to create a new table in the database.
- Query: Allows you to create a new query or modify an existing one.
- Form: Enables you to create a user-friendly form for data input or display.
- Report: Lets you create professional-looking reports based on your database.
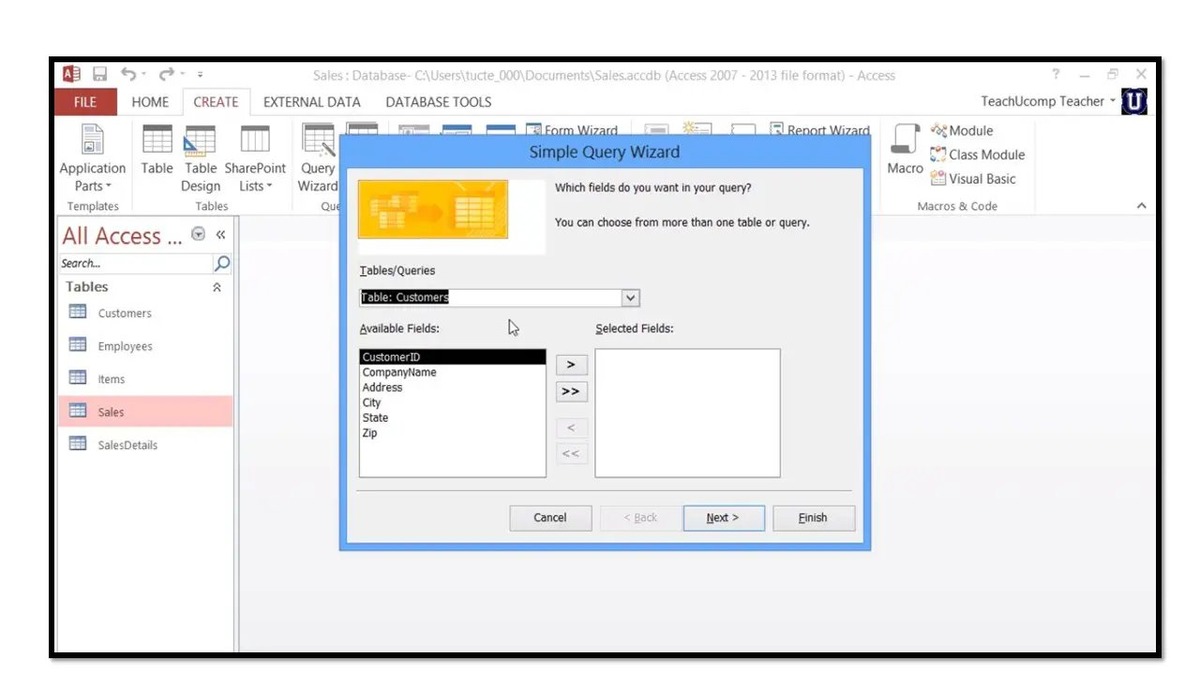
Clicking on the “Query” option is the key step in creating a query. This action will open the query design view, where you can start building and customizing your query.
The “Create” tab also offers additional options such as creating macros, modules, and relationships, which can be useful for advanced database management. However, for the purpose of creating a query, the focus will be on the “Query” option.
Once you have clicked on the “Query” option, you are now ready to advance to the next step, where you will start designing your query in Microsoft Access.
Step 4: Click “Query Design”
After accessing the “Create” tab in Microsoft Access, the next step in creating a query is to select the “Query Design” option. This option allows you to enter the query design view, where you can begin designing and customizing your query according to your specific requirements.
To click on the “Query Design” option and access the query design view, follow these steps:
- In the “Create” tab, locate and click on the “Query Design” option.
Once you click on the “Query Design” option, Microsoft Access will open a blank query design window, also known as the query designer. This window provides you with a graphical interface where you can visually build your query by adding tables, selecting fields, and specifying criteria.
In the query design view, you will find two main sections:
- The “Tables” section, which displays all the tables available in your database.
- The “Design” section, where you will construct your query by adding tables and defining field selections and criteria.
To build your query, you will need to select the tables you want to include and specify which fields you want to retrieve data from. You can do this by:
- Double-clicking on the table to add it to the “Design” section.
- Checking the box next to the field name to include it in the query.
Additionally, you can define sorting options, apply filters, and perform other operations to further refine your query results.
By clicking on the “Query Design” option, you have now entered the query design view in Microsoft Access, setting the stage for the next steps in building your query.
Step 5: Add tables to the design grid
In the query design view of Microsoft Access, the next step in creating a query is to add the necessary tables to the design grid. The design grid is where you specify which tables and fields you want to include in your query.
To add tables to the design grid, follow these steps:
- In the query design view, locate the “Show Table” button in the “Design” tab and click on it.
- A dialog box will appear, displaying all the available tables in your database.
- Select the table or tables you want to add to your query by clicking on them, and then click the “Add” button.
- Click the “Close” button to close the “Show Table” dialog box.
Once you have added the tables to the design grid, you will see the selected tables listed with their associated fields in the query design view.
To include fields from the added tables in your query, simply drag and drop the desired fields from the tables to the “Field” row of the design grid. You can also double-click on a field to add it to the design grid.
By adding tables to the design grid, you establish the foundation of your query by defining the data sources from which you will retrieve information. This step allows you to access and work with the desired tables and their corresponding fields in your query.
Keep in mind that you can add multiple tables to your query, enabling you to retrieve data from different tables and perform operations such as joining tables to combine related information.
With the tables added to the design grid, you can proceed to the next step, which involves adding fields to the design grid and specifying criteria for your query.
Step 6: Add fields to the design grid
After adding the necessary tables to the design grid in Microsoft Access, the next step in creating a query is to add the specific fields you want to include in your query. Adding fields allows you to define the data elements you want to retrieve and work with from the selected tables.
To add fields to the design grid, follow these steps:
- In the query design view, locate the tables that you added in the previous step.
- Click and drag the desired fields from each table to the “Field” row in the design grid.
- Alternatively, you can also double-click on a field to add it to the design grid.
As you add fields to the design grid, you will see them listed under the “Field” row in the query design view. These fields represent the specific data elements that will be included in the results of your query.
Furthermore, you can customize the fields in the design grid by adding aggregate functions, calculations, or expressions to manipulate the data. This allows you to perform calculations, generate summaries, and derive new information from the fields in your query results.
By adding fields to the design grid, you have effectively determined the specific data elements that will be included in the results of your query. These fields define the information you will retrieve and work with, forming the basis for the analysis or reporting you intend to perform.
Once you have added the necessary fields to the design grid, you can proceed to the next step, where you will specify criteria for your query to retrieve the desired data.
Step 7: Specify criteria for the query
After adding tables and fields to the design grid in Microsoft Access, the next step in creating a query is to specify the criteria for the query. Criteria are conditions that filter and narrow down the data results based on specific requirements or conditions you set.
To specify criteria for the query, follow these steps:
- In the query design view, locate the “Criteria” row under the desired field in the design grid.
- Enter the criteria you want to apply to the field. This can be a specific value, a range, a wildcard character, or a comparison operator.
- Repeat the above steps for each field you want to apply criteria to.
For example, if you have a “Price” field and you only want to retrieve records with prices greater than $100, you would enter “>100” as the criteria under the “Price” field in the design grid.
You can also use logical operators like “AND” or “OR” to combine multiple criteria. This allows for more complex filtering conditions, such as retrieving records that meet multiple criteria simultaneously.
Additionally, Microsoft Access provides various comparison operators, such as “=”, “<>“, “>”, “<", ">=”, “<=", to perform comparisons on your data. This allows for more precise and targeted filtering based on your specific requirements.
Specifying criteria for your query is crucial as it helps you retrieve only the data that meets the defined conditions. It allows you to refine your query and obtain results that are relevant and meaningful for your analysis or reporting purposes.
Once you have specified the necessary criteria for your query, you can proceed to the next step, where you will run the query to retrieve the filtered data.
Step 8: Run the query
With the tables, fields, and criteria set in the query design grid of Microsoft Access, the next step in creating a query is to run the query. Running the query will execute it and retrieve the results based on the specified criteria and field selections.
To run the query and retrieve the data, follow these steps:
- In the query design view, locate the “Run” button in the “Design” tab and click on it.
- The query will be executed, and the results will be displayed in the “Datasheet” view.
The “Datasheet” view presents the retrieved data in a tabular format, similar to a spreadsheet. It allows you to see the records and fields that meet the defined criteria and field selections in your query.
You can navigate through the query results by using the scroll bars or by clicking on the navigation buttons available in the footer of the “Datasheet” view. Additionally, you can resize columns, sort data, apply filters, and perform other operations to further analyze and manipulate the data.
If the results of your query do not meet your expectations or if you need to make any adjustments, you can go back to the query design view and modify the tables, fields, or criteria. Once you have made the necessary changes, you can run the query again to retrieve the updated results.
Running the query allows you to see the data that matches your specified criteria and field selections. It provides you with the actual information you need for analysis, reporting, or any other purpose you may have for the query results.
Once you have executed the query and reviewed the retrieved data, you can proceed to the next step and save the query for future use.
Step 9: Save the query
After running and reviewing the results of a query in Microsoft Access, the next important step in the process is to save the query. Saving the query allows you to access and reuse it in the future, saving you time and effort in recreating the query from scratch.
To save the query in Microsoft Access, follow these steps:
- In the query design view or the “Datasheet” view, click on the “Save” button in the Quick Access Toolbar or navigate to the “File” tab and click on the “Save” or “Save As” option.
- In the “Save As” dialog box, enter a name for the query.
- Choose the location where you want to save the query, such as your current database or a different Access database file.
- Click the “Save” button to save the query.
By saving the query, you can easily access it later from the database window or the Navigation Pane in Microsoft Access. This allows you to open the query, run it again, modify it, or use it as a data source for other objects, such as forms or reports.
Furthermore, saving the query ensures that your work is preserved and can be shared with other users or integrated into other parts of your database system. It provides a convenient way to organize and manage your queries within the database environment.
It is recommended to use meaningful and descriptive names when saving queries to make it easier to identify and locate them later. This helps you maintain a well-organized and efficient database structure.
Now that you have successfully saved the query, you can proceed to the final step, which involves modifying and refining the query if needed.
Step 10: Modify and refine the query
After saving a query in Microsoft Access, the final step in the process is to modify and refine the query as needed. Modifying the query allows you to make adjustments to the tables, fields, criteria, or other aspects of the query to better suit your requirements or to reflect any changes in the data or analysis needs.
To modify and refine the query in Microsoft Access, follow these steps:
- Locate and open the saved query either from the database window or the Navigation Pane.
- In the query design view, make the necessary changes to the tables, fields, criteria, sorting options, or other elements of the query.
- Once you have made the desired modifications, run the query again to retrieve the updated results and review the changes.
Modifying and refining a query allows you to fine-tune and adapt the query to better fit your changing needs. This can be done by adding or removing fields, adjusting sorting and filtering criteria, or incorporating additional tables for more comprehensive data analysis.
In addition to modifying the query structure and criteria, you can also enhance the query by incorporating advanced features and techniques offered by Microsoft Access. This includes using expressions, functions, or parameters to further manipulate and analyze the data in the query results.
Regularly reviewing and refining your queries is essential to ensure that you are working with accurate and up-to-date data. By continuously modifying and refining your queries, you can maintain data integrity, improve performance, and obtain the desired insights from your database.
Remember to save the modified query once you are satisfied with the changes, allowing you to reuse it or refer back to it in the future.
With the ability to modify and refine your queries in Microsoft Access, you have the flexibility to tailor your data retrieval and analysis processes to meet your evolving needs and goals.