
Prerequisites for Creating a New Apple ID
Before diving into the process of creating a new Apple ID, it’s important to ensure that you have a few prerequisites in place. These prerequisites will make the creation process smoother and help you get the most out of your Apple experience. Here are the essential things you need:
- An Internet Connection: Make sure you have a stable internet connection to proceed with the creation of your Apple ID. This will ensure uninterrupted access to Apple’s services and products.
- An Email Address: To create an Apple ID, you’ll need a valid and active email address. This email address will be used for communication and verification purposes throughout the account setup process.
- A Compatible Device: You will need a compatible Apple device, such as an iPhone, iPad, or Mac, to create an Apple ID. This is necessary as the Apple ID will be associated with your device and enable you to access various Apple services and features.
- Updated Software: Ensure that your Apple device is running on the latest version of the operating system (iOS or macOS). To check for updates, go to ‘Settings’ on your device and navigate to ‘General’ or ‘Software Update’. Updating your device’s software will ensure compatibility and access to the latest features.
- Secure Password: Choose a strong and unique password for your Apple ID. Apple recommends using a combination of lowercase and uppercase letters, numbers, and special characters to create a secure password. Remember to keep your password confidential and avoid using easily guessable information.
By having these prerequisites ready, you can now proceed confidently to create your new Apple ID. Let’s get started!
Step 1: Visit the Apple ID Account Page
The first step in creating a new Apple ID is to visit the Apple ID account page. This is where you will initiate the account creation process. Follow the steps below to get started:
- Open a web browser on your computer or mobile device.
- Type in the URL https://appleid.apple.com in the address bar and press Enter.
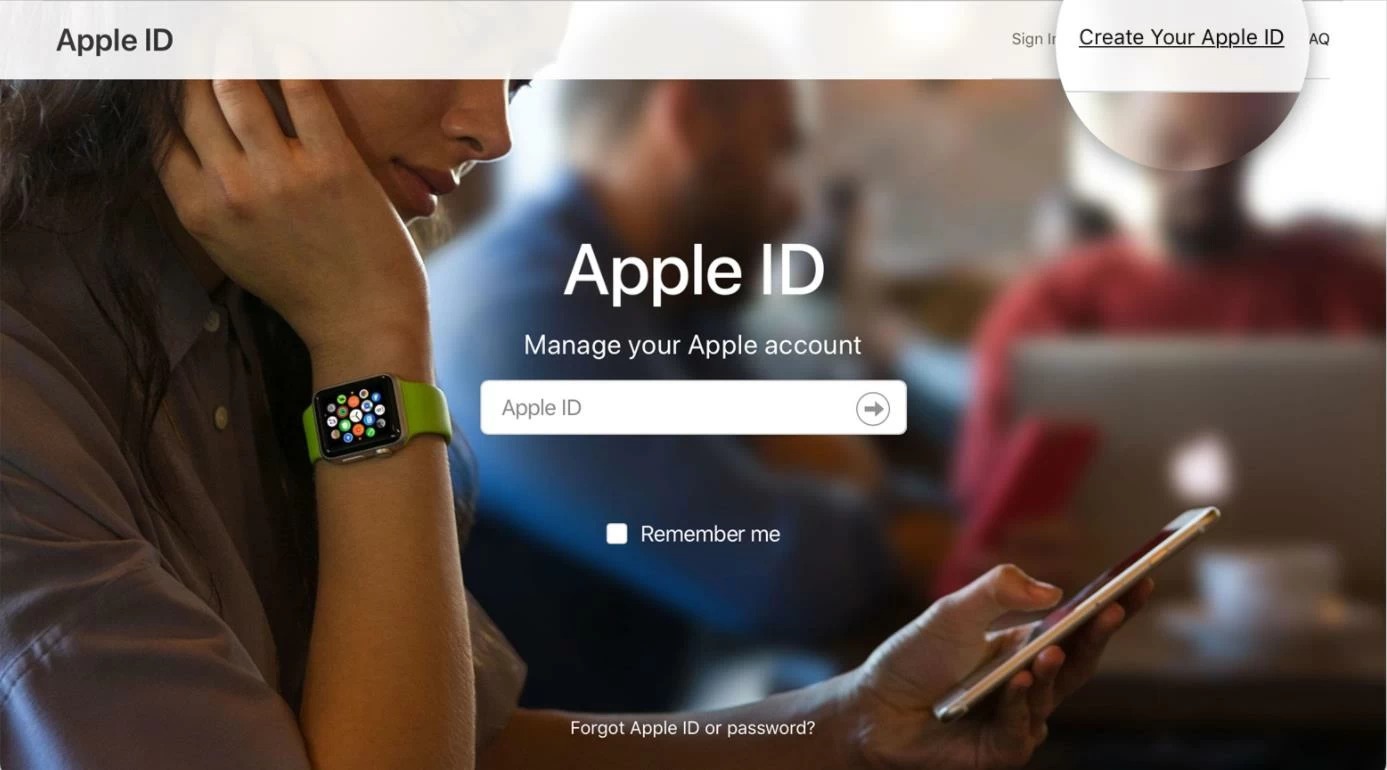
- You will be directed to the Apple ID account page. Here, you have the option to sign in using an existing Apple ID or create a new one. Since you want to create a new Apple ID, click on the “Create Your Apple ID” button.
- Next, you will be prompted to enter your personal information in the required fields. This includes your first and last name, birthdate, and email address. Make sure to provide accurate information as it will be used to verify your identity and manage your account.
- Choose a strong password for your Apple ID. Remember to follow the password guidelines provided on the page to ensure the security of your account.
- After filling out the necessary information, click on the “Continue” button to proceed.
By following these steps, you will successfully land on the Apple ID account page and complete the initial setup for creating your new Apple ID. In the next step, we will guide you through the process of verifying your email address.
Step 2: Click on the “Create Your Apple ID” Button
Once you have landed on the Apple ID account page, the next step in creating a new Apple ID is to click on the “Create Your Apple ID” button. This will initiate the account creation process and allow you to set up a new Apple ID. Follow the steps below to proceed:
- On the Apple ID account page, you will see the option to either sign in with an existing Apple ID or create a new one. Since you want to create a new Apple ID, locate and click on the “Create Your Apple ID” button.
- You will be redirected to the account creation form. Here, you will need to provide your personal information, including your first and last name, birthdate, and email address. It’s important to use a valid email address that you have access to, as Apple will send a verification email to this address.
- Choose a strong password for your Apple ID. A strong password should be a combination of uppercase and lowercase letters, numbers, and special characters. It’s recommended to create a unique password and avoid using easily guessable information.
- Fill in the security questions and their corresponding answers. These questions will be used for additional account security and account recovery purposes in case you forget your password or need to verify your identity.
- Review the Terms and Conditions and the Privacy Policy provided by Apple. Make sure to read and understand the terms before proceeding. If you agree to the terms, check the box to indicate your acceptance.
- Click on the “Continue” button to move on to the next step.
By following these steps, you will click on the “Create Your Apple ID” button and provide the necessary information to proceed with setting up your new Apple ID. In the next step, we will guide you through the process of filling out the required information.
Step 3: Fill out the Required Information
After clicking on the “Create Your Apple ID” button, you will be directed to a form where you need to fill out the required information to create your new Apple ID. This step is crucial as it ensures that your account is properly set up and associated with accurate information. Follow the steps below to fill out the necessary details:
- On the account creation form, enter your first and last name in the designated fields. Make sure to use your legal name as it may be required for verification purposes in the future.
- Provide your birthdate by selecting the month, day, and year from the dropdown menus. This information is essential for age verification and to ensure compliance with applicable laws and regulations.
- Enter a valid and active email address in the provided field. This email address will be associated with your Apple ID and used for communication and account-related notifications. Double-check the email address to avoid any errors.
- Choose a secure password for your Apple ID. The password should be a combination of uppercase and lowercase letters, numbers, and special characters. Avoid using easily guessable information and try to create a unique and strong password to protect your account.
- Provide security questions and their corresponding answers. These security questions act as an additional layer of protection and help verify your identity in case you need to recover your account or change your password. Choose questions and answers that are easy for you to remember but not easily guessable by others.
- Review the Terms and Conditions and the Privacy Policy provided by Apple. Take the time to read and understand the terms before proceeding. If you agree to the terms, check the box to indicate your acceptance.
- Click on the Continue button to proceed to the next step.
By carefully filling out the required information, you will ensure that your new Apple ID is created with accurate details. In the next step, we will guide you through the process of verifying your email address.
Step 4: Verify Your Email Address
After filling out the required information to create your new Apple ID, the next step is to verify your email address. This is an important step that ensures the security and validity of your account. Follow the steps below to successfully verify your email address:
- Once you have completed the account creation form, Apple will send a verification email to the email address you provided.
- Check your email inbox for a message from Apple with the subject line: “Verify your email address.”
- Open the email and click on the “Verify Now” or “Confirm Email Address” button within the email.
- This will redirect you to a verification page on the Apple website.
- On the verification page, you may be prompted to enter your Apple ID and password to confirm your identity. Enter the required information to proceed.
- Once your email address is verified, you will receive a confirmation message notifying you that your email address has been successfully verified.
Note that it’s important to verify your email address within a certain timeframe mentioned in the verification email. Failure to do so may result in the deactivation or suspension of your Apple ID.
By following these steps and verifying your email address, you can ensure the security and authenticity of your new Apple ID. In the next step, we will explore the option to add a payment method, which is optional but can be useful for making purchases and subscriptions.
Step 5: Add a Payment Method (Optional)
Adding a payment method to your Apple ID is an optional step but can be beneficial if you plan to make purchases, subscribe to services, or use paid apps. Here’s how you can add a payment method to your new Apple ID:
- After verifying your email address, you will be prompted to add a payment method. Click on the “Add Payment Method” or “None” option, depending on your preference.
- If you choose “None”, you will not be required to add a payment method at this time. This is suitable if you only plan to use free apps or if you prefer to add a payment method later.
- If you decide to add a payment method, select the “Add Payment Method” option.
- You will be presented with various payment options, including credit or debit cards, PayPal, or mobile phone billing, depending on your region.
- Select the payment method you wish to add and follow the on-screen instructions to provide the necessary details, such as card number, expiration date, and security code.
- Once you have entered the payment information, click on the “Next” or “Done” button to save the payment method to your Apple ID.
- Apple may perform a verification process to ensure the validity of the payment method. This may involve authorizing a small transaction or contacting your bank.
- After the verification process is complete, your payment method will be successfully added to your Apple ID.
By following these steps and adding a payment method, you will have the convenience of making purchases and subscriptions directly from your Apple ID. However, remember that this step is optional, and you can choose to skip it if you prefer not to add a payment method at this time. In the next step, we will discuss how to set up two-factor authentication for enhanced security.
Step 6: Set up Two-Factor Authentication (Optional)
Two-factor authentication (2FA) adds an extra layer of security to your Apple ID, making it more resistant to unauthorized access. While this step is optional, it is highly recommended to enhance the protection of your account. Here’s how you can set up two-factor authentication for your new Apple ID:
- Once you have added a payment method or skipped the step, you will be given the option to set up two-factor authentication. Click on the “Set Up Two-Factor Authentication” or “Not Now” option.
- If you choose “Not Now”, you can set up two-factor authentication at a later time. To do so, navigate to your Apple ID settings and locate the security section.
- If you decide to set up two-factor authentication, select the “Set Up Two-Factor Authentication” option.
- Follow the on-screen instructions to set up two-factor authentication. This may involve confirming your phone number and selecting a trusted device.
- A verification code will be sent to your trusted devices or phone number. Enter the verification code to complete the setup process.
- Once two-factor authentication is enabled, you will have an added layer of security when signing in to your Apple ID, making changes to your account, or making purchases.
- Whenever you log in to a new device or sign in to your Apple ID, you will be asked to verify your identity by entering the verification code sent to your trusted device.
- Note that it is essential to keep your trusted devices secure and your contact information up to date to ensure smooth access to your Apple ID.
By choosing to set up two-factor authentication, you are taking proactive measures to protect your Apple ID. This additional security feature provides peace of mind by guarding against unauthorized access and potential threats. In the next step, we will explore how you can customize your account settings according to your preferences.
Step 7: Customize Your Account Settings
After setting up your new Apple ID, it’s time to customize your account settings according to your preferences. Customizing your account settings allows you to personalize your Apple experience and tailor it to your needs. Here’s how you can customize your account settings:
- Go to the Apple ID account page by visiting https://appleid.apple.com.
- Sign in with your newly created Apple ID using your email address and password.
- Once signed in, you will have access to a range of account settings that you can customize. These settings include your name, email address, password, security questions, and more.
- Click on the relevant sections to make changes or updates. For example, if you want to change your name, click on the “Name, Phone Numbers, Email” section.
- Explore the different settings available and customize them to your liking. You may choose to update your contact information, add or remove trusted devices, manage your payment methods, or adjust privacy settings.
- Take your time to review each setting and make adjustments based on your preferences and requirements.
- Remember to save your changes after making any updates to your account settings.
- You can revisit your account settings at any time to make further changes or updates as needed.
By customizing your account settings, you can make your Apple ID reflect your personal preferences and ensure that it aligns with your needs and requirements. Take advantage of the available options to create a tailored Apple experience that enhances your usage and enjoyment. In the next step, we will explore the wide range of services and products offered by Apple that you can now access with your new Apple ID.
Step 8: Explore Apple’s Services and Products with Your New Apple ID
With your new Apple ID set up and customized to your preferences, it’s time to explore the wide range of services and products offered by Apple. Your Apple ID grants you access to a vast ecosystem of apps, music, movies, books, and more. Here’s how you can start exploring and enjoying Apple’s offerings:
- On your Apple device, sign in to your Apple ID using your email address and password.
- Once signed in, you will have access to the App Store, iTunes Store, iBooks Store, Apple Music, and other Apple services.
- Browse through the App Store to discover a multitude of apps and games for your iPhone, iPad, or Mac. You can search for specific apps, explore top charts, or discover curated app collections.
- Access the iTunes Store to rent or purchase movies, TV shows, and music. You can also explore podcasts and audiobooks to find entertaining and educational content.
- Visit the iBooks Store to discover a vast selection of books, including bestsellers, novels, non-fiction, and more. Explore different genres and indulge in captivating stories.
- With Apple Music, you can stream or download your favorite songs and albums, create personalized playlists, and discover new artists and genres.
- Take advantage of other Apple services such as iCloud for storage and backup, Apple Pay for convenient and secure payments, and Apple News for staying up-to-date with the latest news and articles.
- Explore the Apple website and official Apple apps to learn more about additional services, such as Apple Fitness+, Apple TV+, and Apple Arcade.
- Enjoy the seamless integration of Apple products and services across your devices, allowing you to access your content and settings effortlessly.
By exploring Apple’s services and products with your new Apple ID, you can fully immerse yourself in the Apple ecosystem and make the most of what it has to offer. Whether you’re an avid app user, a music aficionado, or a bookworm, Apple provides an extensive range of content and services to cater to your interests. Congratulations on setting up your new Apple ID and enjoy your journey into the world of Apple!
Tips for Managing Your Apple ID
Now that you have created and set up your new Apple ID, it’s important to ensure proper management of your account to maintain its security and maximize your Apple experience. Here are some helpful tips to keep in mind:
- Keep your Apple ID and password secure: Protect your account by choosing a strong and unique password. Avoid sharing your password with anyone and enable two-factor authentication for an added layer of security.
- Regularly update your account information: Keep your personal details, such as your email address and contact information, up to date. This ensures that you receive important notifications and account-related communications.
- Review your payment methods regularly: If you have added a payment method to your Apple ID, periodically review it and ensure that the information is accurate and up to date. Remove any outdated or unused payment methods to maintain the security of your financial information.
- Be cautious of phishing attempts: Beware of fraudulent emails or messages claiming to be from Apple. Apple will never ask you to provide personal information or account details via email. If you receive a suspicious message, do not click on any links or provide any information.
- Keep your device and software up to date: Regularly update your Apple device’s software to ensure that you have the latest security patches and features. This will help protect your device and your Apple ID against potential vulnerabilities.
- Manage your Apple subscriptions: If you have subscribed to any services or apps through your Apple ID, regularly review and manage your subscriptions. This enables you to cancel or modify subscriptions as per your needs and preferences.
- Backup your data with iCloud: Utilize the iCloud service to backup your important data, such as photos, contacts, and documents. This ensures that your data is secure and easily accessible across your Apple devices.
- Keep track of your purchases: Monitor your App Store, iTunes Store, and iBooks Store purchases to keep track of your spending. This allows you to have better control over your expenses and avoid any surprises on your payment statements.
- Reach out to Apple Support when needed: If you encounter any issues or have questions regarding your Apple ID or any Apple services, don’t hesitate to contact Apple Support. They can provide guidance and assistance to resolve any concerns you may have.
By following these tips, you can effectively manage your Apple ID, ensuring its security and optimizing your usage of Apple services and products. Stay vigilant and proactive in protecting your account, and enjoy the seamless and innovative experience that Apple has to offer!