
Change the Cover Flow View
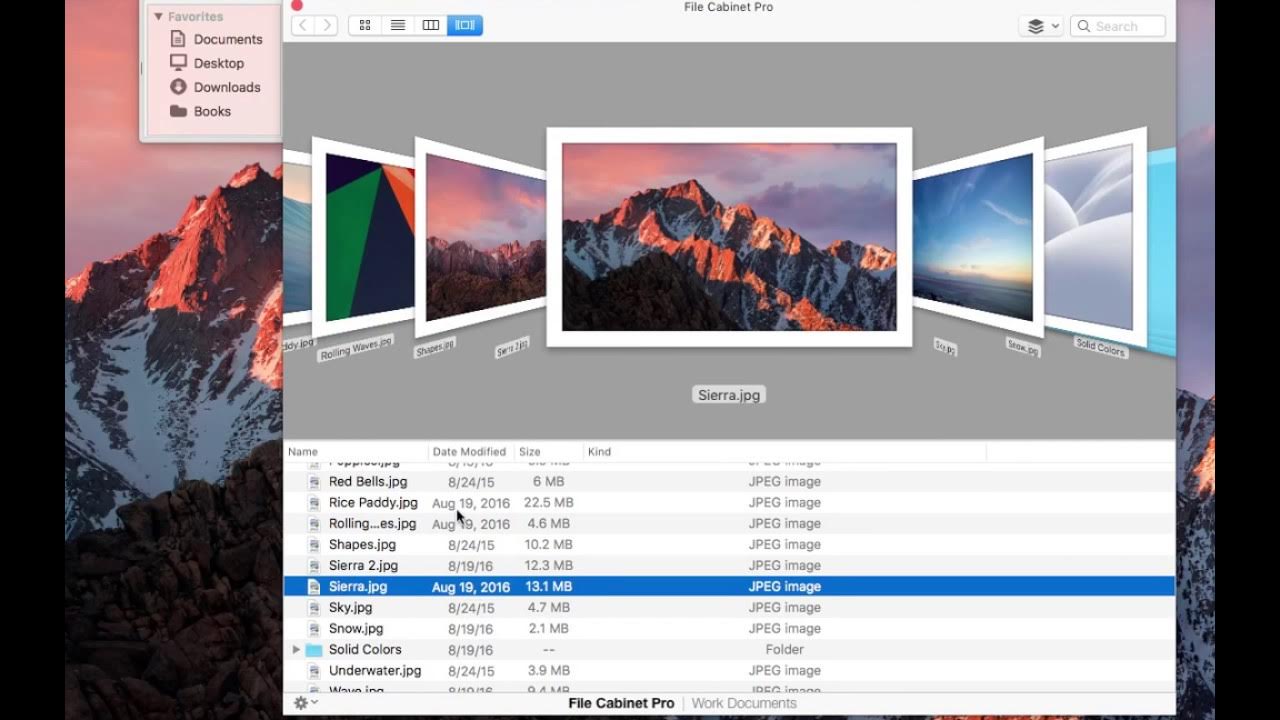
Cover Flow view is a visually appealing way to navigate through your files on a Mac. It displays previews of your files in a three-dimensional layout, allowing you to visually browse through them. However, the default settings may not be suitable for everyone. In this section, we’ll explore how to change the Cover Flow view options to customize your experience.
To begin, open a Finder window on your Mac. From the menu bar at the top of the screen, click on “View” and then select “as Cover Flow” to switch to the Cover Flow view.
Now that you’re in the Cover Flow view, let’s dive into the customization options:
- 1. Zoom In and Out: You can adjust the size of the file previews in Cover Flow. To zoom in, press the Command and Plus (+) keys simultaneously. To zoom out, press the Command and Minus (-) keys. Experiment with different zoom levels to find the one that suits your preference.
- 2. Scroll Through Items: By default, you can scroll horizontally through the items in Cover Flow. If you prefer vertical scrolling, you can open the Terminal app (located in the Utilities folder within the Applications folder) and enter the following command: defaults write com.apple.finder AppleScrollDirection -bool true. Then, press Enter on your keyboard and restart the Finder by holding the Option key and right-clicking the Finder icon in the Dock, then selecting “Relaunch”.
- 3. Show or Hide Information: Cover Flow displays metadata information about your files, such as file names and dates. If you find this distracting, you can hide the information by going to the Finder menu bar, clicking on “View”, and selecting “Hide Preview Sidebar”. To show the information again, follow the same steps and select “Show Preview Sidebar”.
By adjusting these settings, you can personalize your experience with the Cover Flow view on your Mac. Whether you want larger file previews, a different scrolling direction, or a cleaner display, these options allow you to fine-tune your preferences.
Adjust the Cover Flow Background
The background of the Cover Flow view on your Mac adds to the overall aesthetic and can greatly enhance your browsing experience. In this section, we will explore how to adjust the Cover Flow background to suit your personal style.
To begin, open a Finder window on your Mac and switch to the Cover Flow view by clicking on “View” in the menu bar and selecting “as Cover Flow”.
Now, let’s dive into the customization options:
- 1. Change the Background Color: By default, Cover Flow has a black background. However, you can change it to a different color if you prefer. Simply click on the “Finder” menu in the menu bar and choose “Preferences”. Then, click on the “Sidebar” tab and select a different color from the “Background” drop-down menu.
- 2. Use a Custom Image as the Background: If you want to add a personal touch to your Cover Flow view, you can use a custom image as the background. First, select the image you want to use and open it in Preview or any other image editor. Next, click on the “Edit” menu at the top of the screen and choose “Copy”. Finally, go back to the Cover Flow window, right-click on the background, and select “Use Image from Clipboard”. The image will now be set as the background of your Cover Flow view.
- 3. Disable the Background Blur: Cover Flow applies a subtle blur effect to the background by default. If you find this distracting or prefer a crisp look, you can disable the background blur. To do this, open the Terminal app (located in the Utilities folder within the Applications folder) and enter the following command: defaults write com.apple.finder DisableCoverFlowBackgroundBlur -bool true. Press Enter on your keyboard and restart the Finder by holding the Option key and right-clicking the Finder icon in the Dock, then selecting “Relaunch”. The background blur will now be turned off.
With these options, you can easily adjust the Cover Flow background on your Mac to match your personal taste and preferences. Whether you want a different background color, a custom image, or a crisp look without the blur effect, these customization options allow you to create a Cover Flow view that is uniquely yours.
Customize the Cover Flow Layout
The layout of the Cover Flow view on your Mac determines how the file previews are arranged and displayed. By customizing the layout, you can optimize your browsing experience and make it more efficient. In this section, we’ll explore how to customize the Cover Flow layout to suit your needs.
To begin, open a Finder window on your Mac and switch to the Cover Flow view by clicking on “View” in the menu bar and selecting “as Cover Flow”.
Now, let’s dive into the customization options:
- 1. Adjust the Scroll Speed: The scrolling speed of the Cover Flow view can be adjusted to match your desired pace. To make the scrolling faster, hold down the Shift key and scroll the mouse wheel or trackpad. To make it slower, hold down the Option key and scroll. Experiment with different scroll speeds to find the one that feels most comfortable for you.
- 2. Change the Cover Flow Orientation: By default, Cover Flow displays file previews in a horizontal layout. However, you can change it to a vertical layout if you prefer. To do this, open the Terminal app (located in the Utilities folder within the Applications folder) and enter the following command: defaults write com.apple.finder CoverFlowScrollDirection -bool true. Press Enter on your keyboard and restart the Finder by holding the Option key and right-clicking the Finder icon in the Dock, then selecting “Relaunch”. The Cover Flow view will now display the file previews vertically.
- 3. Customize the Number of Previews: Cover Flow allows you to control the number of file previews displayed at once. By default, it shows several previews at a time, but you can increase or decrease the number to suit your preference. To adjust the number of file previews, click on the “View” menu in the menu bar, hover over “Cover Flow Options”, and choose a different option from the “Show Items” submenu. Selecting “10 Items” will display more previews, while selecting “5 Items” will show fewer.
By customizing the Cover Flow layout on your Mac, you can optimize the browsing experience and tailor it to your specific preferences. Whether you want to adjust the scrolling speed, change the orientation, or customize the number of file previews, these options allow you to create a Cover Flow layout that works best for you.
Sort Items in Cover Flow View
Sorting the items in the Cover Flow view on your Mac allows you to quickly find and organize your files based on different criteria. Whether you want to arrange them alphabetically, by date, or by other attributes, this section will guide you through the process of sorting items in the Cover Flow view.
To begin, open a Finder window on your Mac and switch to the Cover Flow view by clicking on “View” in the menu bar and selecting “as Cover Flow”.
Now, let’s explore the different sorting options available:
- 1. Sort by Name: This option arranges the files in alphabetical order by their names. To sort items by name, click on the “View” menu in the menu bar, hover over “Arrange By”, and select “Name”. The files in the Cover Flow view will now be sorted alphabetically.
- 2. Sort by Date Modified: If you want to arrange the files based on the most recent modifications, you can sort them by date. To do this, click on the “View” menu in the menu bar, hover over “Arrange By”, and select “Date Modified”. The files in the Cover Flow view will now be sorted with the most recent ones appearing first.
- 3. Sort by Other Attributes: In addition to name and date, you can sort the files in the Cover Flow view by other attributes such as size, kind, or label. To do this, click on the “View” menu in the menu bar, hover over “Arrange By”, and select the desired attribute. The files will be sorted based on the selected attribute.
By sorting the items in the Cover Flow view, you can quickly locate specific files or organize them in a way that suits your workflow. Whether you prefer alphabetical order, sorting by date, or using other attributes, these options allow you to efficiently navigate and manage your files with ease.
Change the Cover Flow App Icon Size
The size of the app icons in the Cover Flow view on your Mac can impact the visual experience and the ease of navigating through your applications. In this section, we will explore how to change the size of the app icons in the Cover Flow view to suit your preference.
To begin, open a Finder window on your Mac and switch to the Cover Flow view by clicking on “View” in the menu bar and selecting “as Cover Flow”.
Now, let’s dive into the process of changing the app icon size:
- 1. Increase Icon Size: By default, the app icons in the Cover Flow view are displayed at a standard size. To increase the size, hold down the Command key and press the Plus (+) key on your keyboard. Each time you press the Plus (+) key, the app icons will become larger. Experiment with different sizes until you find the one that suits your preference.
- 2. Decrease Icon Size: If you want to make the app icons smaller, hold down the Command key and press the Minus (-) key on your keyboard. Each time you press the Minus (-) key, the app icons will reduce in size. Continue adjusting the size until you reach the desired smaller icon size.
- 3. Reset Icon Size: If you want to return the app icons to the default size, simply go to the “View” menu in the menu bar, click on “Actual Size”, or press the Command and Zero (0) keys simultaneously.
By adjusting the app icon size in the Cover Flow view, you can enhance the visual experience and make it easier to navigate through your applications. Whether you prefer larger icons for better visibility or smaller icons for a more compact layout, these options allow you to customize the app icon size to your liking.
Enable or Disable Cover Flow Bounce
The Cover Flow view on your Mac features a bouncing effect when you scroll beyond the limits of your files. While this can add a playful touch to the browsing experience, it may not be to everyone’s liking. In this section, we will explore how to enable or disable the Cover Flow bounce to suit your preference.
To begin, open a Finder window on your Mac and switch to the Cover Flow view by clicking on “View” in the menu bar and selecting “as Cover Flow”.
Now, let’s explore how to enable or disable the Cover Flow bounce:
- 1. Enable Cover Flow Bounce: By default, the Cover Flow bounce is already enabled on your Mac. As you scroll through the items, they will bounce back when you reach the limits of the view. This bouncing effect can provide a playful and interactive feel to your browsing. If you find it enjoyable, there is no further action required.
- 2. Disable Cover Flow Bounce: If you prefer a more static and controlled browsing experience, you can disable the Cover Flow bounce. Open the Terminal app (located in the Utilities folder within the Applications folder) and enter the following command: defaults write com.apple.finder DisableCoverFlowBounce -bool true. Press Enter on your keyboard and restart the Finder by holding the Option key and right-clicking the Finder icon in the Dock, then selecting “Relaunch”. The Cover Flow view will no longer exhibit the bouncing effect when you scroll beyond the limits of your files.
By enabling or disabling the Cover Flow bounce, you can fine-tune the browsing experience to match your preference. Whether you enjoy the playful bouncing effect or prefer a more static view, these options allow you to tailor the Cover Flow behavior to your liking.