
Creating an Amazon Account
To utilize the Kindle app for Mac, you will need to have an Amazon account. If you already have an Amazon account, you can use the same credentials to sign in to the Kindle app. However, if you don’t have an account yet, here’s how you can create one:
- Open the Safari or your preferred web browser and go to the Amazon website.
- Click on the “Sign in” button located at the top right corner of the page.
- Below the login panel, you will find the option to “Create your Amazon account”. Click on it.
- Enter your name, email address, and create a password for your Amazon account.
- Click on the “Create your Amazon account” button.
- Next, you will be prompted to enter your phone number. This step is optional but can be helpful for added security and account recovery purposes.
- On the subsequent page, enter your billing address and payment information. This is necessary if you plan on purchasing books or subscribing to Kindle Unlimited.
- Once you have filled in all the required information, click on the “Save & Continue” button.
- Finally, verify your email address by clicking on the confirmation link sent to the email associated with your Amazon account.
Once you have successfully created your Amazon account, you can proceed to install the Kindle app on your Mac and sign in to start enjoying a wide selection of books, magazines, and newspapers.
Installing the Kindle App
Installing the Kindle app on your Mac is a straightforward process. Follow the steps below to get started:
- Open the Safari or your preferred web browser and go to the Amazon website.
- Hover over the “Departments” menu at the top left corner of the page and click on “Kindle E-readers & Books”.
- In the dropdown menu, select “Kindle for Mac” from the list of options.
- On the Kindle for Mac page, click on the “Download for Mac” button.
- A pop-up window will appear, asking you to confirm the download. Click on “Save File” to start the download.
- Once the download is complete, locate the installation file in your downloads folder (usually named “KindleForMac.dmg”).
- Double-click on the file to open it, and a new window will appear containing the Kindle app.
- Drag and drop the Kindle app icon to the “Applications” folder on your Mac.
- Once the app is copied to the “Applications” folder, you can eject the installation disk image by right-clicking on it and selecting “Eject”.
- Now, go to the “Applications” folder and double-click on the Kindle app to open it.
- A welcome screen will appear, prompting you to sign in with your Amazon account credentials. Enter your email and password, then click on the “Sign In” button.
- After signing in, the Kindle app will sync your library, and you will be ready to start reading your favorite books on your Mac.
Once you have successfully installed the Kindle app, you can begin exploring the extensive collection of books available in the Kindle Store and start reading them directly on your Mac.
Signing In to the Kindle App
To access your Kindle library and start reading books on the Kindle app for Mac, you will need to sign in with your Amazon account. Follow these steps to sign in:
- Open the installed Kindle app on your Mac.
- You will be greeted with a welcome screen. Click on the “Get Started” button.
- On the sign-in page, enter the email address associated with your Amazon account.
- Next, type in the password for your Amazon account.
- If you want the app to remember your sign-in information for future use, check the “Keep me signed in” option. However, only enable this feature if you are using a personal and secure Mac.
- Click on the “Sign In” button.
- If the entered credentials are correct, the Kindle app will sign you in and sync your library. This may take a moment, especially if you have a large collection of books or if it’s your first time using the app.
- Once the synchronization is complete, you will be taken to the home page of the Kindle app, where you can start exploring your library and reading books.
If you encounter any issues while signing in, double-check that you have entered the correct Amazon account email and password. If you are still unable to sign in, you can try resetting your password or contact Amazon’s customer support for further assistance.
Now that you are signed in to the Kindle app, you can personalize your reading experience, purchase new books, and enjoy the vast collection of literature available at your fingertips.
Navigating the Home Page
Once you have signed in to the Kindle app for Mac, you will be greeted with the home page. The home page serves as a central hub where you can access your library, discover new books, and manage your reading preferences. Here’s a guide on how to navigate the home page:
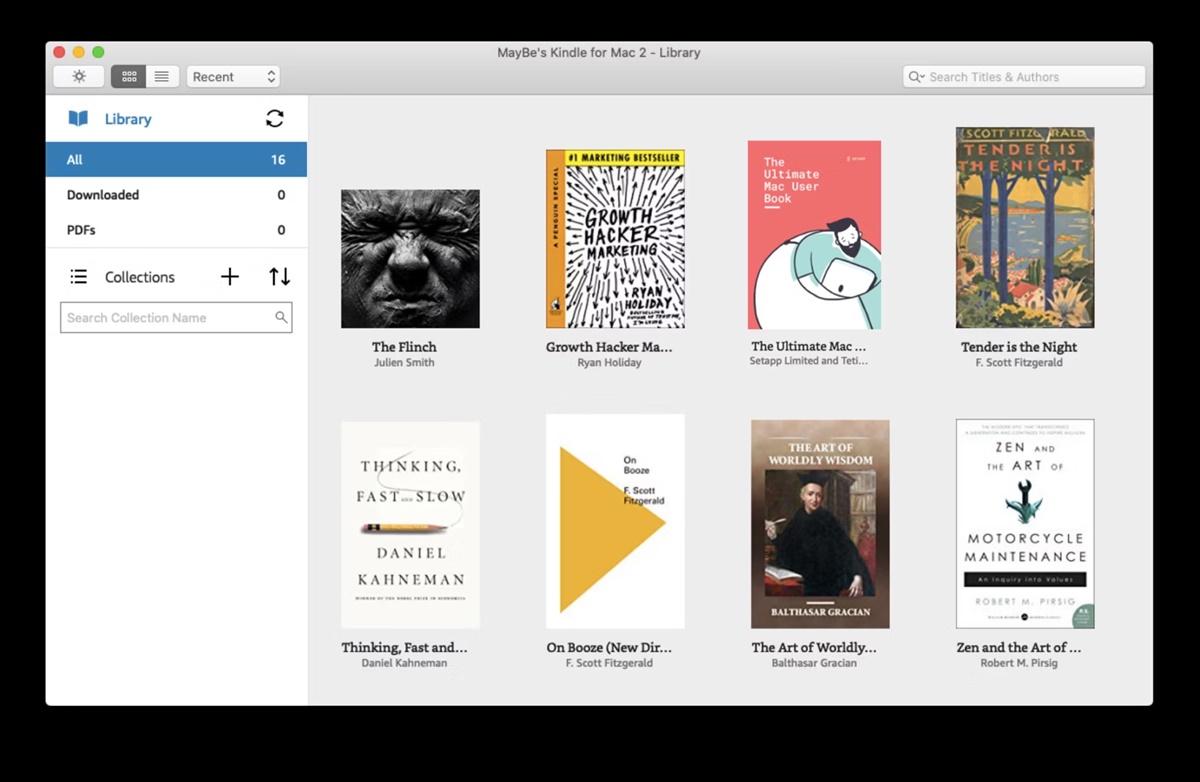
1. Library: The library section displays all the books in your collection. You can browse through your books by scrolling vertically. To view more books, simply keep scrolling down the page. The books are displayed in a grid format, and each book cover is accompanied by its title and author name.
2. Search Bar: Located at the top of the home page, the search bar allows you to quickly search for specific books or authors. Enter relevant keywords and hit the Enter key to see the search results.
3. Filters: On the left side of the home page, you will find a set of filters that help you narrow down your library and explore books based on specific criteria. You can filter by categories, authors, series, and more.
4. Recommendations: As you interact with the Kindle app and read books, the app will provide personalized book recommendations for you. These recommendations are based on your reading history and preferences.
5. Reading Lists: Below the recommendations section, you may find curated reading lists based on popular genres or themes. This is a great way to discover new books that align with your interests.
6. Settings: Access the settings menu by clicking on the gear icon located at the upper-right corner of the home page. Here, you can adjust various preferences, including display settings, syncing options, and more.
7. Featured Content: The home page may showcase featured content such as bestselling books, new releases, or special promotions. These sections often include visually appealing book covers and brief descriptions.
Take your time to explore the different sections of the home page, familiarize yourself with the layout, and discover new books to add to your reading list. The home page is designed to make it easy for you to find, organize, and enjoy your collection of Kindle books.
Browsing and Purchasing Books
One of the great advantages of the Kindle app for Mac is the ability to browse and purchase books directly from your device. Whether you’re looking for a new release, a bestseller, or a specific genre, here’s how you can easily browse and purchase books:
1. Home Page: Start by navigating to the home page of the Kindle app. This is where you can find featured content, recommendations, and your library.
2. Search Bar: If you have a specific book or author in mind, use the search bar at the top of the page to enter relevant keywords. The search results will display books matching your search criteria.
3. Filters: Utilize the filters on the left side of the page to narrow down your search results. You can filter by categories, ratings, publication date, and more.
4. Book Page: Clicking on a book cover will take you to the book page. Here, you can find detailed information about the book, including the author, description, reviews, and sample chapters. Take advantage of these features to make an informed decision about your purchase.
5. Buying Options: On the book page, you will see the various buying options available. These may include purchasing the Kindle edition, adding the book to your wish list, or seeing if the book is available via Kindle Unlimited or Prime Reading.
6. Add to Cart and Buy: If you decide to purchase the book, simply click on the “Add to Cart” or “Buy Now” button. Follow the prompts to complete your purchase. Remember to ensure that your payment method and billing address are up to date.
7. Library Update: Once the purchase is complete, the book will be automatically added to your library. You can access it by navigating back to the home page and scrolling through your collection.
8. Samples and Previews: If you’re unsure about a book, you can also download a sample or preview before making a purchase. This allows you to read a portion of the book to see if it captures your interest.
Take your time to explore the vast selection of books available on the Kindle app for Mac. Whether you’re an avid reader or just starting your reading journey, the ability to browse and purchase books at your fingertips makes it a convenient and enjoyable experience.
Managing Your Library
With the Kindle app for Mac, managing your library of books is easy and convenient. Whether you want to organize your books, delete unwanted titles, or access your reading progress, here’s how you can effectively manage your library:
1. Library View: Start by navigating to the library section of the Kindle app. This is where you can see all the books in your collection.
2. Organizing Books: To keep your library organized, you can create custom collections. Collections allow you to categorize your books based on your preferences. To create a new collection, go to the library view, click on “Add Collection”, and give it a name. Then, simply drag and drop books into the desired collection.
3. Deleting Books: If you want to remove a book from your library, right-click on the book cover or use the “Ctrl+Click” option. From the context menu, select “Remove from Device”. Please note that deleting a book from your library will only remove it from the device you’re currently using. The book will still be available in your Amazon account’s cloud storage and can be re-downloaded later if needed.
4. Viewing Reading Progress: The Kindle app allows you to keep track of your reading progress for each book. Simply open a book, and at the bottom of the screen, you will see a progress bar indicating your current location. You can also access bookmarks, highlights, and notes from this view.
5. Sorting and Filtering Options: To quickly find a specific book in your library, use the sorting and filtering options. You can sort your books by title, author, or recent activity. You can also filter them based on their format, such as books, documents, or audiobooks.
6. Syncing and Cloud Storage: The Kindle app automatically syncs your library across devices, ensuring that your books are available on all your devices. If you download or delete a book on one device, it will reflect the changes on all your Kindle devices and apps. This feature also allows you to start reading on one device and seamlessly continue reading on another.
7. Book Details and Options: When viewing your library, you can access additional options for each book. Right-click or use the “Ctrl+Click” option on the book cover to reveal a context menu. From here, you can perform actions such as adding the book to a collection, rating the book, or accessing additional book details.
Take advantage of the library management features in the Kindle app for Mac to keep your collection organized and easily accessible. With just a few clicks, you can create collections, delete unwanted books, and seamlessly sync your library across devices.
Customizing the Reading Experience
The Kindle app for Mac offers a range of customization options that allow you to tailor the reading experience to your preferences. From adjusting the font size to changing the background color, here’s how you can customize your reading experience:
1. Text Size and Font: While reading a book, you can easily adjust the text size by clicking on the “Aa” icon located at the top of the screen. This will open a menu where you can choose from several font sizes. Additionally, you can also change the font style by selecting a different font from the available options.
2. Page Orientation: By default, the Kindle app displays pages in portrait orientation. However, you can switch to landscape mode for a wider reading view. To do this, simply rotate your Mac or go to the “View” menu and select “Rotate Left” or “Rotate Right”.
3. Background Color: If you prefer reading with a different background color, you can change it to suit your preferences. In the “Aa” menu, you will find options to switch between white, sepia, and black background colors. Experiment with different options to find the one that is most comfortable for your eyes.
4. Margin and Line Spacing: To adjust the margin and line spacing of the text, go to the “Aa” menu and click on “Page Display”. Here, you can increase or decrease the margin size and line spacing to improve readability based on your preference.
5. Reading Progress Indicator: The Kindle app provides options for displaying the reading progress indicator. You can choose to show the percentage of the book that you have read or the time remaining in the current chapter. To change this setting, go to the “Aa” menu and select “Reading Progress”.
6. Dictionary and Translator: A convenient feature of the Kindle app is the built-in dictionary. Simply select a word while reading and a definition will appear. You can also translate words or phrases into different languages using the translation feature. This is particularly useful for language learners or when reading books in foreign languages.
7. Full-Screen Mode: For distraction-free reading, you can enter full-screen mode by selecting the “View” menu and clicking on “Full Screen”. This will maximize the reading area, hiding any distracting elements and allowing you to focus solely on the text.
Remember that the Kindle app allows you to customize the reading experience to suit your preferences. Experiment with different settings and find the combination that enhances your reading comfort and enjoyment.
Syncing Your Books Across Devices
One of the key benefits of using the Kindle app for Mac is the ability to sync your books across multiple devices. This enables you to seamlessly switch between devices without losing your reading progress. Here’s how you can sync your books:
1. Sign In: Ensure that you are signed in to the Kindle app using the same Amazon account on all devices you want to sync.
2. Enable Sync: In the Kindle app on your Mac, go to the “Preferences” or “Settings” menu. Check if the “Sync” option is enabled. This ensures that any changes you make are synchronized across devices.
3. Network Connection: To sync your books, make sure that your Mac and other devices are connected to the internet via Wi-Fi or cellular data.
4. Open the Kindle App: On your other devices, such as a Kindle e-reader, smartphone, or tablet, open the Kindle app and sign in with the same Amazon account.
5. Wait for Sync: Once you open the app on your other devices, the sync process will start automatically. It may take a few moments for the books and reading progress to update.
6. Verify Sync: To ensure that your books have synced, open a book on your Mac and navigate to a specific page. Then, open the same book on another device and check if it opens to the same page. If it does, it means the sync was successful.
7. Reading Progress: As you read books on any device, the Kindle app will automatically synchronize your reading progress. This means that if you stop reading on your Mac and later continue on your smartphone, the app will remember where you left off.
8. Note-Taking and Highlighting: Any notes or highlights you make while reading are also synchronized across your devices. This allows you to access your annotations from any device and easily refer back to them.
With the sync feature, you can seamlessly transition between different devices while enjoying a consistent reading experience. Whether you’re at home, on the go, or switching between devices, your books and reading progress will always be up to date and readily accessible.
Highlighting and Taking Notes
The Kindle app for Mac allows you to highlight important passages and take notes while reading. These features are incredibly useful for studying, research, or simply capturing your thoughts. Here’s how you can effectively highlight and take notes in the Kindle app:
1. Highlighting Text: To highlight a specific passage, simply select the text by clicking and dragging your cursor over it. A menu will appear with various options, including “Highlight”. Click on “Highlight” to mark the text with a color of your choice. You can also change the color of the highlight by right-clicking (or using “Ctrl+Click”) on the highlighted text and selecting “Change Color”.
2. Adding Notes: Alongside highlighting, you can add notes to specific sections of the book. After selecting the text you want to annotate, choose the “Add Note” option from the menu. A text box will appear, allowing you to type in your notes. The notes will be associated with the highlighted text, making it easy to refer back to them later.
3. Viewing Highlights and Notes: To access your highlights and notes, go to the “Menu” button (three dots) at the top right corner while reading a book. From there, select the “Notes” option. This will open a panel on the right side, displaying all your highlights and notes. You can navigate through them and jump directly to the corresponding section in the book.
4. Editing and Deleting: If you want to edit or delete a highlight or note, simply click on it in the “Notes” panel. A pop-up window will appear, giving you the option to make changes or remove it altogether. This allows you to refine your annotations or remove them if they are no longer necessary.
5. Exporting and Sharing: The Kindle app also allows you to export your highlights and notes. From the “Notes” panel, click on the “Export Notes” button. You can choose to export them as a text file or send them directly via email. This feature is especially useful for academic purposes, as you can easily compile your annotations for further analysis or sharing with others.
6. Syncing Across Devices: Any highlights and notes you make on your Mac will sync with your other devices. This means that you can access and edit them on your Kindle e-reader, smartphone, or tablet, ensuring a consistent experience across all your devices.
Highlighting and taking notes in the Kindle app for Mac allows you to engage with the content and actively interact with the books you’re reading. Whether it’s for studying, personal insights, or research purposes, these features enhance your reading experience and help you retain and organize important information.
Managing Your Highlights and Notes
The Kindle app for Mac provides various options for managing and organizing your highlights and notes. Whether you want to review your annotations, export them for further use, or search for specific text within your highlights, here’s how you can effectively manage your highlights and notes:
1. Accessing Highlights and Notes: To access your highlights and notes, click on the “Menu” button (three dots) at the top right corner of the Kindle app while reading a book. From the drop-down menu, select the “Notes” option. This will open a panel on the right side, displaying all your highlights and notes for the current book.
2. Navigating and Jumping to Annotations: In the “Notes” panel, you can easily navigate through your annotations using the scroll bar. Each highlight or note is labeled with the location it corresponds to in the book. Clicking on a specific annotation will take you directly to the corresponding section in the book.
3. Editing and Deleting Annotations: To make changes to a highlight or note, click on it in the “Notes” panel. A pop-up window will appear, allowing you to edit the content of your annotation or remove it altogether. This allows you to refine your annotations or delete them if they are no longer necessary.
4. Exporting Highlights and Notes: If you want to save or share your annotations, you can export them from the “Notes” panel. Click on the “Export Notes” button, and you will have the option to export your highlights and notes as a text file or send them via email. This feature is beneficial for referencing your annotations or sharing them with others.
5. Searching for Text within Highlights: If you are looking for specific text within your highlights and notes, you can use the search feature. From the “Notes” panel, enter your desired keywords in the search bar located at the top. The app will display results that match your search criteria within your annotations.
6. Syncing Across Devices: Your highlights and notes are synced across all your devices using the Kindle app. This means that any changes you make on your Mac will be reflected on your other devices, allowing you to access and manage your annotations seamlessly.
By effectively managing your highlights and notes in the Kindle app for Mac, you can organize and review your annotations easily. Whether it’s for studying, research, or personal insights, these features provide you with a convenient way to interact with and derive maximum value from the books you read.
Adjusting Text Size and Font
With the Kindle app for Mac, you have the flexibility to adjust the text size and font according to your preferences. Whether you prefer larger text for easy reading or a specific font style for added readability, here’s how you can easily make these adjustments:
1. Text Size: To adjust the text size, click on the “Aa” icon located at the top-right corner of the Kindle app while reading a book. This will open the text customization menu. You will find a slider that allows you to increase or decrease the text size. Slide it to the right for a larger font or to the left for a smaller font.
2. Font Styles: In addition to adjusting the text size, you can also choose from different font styles to enhance your reading experience. In the “Aa” menu, you will find a list of available fonts. Click on a font style to select it. The app provides options such as Bookerly, Baskerville, Helvetica, and more.
3. Line Spacing: If you find it helpful to have more space between lines of text, you can adjust the line spacing. In the “Aa” menu, click on “Page Display”. Here, you can increase or decrease the line spacing to suit your preference. This can be particularly useful for individuals with visual impairments or those who prefer a more open layout.
4. Margin Size: The Kindle app allows you to adjust the margin size to optimize the reading experience. In the “Aa” menu, choose “Page Display” and you will find options to increase or decrease the margin size. By adjusting the margins, you can customize the reading view to maximize the text area or create comfortable visual boundaries.
5. Justification: Some readers prefer left alignment, while others prefer full justification of text. The Kindle app allows you to choose your preferred alignment. In the “Aa” menu, select “Page Display” and you will find an option to toggle between left-aligned or fully justified text.
6. Dark Mode: If you prefer reading with a dark background and light text, the Kindle app also offers a dark mode option. In the “Aa” menu, you can select the background color of your choice, such as black or sepia, for a more comfortable reading experience in low-light environments.
By adjusting the text size and font in the Kindle app for Mac, you can tailor your reading experience to your specific preference. Experiment with different settings to find the combination that provides optimal comfort and readability for your books.
Using the Dictionary and Translator
The Kindle app for Mac offers a built-in dictionary and translator feature, allowing you to easily look up definitions and translate words or phrases while reading. These features are incredibly helpful for expanding your vocabulary, understanding complex terms, or reading books in foreign languages. Here’s how you can effectively use the dictionary and translator:
1. Dictionary Lookup: To look up a word in the dictionary, simply select the word by clicking and dragging your cursor over it. A pop-up window will appear displaying the definition of the selected word. This allows you to quickly understand the meaning without having to leave the page.
2. Dictionary Options: The dictionary feature offers additional options to enhance your understanding of a word. You can click on the word in the dictionary pop-up window to access a more detailed definition, synonyms, antonyms, and even Wikipedia entries related to the word.
3. Translator: In addition to the dictionary, the Kindle app also provides a translator feature. By selecting a word or phrase, you can choose to translate it into various languages. Click on the “Translate” option in the pop-up window to see the translated text. This is especially useful when reading books in a language that is not your native tongue.
4. Language Selection: To translate a word or phrase, make sure you have selected the appropriate language for translation. You can choose the source and target languages by clicking on the language button located at the top-right corner of the dictionary or translator pop-up window. Select your desired languages from the list provided.
5. Pronunciation: If you’re unsure how to pronounce a word, the dictionary feature also provides an option for listening to the audio pronunciation. Simply click on the speaker icon in the dictionary pop-up window, and the app will play the correct pronunciation of the word or phrase for you to hear.
6. Further Exploration: The dictionary and translator features allow you to delve deeper into words and phrases you encounter while reading. Take advantage of these tools by exploring additional meanings, related words, and translations to enhance your understanding and language skills.
By utilizing the dictionary and translator features in the Kindle app for Mac, you can easily expand your vocabulary, comprehend complex terms, and enjoy books in different languages with confidence. These features make it easily accessible to enhance your reading experience and explore new words and languages without interrupting the flow of your reading.
Bookmarking Pages
When reading a book on the Kindle app for Mac, you may come across passages or pages that you want to revisit later. The bookmarking feature allows you to mark specific pages or locations within a book for easy reference. Here’s how you can effectively bookmark pages in the Kindle app:
1. Placing a Bookmark: To bookmark a specific page, simply go to the page you want to mark. Click on the “Bookmark” icon located at the top-right corner of the screen. The icon looks like a folded corner of a page. Once you click on it, the page will be bookmarked, and a small bookmark symbol will appear on the top-right corner of the page you bookmarked.
2. Accessing Bookmarks: To view your bookmarks, go to the “Menu” button (three dots) at the top right corner of the Kindle app while reading a book. From the drop-down menu, select the “Bookmarks” option. This will display all your bookmarks for the current book.
3. Navigating with Bookmarks: With your bookmarks visible, you can quickly navigate to bookmarked pages. Clicking on a bookmark in the list will take you directly to the corresponding page in the book. This allows for easy referencing and revisiting of important sections in the future.
4. Removing a Bookmark: If you want to remove a bookmark, go to the “Bookmarks” section as mentioned earlier. Click on the bookmark you want to remove, and it will be deselected. The bookmark symbol will disappear, indicating that the page is no longer bookmarked.
5. Syncing Bookmarks: Your bookmarks are synced across all of your devices using the Kindle app. This means that if you bookmark a page on your Mac, you can access the same bookmark on your Kindle e-reader, smartphone, or tablet. The syncing feature ensures that your bookmarks are always up to date, regardless of the device you use to read.
6. Note-Taking: While bookmarks allow you to mark specific pages, remember that you can also take notes alongside your bookmarks. This allows you to add extra context or reminders to the sections you have bookmarked, making it even more useful for future reference.
By effectively using the bookmarking feature in the Kindle app for Mac, you can easily mark and access important pages and passages within a book. This enables you to quickly jump to key sections, whether it’s for study, research, or revisiting your favorite quotes or ideas.
Searching for Keywords or Phrases
When reading a book on the Kindle app for Mac, you may want to quickly find specific information or locate a particular passage. The search feature allows you to search for keywords or phrases within a book, making it easy to locate the desired information. Here’s how you can effectively search for keywords or phrases in the Kindle app:
1. Open the Search Bar: To initiate a search, click on the magnifying glass icon located at the top-right corner of the Kindle app while reading a book. This will open the search bar.
2. Enter the Keyword or Phrase: In the search bar, type in the keyword or phrase you want to search for within the book. As you start typing, the app will provide suggestions based on what you’ve entered.
3. Filter Search Results: By default, the search results will display all occurrences of the keyword or phrase within the book. However, you can narrow down the results by using the filtering options. For example, you can choose to search only in specific chapters or sections.
4. Navigate Search Results: The search results will be displayed as a list, showing the locations where the keyword or phrase appears in the book. Click on a search result to jump directly to that specific page or location in the book. This allows for quick access to the desired information.
5. Multiple Search Results: If the keyword or phrase appears in multiple locations, you can move through the search results by clicking on the arrow buttons located at the bottom of the search results panel. This allows you to easily navigate between different occurrences of the keyword or phrase.
6. Clearing Search Results: To clear the search results and return to normal reading, click on the “X” icon in the search bar. This will remove the search term and restore the original view of the book.
7. Saving Search Terms: If you want to save a particular search term for future reference, you can bookmark it by clicking on the “Bookmark” icon next to the search bar. This allows you to quickly access the saved search terms and perform the search again later.
By effectively using the search feature in the Kindle app for Mac, you can quickly find specific keywords or phrases within a book. This feature is incredibly useful for locating information, referencing passages, or revisiting key ideas for study or research purposes.
Reading in Full-Screen Mode
The Kindle app for Mac offers a full-screen mode option, providing a distraction-free reading experience. By entering full-screen mode, you can immerse yourself in the book’s content without any distractions from menus, toolbars, or other elements on your screen. Here’s how you can enjoy reading in full-screen mode:
1. Activate Full-Screen Mode: To enter full-screen mode, go to the “View” menu at the top of the Kindle app while reading a book. From the drop-down menu, select the “Full Screen” option. Alternatively, you can use the shortcut keys “Command + Shift + F” on your keyboard.
2. Exit Full-Screen Mode: To exit full-screen mode, move your cursor to the top of the screen to reveal the menu and toolbar. Alternatively, you can press the “Escape” key on your keyboard to return to the regular view of the app.
3. Navigation Controls: When in full-screen mode, you can still navigate through the book by using the arrow keys on your keyboard or the scroll wheel on your mouse. This allows you to move forward or backward through the pages without interrupting your reading experience.
4. Toolbar Options: While in full-screen mode, the top toolbar will disappear to maximize the available reading space. However, you can still access important features by moving your cursor to the top of the screen. This will reveal the toolbar with options such as changing text size, font, or background color.
5. Annotation and Dictionary: Even in full-screen mode, you can still access the dictionary and annotation features. Simply select a word or passage, and the pop-up window will appear, providing options for definitions, translations, highlighting, and note-taking.
6. Adjusting Display Settings: While in full-screen mode, you can adjust the display settings to further enhance your reading experience. Click on the “Aa” icon at the top of the screen to access the text customization menu. From here, you can change the font size, style, line spacing, and more.
7. Customization: Full-screen mode allows for a personalized reading experience. You can choose the font, font size, background color, and other settings that best suit your preferences, enhancing your comfort and minimizing distractions.
Reading in full-screen mode on the Kindle app for Mac offers a focused and immersive reading experience. By eliminating distractions and maximizing the available space, you can fully immerse yourself in the book’s content and enjoy a distraction-free reading environment.
Adjusting Reading Preferences
The Kindle app for Mac provides a range of reading preferences that you can customize to enhance your reading experience. From adjusting the display settings to enabling features like page-flipping animations, here’s how you can personalize your reading preferences in the app:
1. Display Settings: Click on the “Aa” icon located at the top of the Kindle app while reading a book. This will open the text customization menu. Adjust the font size, style, and line spacing to your desired preferences. You can also choose the background color, including options for white, sepia, and black, to suit your reading comfort.
2. Page-Flipping Animation: The Kindle app allows you to customize the page-flipping animation. To adjust this, go to the “Menu” button (three dots) at the top right corner of the app while reading a book. From the drop-down menu, select “Page Flip Animations”. Here, you can choose from options like page curl or slide, or even disable the animation altogether for a simple page transition.
3. Display Orientation: By default, the Kindle app displays pages in portrait orientation. However, you can switch to landscape mode for a wider reading view. Simply rotate your Mac or go to the “View” menu and select “Rotate Left” or “Rotate Right”. This allows you to read comfortably in your preferred orientation.
4. Reading Progress: In the “Aa” menu, you can choose how you want to monitor your reading progress. Select between percentage read or time left in the current chapter. This provides useful information while reading, helping you keep track of your progress within the book.
5. Font Rendering: The font rendering option allows you to choose between crisp and smooth fonts. You can access this option from the “Aa” menu, under “Font Appearance”. Experiment with different settings to find the one that provides the best reading experience for your eyes.
6. Alignment: In the “Aa” menu, you can select between left-aligned text or full justification. Left-aligned text provides a casual reading experience, while full justification offers a clean and professional appearance. Choose the alignment that suits your personal preference.
7. Auto-Brightness: The Kindle app on Mac supports auto-brightness, which adjusts the screen brightness based on ambient lighting conditions. To enable this feature, go to the “Preferences” or “Settings” menu in the app and select the option to enable auto-brightness. This ensures optimal readability in various lighting environments.
By adjusting these reading preferences in the Kindle app for Mac, you can create a customized reading experience that suits your comfort and preferences. Whether it’s tweaking the display settings, choosing animations, or selecting your preferred orientation, these options allow you to tailor the app to your unique reading style.
Switching Between Different Books
The Kindle app for Mac allows you to easily switch between different books in your library. Whether you want to jump from one novel to another or switch between genres, here’s how you can seamlessly transition between different books:
1. Accessing the Library: To switch between books, start by clicking on the “Library” button located at the top left corner of the Kindle app. This will take you to the main library view where all your books are listed.
2. Selecting a Book: In the library view, scroll through the list of books until you find the one you want to read. Click on the book cover to open it and start reading. The app will remember your progress in each book, allowing you to pick up where you left off.
3. Recent Books: If you have recently read a book, you can quickly access it by clicking on the “Recent” button located at the top of the library view. This will display a list of your recently read books, making it convenient to jump back into those books without searching through the entire library.
4. Search Option: In the library view, you can also use the search option to find a specific book. Simply enter the title, author name, or relevant keywords in the search bar located at the top-right corner of the library view. This will filter the books accordingly, making it easier to locate and select the desired book.
5. Collections: If you have organized your books into collections, you can switch between books within a specific collection. In the library view, click on the collection name to display the books contained within it. From there, you can select the book you want to read and start enjoying it.
6. Reading Progress Sync: The Kindle app syncs your reading progress across devices. If you switch from reading a book on your Mac to another device such as your Kindle e-reader, smartphone, or tablet, the app will remember where you left off and resume from the same point. This allows for a seamless reading experience across different devices.
With the ability to switch between different books effortlessly, the Kindle app for Mac offers convenience and versatility for readers. Whether you’re in the mood for a different genre or want to pick up where you left off in a particular book, these features make it easy to navigate and enjoy your diverse library of books.
Adding and Managing Collections
The Kindle app for Mac allows you to create collections to better organize and manage your books. Collections provide an efficient way to group related books together, making it easier to find and access them. Here’s how you can add and manage collections in the Kindle app:
1. Creating a Collection: Start by going to the library view in the Kindle app. Click on the “Add Collection” button, usually located at the top or bottom of the library screen. Give your collection a name that represents the theme or category of the books you want to group together.
2. Adding Books to a Collection: After creating a collection, you can add books to it. While in the library view, click on the book cover and hold the mouse button until the book cover pops out. Drag and drop the book into the desired collection. Alternatively, you can right-click on the book cover, select “Add to Collection,” and choose the relevant collection.
3. Viewing Collections: To view your collections, go to the library view and click on the collection name. This will display the books included in that collection. You can switch between different collections by clicking on their respective names.
4. Renaming a Collection: If you want to rename a collection, right-click on the collection name and select “Rename” from the options. Enter the new name in the provided field and click “Save” or press the Enter key on your keyboard.
5. Deleting a Collection: To delete a collection, right-click on the collection name and select “Delete” from the options. A confirmation prompt will appear, asking if you want to delete the collection. Note that deleting a collection does not remove the books from your library; it removes only the grouping.
6. Managing Books within Collections: To manage books within a collection, right-click on the book cover within the collection and choose from various options. You can remove a book from a collection, add it to another collection, rate the book, or access additional item details.
7. Sorting Collections: By default, the Kindle app arranges your collections alphabetically. However, you can change the sorting order. Right-click anywhere in the library view and select “Sort By.” Choose your preferred sorting option, such as title, author, or recent activity.
With the ability to add and manage collections in the Kindle app for Mac, you can easily organize your books and create a personalized library. By grouping related books together, you can quickly access them and enjoy a more streamlined reading experience.
Listening to Audiobooks
The Kindle app for Mac provides the option to listen to audiobooks, allowing you to enjoy your favorite books through audio narration. This feature is perfect for those who prefer to listen to books while on the go or for individuals with visual impairments. Here’s how you can listen to audiobooks in the Kindle app:
1. Audiobook Availability: Not all books in the Kindle Store have an accompanying audiobook. To find audiobooks, look for the headphone icon or the mention of “Whispersync for Voice” in the book’s details page on Amazon’s website. These icons indicate that the audiobook version is available for purchase or can be accessed through a subscription service.
2. Purchasing Audiobooks: If an audiobook is available for a book you want to read, you can purchase it directly from the Kindle app. Click on the book cover in the app and select the option to purchase the audiobook. Follow the prompts to complete the purchase. Alternatively, if you are a member of Audible, you can link your Audible account to the Kindle app and access your audiobooks from there.
3. Accessing the Audiobook: After purchasing an audiobook, it will be available in your library. Go to the library view in the Kindle app and click on the book cover. Under the title, you will see the option to “Play” the audiobook. Click on it to start listening to the narration.
4. Audiobook Controls: While listening to the audiobook, you will have control over playback. You can pause, resume, rewind, or fast forward through the narration using the controls, which are typically located at the bottom of the app’s interface. Adjust the volume using the system volume controls on your Mac.
5. Syncing with Ebooks: The Kindle app offers a feature called Whispersync that synchronizes your reading progress between the ebook and audiobook formats of a book. This allows you to seamlessly switch between reading and listening. The app will remember your last position in the audiobook, making it easy to pick up where you left off.
6. Managing Audiobooks: Audiobooks are treated as a separate format in the Kindle app. Within the library view, you can access and manage your audiobooks like any other book. Use the filtering options or search bar to specifically view or find your audiobooks.
7. Playback Speed and Narrator: Some audiobooks may allow you to adjust the playback speed to your preference. Additionally, you can enjoy different narrators for different audiobooks. Explore the options available within the audiobook settings to customize your listening experience.
With the ability to listen to audiobooks in the Kindle app for Mac, you have a convenient and accessible way to enjoy your favorite books. Whether you’re commuting, exercising, or simply relaxing at home, audiobooks provide an immersive storytelling experience to enhance your reading pleasure.
Syncing PDFs and Personal Documents
In addition to ebooks, the Kindle app for Mac allows you to sync and access PDF files and personal documents across your devices. Whether it’s work-related documents, research papers, or manuals, here’s how you can easily manage and sync PDFs and personal documents:
1. Uploading Documents: To sync PDFs and personal documents, start by visiting the Amazon website on your computer. Go to “Manage Your Content and Devices” and click on the “Preferences” tab. Under “Personal Document Settings”, make sure “Personal Document Archiving” is enabled. You can then choose a preferred email address to send the documents to.
2. Sending Documents via Email: To sync a PDF or personal document, send it as an email attachment to your designated Kindle email address. Ensure that the email subject line includes the word “convert” if you want the document to be converted into a Kindle-friendly format.
3. Checking the Sync: Once you have sent the email, the document should appear in your Kindle library within a few minutes. You can check the status of the sync by going to the “Manage Your Content and Devices” page on the Amazon website.
4. Downloading and Opening Documents: Launch the Kindle app on your Mac and go to the library view. Your synced PDFs and personal documents will be displayed alongside your ebooks. Click on the document cover to download it to your device. The downloaded file can be opened within the app for reading.
5. Syncing Different Devices: If you have the Kindle app installed on multiple devices, such as your smartphone or tablet, the PDFs and personal documents you sync will be available on those devices as well. The app will automatically sync your library across all your devices.
6. Managing PDFs and Documents: Within the Kindle app on your Mac, you can manage your PDFs and personal documents just like any other book. Use the search option or filtering options to specifically view or find your PDFs and personal documents. You can also organize them into collections for easier access.
7. Compatibility and Formatting: PDFs and personal documents are displayed in their original format. However, the Kindle app offers limited formatting options for these files. You can use the zoom features to adjust the view, but certain advanced formatting, such as tables or complex layouts, may not be fully preserved.
With the ability to sync PDFs and personal documents across your devices, you can conveniently access important files wherever you go. Whether it’s work-related materials or personal references, the Kindle app offers a seamless way to manage and read these documents alongside your ebooks.
Sharing Book Recommendations
The Kindle app for Mac allows you to easily share book recommendations with others, whether it’s to discuss your favorite reads or suggest books to friends and family. Here’s how you can share book recommendations using the Kindle app:
1. Social Media Integration: The Kindle app offers integration with popular social media platforms like Facebook and Twitter. To share a book recommendation, go to the library view and click on the book cover. From the book details page, you can click on the social media button of your choice to share the book with your friends or followers.
2. Share via Email or Messaging Apps: If you prefer to share book recommendations privately, you can do so via email or messaging apps. In the library view, click on the book cover, and then select the option to share via email or specific messaging apps installed on your Mac. This allows you to send personalized book recommendations directly to individuals.
3. Goodreads Integration: Goodreads, a popular social platform for book lovers, is seamlessly integrated with the Kindle app. You can connect your Goodreads account within the app settings and use it to share book recommendations, read and write reviews, join book clubs, and participate in reading challenges. Goodreads provides a broader community for sharing and discovering books.
4. Reading Status Updates: While reading a book, you can provide updates on your progress and share snippets of your thoughts. Click on the “Menu” button (three dots) while reading a book and select “Update Reading Status”. This allows you to post updates or quotes to your connected social media platforms or Goodreads profile, engaging with others who may be interested in the book.
5. Book Club Discussions: If you’re part of a book club or reading group, the Kindle app offers features for organizing and participating in book club discussions. Use the app’s highlighting and note-taking features to mark key points or discussion topics and share them with other members. This promotes lively conversations about the book and provides a platform for sharing recommendations within the group.
6. Recommendations Based on Kindle Highlights: The Kindle app offers a unique feature called “Popular Highlights”. This feature shows you the most commonly highlighted passages in a book amongst Kindle users. You can view these popular highlights while reading a book and share them with others, sparking conversations and recommendations.
With the sharing features in the Kindle app for Mac, you can easily spread the word about books you enjoy and discover new reads recommended by others. Whether it’s through social media, email, or book club discussions, sharing book recommendations fosters a sense of community and promotes the joy of reading.
Troubleshooting and FAQs
While using the Kindle app for Mac, you may encounter certain issues or have common questions. This section addresses some common troubleshooting tips and frequently asked questions to help you resolve any problems you may encounter:
1. Syncing Issues: If your books, bookmarks, or reading progress are not syncing across your devices, ensure that your Kindle app is up to date and connected to the internet. Check your account settings on the Amazon website to verify that “Whispersync” is enabled. If the issue persists, try signing out and signing back into the app, or contact Amazon customer support for further assistance.
2. Frozen App or Unresponsive Pages: If the Kindle app becomes unresponsive or the pages freeze, try closing the app and reopening it. If the issue continues, restart your Mac. Clearing the app’s cache or reinstalling the app may also help resolve these issues.
3. Missing Books or Library: If you’re unable to see certain books in your library, check your Amazon account to ensure that the books are still associated with your account. If they are, try syncing your library by clicking on the “Sync” button or restarting the app. If the issue persists, contact Amazon customer support for assistance.
4. Troubles Opening or Viewing PDF files: If you encounter difficulties opening or viewing PDF files in the Kindle app, ensure that the files are in a compatible PDF format. Try converting the PDF using online conversion tools or re-downloading the file. If the problem persists, consider using other PDF readers specifically designed for Mac.
5. Kindle App Crashes: If the Kindle app crashes frequently, ensure that you have the latest version of the app installed. Check for system updates on your Mac and ensure that your device has enough available storage space. If the issue continues, contact Amazon customer support for further troubleshooting.
6. Transfer and Conversion of Non-Amazon Books: The Kindle app can handle various ebook formats, including MOBI and AZW3. However, for non-Amazon ebooks, you might need to convert them to a compatible format like MOBI using conversion tools like Calibre before transferring them to your Kindle app.
7. Can I read Kindle books without an internet connection? Yes, once you download a Kindle book to your Mac using the app, you can read it offline without an internet connection.
8. Can I highlight and take notes in my Kindle books? Yes, you can highlight text, add notes, or bookmark pages in your Kindle books using the app’s built-in tools. Your annotations will be synced across devices.
If you encounter any other issues or have additional questions, refer to the Kindle Help & Customer Service section on the Amazon website. There, you’ll find comprehensive resources and guides to assist you.