
Finding the Router IP Address
When you want to connect to your home router as an administrator, the first step is to find out its IP address. This unique identifier is essential to access the router’s web-based interface where you can make configuration changes.
Here are a few methods to find the router’s IP address:
- Refer to the router manual: The manual usually contains the default IP address for the device. Check the documentation that came with your router to find this information.
- Check the router’s label: Many routers have the IP address listed on a label attached to the device itself. Look for a sticker on the router and note down the IP address mentioned there.
- Use the command prompt (Windows): Open the command prompt by pressing the Windows key + R, then type “cmd” and press enter. In the command prompt window, type “ipconfig” and press enter. Look for the “Default Gateway” address, which is your router’s IP address.
- Use the network settings (Mac): Go to System Preferences, then select Network. Choose your active network connection (Ethernet or Wi-Fi). Click on the “Advanced” button, and go to the TCP/IP tab. The router’s IP address will be listed as the “Router” or “Gateway”.
- Use a network scanner app: There are several network scanner apps available for mobile devices that can discover the IP address of your router. Install one of these apps and follow the instructions to identify your router’s IP address.
Once you have obtained the router’s IP address, you can move on to the next step: accessing the router interface.
Accessing the Router Interface
After discovering the IP address of your home router, the next step is to access the router’s web-based interface. This interface allows you to make changes to the router’s settings and configure various features. Here’s how to access the router interface:
- Open a web browser: Launch your preferred web browser on a device connected to the same network as the router.
- Enter the router’s IP address: In the web browser’s address bar, type the router’s IP address. Make sure to enter it correctly to avoid any errors. Press enter to proceed.
- Wait for the login page to load: After entering the IP address, you should see the login page of the router interface. This page might vary depending on the router model and firmware version.
- Enter the administrator credentials: Provide the required login credentials to access the router interface. These credentials typically consist of a username and password.
- Click “Login” or press enter: Once you have entered the login credentials, click the “Login” button on the page, or simply press enter on your keyboard.
If you have entered the correct login details, you will be granted access to the router interface. Congratulations! You are now logged in as an administrator and can begin configuring the router settings according to your needs.
It’s worth noting that some routers may have a different login process or require additional steps such as security verification. Refer to the router’s documentation or support website for specific instructions on accessing the router interface.
Logging in as an Administrator
When accessing the router interface, it’s crucial to log in as an administrator to gain full control over the router’s settings. By logging in with administrative privileges, you will have the ability to make changes and customize your network configuration. Here’s what you need to do:
- Access the router interface: Follow the steps outlined in the previous section to access the router’s web-based interface.
- Locate the login section: Once you arrive at the router interface, search for the login section. It is usually located on the main page or in a designated login section.
- Enter the administrator username and password: In the respective fields, input the correct administrator username and password. If you haven’t changed these credentials since the router was set up, refer to the default login information in the router’s manual.
- Click “Login” or press enter: After entering the login credentials, click the “Login” button on the page or press enter on your keyboard.
- Verify successful login: If the provided credentials are correct, you will be logged in as an administrator, and the router interface will display the administrative options and settings.
It’s important to note that the administrator credentials may differ from those used to connect to the Wi-Fi network. The administrator login is specific to the router configuration and allows you to make changes to the network settings and other options related to the router.
If you are unable to log in as an administrator, ensure that you have entered the correct username and password. If the issue persists, consider performing a factory reset, as this will restore the router to its default settings, including the default administrator login credentials.
Once you have successfully logged in as an administrator, you can proceed to customize and optimize various aspects of your network configuration.
Default Router Login Credentials
When accessing your home router’s web-based interface, you will typically be prompted to enter login credentials. In most cases, routers come with default login information that can be used to access the router as an administrator. Here’s what you need to know about default router login credentials:
1. Default username: Each router manufacturer may use different default usernames. Common default usernames include “admin”, “administrator”, “user”, or simply leaving the field blank.
2. Default password: Similar to usernames, default router passwords can vary. Common default passwords include “admin”, “password”, “1234”, or leaving the field blank.
3. Default login combinations: Some routers have specific default login combinations provided by the manufacturer. For instance, the username might be “admin” and the password could be “admin” as well. Check your router’s documentation or the manufacturer’s website for the exact default login credentials.
4. Importance of changing default credentials: It is crucial to change the default login credentials once you gain access to the router interface. Leaving the default username and password unchanged poses a security risk, as anyone connected to your network could potentially access your router and make unauthorized changes.
5. Resetting the router: If you have forgotten or misplaced the default login credentials, you can reset your router to factory settings. This will restore the router to its original state, including the default login information. However, keep in mind that performing a factory reset will erase any custom settings you have made.
Remember, using strong and unique passwords for your router is highly recommended. Combine uppercase and lowercase letters, numbers, and special characters to create a secure password that is hard to guess.
It’s essential to note that default login credentials may vary depending on the router model, firmware version, and the manufacturer’s practices. Always refer to the documentation provided with your specific router model or check the manufacturer’s website for accurate default login credential information.
Changing the Router Password
After accessing your home router as an administrator, one of the first things you should do is change the default password. Using a strong and unique password helps protect your router from unauthorized access and ensures the security of your network. Here are the steps to change the router password:
- Access the router interface: Follow the steps mentioned earlier to log in as an administrator and access the router’s web-based interface.
- Locate the password settings: Once logged in, navigate to the settings or preferences section of the router interface. Look for an option related to the administrator password or security settings.
- Enter the current password: Before changing the password, you will likely be required to enter the current password for verification purposes. Type in the current password in the designated field.
- Enter the new password: Once the current password is verified, enter the new password that you wish to set. Make sure to choose a strong and unique password that includes a combination of letters, numbers, and special characters.
- Confirm the new password: To ensure accuracy, re-enter the new password in the confirmation field. This step helps prevent errors while typing the password.
- Click “Save” or “Apply” to confirm the changes: Once you have entered and confirmed the new password, locate the “Save” or “Apply” button in the router interface and click on it. This will save the new password and apply the changes.
It is important to keep the new password confidential and avoid using easily guessable information such as birthdates or names. Regularly updating the router password is also recommended as an additional measure to enhance network security.
If you encounter any difficulties during the password change process, refer to the router’s documentation or the manufacturer’s website for specific instructions related to your router model and firmware version.
Updating Router Firmware
Router firmware plays a critical role in the performance and security of your home network. Firmware updates often include bug fixes, performance improvements, and new features that enhance the router’s functionality. Keeping your router firmware up to date is important to ensure optimal performance and protect against potential vulnerabilities. Here’s how you can update your router firmware:
- Check for manufacturer updates: Visit the manufacturer’s website or consult the router’s documentation to check if any firmware updates are available for your router model.
- Download the firmware update: If an update is available, download the latest firmware version from the manufacturer’s website. Make sure to select the correct firmware file for your specific router model.
- Access the router interface: Open your web browser and enter the router’s IP address to access the router interface, following the steps outlined earlier.
- Locate the firmware update section: Navigate to the firmware or system settings section of the router interface. Look for an option related to firmware updates or system upgrades.
- Upload the firmware file: In the firmware update section, you will typically find an option to browse and select the firmware file you downloaded earlier. Choose the file and initiate the upload process.
- Read and follow instructions: Depending on the router model, you may be required to follow specific instructions during the firmware update process. Read any on-screen prompts or documentation provided by the manufacturer and follow the steps accordingly.
- Wait for the update to complete: The firmware update process may take a few minutes. Do not turn off or restart the router during this time. Allow the router to complete the update process.
- Confirm successful update: Once the update is finished, the router will reboot. Access the router interface again to ensure that the firmware update was successful and that you are now running the latest version.
Regularly checking for firmware updates and keeping your router up to date is crucial for maintaining optimal performance and security. Set a reminder to periodically check for updates or enable automatic updates if your router supports this feature.
It’s worth noting that firmware update processes may vary depending on the router model and manufacturer. Refer to your router’s documentation or the manufacturer’s website for specific instructions related to your router.
Configuring Network Settings
Configuring the network settings of your home router allows you to customize various aspects of your network, such as network name, password, IP address allocation, and more. Adjusting these settings can help improve network performance and security. Here’s how you can configure network settings on your router:
- Access the router interface: Log in as an administrator and access the router’s web-based interface using the steps mentioned earlier.
- Navigate to the network settings section: Look for a section in the router interface that is specifically dedicated to network settings. This section might be labeled as “Network”, “Wireless”, or “LAN Settings”.
- Set the network name (SSID): The network name, also known as the SSID (Service Set Identifier), is the name you see when searching for Wi-Fi networks. Choose a unique and easily identifiable name for your network.
- Configure wireless security: Select the type of wireless security you want to use, such as WPA2-PSK (AES). Set a strong password that will be required to connect to your Wi-Fi network. Avoid using default passwords or easily guessable information.
- Assign IP addresses: Depending on your network setup, you can choose between two IP address allocation methods: DHCP (Dynamic Host Configuration Protocol) or manual IP assignment. DHCP automatically assigns IP addresses to devices on your network, while manual IP assignment allows you to specify IP addresses for each device.
- Configure DNS settings: DNS (Domain Name System) translates domain names into IP addresses. You can use the default DNS settings provided by your ISP (Internet Service Provider) or opt for custom DNS servers such as Google DNS or OpenDNS for potentially faster and more secure browsing.
- Save and apply changes: Once you have made the desired network configuration adjustments, click on the “Save” or “Apply” button in the router interface to save the changes and apply the new settings.
It’s important to note that the network settings and options available in your router interface may vary depending on the router model and firmware version. Refer to the router’s documentation or the manufacturer’s website for detailed instructions related to your specific router.
By configuring network settings according to your preferences, you can optimize your home network for better performance, security, and customization.
Managing Wireless Networks
Efficiently managing your wireless networks is crucial for maintaining a reliable and secure connection. Your home router provides various options to manage and optimize your wireless networks. Here are some key features and settings to consider:
- Wireless channel selection: In crowded environments with multiple Wi-Fi networks, interference can occur. Your router allows you to select the wireless channel manually or automatically. Experiment with different channels to find the one with the least interference, resulting in better Wi-Fi performance.
- Wireless signal strength: Some routers allow you to adjust the transmit power of the wireless signal. Decreasing the power might be useful to limit the signal range within your home, preventing it from reaching outside, and reducing the risk of unauthorized access.
- Guest network: To provide secure internet access to visitors without granting them access to your main network, you can set up a guest network. This segregated network allows guests to connect to the internet while keeping your main network and connected devices protected.
- MAC address filtering: MAC address filtering enables you to control which devices can connect to your network. By adding the MAC addresses of your trusted devices to the router’s filter list, you can restrict access to unknown devices even if they have the correct password.
- Wireless security protocols: Ensure your wireless network is protected by selecting the appropriate security protocol. WPA2-PSK (AES) is currently considered the most secure option and should be used if supported by your devices and router.
- Wireless schedule: If you want to limit Wi-Fi availability during specific hours, you can set up a wireless schedule. This feature allows you to define time periods when the Wi-Fi network will be turned off, conserving energy and enhancing security.
- Wireless range extender: If you have areas in your home with weak Wi-Fi coverage, consider using a wireless range extender or a mesh system. These devices can amplify and extend the wireless signal, providing better coverage throughout your living space.
- Regularly update firmware: Keeping your router’s firmware up to date is essential for maintaining network security and accessing the latest features and improvements provided by the manufacturer. Check for firmware updates regularly and apply them as recommended.
Managing your wireless networks efficiently ensures optimal performance, security, and convenience for all connected devices. Explore the various settings and features available in your router’s interface to tailor your wireless networks to your specific needs.
Remember to consult the router’s documentation or the manufacturer’s website for detailed instructions on managing wireless networks specific to your router model and firmware version.
Enabling Parental Controls
In today’s digital age, enabling parental controls on your home router is vital to ensure a safe online environment for your children. Parental controls allow you to manage and restrict internet access, filter content, and set boundaries for devices connected to your network. Here’s how you can enable parental controls on your router:
- Access the router interface: Log in as an administrator and open the router’s web-based interface, using the steps explained earlier.
- Locate the parental controls section: Navigate to the settings or preferences section of the router interface and look for the parental controls option. Sometimes, parental controls are found under a dedicated tab or submenu.
- Enable parental controls: Activate the parental controls feature by toggling the switch or checkbox associated with it.
- Create user profiles: Set up individual user profiles for each family member, including your children. Assign usernames and passwords to differentiate their access levels and enforce age-appropriate restrictions.
- Set content filters: Configure content filters based on categories, keywords, or specific websites. These filters block or allow access to certain types of content, ensuring that inappropriate material is filtered out.
- Manage time restrictions: Define time limits for internet usage by specifying specific hours or time periods during which access is permitted. This feature helps in controlling screen time and establishing boundaries.
- Block specific websites or applications: If there are specific websites or applications you want to block, add them to the blacklist in the parental controls settings. This prevents users from accessing those sites or using the specified applications.
- Review and customize settings: Review the default settings and adjust them according to your family’s needs. Fine-tune the restrictions, filters, and access controls to provide a safe and suitable online environment.
By enabling parental controls on your router, you can monitor and manage your children’s online activities, ensuring they are protected from inappropriate content and online threats. Regularly review and update the settings as your children grow older and their online needs change.
Keep in mind that the availability and configuration of parental controls may vary based on your router model and firmware version. Consult the router’s documentation or the manufacturer’s website for specific instructions related to your router.
Setting Up Guest Networks
Setting up a guest network on your home router is a convenient way to provide internet access to visitors without compromising the security of your main network. Guest networks create a separate Wi-Fi network that allows guests to connect to the internet while keeping your personal devices and data isolated. Here’s how you can set up a guest network on your router:
- Access the router interface: Log in as administrator and open the router’s web-based interface using the steps mentioned earlier.
- Navigate to the wireless settings: Look for the wireless or network settings section in the router interface. This is where you’ll find options related to creating and configuring wireless networks.
- Enable guest network: Activate the guest network feature by toggling the switch or checkbox associated with it. Some routers may require you to specify details such as the network name (SSID) and password for the guest network.
- Configure guest network settings: Depending on your router, you may have additional options to customize the guest network settings. You can choose to enable or disable features such as network isolation (to restrict communication between devices connected to the guest network) or bandwidth limitations.
- Set a secure guest network password: Assign a strong and unique password to the guest network to ensure only authorized guests can access it. Avoid using the same password as your main network to maintain separation and security.
- Save and apply changes: Once you have configured the guest network settings and set a password, click on the “Save” or “Apply” button in the router interface. This will save the changes and activate the guest network.
Guest networks provide a convenient and secure way for visitors to access the internet without gaining access to your personal network or devices. It helps safeguard your personal data and limits their access to resources on your network.
It’s essential to periodically review and update your guest network settings, including changing the password, to maintain the security and integrity of your network.
Remember, the availability and configuration options for guest networks may vary depending on your router model and firmware version. Check the router’s documentation or the manufacturer’s website for specific instructions tailored to your router.
Troubleshooting Router Issues
Encountering issues with your router can disrupt your internet connectivity and overall network performance. Fortunately, many common router problems can be resolved through troubleshooting. Here are some troubleshooting steps to help you diagnose and fix router issues:
- Restart the router: The first step is often the simplest and most effective. Turn off your router, wait for 10 seconds, and then turn it back on. This can help resolve temporary glitches and restore normal operation.
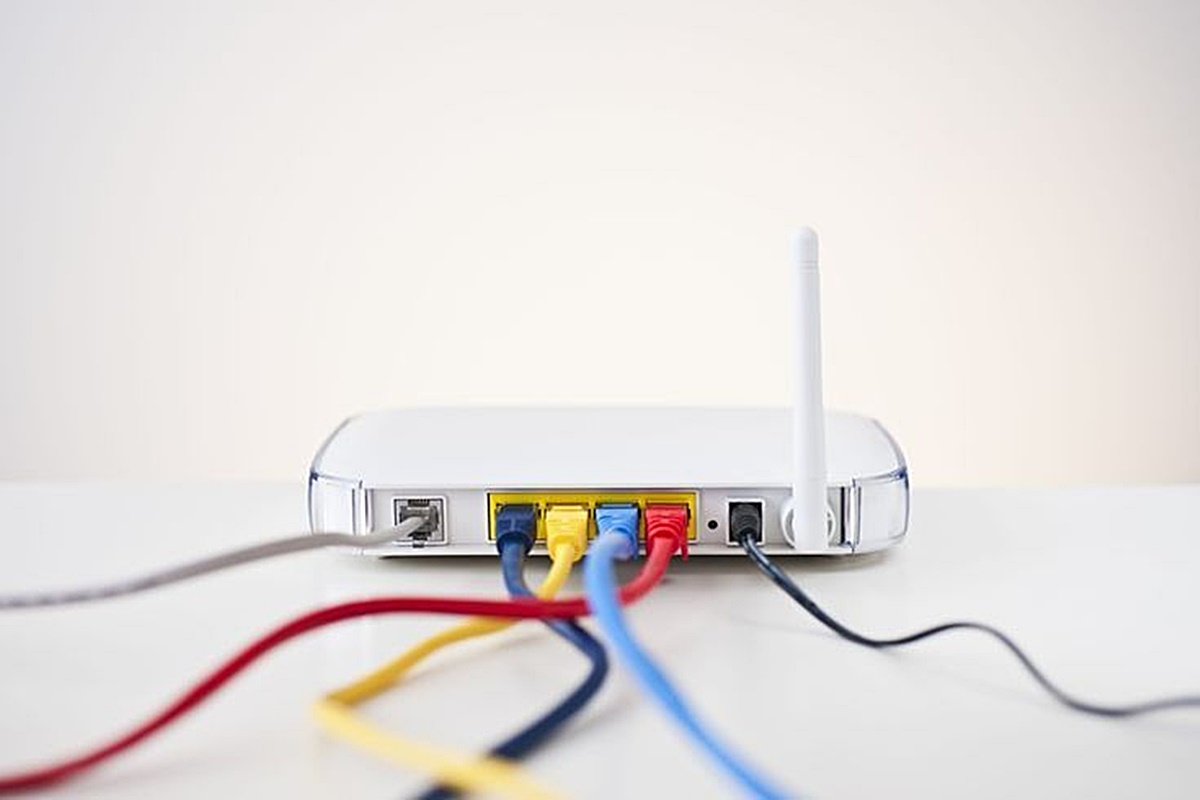
- Check physical connections: Ensure that all cables connecting your router to the modem and other devices are securely plugged in. Loose or faulty connections can contribute to connectivity issues.
- Reset the router: Performing a factory reset can help resolve more complex issues. Use a small, pointed object to press and hold the reset button on the router for about 10 seconds. Be aware that this will erase all custom settings, so make sure to note them down before resetting.
- Update firmware: Outdated firmware can lead to stability and compatibility problems. Check the manufacturer’s website for any available firmware updates for your router model, and follow the instructions to install them.
- Change wireless channel: Interference from neighboring networks can weaken your Wi-Fi signal. Access your router settings, locate the wireless channel settings, and try switching to a channel with less interference.
- Check for IP address conflicts: If multiple devices on your network have the same IP address, connectivity issues may arise. Access your router’s interface, release and renew IP addresses, or utilize DHCP settings to resolve conflicts.
- Reset or reconfigure Wi-Fi settings: If you are experiencing issues with Wi-Fi connectivity, try resetting or reconfiguring your router’s Wi-Fi settings. This can involve changing the wireless mode, enabling or disabling security protocols, or adjusting the transmit power.
- Contact your ISP: If the issues persist, it may be worth reaching out to your internet service provider (ISP) to check for any network outages or connection problems on their end.
- Consult manufacturer support: If all other troubleshooting steps fail, consider contacting the router manufacturer’s support team. They can provide further assistance and guide you through more advanced troubleshooting techniques.
Remember to document any changes you make during troubleshooting in case you need to revert to previous settings. Additionally, it’s advisable to refer to your router’s documentation or the manufacturer’s website for specific troubleshooting guidance tailored to your router model.
By following these troubleshooting steps, you can diagnose and resolve common router issues, ensuring a stable and reliable network connection.