
Enable Supervised User
Google Chrome offers a built-in feature called Supervised User that allows you to set up and manage parental controls for safer browsing. By enabling a supervised user, you can have better control over the content accessed by your children or any other user on your computer. Here’s how you can enable the Supervised User feature in Google Chrome:
1. Open Google Chrome and click on the three-dot menu icon located at the top-right corner of the browser window.
2. From the drop-down menu, select “Settings” to open the Chrome settings page.
3. In the settings page, scroll down and click on “Advanced” to expand additional settings options.
4. Under the “People” section, click on “Manage other people” to access user management settings.
5. On the “Manage other people” page, click on the “Add person” button.
6. A pop-up window will appear, prompting you to enter a name and choose an icon for the supervised user. Enter the required details and click “Add”.
7. Next, you’ll be asked to set up the supervised user’s browsing restrictions. You can choose to enable SafeSearch, block specific websites, and set time limits for browsing, among other options. Adjust these settings according to your preferences.
8. Once you have configured the restrictions for the supervised user, click on “Add” to create the supervised user account.
9. The new supervised user account will now be created, and you can switch to it by clicking on the user icon in the top-right corner of Chrome and selecting the supervised user’s name.
Enabling supervised user in Google Chrome grants you greater control and peace of mind when it comes to your children’s online activities. By following these simple steps, you can create a supervised user account and customize the browsing restrictions according to your specific requirements.
Create a Supervised User
Creating a supervised user in Google Chrome allows you to have more control over the browsing experience of your children or other users on your computer. With a supervised user account, you can set specific restrictions and monitor their online activities. Here’s how you can create a supervised user in Google Chrome:
1. Open Google Chrome and click on the three-dot menu icon at the top-right corner of the browser window.
2. From the drop-down menu, select “Settings” to access the Chrome settings page.
3. In the settings page, scroll down and click on “Advanced” to display additional settings options.
4. Under the “People” section, click on “Manage other people.”
5. On the “Manage other people” page, click on the “Add person” button.
6. A pop-up window will appear, prompting you to enter a name and choose an icon for the supervised user. Fill in the required information and click “Add”.
7. You’ll be asked to set up the supervised user’s browsing restrictions. You can enable SafeSearch, block specific websites, and set time limits for browsing to ensure a safer online experience. Customize these settings as needed.
8. Once you have configured the browsing restrictions for the supervised user, click “Add” to create the supervised user account.
9. The new supervised user account will be created, and you can switch to it by clicking on the user icon in the top-right corner of Chrome and selecting the supervised user’s name.
By following these steps, you can easily create a supervised user account in Google Chrome to manage and monitor the browsing activities of specific users. This feature is particularly useful for parents who want to ensure a safe and secure online experience for their children.
Manage and Customize Supervised Users
Once you have created a supervised user in Google Chrome, you can further manage and customize their browsing experience to ensure a safe and tailored internet usage. Here are some ways to manage and customize your supervised users:
1. Open Google Chrome and click on the user icon in the top-right corner of the browser window.
2. From the drop-down menu, select the supervised user’s name to switch to their account.
3. To manage and customize the supervised user’s settings, click on the user icon again and select “Manage People.”
4. In the “Manage People” section, you’ll see the list of users. Locate the supervised user, and click on the three-dot menu icon next to their name.
5. From the options displayed in the menu, you can customize various aspects of the supervised user’s account, including changing the name or icon, editing browsing restrictions, and removing the supervised user.
6. To change the browsing restrictions, click on “Edit” next to “Browsing restrictions.” Here, you can enable SafeSearch, configure website blocklists, set time limits, and manage other content restrictions.
7. After customizing the settings, click “Save” to apply the changes.
8. To remove a supervised user, click on “Remove from this device” from the three-dot menu. Note that this will delete their browsing history and remove all their settings.
9. If you want to disable the supervised user feature entirely, return to the “Manage other people” page in Chrome settings and click on the three-dots menu next to the supervised user’s name. Then, select “Remove” to delete the supervised user account.
By managing and customizing supervised users, you can maintain a safe and controlled browsing environment while tailoring the experience to suit individual preferences. Whether you want to adjust browsing restrictions, rename the supervised user, or remove their account altogether, Google Chrome provides you with the necessary tools to customize and manage supervised users efficiently.
Set SafeSearch Filters
SafeSearch is a feature provided by Google to filter out explicit content from search results. By enabling SafeSearch filters for supervised users in Google Chrome, you can ensure that search results are more family-friendly and suitable for younger users. Here’s how to set up SafeSearch filters:
1. Open Google Chrome and click on the user icon in the top-right corner of the browser window.
2. From the drop-down menu, select the supervised user’s name to switch to their account.
3. Click on the three-dot menu icon next to the user icon, and choose “Manage People.”
4. In the “Manage People” section, locate the supervised user and click on the three-dot menu icon next to their name.
5. From the options displayed in the menu, select “Edit” next to “Browsing restrictions.”
6. In the browsing restrictions settings, toggle the switch to enable “SafeSearch Filters.”
7. SafeSearch filters will help block explicit content from appearing in search results, ensuring a safer browsing experience.
8. Once you have enabled SafeSearch filters, click “Save” to apply the changes.
By setting up SafeSearch filters, you can limit the chances of encountering explicit content while conducting online searches. This helps provide a safer online environment, especially for supervised users such as children or users who require content restrictions. Ensure that the SafeSearch feature is enabled for supervised users in Google Chrome to enhance internet safety and peace of mind.
Block Inappropriate Websites
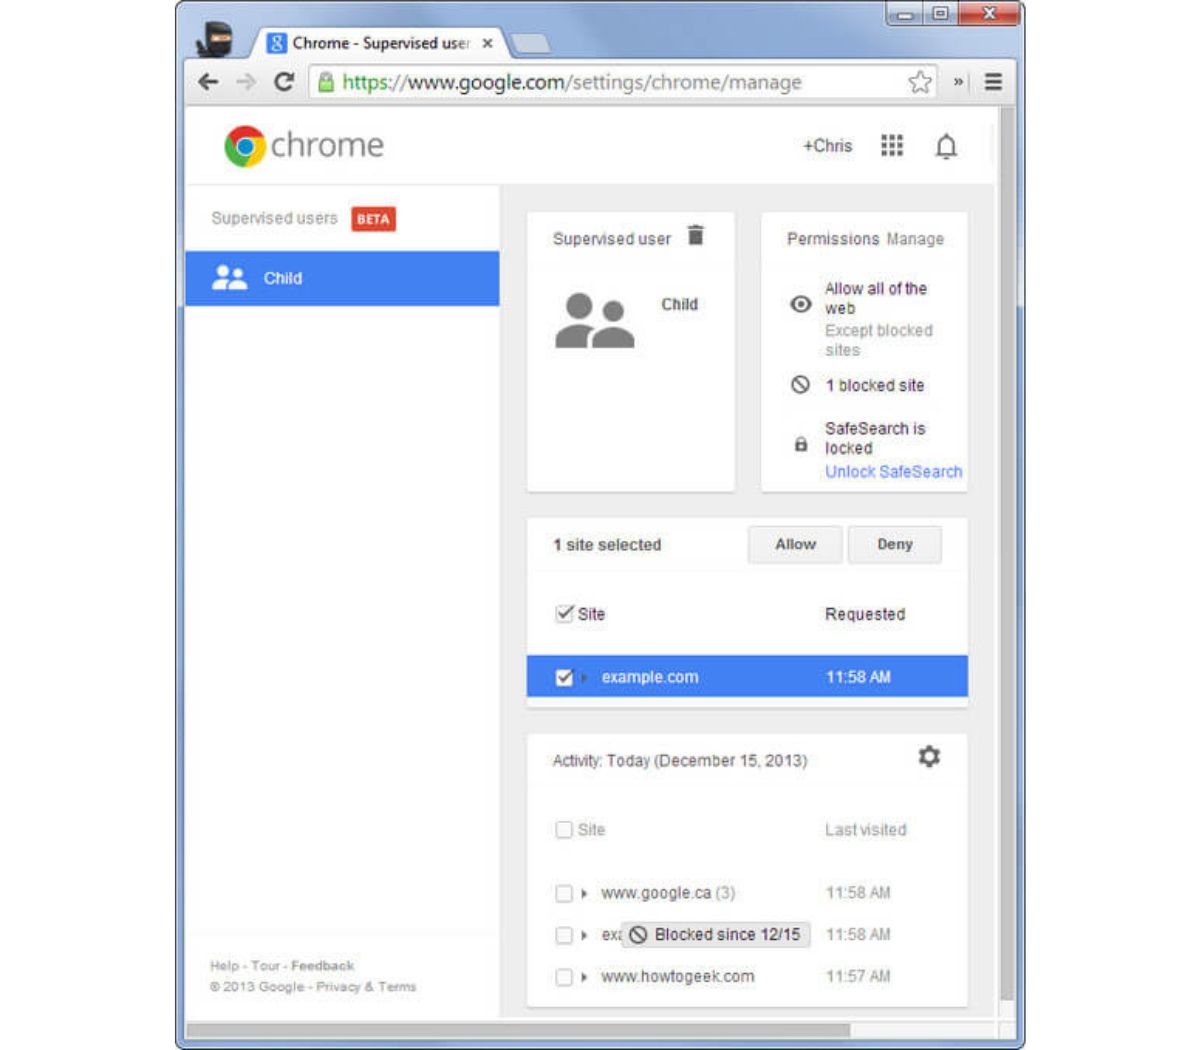
One of the key features of managing supervised users in Google Chrome is the ability to block access to inappropriate websites. By blocking specific websites, you can ensure that supervised users are not exposed to content that may be harmful, offensive, or unsuitable. Here’s how to block inappropriate websites:
1. Open Google Chrome and switch to the supervised user’s account by clicking on the user icon in the top-right corner of the browser window and selecting their name.
2. Click on the three-dot menu icon next to the user icon and choose “Manage People” from the dropdown menu.
3. In the “Manage People” section, locate the supervised user and click on the three-dot menu icon next to their name.
4. From the options displayed in the menu, select “Edit” next to “Browsing restrictions.”
5. Scroll down to the “Block” section and click on “Add” to enter the URL of the website you want to block.
6. You can add multiple websites to the blocklist by entering their URLs one by one.
7. After adding the websites to the blocklist, click “Save” to apply the changes.
8. Any attempts to access the blocked websites will be prevented, and the supervised user will receive a notification that the website is blocked.
9. Remember to periodically check and update the blocklist to ensure that new inappropriate websites are promptly blocked.
Blocking inappropriate websites is an effective way to control the content that supervised users can access. By utilizing this feature in Google Chrome, you can create a safer browsing environment for children or users who require specific content restrictions. Take advantage of the website blocking feature to enhance online safety and maintain a healthy online experience for supervised users.
Allow Only Specific Websites
To provide a more controlled browsing experience for supervised users in Google Chrome, you have the option to allow access to only specific websites. By allowing only selected websites, you can ensure that supervised users are restricted to accessing trusted and appropriate content. Here’s how to allow only specific websites:
1. Open Google Chrome and switch to the supervised user’s account by clicking on the user icon in the top-right corner of the browser window and selecting their name.
2. Click on the three-dot menu icon next to the user icon and choose “Manage People” from the dropdown menu.
3. In the “Manage People” section, locate the supervised user and click on the three-dot menu icon next to their name.
4. From the options displayed in the menu, select “Edit” next to “Browsing restrictions.”
5. Scroll down to the “Allow” section and click on “Add” to enter the URL of the specific website you want to allow.
6. You can add multiple websites to the allowlist by entering their URLs one by one.
7. After adding the websites to the allowlist, click “Save” to apply the changes.
8. The supervised user will only be able to access the websites that are explicitly allowed in the browsing restrictions.
9. Periodically review and update the allowlist to ensure that the supervised user has access to the desired websites.
By allowing access to only specific websites, you can have greater control over the online content that supervised users can access. This is particularly useful for children or users who require a restricted browsing experience. Utilize the website allowance feature in Google Chrome to create a safer and more tailored browsing experience for supervised users.
Set Time Limits for Browsing
Managing the amount of time spent on the internet is crucial, especially for supervised users. Google Chrome allows you to set time limits for browsing, helping you regulate and control the amount of time a supervised user can spend online. Here’s how you can set time limits for browsing:
1. Open Google Chrome and switch to the supervised user’s account by clicking on the user icon in the top-right corner of the browser window and selecting their name.
2. Click on the three-dot menu icon next to the user icon and choose “Manage People” from the dropdown menu.
3. In the “Manage People” section, locate the supervised user and click on the three-dot menu icon next to their name.
4. From the options displayed in the menu, select “Edit” next to “Browsing restrictions.”
5. Scroll down to the “Time limits” section and click on “Set time limits.”
6. A pop-up window will appear, allowing you to set specific time limits for the supervised user’s browsing sessions. You can specify the maximum number of hours and minutes they are allowed to spend online per day.
7. Once you have set the desired time limits, click “Save” to apply the changes.
8. The supervised user will receive a notification when they reach the set time limit, reminding them that their browsing session has ended.
9. It is important to note that the time limits apply to the entire browsing session for the supervised user, regardless of the number of tabs or windows they have opened.
By setting time limits for browsing, you can effectively manage the amount of time a supervised user spends online. This feature is particularly useful for ensuring a healthy balance between online activities and other aspects of life, such as homework or family time. Utilize the time limits feature in Google Chrome to encourage responsible and controlled internet usage for supervised users.
Control App and Extension Permissions
Controlling app and extension permissions is an essential aspect of managing supervised users in Google Chrome. By managing these permissions, you can ensure that only trusted and appropriate apps and extensions are accessed by supervised users. Here’s how you can control app and extension permissions:
1. Open Google Chrome and switch to the supervised user’s account by clicking on the user icon in the top-right corner of the browser window and selecting their name.
2. Click on the three-dot menu icon next to the user icon and choose “Manage People” from the dropdown menu.
3. In the “Manage People” section, locate the supervised user and click on the three-dot menu icon next to their name.
4. From the options displayed in the menu, select “Edit” next to “Browsing restrictions.”
5. Scroll down to the “Permissions” section, which lists the apps and extensions installed for the supervised user.
6. Review the list of apps and extensions and decide which ones you want to allow or block.
7. To allow an app or extension, simply toggle the switch to “On.”
8. To block an app or extension, toggle the switch to “Off.”
9. After customizing the permissions, click “Save” to apply the changes.
By controlling app and extension permissions, you can ensure that supervised users are only using trusted and appropriate additions to the browser. This feature allows you to create a safer browsing experience by preventing access to potentially harmful or inappropriate apps and extensions. Periodically review and update these permissions to maintain a secure and tailored internet usage environment for supervised users.
View Browsing History and Activity Reports
As a parent or supervisor, it’s important to have insight into the browsing history and online activities of supervised users. Google Chrome provides the ability to view browsing history and activity reports, allowing you to monitor and ensure safe internet usage. Here’s how you can access and review browsing history and activity reports:
1. Open Google Chrome and switch to the supervised user’s account by clicking on the user icon in the top-right corner of the browser window and selecting their name.
2. Click on the three-dot menu icon next to the user icon and choose “History” from the dropdown menu.
3. The browsing history for the supervised user will be displayed, showing a list of websites visited chronologically.
4. You can click on any website entry to view more details about the visit, including the date and time of access.
5. Additionally, you can access activity reports for a more comprehensive view of the supervised user’s online activities.
6. To access activity reports, visit the “Family link” website and sign in with your Google Account credentials.
7. Select the supervised user’s account, and you will be able to view detailed activity reports, including websites visited, total screen time, and app usage.
8. Activity reports provide valuable insights into the online behavior and habits of supervised users.
9. Use this information to identify any potential concerns and have informed conversations about safe internet usage with the supervised user.
By being able to view browsing history and activity reports, you can better understand and monitor the online activities of supervised users. This feature enables you to identify any potential issues, ensure safe internet usage, and have meaningful discussions about responsible online behavior. Regularly reviewing browsing history and activity reports is a proactive approach to maintaining a safe and secure browsing environment for supervised users.
Disable Guest Browsing
Disabling guest browsing in Google Chrome is an important step to enhance security and control over the browsing experience of supervised users. By disabling guest browsing, you can restrict access to the browser and ensure that only authorized users can use the browser. Here’s how to disable guest browsing:
1. Open Google Chrome and click on the three-dot menu icon at the top-right corner of the browser window.
2. From the drop-down menu, select “Settings” to access the Chrome settings page.
3. In the settings page, scroll down and click on “Advanced” to display additional settings options.
4. Under the “Privacy and security” section, click on “Manage other people.”
5. On the “Manage other people” page, you’ll see the option to “Enable guest browsing.” Toggle the switch to the “Off” position.
6. Disabling guest browsing will prevent anyone from using the Chrome browser in guest mode on your computer.
7. For supervised users, it is important to ensure that guest browsing is disabled to maintain control and accountability.
8. Additionally, consider setting up supervised users individually, as this offers more control and customization options.
9. Once you have disabled guest browsing, click “Done” to save the changes.
By disabling guest browsing, you can secure the browsing environment and prevent unauthorized access to the Chrome browser. This precautionary measure ensures that only trusted individuals are able to use the browser, providing a safer and more controlled browsing experience for supervised users.