
Why Cleaning Your VCR Heads is Important
Despite the advancements in technology, many people still own and cherish their VCRs. These vintage devices can bring back memories of watching favorite movies or recording special moments. However, over time, the VCR heads – the small metal parts responsible for reading and writing signals on the tape – can become dirty or clogged with debris.
Regularly cleaning your VCR heads is crucial for maintaining optimal performance and extending the lifespan of your beloved device. Here are a few reasons why cleaning VCR heads is important:
- Improved Playback Quality: Over time, dust, dirt, and grime can accumulate on the VCR heads, resulting in poor playback quality. If you notice fuzzy or distorted images, audio dropouts, or erratic tracking, it’s likely that the heads need cleaning. By removing the debris from the heads, you can restore the sharpness and clarity of your videos.
- Prevention of Tape Damage: Dirty VCR heads can damage your precious video tapes. When the heads are clogged, the tape may not run smoothly, causing it to get stuck or tangled in the VCR mechanism. This can lead to tape breakage or stretching, permanently damaging your tapes. Regular cleaning helps ensure smooth tape movement and minimizes the risk of damage.
- Prolonged VCR Lifespan: Cleaning the VCR heads regularly is an effective way to extend the life of your VCR. When the heads are dirty, the VCR has to work harder to read the tape, putting additional strain on the motor and other mechanical parts. By keeping the heads clean, you can reduce wear and tear, improving the overall longevity of your VCR.
- Optimized Recording Performance: If you use your VCR to record content, cleaning the heads is essential. Dirty heads can result in poor recording quality, with glitches, dropouts, or distorted audio. By maintaining clean heads, you can ensure optimal recording performance, capturing your favorite shows or memories with clarity and precision.
Regular maintenance, including cleaning the VCR heads, is crucial for preserving the performance and longevity of your VCR. By dedicating a little time and effort to clean the heads, you can enjoy improved playback, protect your video tapes, and maximize the lifespan of your cherished VCR. Let’s dive into the step-by-step process of cleaning VCR heads in the following sections.
Before You Begin: What You’ll Need
Before diving into the process of cleaning your VCR heads, it’s essential to gather the necessary tools and materials. Here’s a list of what you’ll need:
- Soft Lint-Free Cloth: Choose a gentle cloth, such as a microfiber cloth or a lens cleaning cloth. Avoid using abrasive materials like paper towels, as they can scratch the delicate surfaces of the VCR heads.
- Isopropyl Alcohol or VCR Head Cleaning Solution: Isopropyl alcohol is widely available and effective for cleaning VCR heads. Alternatively, you can use a VCR head cleaning solution specifically designed for this purpose. Avoid using strong solvents or household cleaners, as they may damage the VCR heads or other components of the device.
- Small Screwdriver: Depending on the model of your VCR, you may need a small screwdriver to remove the cover and access the VCR heads. Make sure you have the appropriate size and type of screwdriver to prevent damage to the VCR casing or screws.
- Cleaning Cassette: A cleaning cassette is a convenient option for cleaning VCR heads. These cassettes contain special cleaning tapes that effectively remove debris from the heads. Look for a cleaning cassette designed for your specific VCR model.
- Cotton Swabs: Cotton swabs can be useful for reaching tight spaces and corners during the cleaning process. They allow you to apply cleaning solution precisely and remove stubborn dirt or residue.
- Compressed Air or Handheld Vacuum: To remove loose dust and debris from inaccessible areas, you can use a can of compressed air or a handheld vacuum with a soft brush attachment. This will help to ensure a thorough cleaning of the VCR heads and other components.
Having these supplies on hand will ensure a smooth and successful VCR head cleaning process. Once you’ve gathered all the necessary tools and materials, you’re ready to proceed with the cleaning steps. Let’s move on to the next section where we will guide you through the process of cleaning your VCR heads.
Step 1: Unplug Your VCR and Remove the Cover
Before you can begin cleaning the VCR heads, it’s essential to ensure the device is unplugged to avoid any risk of electrical shock. Once you’ve done that, follow these steps to remove the cover:
- Locate the Screws: Flip your VCR over and examine the bottom panel. You will likely notice several small screws holding the cover in place. Using a small screwdriver, carefully remove these screws and set them aside in a safe place.
- Slide Off the Cover: Once you’ve removed all the screws, gently slide or lift off the cover of your VCR. Take care not to force it, as some models may have clips or tabs holding the cover in place. If you encounter resistance, double-check for any missed screws or obstructions.
- Place the Cover Safely: Set aside the VCR cover in a clean and secure location. This will prevent it from getting damaged or attracting dust while you clean the VCR heads.
As you remove the cover, take note of the internal components and the location of the VCR heads. This will help you navigate the cleaning process more easily. Additionally, you might want to consult the user manual or reference online resources for your specific VCR model to ensure you handle the device appropriately.
By following these steps, you’ve successfully unplugged the VCR and removed its cover. The next section will guide you through locating the VCR heads, so you can proceed with the cleaning process. Let’s move on!
Step 2: Locate the VCR Heads
Now that you have removed the cover of your VCR, it’s time to locate the VCR heads. The heads are responsible for reading and writing the signals on the tape, so identifying their location is crucial for effective cleaning. Here’s how you can find the VCR heads:
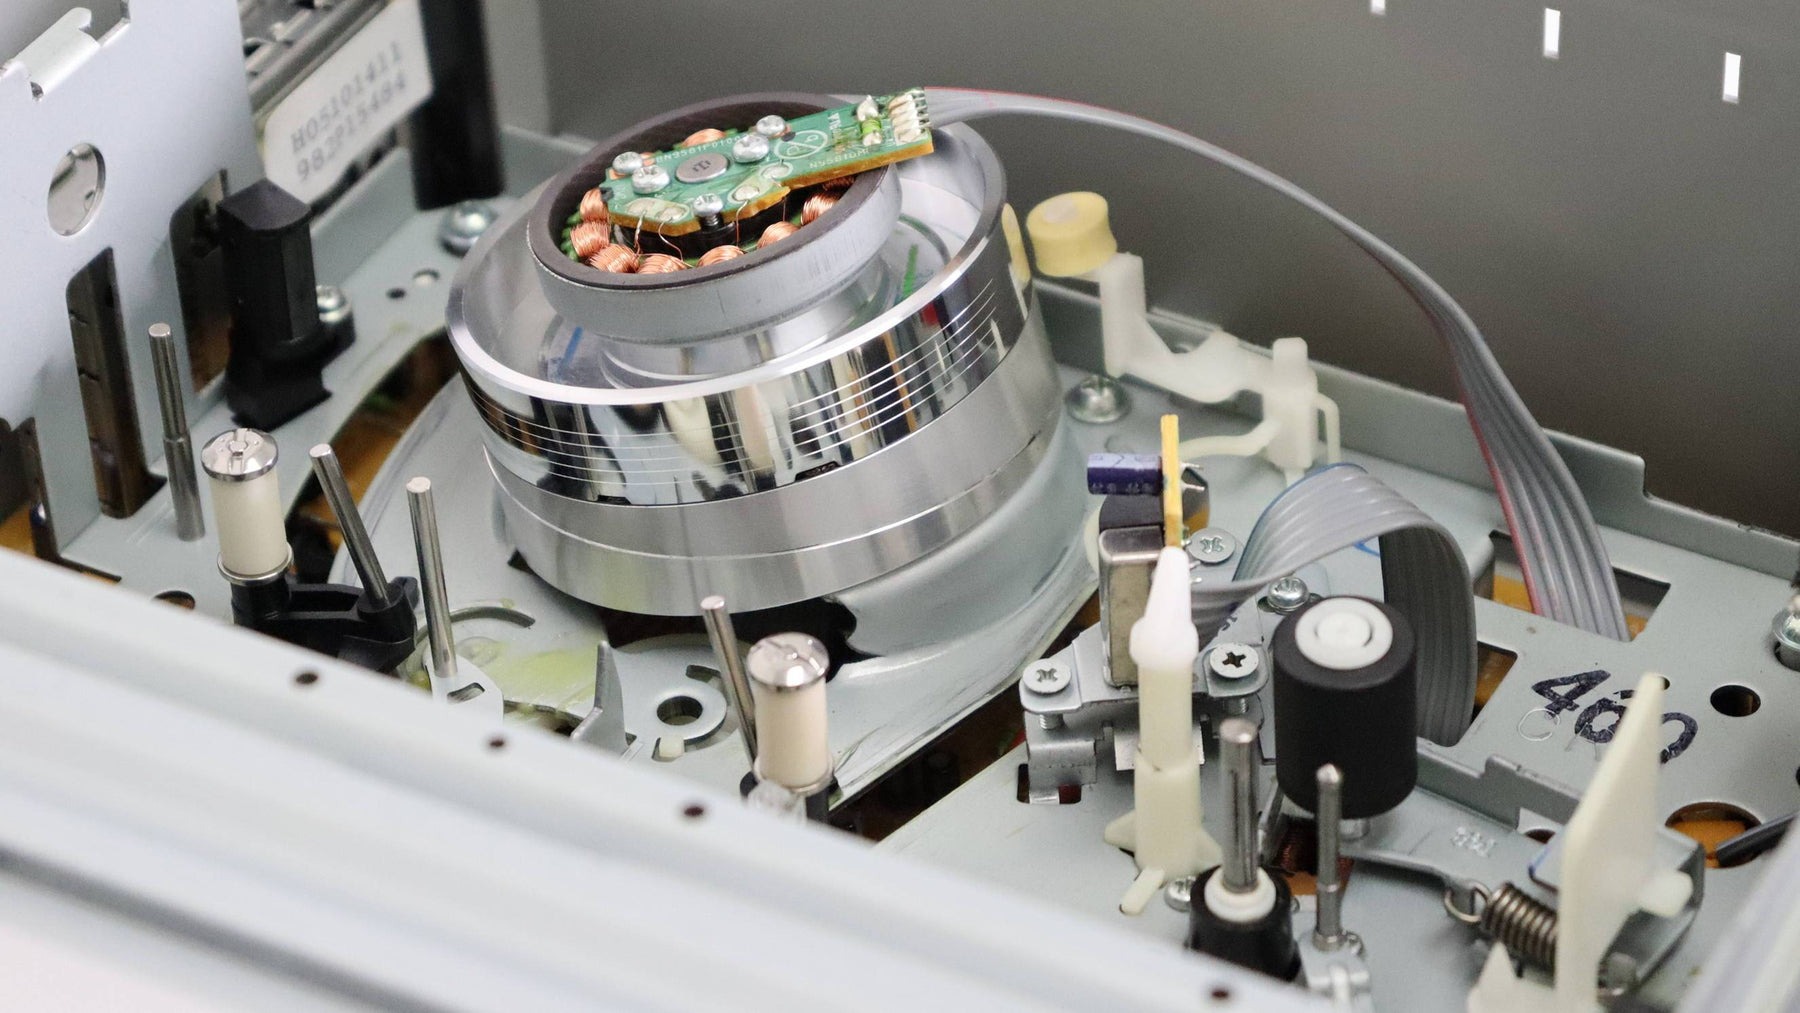
- Identify the Video Drum: The VCR heads are typically located on the video drum, which is a silver or black cylindrical component that spins the tape. The video drum is often positioned towards the front or center of the VCR mechanism. Take a moment to familiarize yourself with the different components inside the VCR and locate the video drum.
- Spot the VCR Head Assembly: On the video drum, you will find the VCR head assembly. This assembly consists of one or more small metal heads that come into contact with the magnetic tape during playback or recording. The exact number and arrangement of heads may vary depending on the VCR model.
- Note the Orientation: While examining the VCR head assembly, pay attention to the orientation of the heads. There may be labels or arrows indicating which side of the assembly faces towards the tape. This information will be helpful when it comes to cleaning the heads manually or using a cleaning cassette.
It’s important to handle the VCR heads with care as they are delicate and susceptible to damage. Avoid touching the heads directly with your fingers, as they are sensitive to oils and fingerprints. If you accidentally touch the heads, gently wipe them with a lint-free cloth lightly dampened with isopropyl alcohol.
Now that you have successfully located the VCR heads, you are ready to move on to the next step, which involves preparing the cleaning solution. Let’s proceed!
Step 3: Prepare the Cleaning Solution
Before you can start cleaning the VCR heads, it’s essential to prepare the cleaning solution. The right solution will help effectively remove dirt and debris from the heads, ensuring optimal performance. Here’s how you can prepare the cleaning solution:
- Isopropyl Alcohol: If you are using isopropyl alcohol, start by ensuring you have the correct concentration. Look for 90% or higher isopropyl alcohol, as lower concentrations may contain more water, which can leave residue on the heads. Avoid using rubbing alcohol, as it may have additives that can damage the heads. If necessary, purchase isopropyl alcohol from a pharmacy or electronics store.
- Dilute if Required: If you have purchased concentrated isopropyl alcohol that needs to be diluted, follow the instructions on the bottle. Typically, you will need to mix the concentrated alcohol with distilled water. Avoid using tap water, as it may contain minerals or impurities that can leave residue on the heads.
- VCR Head Cleaning Solution: If you prefer using a VCR head cleaning solution, refer to the manufacturer’s instructions. These specialized solutions are formulated to effectively clean the heads without damaging them. Follow the recommended guidelines regarding quantity and application.
- Dampen the Cleaning Cloth or Swab: Once you’ve prepared the cleaning solution, dampen a soft lint-free cloth or a cotton swab with the solution. Be cautious not to oversaturate the cloth or swab, as excess liquid can drip inside the VCR and cause damage.
Remember, the cleaning solution is crucial in safely and effectively removing debris from the VCR heads. Avoid using strong solvents, household cleaners, or abrasive materials, as they can harm the delicate heads or other components of the device.
With the cleaning solution ready, you’re now prepared to move on to the next steps: using a cleaning cassette or manually cleaning the VCR heads. We will explore both methods in the following sections, so let’s proceed!
Step 4: Use a Cleaning Cassette
Using a cleaning cassette is a convenient and straightforward method to clean the VCR heads. These cassettes are designed to remove dirt and debris from the heads while being safe for the VCR’s delicate components. Here’s how you can use a cleaning cassette:
- Insert the Cleaning Cassette: Open the VCR cassette compartment and insert the cleaning cassette just like you would with a regular VHS tape. Ensure it is properly seated and aligned with the VCR mechanism.
- Engage the Cleaning Cycle: Once the cleaning cassette is inserted, close the VCR cassette compartment. Press play on the VCR’s control panel or remote to engage the cleaning cycle. The cleaning cassette contains special cleaning tapes designed to gently scrub the VCR heads as the tape plays.
- Follow the Instructions: Pay attention to any instructions provided with the cleaning cassette. Some cassettes may require you to play the tape for a specified duration, while others may have an automatic cleaning cycle that stops after a certain period. Ensure you follow the manufacturer’s guidelines for optimal cleaning effectiveness.
- Eject the Cleaning Cassette: Once the cleaning cycle is complete, eject the cleaning cassette from the VCR by pressing the eject button or using the controls on the VCR’s panel. Be cautious not to touch the tape inside the cassette, as it may be wet with cleaning solution.
Using a cleaning cassette is a quick and hassle-free way to clean your VCR heads. However, keep in mind that these cassettes may not be as effective in removing stubborn debris or heavy buildup. If you notice persistent issues with playback quality even after using a cleaning cassette, you may need to manually clean the VCR heads, which we will cover in the next step.
With the cleaning cassette process completed, you are now prepared to move forward with manual cleaning of the VCR heads. Let’s explore this method in the following section!
Step 5: Cleaning the VCR Heads Manually
If you prefer a more hands-on approach or if the cleaning cassette method hasn’t fully resolved the issues with your VCR heads, manual cleaning is another option. Here’s a step-by-step guide on how to clean the VCR heads manually:
- Dampen the Cloth or Swab: Take a soft lint-free cloth or a cotton swab and dampen it with the cleaning solution you prepared earlier. Ensure that it is not dripping with liquid, as excess moisture can be harmful to the VCR heads.
- Locate the VCR Heads: Refer back to the previous step and identify the location of the VCR head assembly. You may need to use a flashlight or magnifying glass to see them more clearly.
- Gently Wipe the VCR Heads: With the dampened cloth or swab, gently wipe the VCR heads in a back-and-forth motion. Apply light pressure to remove any dirt or debris that may have accumulated. Avoid touching any other delicate parts inside the VCR.
- Clean the Video Drum: While you’re cleaning the heads, it’s a good idea to clean the video drum as well. Take another portion of the cloth or a fresh cotton swab dampened with the cleaning solution and carefully wipe the surface of the video drum. This will help ensure smoother playback and recording.
- Avoid Excessive Force: It’s important to handle the VCR heads and the video drum with caution. Do not apply excessive force or scrub vigorously, as this can damage the delicate components of the VCR.
- Allow the Heads to Dry: After cleaning, ensure that the VCR heads are dry before proceeding. The cleaning solution, if applied correctly, should evaporate quickly. Alternatively, you can use a dry lint-free cloth or allow the heads to air dry naturally.
Manual cleaning is effective in removing stubborn debris or residue that may not be fully eliminated by a cleaning cassette. However, be aware that excessive cleaning or using abrasive materials can cause damage to the VCR heads, so it’s important to exercise caution throughout the process.
Now that you have successfully cleaned the VCR heads, let’s move on to the next step, where we address cleaning the video drum. This step further enhances the performance of your VCR. Let’s continue!
Step 6: Cleaning the Video Drum
In addition to cleaning the VCR heads, it’s essential to clean the video drum to ensure optimal playback and recording quality. The video drum is responsible for spinning the tape and plays a vital role in the VCR’s functionality. Here’s how you can clean the video drum:
- Prepare a Clean Cloth or Swab: Take a fresh portion of a soft lint-free cloth or a clean cotton swab. It’s important to use a separate cloth or swab from the one used to clean the VCR heads to prevent any potential transfer of debris.
- Dampen the Cloth or Swab: Dampen the cloth or swab with the cleaning solution that you prepared earlier. Again, ensure that it is not overly saturated with liquid to prevent any damage to the VCR.
- Locate the Video Drum: Identify the video drum, which is the rotating cylindrical component responsible for spinning the tape. It can typically be found near the VCR heads.
- Gently Wipe the Video Drum: Carefully wipe the surface of the video drum using the dampened cloth or swab. Move in a gentle back-and-forth motion to remove any accumulated dirt or debris. Be cautious not to apply excessive pressure or scrub aggressively, as this may damage the delicate components of the VCR.
- Allow the Video Drum to Dry: Once you have cleaned the video drum, allow it to air dry naturally or use a dry lint-free cloth to gently pat it dry. Ensure that the drum is completely dry before reassembling your VCR.
Cleaning the video drum helps maintain smooth tape movement, prevents playback issues, and ensures consistent performance from your VCR. Be sure to clean the video drum regularly, especially if you notice any buildup or debris during your cleaning process.
Now that you have successfully cleaned the VCR heads and the video drum, let’s move on to the next step, where we will guide you through reassembling your VCR. Stay with us!
Step 7: Reassemble Your VCR
Now that you have completed the cleaning process for your VCR heads and video drum, it’s time to reassemble the VCR. Follow these steps to ensure proper reassembly:
- Inspect the Internal Components: Before reassembling your VCR, take a moment to inspect the internal components, ensuring that there is no leftover debris or foreign objects that could interfere with the VCR’s functionality.
- Place the Cover: Take the VCR cover that you set aside earlier and align it correctly with the VCR chassis. Gently slide or lower the cover back into position. Ensure that it fits snugly and aligns with any clips or tabs on the VCR casing.
- Replace the Screws: Once the VCR cover is properly positioned, retrieve the screws that you removed in the first step. Using a small screwdriver, carefully reinsert and tighten each screw until they are secure. Be cautious not to overtighten, as it may damage the VCR casing or the screws themselves.
- Double-Check for Loose Parts: After reassembling the VCR, double-check that all screws are securely fastened and that there are no loose parts. A loose component could cause damage or interfere with the VCR’s operation, so it’s essential to make sure everything is properly tightened.
Once you have completed these steps, you have successfully reassembled your VCR after cleaning the heads and video drum. Your VCR is now ready for use.
Remember to keep up with regular maintenance to prevent excessive buildup and extend the lifespan of your VCR. Routine cleaning of the heads and video drum, along with proper storage and handling of tapes, will help ensure optimal performance and longevity.
Now that your VCR is reassembled, let’s move on to the final step: testing your VCR to ensure it is working properly. Stay tuned!
Step 8: Test Your VCR
After cleaning the VCR heads, video drum, and reassembling your VCR, it’s important to test its functionality to ensure that the cleaning process was successful. Follow these steps to test your VCR:
- Connect the Cables: Ensure that your VCR is properly connected to your television or monitor using the appropriate cables. Double-check that all connections are secure and that the cables are in good condition.
- Plug In and Power On: Plug your VCR back into a power outlet and turn it on. Wait a few moments for the VCR to power up and stabilize.
- Insert a Test Tape: Take a test tape, preferably one with known good content, and carefully insert it into the VCR’s cassette compartment. Close the compartment securely.
- Playback Test: Press the play button on your VCR’s control panel or use the remote control to initiate playback. Observe the quality of the audio and video playback. Check for any issues such as dropouts, glitches, or distortion that may have been present prior to cleaning. Ensure that the playback is smooth and the audio is clear.
- Record Test: If you use your VCR for recording, perform a recording test. Select a source, such as a TV channel or an external video input, and initiate a recording. Monitor the quality of the recording, ensuring that it captures the content without any glitches or distortions.
- Fast Forward and Rewind Test: Test the fast forward and rewind functions to ensure they are working smoothly. Look for any unusual noises or jerky movements during these processes.
- Eject the Tape: Once you have finished testing, press the eject button to safely remove the test tape from the VCR’s cassette compartment.
By thoroughly testing your VCR after cleaning, you can be confident in its performance and ensure that the cleaning process has resolved any playback issues or quality concerns.
If you encounter any persistent problems with playback quality or functionality, it may indicate a more significant issue that requires professional attention or a deeper cleaning. In such cases, reaching out to a qualified technician or considering professional servicing may be necessary.
Congratulations! You have successfully completed the cleaning and testing process for your VCR. With regular maintenance and proper care, your VCR can continue to bring you hours of enjoyment and nostalgia.
Tips for Maintaining Your VCR Heads
Regular maintenance is key to extending the life and optimal performance of your VCR heads. Here are some tips to help you maintain your VCR heads:
- Clean the VCR Heads Regularly: Make it a habit to clean your VCR heads periodically. Regular cleaning helps prevent dirt and debris buildup, ensuring smooth playback and recording.
- Avoid Dirty or Damaged Tapes: Dirty or damaged tapes can transfer debris onto the VCR heads, causing issues. Clean or replace tapes that show signs of dust, dirt, or damage before inserting them into your VCR.
- Use High-Quality Tapes: High-quality tapes not only deliver better video and audio performance but also reduce the risk of shedding or leaving residue on the VCR heads. Invest in reputable brands for your tapes.
- Store Tapes Properly: Proper tape storage is crucial to preventing damage to both the tapes and the VCR heads. Store tapes in their original cases, in a cool and dry environment, away from direct sunlight and magnetic fields.
- Avoid Frequent Rewinding and Fast Forwarding: Excessive rewinding and fast forwarding can put unnecessary strain on the VCR heads. Minimize unnecessary fast forwarding and rewinding to prolong the life of your heads.
- Remove Dust and Debris: Regularly remove dust and debris from your VCR using a soft brush or compressed air. This prevents particles from settling on the heads and potentially causing damage.
- Avoid Tinkering with Internal Components: Unless you have proper training and experience, avoid attempting to repair or modify the internal components of your VCR. Mishandling or incorrect adjustments can lead to irreparable damage.
- Consult a Professional: If you encounter persistent issues or if your VCR heads require extensive cleaning or repair, it’s best to seek the assistance of a qualified technician who specializes in VCR maintenance and repair.
By following these tips, you can ensure that your VCR heads remain in optimal condition, providing you with the best possible playback and recording experience.
Remember, proper maintenance and care are essential for the longevity and performance of your VCR. Enjoy your VCR and relish the nostalgia and joy it brings!