
Backup Your Data
Prior to performing a clean install of Windows XP, it is crucial to back up your important data to ensure it is not lost during the installation process. Creating a backup will serve as a safeguard against any potential data loss or corruption. Here are the steps to help you safely backup your data:
- Identify valuable files: Take some time to identify the files and folders that contain your important data. This may include documents, photos, videos, music, and any other personal files.
- Choose a backup method: There are various methods you can use to back up your data. Consider using an external hard drive, USB flash drive, cloud storage service, or backup software.
- Create a backup plan: Determine how frequently you want to back up your data. It is generally recommended to perform regular backups to ensure you have the most recent versions of your files.
- Transfer files to the chosen backup location: Connect the external hard drive or insert the USB flash drive to your computer. Copy and paste the identified files and folders to the backup location. If you are using a cloud storage service, upload your files to the designated folder.
- Verify the backup: After the files have been transferred, double-check the backup location to ensure all the files have been successfully copied. It’s a good practice to open a few files to make sure they are intact and accessible.
- Label and organize: If you are using physical media for backup, such as DVDs or CDs, label them clearly with the date and contents. This will make it easier to locate specific files if needed in the future.
- Keep your backup in a safe place: Store your backup in a secure location away from potential hazards like water, heat, and theft. Consider keeping a duplicate copy of the backup in a separate physical location for added protection.
By following these steps, you can ensure the safety of your important data before proceeding with the clean installation of Windows XP. Having a backup in place will provide you with peace of mind and make the transition smoother. Once you have completed the backup process, you are now ready to proceed with preparing a Windows XP installation disc or USB.
Prepare a Windows XP Installation Disc or USB
In order to perform a clean install of Windows XP, you will need to have a Windows XP installation disc or a USB flash drive that contains the Windows XP installation files. Here are the steps to help you prepare the necessary installation media:
- Obtain a valid Windows XP installation disc: If you already have a Windows XP installation disc, ensure that it is a legitimate and valid copy. Alternatively, you can purchase a retail copy or download an ISO file from a trusted source.
- Create a bootable USB drive: If you prefer to use a USB flash drive instead of a disc, you can create a bootable USB drive using the Windows USB/DVD Download Tool or third-party software like Rufus. This will allow you to install Windows XP from the USB drive.
- Download Windows XP service packs: If your Windows XP installation disc does not include service packs, it is advisable to download and save the necessary service packs to a separate USB drive or folder. This will ensure that your installation contains the latest updates and security patches.
- Collect necessary drivers and software: Before starting the installation process, gather the drivers for your computer’s hardware components, such as the graphics card, sound card, and network adapter. If possible, download the latest drivers from the manufacturers’ websites and save them to a USB drive for easy access during the installation.
- Verify the integrity of the installation media: It is essential to make sure that the installation disc or USB drive is in good condition and free from errors. Check for any visible scratches or damage on the disc surface, or use software tools to verify the integrity of the USB drive.
Prepare the Windows XP installation disc or USB drive in advance to avoid any last-minute issues. Double-check that you have a valid copy of Windows XP, create a bootable USB drive if necessary, and gather the necessary drivers and software. Verifying the integrity of the installation media will ensure a smooth and error-free installation process. With the Windows XP installation media prepared, you are now ready to move on to the next steps of accessing the BIOS settings and setting your computer to boot from the installation disc or USB.
Access the BIOS Settings
Before you begin the clean installation of Windows XP, it is important to access the BIOS (Basic Input Output System) settings on your computer. The BIOS is a firmware interface that controls the basic functions of your computer, including the hardware settings. Here are the steps to help you access the BIOS settings:
- Restart your computer: Begin by restarting your computer. If your computer is already powered on, save any open files and click on the “Restart” option in the Start menu.
- Enter the BIOS: During the startup process, you will need to press a specific key or combination of keys to enter the BIOS. Common keys to access the BIOS include F2, Del, Esc, or F12. The key to enter the BIOS may vary depending on the computer manufacturer, so refer to your computer’s documentation or look for on-screen prompts.
- Navigate the BIOS: Once you have successfully entered the BIOS, you will be presented with a menu or interface. Use the arrow keys on your keyboard to navigate through the different options.
- Identify the boot order: Look for an option related to “Boot” or “Boot Order” in the BIOS menu. This setting determines the order in which your computer looks for bootable devices. Ensure that the installation disc or USB drive is set as the first boot device.
- Save and exit: After you have made the necessary changes to the boot order, navigate to the “Exit” or “Save & Exit” option. Select it, and choose the option to save your changes and exit the BIOS.
Accessing the BIOS settings is a crucial step as it allows you to set the correct boot device for the clean installation of Windows XP. By entering the BIOS and adjusting the boot order, you ensure that your computer will prioritize the installation disc or USB drive during the startup process. Once you have successfully accessed the BIOS settings and made the necessary adjustments, you are now ready to proceed to the next step of setting your computer to boot from the installation disc or USB.
Set Your Computer to Boot from the Installation Disc or USB
Before you can begin the clean installation of Windows XP, you need to ensure that your computer is set to boot from the installation disc or USB. This step ensures that the computer will recognize the installation media as the primary boot device. Here’s how you can set your computer to boot from the installation disc or USB:
- Restart your computer: Start by restarting your computer. If your computer is currently powered on, save any open files and click on the “Restart” option in the Start menu.
- Access the boot menu: During the restart process, pay attention to any on-screen instructions or prompts that appear. Look out for a message that says something like “Press [KEY] to enter boot menu” or “Press [KEY] for boot options.” This key could be F8, F12, or Esc, depending on your computer’s manufacturer.
- Choose the boot device: Once you access the boot menu, you will be presented with a list of devices to boot from. Use the arrow keys on your keyboard to highlight the installation disc or USB drive. Press Enter to select it as the boot device.
- Initiate the boot process: After selecting the boot device, your computer will begin the boot process from the chosen device. You may see a Windows XP logo or a message indicating that it is loading the necessary files for the installation process.
- Proceed with the Windows XP installation: Once the boot process is complete, your computer will present the Windows XP setup screen. From here, you can follow the on-screen instructions to proceed with the clean installation of Windows XP.
By setting your computer to boot from the installation disc or USB, you ensure that the Windows XP installation process will begin smoothly. This step allows your computer to recognize the installation media as the primary boot device, enabling you to proceed with the next steps of the installation process. After setting your computer to boot from the installation disc or USB, you are now ready to start the installation process and move on to the next steps, such as partitioning the hard drive and formatting it.
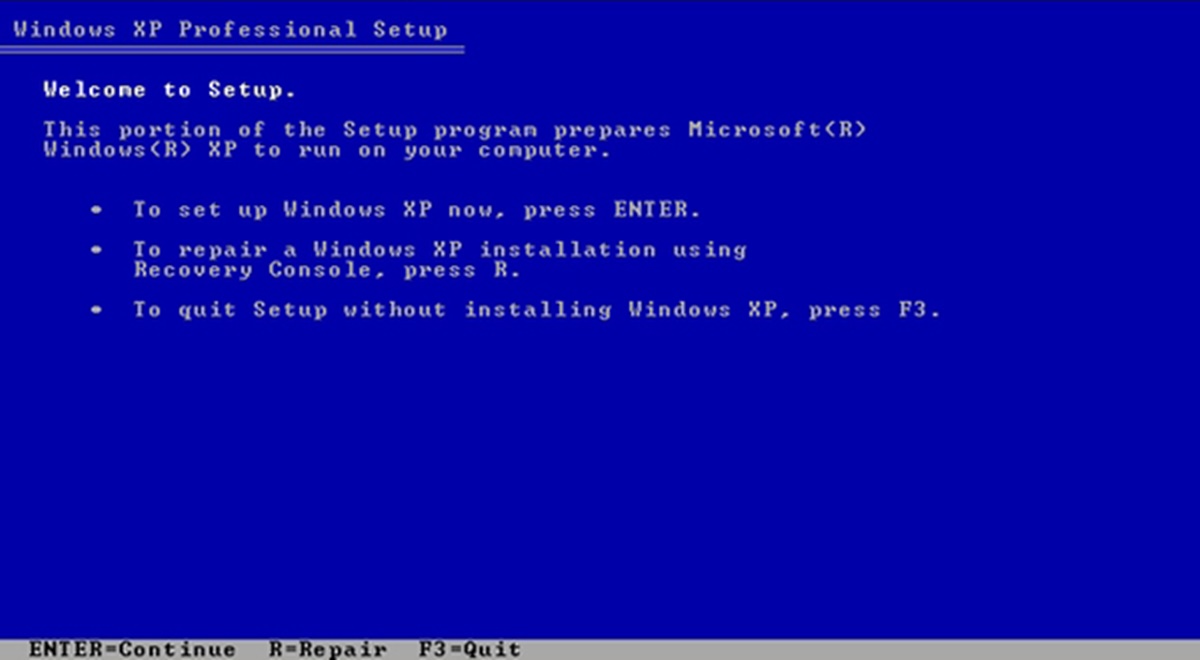
Start the Installation Process
After successfully setting your computer to boot from the Windows XP installation disc or USB, you are ready to begin the installation process. This step marks the official start of installing Windows XP on your computer. Follow these steps to initiate the installation:
- Select your language and regional preferences: When the Windows XP setup screen appears, you will be prompted to select your desired language, time zone, and keyboard layout. Make the appropriate selections and click “Next” to continue.
- Accept the End-User License Agreement (EULA): Read through the license agreement carefully and click the checkbox to indicate that you accept the terms. Click “Next” to proceed.
- Choose the installation type: Windows XP offers two installation options: “Upgrade” and “New installation (advanced)”. If you are performing a clean install, select the “New installation (advanced)” option.
- Select the destination drive: If you have multiple hard drives or partitions, you will be prompted to choose which drive to install Windows XP on. Select the appropriate drive and click “Next” to continue.
- Format the drive: If you are performing a clean install and the selected drive contains existing data, you will be prompted to format it. Formatting will erase all data on the drive, so ensure that you have backed up any necessary files. Choose the desired file system (usually NTFS) and select the formatting option. Click “Next” to begin the formatting process.
- Copying files: The installation process will now copy the necessary files to the hard drive. This may take some time, and your computer may restart during this process. Let the installation proceed until it reaches the next step.
- Provide user information: You will be prompted to enter your name and organization (if applicable). You may also choose to enter a product key at this stage or skip it for now. Click “Next” to continue.
- Set the computer’s name and password: Enter a name for your computer and create a password (optional) to secure the Administrator account. Click “Next” to proceed.
- Enter the product key: If you haven’t entered the product key earlier, you will be prompted to enter it now. Input the valid Windows XP product key provided with your installation media. Click “Next” to continue.
- Configure date, time, and networking settings: Set the appropriate date, time, and time zone for your location. Choose the networking settings that best suit your requirements. Click “Next” to proceed.
- Finalize the installation: The installation process will now complete, and your computer will restart. Allow it to restart and proceed to the next steps of driver installation, configuring Windows settings, and installing essential software.
Starting the Windows XP installation process is a critical step towards setting up an operating system that suits your needs. Follow the on-screen instructions and make the necessary selections to customize your installation. Once the installation is complete, your computer will reboot, and you can then move on to the next steps of configuring Windows XP settings and installing drivers for hardware peripherals.
Partitioning the Hard Drive
As part of the clean installation process, it is recommended to partition the hard drive on your computer. Partitioning involves dividing the hard drive into separate sections, known as partitions. Each partition acts as a separate storage area and allows you to organize your data more efficiently. Here’s how you can partition the hard drive during the Windows XP installation:
- Choose the unpartitioned space: During the installation process, you will be presented with a list of available hard drives and unpartitioned space. Select the unpartitioned space and click “Enter” to continue.
- Select the partition size: Specify the desired size for the partition. You can assign the entire available space to a single partition, or create multiple partitions by allocating specific sizes to each. Use the arrow keys and the “Enter” key to define the size.
- Format the partition: After specifying the partition size, select the file system that you wish to use for the partition. The recommended file system for Windows XP is NTFS. Choose the formatting option and click “Enter” to begin formatting the partition.
- Repeat for additional partitions: If you want to create multiple partitions, repeat the above steps for each additional unpartitioned space. Allocate the desired size and format each partition as needed.
- Continue the Windows XP installation: Once you have finished partitioning the hard drive, the installation process will proceed as normal. The Windows XP setup will copy the necessary files and complete the installation on the specified partitions.
Partitioning the hard drive during the Windows XP installation provides several benefits. It allows you to keep your data organized and separate different types of files. For example, you could have one partition for the operating system and another for personal files. Additionally, partitioning can improve system performance by isolating the operating system from user data and reducing the risk of data loss.
Consider your needs and preferences when partitioning the hard drive. Determine the ideal partition sizes and formats based on the intended usage of your computer. Once the partitioning is complete, you can proceed with the installation of Windows XP and configure the settings to customize your system further.
Format the Hard Drive
After partitioning the hard drive, the next step in the clean installation of Windows XP is to format the partitions. Formatting prepares the partitions for the installation of the operating system by erasing any existing data and setting up the file system. Follow these steps to format the hard drive:
- Select the partition: During the installation process, you will be prompted to choose the partition where you want to install Windows XP. Use the arrow keys to select the desired partition and press “Enter” to continue.
- Choose the format option: A list of available format options will be displayed. Select the desired file system format to use for the partition. The recommended format for Windows XP is NTFS (New Technology File System).
- Confirm the format: Once you have selected the format option, you will be asked to confirm your decision. Keep in mind that formatting will erase all data on the selected partition. Make sure that you have backed up any important files before proceeding.
- Wait for the formatting process: After confirming the format, the formatting process will begin. Depending on the size of the partition, this process may take a few minutes. Do not interrupt or restart your computer during this time.
- Complete the formatting process: Once the formatting is complete, the Windows XP installation process will continue. The setup will copy the necessary files to the formatted partition and proceed with the system installation.
Formatting the hard drive is an essential step to ensure a clean installation of Windows XP. It prepares the selected partition by erasing any existing data and sets up the file system for Windows to be installed. It is important to note that formatting the hard drive will permanently delete all data on the partition, so be sure to backup any important files before formatting.
By properly formatting the hard drive, you create a clean slate for the installation of Windows XP. This helps ensure a smooth installation process and allows Windows XP to be installed on a reliable and organized file system. Once the formatting process is complete, you can proceed with the installation of Windows XP and configure the necessary settings for your system.
Install Windows XP
Once you have partitioned and formatted the hard drive, you are ready to proceed with the installation of Windows XP. This step involves copying the necessary files and configuring the operating system on your computer. Follow these steps to install Windows XP:
- Select the partition: During the installation process, you will be prompted to choose the partition where you want to install Windows XP. Use the arrow keys to select the desired partition and press “Enter” to continue.
- Begin the installation: Once you have selected the partition, the Windows XP setup will begin copying the necessary files to your computer. This process may take several minutes, so be patient and wait for it to complete.
- Provide regional and user settings: After the files have been copied, you will be prompted to provide regional and language settings, as well as create a user account. Follow the on-screen instructions to set your preferences and create the necessary user account.
- Activate Windows XP: During the installation, you will be asked to activate your copy of Windows XP. Enter the product key provided with your installation media and follow the prompts to complete the activation process. Activation ensures that your copy of Windows XP is genuine and properly licensed.
- Configure Windows XP settings: Once Windows XP is installed, you will be guided through a series of setup screens to configure additional settings. This includes network setup, automatic updates, and other customization options. Follow the prompts and make the necessary selections based on your preferences.
- Complete the installation: Once you have finished configuring the settings, Windows XP will finalize the installation and prepare your computer for use. This process may take some time, and your computer may restart during this stage.
Installing Windows XP allows you to have a functional operating system on your computer. By following the prompts and making the necessary selections, you can customize the settings according to your preferences. This includes providing regional settings, activating Windows XP, and configuring additional setup options.
After completing the installation, your computer will be ready to use with Windows XP. You can proceed to install drivers for hardware peripherals, essential software programs, and perform necessary updates to ensure the system is up to date and secure. Enjoy using Windows XP on your newly installed operating system!
Configure Windows XP Settings
After successfully installing Windows XP, it is essential to configure the settings to optimize your user experience and ensure the smooth operation of the operating system. Here are the steps to help you configure the Windows XP settings:
- Network setup: If you have an internet connection, Windows XP will prompt you to set up the network settings. Choose the appropriate connection type, whether it be wired or wireless, and follow the on-screen instructions to connect to your network.
- Automatic updates: Windows XP offers the option to enable automatic updates, ensuring that your system is kept up to date with the latest security patches and bug fixes. It is highly recommended to enable this feature to protect your computer and enhance its performance.
- Display and resolution: Adjust the display settings to your preference. Set the screen resolution to the optimal level for your monitor and adjust other display properties like color depth and font sizes as needed.
- Power settings: Configure the power settings according to your usage. Choose the power scheme that suits your needs, whether it is optimizing for performance or conserving energy. Customize the sleep, hibernation, and power button functions to align with your preferences.
- User accounts: Create additional user accounts if needed. User accounts provide separate profiles for different users, ensuring privacy and personalization. Assign appropriate privileges and controls to each user account based on their needs.
- Desktop customization: Personalize your desktop by choosing a background image, customizing the theme, and adding desktop icons. Windows XP allows you to customize the appearance of the operating system to reflect your personal style.
- Software and program installation: Install essential software programs that you require for everyday tasks, such as web browsers, productivity suites, media players, and antivirus software. Be cautious when downloading and installing software from the internet, ensuring that it comes from trusted sources.
- Browser and internet settings: Set up your default web browser preferences, such as homepage, search engine, and privacy settings. Configure internet options, including proxy settings, security settings, and cookie management, to maximize your browsing experience.
- File and folder organization: Organize your files and folders in a logical and efficient manner. Create dedicated folders for different types of files and use meaningful names to easily locate and manage your data.
- Firewall and security: Enable the built-in Windows XP firewall or install a third-party firewall program to protect your computer from unauthorized access. Regularly update and run antivirus software to scan for and remove any potential threats.
Configuring the Windows XP settings allows you to customize the operating system to suit your preferences and optimize the performance of your computer. By emphasizing security and personalization, you can create a tailored user experience while ensuring that your system is protected against potential threats. Take the time to configure these settings after the installation to fully optimize your Windows XP experience.
Install Drivers for Hardware Peripherals
After installing Windows XP, it is important to install the necessary drivers for your hardware peripherals. Drivers are software applications that allow the operating system to communicate with and control various hardware devices connected to your computer. Here are the steps to help you install drivers for hardware peripherals:
- Identify the hardware peripherals: Make a list of the hardware peripherals connected to your computer, such as the graphics card, sound card, network adapter, printer, and scanner.
- Download the drivers: Visit the manufacturers’ websites or use the driver installation discs that came with your hardware peripherals to download the latest drivers. Ensure that you select the appropriate drivers for your specific model and operating system (Windows XP).
- Run the driver installation files: Once the driver files are downloaded, locate the files and run the installation programs. Follow the on-screen instructions to install the drivers. Some drivers may require you to restart your computer for the changes to take effect.
- Update drivers through Windows Update: After installing the drivers for your hardware peripherals, it is recommended to perform a Windows Update. This will allow Windows XP to search for any available driver updates and install them as needed.
- Verify proper installation: Once the drivers are installed and updated, verify the proper functioning of your hardware devices. Test each device to ensure that it is functioning correctly and that all features and functionalities are operational.
- Install additional software: Some hardware peripherals may require additional software to unlock advanced features or to facilitate configuration. Check the manufacturer’s website for any optional software or utilities related to your hardware peripherals.
Installing the correct drivers for your hardware peripherals is crucial for ensuring optimal performance and compatibility. By following the provided steps, you can successfully install and update the necessary drivers. It is important to keep your hardware drivers up to date to provide the best experience and functionality for your peripherals.
Regularly checking for driver updates and installing them when available can also help improve the stability and security of your system. Remember to periodically check for new drivers to ensure that your hardware peripherals remain supported and optimized on your Windows XP system.
Install Essential Software and Programs
After installing Windows XP and drivers for your hardware peripherals, it’s time to install essential software and programs to enhance your computer’s functionality. Here are the steps to help you install the necessary software:
- Create a software list: Make a list of the essential software and programs you frequently use, such as web browsers, productivity suites, media players, and communication tools.
- Download the software: Visit the official websites or trusted software repositories to download the installation files for the desired software. Ensure that you download the correct version compatible with Windows XP.
- Run the installation files: Locate the downloaded installation files and double-click on them to run the installation programs. Follow the on-screen instructions for each software installation.
- Customize the installation: Some software installations offer customization options during the installation process. Review the available options and select the desired settings.
- Activate and register the software: If required, enter the product key or activate the software using the provided instructions. Some software may require online registration or creation of an account.
- Check for updates: After installing the software, it is important to check for updates through the software’s built-in update feature. This ensures that you have the latest bug fixes and security patches.
- Organize and manage shortcuts: Once the software installations are complete, organize the program shortcuts on your desktop or start menu for easy access.
- Test the software: Verify the proper functionality of the installed software by launching each program and testing its features and functionalities.
Installing essential software and programs is crucial to setting up your computer for everyday usage. From web browsers to productivity tools, the software you choose will enhance your computing experience and allow you to perform various tasks efficiently.
Remember to periodically update the installed software to benefit from new features, performance improvements, and security enhancements. Keeping your software up to date ensures a smooth and secure operation of your Windows XP system.
Activate Windows XP
After installing Windows XP, it is important to activate your copy of the operating system to ensure its validity and authenticity. Activating Windows XP allows you to access all the features and receive updates from Microsoft. Here are the steps to activate Windows XP:
- Access the activation wizard: Click on the “Start” menu, go to “All Programs,” then “Accessories,” and finally, “System Tools.” Within the “System Tools” folder, click on the “Activate Windows” option.
- Choose the activation method: In the activation wizard, you have two options: “Activate Windows over the internet” and “Activate Windows by phone.” Select the method that is most convenient for you.
- Activate Windows over the internet: If you choose to activate over the internet, Windows XP will try to connect to the activation servers automatically. Follow the on-screen instructions, provide the necessary information if prompted, and wait for the activation process to complete.
- Activate Windows by phone: If you choose to activate by phone, you will be provided with a toll-free phone number and an installation ID. Follow the instructions on the screen, call the provided number, and enter the installation ID when prompted. The automated system will guide you through the remaining steps to complete the activation process.
- Enter the product key: During the activation process, you may be asked to enter the product key. The product key should be located on the packaging of your Windows XP installation disc or in the confirmation email if you purchased a digital copy.
- Confirm the successful activation: Once the activation process is complete, you will receive a confirmation message indicating the successful activation of Windows XP.
- Verify the activation status: To ensure that Windows XP is properly activated, go to the “System” control panel by right-clicking “My Computer” and selecting “Properties.” In the “System” window, you should see the activation status and details of your operating system.
Activating Windows XP is a necessary step to validate your copy of the operating system. By activating, you can access all the features and receive important updates, including security patches and bug fixes. It is important to activate Windows XP within the specified timeframe to maintain a genuine and legal installation.
Make sure to keep a record of your product key in a safe place for future reference. If you encounter any issues during the activation process, contact Microsoft support for further assistance.
Update Windows XP
After installing Windows XP, it is crucial to regularly update the operating system to ensure optimal performance, security, and compatibility with the latest software and hardware. Updating Windows XP involves downloading and installing the latest updates and patches released by Microsoft. Here are the steps to update Windows XP:
- Enable automatic updates: Open the Control Panel from the Start menu and navigate to the “Security Center.” Click on “Automatic Updates” and select the option to enable automatic updates. This allows Windows XP to automatically download and install updates.
- Manually check for updates: If you prefer to manually check for updates, you can do so by accessing the Windows Update website. Open Internet Explorer and go to the address: http://windowsupdate.microsoft.com. Follow the on-screen instructions to check for available updates.
- Select the desired updates: After checking for updates, Windows XP will present you with a list of available updates. It is important to select all critical updates, security updates, and recommended updates to maintain the security and stability of your system. Additionally, consider downloading and installing any optional updates that may be beneficial.
- Start the update process: Once you have selected the desired updates, click on the “Install” or “Download” button to start the update process. Windows XP will download and install the selected updates.
- Restart if necessary: In some cases, updates may require a system restart to complete the installation. If prompted to do so, save your work and restart your computer.
- Repeat the update process regularly: It is important to repeat the update process regularly to ensure that your Windows XP system remains up to date. Set a reminder to check for updates at least once a month or enable automatic updates to ensure that your system is continuously updated.
Updating Windows XP is essential to keep your computer secure, improve system stability, and ensure compatibility with the latest software and hardware. By regularly updating your operating system, you can protect your computer from potential security threats and benefit from performance enhancements.
Remember to back up your important data before performing any updates to avoid any potential data loss during the update process. If you encounter any issues with updates, contact Microsoft support for further assistance.
Restore Your Backed Up Data
After completing a clean installation of Windows XP and ensuring that your system is up to date, it’s time to restore your backed-up data. By restoring your files and folders, you can regain access to your important documents, photos, videos, and other personal data. Here’s how you can restore your backed-up data:
- Connect your backup device: If you backed up your data to an external hard drive or USB flash drive, connect the device to your computer. Ensure that it is properly recognized and accessible.
- Run the backup software: Many backup software programs have a restore feature, allowing you to easily recover your backed-up files and folders. Locate and run the backup software you used for the initial backup.
- Select the backup source: In the backup software, locate the backup source, which is typically your external hard drive or USB flash drive. Select the backup source to proceed with the restore process.
- Choose the files to restore: Depending on the backup software, you can typically choose to restore specific files and folders or restore everything. Select the files and folders you want to restore to your computer.
- Select the restore destination: Choose the location on your computer where you want to restore the files and folders. Ensure that you have enough available disk space on the selected destination.
- Start the restore process: Once you have configured the restore settings, initiate the restore process. The backup software will begin restoring your files and folders to the specified location on your computer. Depending on the size of the backup and the speed of your computer, it may take some time to complete.
- Verify the restored data: After the restore process is complete, take some time to verify the restored data. Open a few files and folders to ensure that everything has been successfully restored and is accessible.
- Organize your restored data: Now that your data is restored, organize it according to your preferred file and folder structure. Create new directories if necessary and move files to their appropriate locations.
- Regularly back up your data: To prevent future data loss, it is important to establish a regular backup routine. Schedule periodic backups of your important files and folders to ensure that you always have a recent copy available.
Restoring your backed-up data is a crucial step after a clean installation of Windows XP. It allows you to regain access to your important files and folders, ensuring that your data is intact and accessible. Take the time to carefully restore and organize your data to maintain a well-structured and organized file system on your computer.
Remember to regularly back up your data to minimize the risk of data loss. By establishing a consistent backup routine, you can protect your important files and ensure peace of mind in the event of any unforeseen circumstances.