Clearing Browsing History on Chrome
When it comes to clearing your browsing history on Google Chrome, there are a few simple steps you can follow to ensure that your browsing activity is removed from your computer. Clearing your browsing history can help protect your privacy and free up some space on your device. Here’s how to do it:
1. Open Google Chrome: Launch Google Chrome by clicking on its icon in the taskbar or desktop.
2. Access the Menu: Click on the three-dot menu icon located at the top-right corner of the browser window. This will open a dropdown menu.
3. Select History: In the dropdown menu, hover over the “History” option, and another menu will appear to the side.
4. Choose “History” again: From the side menu, click on the “History” option. This will open a new tab displaying your browsing history.
5. Clear Browsing Data: On the left-hand side of the browsing history tab, you’ll see a list of options. Click on “Clear browsing data” to open the settings page.
6. Choose Time Range: In the “Clear browsing data” settings page, you can choose the time range for which you want to clear your browsing history. You can select “Last hour,” “Last 24 hours,” “Last 7 days,” “Last 4 weeks,” or “All time.” If you want to clear everything, select “All time.”
7. Select Data Types: Below the time range options, you’ll see a list of data types to clear. This includes browsing history, download history, cookies and other site data, cached images and files, passwords, and more. Select the data types you want to clear.
8. Click “Clear data”: Once you’ve chosen the time range and data types, click on the “Clear data” button. Chrome will now clear your browsing history and any other selected data.
By following these steps, you can easily clear your browsing history on Google Chrome. It’s important to note that after clearing your browsing history, the data cannot be recovered. So, make sure you really want to remove it before proceeding. Regularly clearing your browsing history can help maintain your privacy, improve browser performance, and ensure a clutter-free browsing experience.
Clearing Browsing History on Firefox
If you’re using Firefox as your preferred web browser, it’s important to know how to clear your browsing history to maintain your privacy and keep your browsing experience optimized. Follow these simple steps:
1. Open Firefox: Launch Firefox by clicking on its icon in the taskbar or desktop.
2. Access the Menu: Look for the three horizontal lines in the top-right corner of the browser window. Click on them to open the Firefox menu.
3. Select History: From the Firefox menu, click on the “History” option. This will open a dropdown menu with various history-related options.
4. Clear Recent History: In the history dropdown menu, click on “Clear Recent History.” A new window will pop up, allowing you to customize the settings for clearing your browsing history.
5. Choose Time Range: In the “Clear Recent History” window, you can choose the time range for which you want to clear your browsing history. You have options like “Last hour,” “Last two hours,” “Last four hours,” “Today,” “Everything,” and more. Select the time range that suits your needs.
6. Select Data Types: Below the time range options, you’ll see a list of data types to clear. This includes browsing & download history, form & search history, cookies, cache, and more. You can choose to clear all the data types or select specific ones.
7. Click “Clear Now”: Once you’ve chosen the time range and data types, click on the “Clear Now” button. Firefox will now clear your browsing history and any other selected data.
By following these steps, you can effectively clear your browsing history on Firefox. It’s worth noting that clearing your browsing history removes the data permanently, so make sure you really want to delete it. Regularly clearing your browsing history can help protect your privacy, enhance browser performance, and ensure a clutter-free browsing experience in Firefox.
Clearing Browsing History on Safari
When using Safari as your browser of choice on a Mac or iOS device, it’s important to know how to clear your browsing history to protect your privacy and improve the performance of your browser. Follow these steps to clear your browsing history on Safari:
1. Open Safari: Launch the Safari browser by clicking on its icon in the dock or the Applications folder on your Mac or by tapping its icon on your iOS device’s home screen.
2. Access the History Menu: In the top menu bar of Safari, click on “History” to open the history menu.
3. Choose “Clear History”: From the history menu, select “Clear History…” to open the clearing options.
4. Choose Time Range: In the Clear History window, you can select the time range for which you want to clear your browsing history. You have options such as the last hour, today, today and yesterday, and all history. Select the desired time range.
5. Clear History: Once you’ve chosen the time range, click on the “Clear History” button. Safari will now clear your browsing history for the selected time period.
6. Confirm Clearing: A confirmation dialog will appear asking if you’re sure you want to clear your history. Click on “Clear” to proceed.
It’s important to note that clearing your browsing history in Safari will also remove website data, which includes cookies and other cached files. If you’re signed into iCloud and have Safari enabled, the changes you make to your browsing history on one device will be automatically synced across all your devices.
By regularly clearing your browsing history in Safari, you can maintain your privacy, free up storage space, and ensure a smoother browsing experience. It’s good practice to clear your history periodically, especially if you share your device with others or if you’re concerned about your online privacy.
Clearing Browsing History on Internet Explorer
If you are using Internet Explorer as your web browser, it’s important to know how to clear your browsing history to maintain your privacy and optimize your browsing experience. Here are the steps to clear your browsing history in Internet Explorer:
1. Open Internet Explorer: Launch Internet Explorer by clicking on its icon in the taskbar or desktop.
2. Access the Tools Menu: Look for the gear icon in the top-right corner of the browser window. Click on it to open the Tools menu.
3. Choose Internet Options: From the Tools menu, select “Internet Options.” This will open a new window with various settings.
4. Clear Browsing History: In the Internet Options window, go to the “General” tab and look for the “Browsing history” section. Click on the “Delete” button.
5. Select Data to Delete: In the “Delete Browsing History” window, you can choose the data you want to delete. This includes browsing history, cookies, temporary internet files, and more. Select the options you wish to clear.
6. Clear the Selected Data: Once you’ve chosen the data types you want to delete, click on the “Delete” button. Internet Explorer will now clear your browsing history and any other selected data.
7. Confirm Clearing: A confirmation dialog will appear asking if you’re sure you want to delete the data. Click on “Yes” to proceed.
By following these steps, you can easily clear your browsing history on Internet Explorer. Regularly clearing your browsing history can help maintain your privacy, optimize browser performance, and keep your browsing experience clutter-free. It’s important to note that clearing your browsing history permanently deletes the data, so make sure you want to remove it before proceeding.
Clearing Browsing History on Microsoft Edge
When using Microsoft Edge as your web browser, it’s important to know how to clear your browsing history to protect your privacy and optimize your browsing experience. Here’s how you can clear your browsing history in Microsoft Edge:
1. Open Microsoft Edge: Launch Microsoft Edge by clicking on its icon in the taskbar or desktop.
2. Access the Settings Menu: Look for the three-dot menu icon in the top-right corner of the browser window. Click on it to open the Settings menu.
3. Choose History: From the Settings menu, select “History.” This will display your browsing history in a new tab.
4. Clear Browsing Data: In the browsing history tab, you’ll see a sidebar on the left-hand side with several options. Click on the “Clear browsing data” option.
5. Select Data to Clear: In the “Clear browsing data” settings page, you can choose the data you want to clear. This includes browsing history, cookies and other site data, cached images and files, and more. Select the options you wish to clear.
6. Choose Time Range: Below the data types, you’ll see a dropdown menu to choose the time range for which you want to clear your browsing history. You can select options like “Last hour,” “Last 24 hours,” “Last 7 days,” and “All time.”
7. Clear Data: Once you’ve selected the data types and time range, click on the “Clear” button. Microsoft Edge will now clear your browsing history and any other selected data.
Note that clearing your browsing history on Microsoft Edge removes the data permanently, so ensure that you want to delete it before proceeding. Regularly clearing your browsing history can help maintain your privacy, enhance browser performance, and ensure a clutter-free browsing experience.
Clearing Browsing History on Opera
If you’re using Opera as your preferred web browser, it’s important to know how to clear your browsing history to protect your privacy and optimize your browsing experience. Follow these steps to clear your browsing history in Opera:
1. Open Opera: Launch Opera by clicking on its icon in the taskbar or desktop.
2. Access the Menu: Look for the Opera logo or the “Menu” button located in the top-left corner of the browser window. Click on it to open the menu.
3. Choose “Settings”: From the menu, select “Settings” or “Preferences” (depending on your Opera version). This will open the settings page.
4. Find “Privacy & Security”: In the left sidebar of the settings page, click on “Advanced” and then select “Privacy & Security.”
5. Clear Browsing Data: Under the “Privacy & Security” section, click on the “Clear browsing data” button. A new window will open with various options.
6. Select Data Types: In the “Clear browsing data” window, you can choose the data types you want to clear. This includes browsing history, cookies, cached images, and files, and more. Select the options you wish to remove.
7. Choose Time Range: Below the data types, you’ll see a dropdown menu to choose the time range for which you want to clear your browsing history. You can select options like “Last hour,” “Last 24 hours,” “Last 7 days,” and “All time.”
8. Clear Data: Once you’ve selected the data types and time range, click on the “Clear data” button. Opera will now clear your browsing history and any other selected data.
By regularly clearing your browsing history in Opera, you can maintain your privacy, free up storage space, and ensure a smoother browsing experience. It’s good practice to clear your history periodically, especially if you share your device with others or if you’re concerned about your online privacy.
Checking Browser History Using Keyboard Shortcuts
If you want to quickly check your browser history without navigating through menus or settings, you can use keyboard shortcuts. Keyboard shortcuts offer a convenient and efficient way to access your browsing history with just a few keystrokes. Here are the keyboard shortcuts for checking browser history in popular web browsers:
Google Chrome:
- Windows: Press Ctrl + H to open the browsing history directly.
- Mac: Press Command + Y to access the browsing history.
Firefox:
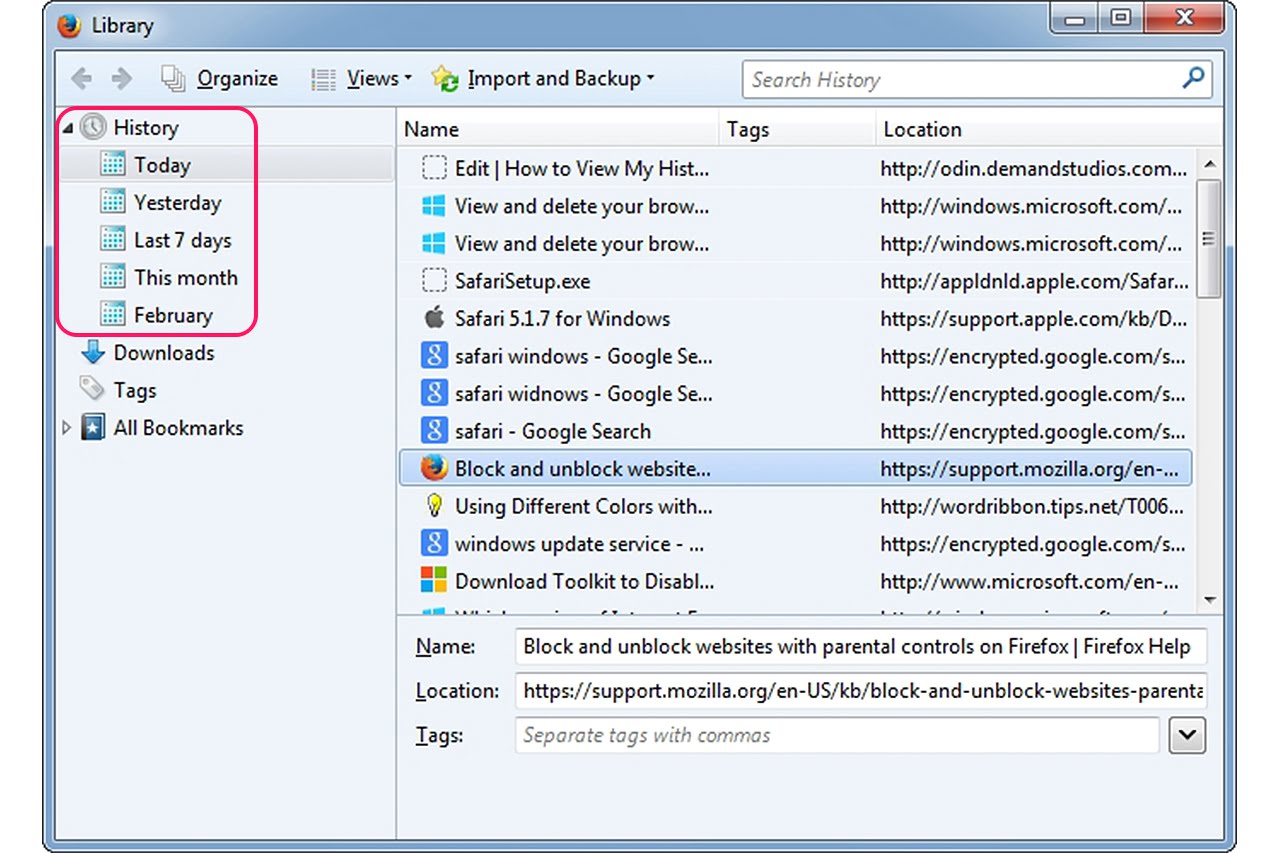
- Windows: Press Ctrl + Shift + H to open the Library window, where you can access your browsing history.
- Mac: Press Command + Shift + H to open the Library window and view your browsing history.
Safari:
- Windows and Mac: Press Command + Y to open the browsing history sidebar.
Internet Explorer:
- Windows: Press Ctrl + H to open the browsing history sidebar where you can view your history.
Microsoft Edge:
- Windows: Press Ctrl + H to open the browsing history sidebar and view your history.
Opera:
- Windows and Mac: Press Ctrl + H to access the browsing history directly.
By utilizing these keyboard shortcuts, you can quickly check your browsing history without wasting time navigating through various menus. This can be especially helpful when you want to access a previously visited webpage or find information you recently viewed.
Keep in mind that keyboard shortcuts may vary based on the browser version and operating system you are using. It’s a good idea to familiarize yourself with the specific shortcuts for your browser to optimize your browsing experience.
Checking Browser History Using the Browsing History Menu
Another way to check your browser history is by using the browsing history menu within your web browser. This method allows you to access your browsing history through the browser’s user interface. Here’s how you can do it:
1. Open Your Web Browser: Launch your preferred web browser by clicking on its icon in the taskbar or desktop.
2. Access the Browsing History Menu: Look for the menu option that specifically mentions browsing history. The location of this option can vary depending on the browser you are using.
3. Click on the Browsing History Option: Once you locate the browsing history option in the menu, click on it to open the browsing history submenu or a dedicated tab with your browsing history.
4. Review Your Browsing History: In the browsing history submenu or tab, you will see a list of websites or webpages you have previously visited. The list may be organized by date, allowing you to easily find websites you’ve accessed on a specific day.
5. Click on a History Entry: To revisit a specific webpage, click on the corresponding entry in the browsing history list. This will directly take you back to that website, allowing you to view its content again.
6. Use Search or Sorting Options: Depending on your browser, you may have additional functionality available in the browsing history menu. Some browsers provide a search option to quickly find specific websites or provide sorting options to organize your browsing history by criteria such as date or website name.
By using the browsing history menu, you can easily view and navigate through the webpages you have visited. This is especially useful when you want to revisit a website you recently accessed or retrace your steps to find information you were searching for.
Remember that the browsing history menu can vary in appearance and location depending on the browser you are using. Explore the menu options in your specific browser to familiarize yourself with its browsing history functionality and make the most of this feature.
Checking Browser History Using the Browser Search Bar
Checking your browser history using the search bar is a quick and efficient method to find specific webpages or websites you have previously visited. By leveraging the search bar functionality, you can easily access your browsing history within seconds. Here’s how you can use the search bar to check your browser history:
1. Open Your Web Browser: Launch your preferred web browser by clicking on its icon in the taskbar or desktop.
2. Locate the Search Bar: Look for the search bar at the top of the browser window. It is typically labeled with the search engine you have set as default.
3. Click on the Search Bar: Click on the search bar to activate it and make it ready for your search input.
4. Start Typing: Begin typing a website URL or a search term related to the webpage you want to find. As you type, the search bar may display suggestions based on your browsing history or popular searches.
5. Look for Suggestions: Pay attention to the suggestions that appear in the search bar dropdown menu. These suggestions may include websites or webpages you have visited before.
6. Select a Suggestion: If you see the webpage or website you are looking for in the suggestions, click on it to visit that page directly.
7. Use the History Option: Some browsers offer a history option or a clock icon within the search bar that allows you to directly access your browsing history. Click on this option to view a list of your recently visited webpages.
8. Scroll Through History: In the browsing history dropdown menu, you can scroll through the list of webpages you have visited. Each entry may include the page title, URL, and the date and time you accessed it. Click on an entry to revisit that webpage.
Using the browser search bar is an intuitive way to access your browsing history. It enables you to quickly find specific webpages or websites without going through the menu or settings. This method is particularly useful when you have a specific webpage in mind or when you want to find a recently visited site.
Remember that the search bar functionality and appearance may vary depending on the browser you are using. Take some time to explore your browser’s search bar features to make the most of your browsing history search experience.
Checking Browser History Using Incognito Mode
If you’re concerned about privacy or simply want to access the internet without leaving traces of your browsing activity, you can use the incognito mode available in most web browsers. Incognito mode, also known as private browsing, allows you to browse the internet without storing your browsing history. Here’s how you can check your browsing history when using incognito mode:
1. Open Your Web Browser: Launch your preferred web browser by clicking on its icon in the taskbar or desktop.
2. Activate Incognito Mode: Look for the option to open a new incognito or private browsing window. The location of this option may vary depending on the browser you are using.
3. Access the Browser Menu: Once you are in the incognito mode, open the browser menu by clicking on the menu icon located in the top-right corner of the browser window.
4. Look for the “History” Option: In the browser menu, you should find an option labeled “History” or a clock icon. Click on it to access the browsing history in the incognito mode.
5. Review Your Browsing History: In the browsing history window, you will see a list of websites or webpages visited during the current incognito session. This history is only available for the current incognito window and will be cleared once you close it.
6. Click on a History Entry: To revisit a specific webpage, click on the corresponding entry in the incognito browsing history list. This will directly take you back to that website, allowing you to view its content again.
7. Clear the Incognito Browsing History: If you want to remove the browsing history from the current incognito session, you can usually find an option to clear it in the browser menu. This ensures that no traces of your browsing activity remain on the device you are using.
By using incognito mode, you can browse the web without leaving a trail of your online activities. It’s important to note that while incognito mode protects your browsing history from being stored on your device, it does not make you completely anonymous online. Your internet service provider, employer, or certain websites may still be able to track your activities.
Remember to use incognito mode responsibly and understand its limitations. It’s a useful tool for temporary privacy, but for more comprehensive privacy protection, you may want to consider using a virtual private network (VPN) or other privacy-enhancing technologies.
Checking Browser History Using Internet Service Provider Logs
Checking your browser history using internet service provider (ISP) logs is a method that applies if you don’t have direct access to your browsing history or if it has been cleared from your device. ISPs have the ability to keep records of your internet activity through their logs, including the websites you visit. However, it’s important to note that accessing ISP logs typically requires legal authorization or cooperation from the ISP. Here’s an overview of how checking browser history through ISP logs works:
1. Legal Authorization: To access ISP logs, you usually need legal authorization, such as a search warrant or court order. Law enforcement agencies or authorized entities may obtain these legal permissions to investigate potential criminal activities.
2. Requesting ISP Assistance: If you are authorized to access ISP logs, you will need to work with the ISP to obtain the necessary information. Contact your ISP’s customer support or legal department to initiate the process.
3. Provide Required Information: The ISP may request specific details, such as the time period during which you want the browsing history, your account information, and the purpose for accessing the logs. Verify and provide the requested information as needed.
4. Wait for Response: Once you have submitted your request, you will need to wait for the ISP to process it. The time it takes to receive a response can vary depending on the specific circumstances and protocols of the ISP.
5. Examination of ISP Logs: If your request is approved, the ISP will provide you with access to the logs or relevant information. This will allow you to review the browsing history records as per your request.
It’s important to keep in mind that accessing ISP logs for browsing history is a complex process involving legal procedures and privacy considerations. It is typically reserved for specific investigations and legal purposes. For everyday users, it is essential to rely on the browsing history within your browser or device unless authorized legal access to ISP logs is granted.
Additionally, it’s worth noting that browsing history through ISP logs may not provide a complete picture of your browsing activity. Some websites may use secure connections (HTTPS), which encrypt the communication between your device and the website, making it difficult for ISPs to log the specific pages visited on those websites.
Understanding ISP logs and their role in browsing history allows you to have an overview of how the process works. However, it’s important to respect privacy rights and ensure that proper legal authorization is obtained before accessing such sensitive information.
Checking Browser History Using Parental Control Software
Parental control software provides a way for parents to monitor and manage their children’s online activities, including checking their browser history. This type of software allows parents to keep an eye on the websites their children visit and ensure they are staying safe online. Here’s how you can check browser history using parental control software:
1. Install Parental Control Software: Begin by installing a reputable parental control software that offers browsing history monitoring features. There are various options available, both free and paid, with different features and levels of control.
2. Set Up User Profiles: Once the software is installed, create user profiles for each family member, including your children. Specify the appropriate age restrictions and customize the settings based on your preferences and the level of control you want to have.
3. Enable Browsing History Monitoring: In the parental control software settings, find the option to enable browsing history monitoring. This may be labeled as “Browser History,” “Web Activity,” or something similar. Enable the feature to start capturing the browsing history of the designated user profiles.
4. Access Parental Control Dashboard: Open the parental control software dashboard either on your computer or through a mobile app. This dashboard is the central hub where you can monitor and manage various aspects of your children’s online activities, including browsing history.
5. View Browsing History Reports: Within the parental control dashboard, locate the browsing history section or report. This is where you can view the websites visited by your children, along with the dates and times of access.
6. Customize Filters and Restrictions: Many parental control software options allow you to further customize the filtering and restrictions applied to browsing history. You can block specific websites, set time limits, and create blacklists or whitelists as appropriate.
7. Continuously Monitor and Adjust: Regularly check the browsing history reports provided by the parental control software to stay informed about your children’s internet activity. Based on the reports, you can have conversations with your children about responsible internet usage and make necessary adjustments to the filtering and restriction settings.
Parental control software offers a valuable solution for parents who want to monitor their children’s online activities, including their browsing history. This helps parents ensure their children’s safety, manage screen time effectively, and guide them towards responsible internet usage.
It’s important to choose a reliable parental control software that meets your specific needs as a parent. Take the time to research and compare different options to find the one that offers the features and level of control you desire while respecting your children’s privacy.
Checking Browser History Using Third-Party Monitoring Software
Third-party monitoring software provides a way to track and monitor browsing activities on a computer or network. This software is often used by organizations or individuals who want to keep tabs on internet usage for various reasons such as security, productivity, or compliance. Here’s how you can check browser history using third-party monitoring software:
1. Install the Monitoring Software: Begin by installing a reputable third-party monitoring software on the target computer or network that you want to monitor. This software is typically purchased or subscribed to from a trusted provider that specializes in monitoring solutions.
2. Configure Monitoring Settings: Once the software is installed, customize the monitoring settings according to your requirements. This may include specifying which users or devices to monitor, setting up monitoring policies, and defining the level of detail you want to capture in the browsing history.
3. Enable Browsing History Monitoring: In the monitoring software’s settings, make sure to activate the browsing history monitoring feature. This feature should capture the URLs or websites visited, along with relevant details such as timestamps and user information.
4. Access the Monitoring Dashboard: Open the monitoring software’s dashboard, which is the centralized interface where you can view and analyze the collected data. This dashboard may be accessible through a web portal or a dedicated application provided by the monitoring software.
5. Review the Browsing History Logs: Within the monitoring dashboard, navigate to the section or report that shows the browsing history logs. This is where you can view the URLs visited, date and time stamps, and other relevant information about the browsing activities of the monitored users or devices.
6. Analyze and Generate Reports: Utilize the features provided by the monitoring software to analyze the browsing history data. This may include applying filters, generating reports, or exporting the data for further analysis or presentation.
7. Maintain Privacy and Compliance: It’s crucial to ensure that the monitoring activities comply with legal and ethical standards, especially in regards to privacy. Follow the relevant regulations and guidelines to protect the privacy rights of the users being monitored and maintain compliance with applicable laws.
Third-party monitoring software can be a powerful tool in situations where robust tracking and monitoring of browsing history is required. It provides valuable insights into internet usage patterns, helps identify potential security risks or policy violations, and assists in enforcing accountability and compliance.
However, it’s essential to use monitoring software responsibly and transparently, especially in the case of employee monitoring. Clear communication and obtaining consent from the individuals being monitored is important to maintain trust and respect privacy concerns.
Choose a reputable third-party monitoring software with solid security features and demonstrable privacy protections to ensure the data collected remains secure and confidential.
Checking Browser History on Mobile Devices
Checking browser history on mobile devices, such as smartphones and tablets, is slightly different compared to desktop or laptop computers. Mobile browsers offer intuitive methods to access and review browsing history. Here’s how you can check browser history on mobile devices:
1. Open the Browser: Unlock your mobile device and locate the browser app on your home screen or in the app drawer. Tap on the browser icon to launch it.
2. Access the Menu: Look for the menu icon in the browser interface, typically represented by three dots, three lines, or a gear icon. Tap on it to open the menu options.
3. Find “History” or “Browsing History”: In the browser menu, you should see an option labeled “History” or “Browsing History.” Tap on it to access your browsing history.
4. Review the Browsing History: Once you are in the browsing history section, you will find a list of webpages or websites you have recently visited. The list may be organized by date and time, making it easier to locate specific entries.
5. Tap on a History Entry: To revisit a specific webpage, tap on the corresponding entry in the browsing history list. This will take you back to that webpage, allowing you to view its content again.
6. Use Search or Filtering Options: Depending on the mobile browser you are using, you may have additional functionality available, such as a search bar or filtering options. You can use these features to search for specific webpages or refine your browsing history based on criteria like date, website name, or frequency of visits.
7. Clear Browsing History: If desired, you can also find an option within the browser menu to clear your browsing history. This will permanently remove all the recorded webpages from your device.
It’s important to note that the process of checking browser history may vary slightly depending on the mobile browser and device you are using. Some browsers may have different menu options or labels, so explore the interface to locate the browsing history feature.
Mobile browsers also offer features like incognito or private browsing mode, which allows you to browse the internet without saving your browsing history. To access private browsing mode, open the browser menu and look for options like “New Incognito Tab” or “Private Browsing.”
Regularly checking your browsing history on mobile devices can help you revisit previously visited webpages, find information, or maintain awareness of your online activities. However, be mindful of privacy concerns and ensure the security of your mobile devices to protect your browsing history from unauthorized access.
Considerations for Checking Someone Else’s Computer History
Checking someone else’s computer history is a delicate matter that requires careful consideration and respect for privacy. While there may be valid reasons for wanting to access another person’s browsing history, it is important to approach such situations with caution and adherence to ethical and legal standards. Here are some key considerations to keep in mind:
1. Privacy and Consent: Respecting someone’s privacy should be a top priority. It is essential to obtain the person’s informed consent before accessing their computer history. Without consent, accessing someone else’s browsing history may be deemed an invasion of privacy and could have legal implications.
2. Legal Compliance: Familiarize yourself with the local laws and regulations regarding privacy and computer use. In some jurisdictions, unauthorized access to another person’s computer history can be considered a violation of privacy laws or even a criminal offense. Ensure that you are complying with the applicable legal framework in your jurisdiction.
3. Relationship and Trust: Consider the nature of your relationship with the person whose computer history you wish to check. It is important to maintain trust and open communication. If you have concerns or suspicions, it may be more appropriate to address them directly with the person rather than resorting to checking their browsing history without their knowledge.
4. Purpose and Justification: Evaluate the purpose and justification for checking someone else’s computer history. Is it for legitimate reasons such as protecting someone’s safety or security, investigating potential illicit activities, or ensuring compliance with organizational policies? Understanding the motive behind your actions can help determine the most appropriate course of action.
5. Alternative Approaches: Before resorting to checking someone else’s computer history, consider alternative approaches to address your concerns or gather the necessary information. Open dialogue, discussing concerns, or seeking professional assistance may be more effective and respectful options.
6. Transparency and Communication: If there is a valid reason for checking someone else’s browsing history, transparency and open communication are key. Clearly explain your intentions, be honest about your concerns, and seek their consent before accessing their computer history.
It is crucial to approach checking someone else’s computer history with utmost respect for privacy, adherence to legal requirements, and consideration for the relationship and trust involved. Whenever possible, it is recommended to address concerns directly or seek professional guidance to ensure ethics, legality, and respect for privacy are maintained.
Tips for Maintaining Privacy and Security
In today’s digital age, maintaining privacy and security online is of utmost importance. With countless threats lurking on the internet, it is essential to adopt measures that safeguard your personal information and protect your online presence. Here are some valuable tips to help maintain your privacy and security:
1. Strong and Unique Passwords: Use strong, unique passwords for all your online accounts. Avoid using easily guessable information such as birthdays or common words. Consider using a password manager to securely store and generate strong passwords.
2. Two-Factor Authentication (2FA): Enable two-factor authentication whenever possible. This adds an additional layer of security by requiring a second verification step, such as a code sent to your mobile device, to access your accounts.
3. Regular Software Updates: Keep your devices and software up to date with the latest security patches and updates. These updates often contain important bug fixes and security enhancements that protect against vulnerabilities.
4. Secure Wi-Fi Networks: When connecting to Wi-Fi networks, ensure that you are using trusted and secure networks. Avoid connecting to public or unsecured Wi-Fi networks, as they can be vulnerable to hacking and unauthorized access to your data.
5. Use Virtual Private Networks (VPNs): Consider using a VPN service to encrypt your internet connection and protect your online activities from being tracked or intercepted. VPNs create a secure and private connection between your device and the internet.
6. Be Cautious with Personal Information: Be mindful of what personal information you share online. Avoid sharing sensitive information such as your full name, address, date of birth, or financial details unless necessary and within trusted platforms.
7. Secure Browsing Practices: Use secure browsing protocols such as HTTPS when accessing websites. Be cautious of phishing attempts by verifying URLs before entering any sensitive information.
8. Regularly Review Privacy Settings: Regularly review and adjust the privacy settings on your social media accounts, devices, and online platforms. Limit the amount of personal information shared and consider making your profiles private.
9. Exercise Caution with Email and Downloads: Be cautious when clicking on email attachments or downloading files from untrusted sources. Malicious attachments or downloads can contain malware or viruses that compromise your privacy and security.
10. Educate Yourself: Stay informed about the latest online threats and adopt safe digital practices. Keep up with security news, read security blogs, and follow reliable sources to stay updated.
By implementing these privacy and security tips, you can significantly reduce the risk of falling victim to online threats and protect your personal information. Be proactive in taking measures to safeguard your digital life and create a safe online environment for yourself and your loved ones.