
The Importance of Changing Your iPhone’s Name
Did you know that you can personalize the name of your iPhone? Many people overlook this feature and stick with the default name assigned by Apple. However, changing your iPhone’s name can bring about several benefits and enhance your overall user experience. Here are some reasons why you should consider changing your iPhone’s name:
- Personalization: Changing your iPhone’s name allows you to give it a unique and personal touch. By picking a name that resonates with you, you can add a sense of ownership and customization to your device.
- Easy Identification: If you have multiple Apple devices or are often in crowded places with other iPhone users, changing the name of your device can make it easier for you to identify it quickly. For example, you can include your initials or add a word that reflects its purpose, such as “Work iPhone” or “Travel Companion.”
- Enhanced Security: Giving your iPhone a custom name can serve as an added security measure. When connecting to Bluetooth devices or Wi-Fi networks, hackers may use generic iPhone names to target users. By changing your device’s name, you can make it more difficult for potential attackers to identify and target your device.
- Seamless Device Management: If you work in an organization or share your iPhone with family members, changing its name can simplify device management. With a unique and recognizable name, you can easily locate and manage your iPhone when using management tools or apps.
- Showcase your Personality: Your iPhone is an extension of your personality, so why not let it reflect who you are? By changing its name to something that represents your interests or style, you can add a personal touch and make your iPhone truly yours.
Overall, changing your iPhone’s name is a simple yet effective way to enhance your device’s personalization, security, and manageability. By taking a few minutes to customize the name, you can make your iPhone stand out among the crowd and enjoy an improved user experience.
How to Change Your iPhone’s Name Using Settings
If you’re ready to give your iPhone a new name, you can easily do so using the built-in settings on your device. Follow these step-by-step instructions to change your iPhone’s name:
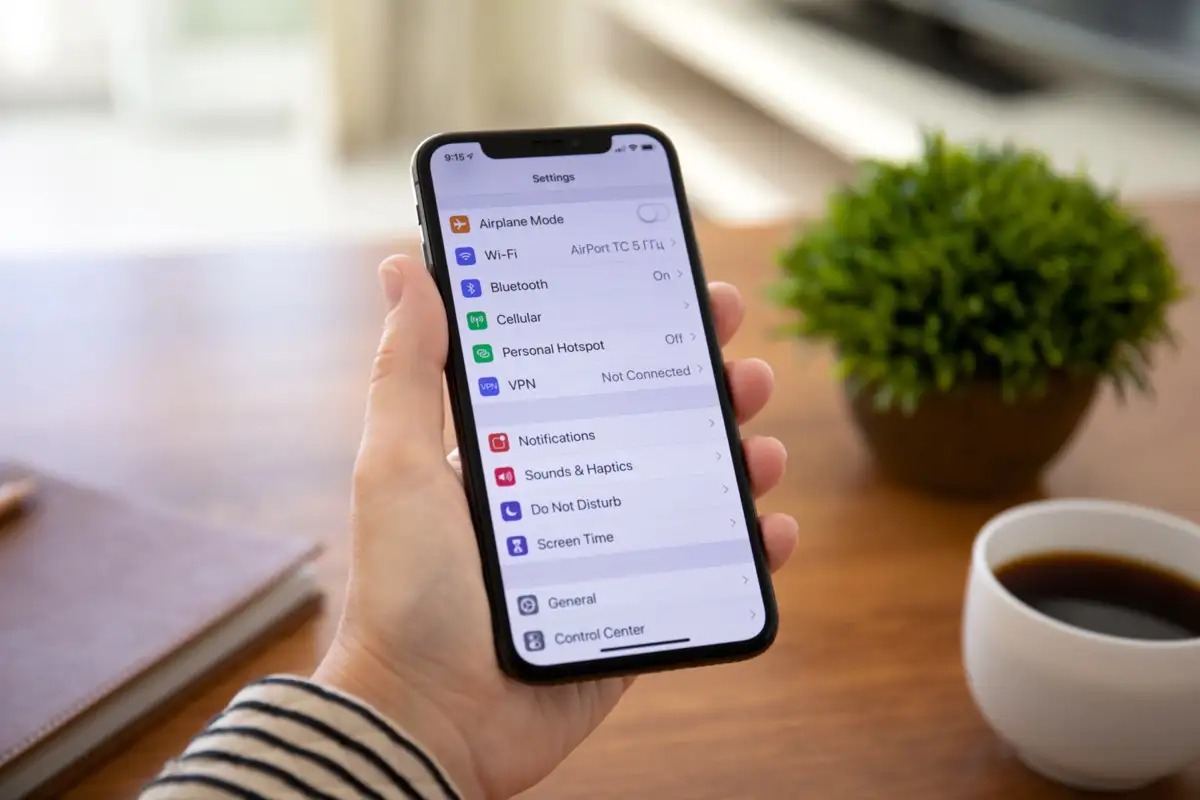
- Open the “Settings” app on your iPhone’s home screen.
- Scroll down and tap on “General.”
- In the “General” menu, tap on “About.”
- At the top of the “About” page, you’ll see the current name of your iPhone. Tap on it.
- Delete the existing name and enter a new name of your choice using the on-screen keyboard.
- Once you’ve entered the new name, tap on “Done” or the back arrow in the upper left corner of the screen to save the changes.
- Exit the “Settings” app by pressing the home button or swiping up from the bottom of the screen if you have an iPhone with Face ID.
That’s it! Your iPhone’s name will now be updated to the new name you entered. You can verify the change by going back to the “About” screen in the “General” settings.
It’s worth noting that changing your iPhone’s name using the settings is a straightforward and hassle-free process that doesn’t require any additional tools or software. Plus, it allows you to quickly personalize your device without any technical expertise.
Now that you know how to change your iPhone’s name using the settings, give it a try and unleash your creativity. Whether you choose a fun, descriptive, or meaningful name, customizing your iPhone’s name will add a personal touch to your device and make it truly yours.
Step-by-Step Guide to Changing Your iPhone’s Name
Are you ready to change your iPhone’s name but need a detailed walkthrough? Don’t worry, we’ve got you covered. Follow this step-by-step guide to easily change your iPhone’s name:
- Unlock your iPhone and navigate to the home screen.
- Tap on the “Settings” app. The app icon resembles gray gears.
- Scroll down the list of settings options and tap on “General.”
- In the “General” menu, look for and tap on “About.”
- On the “About” page, you’ll find various information about your iPhone, including its current name. Tap on the current name.
- A text field will appear, allowing you to edit the name. Use the on-screen keyboard to enter a new name for your iPhone.
- Once you’ve entered the desired name, tap on “Done” to save the changes.
- Exit the “Settings” app by pressing the home button at the bottom of the screen or using swipe gestures depending on your iPhone model.
Congratulations! You have successfully changed your iPhone’s name. You can confirm the update by going back to the “About” page in the “General” settings and verifying the new name.
Remember, the process of changing your iPhone’s name is relatively simple and doesn’t require any technical expertise. It’s a great way to add a personal touch to your device and make it stand out among the crowd.
Feel free to experiment with different names until you find one that perfectly reflects your style or purpose for the device. Whether it’s a creative, funny, or meaningful name, the choice is yours!
Now that you know the step-by-step process, go ahead and change your iPhone’s name to make it truly yours. Enjoy the personalized experience with your newly named iPhone!
How to Change Your iPhone’s Name Using iTunes
If you prefer to change your iPhone’s name using iTunes on your computer, follow these steps for a seamless renaming process:
- Connect your iPhone to your computer using a USB cable.
- Open iTunes on your computer. If you don’t have iTunes installed, you can download it from the official Apple website.
- Once your iPhone is connected, you will see its icon appear in the top left corner of the iTunes window. Click on the icon to access the device summary page.
- In the device summary page, you’ll find various details about your iPhone, including its current name. Click on the existing name next to the device icon.
- Type in the desired new name for your iPhone.
- Once you’ve entered the new name, press the “Enter” key on your keyboard to save the changes.
- Finally, safely disconnect your iPhone from your computer by clicking on the “Eject” button next to its name in iTunes or by using the appropriate method for your computer’s operating system.
That’s it! Your iPhone’s name is now updated using iTunes. To confirm the change, you can check the name on the device summary page in iTunes or on your iPhone itself.
Note that changing your iPhone’s name via iTunes provides an alternative method for those who prefer managing their device settings on a computer. It gives you more control and flexibility when it comes to naming your iPhone.
Remember to choose a name that resonates with you and effectively reflects the purpose or personality of your device. Whether it’s a professional, personal, or fun name, the choice is yours!
Now that you know how to change your iPhone’s name using iTunes, go ahead and give your device a personalized touch. Enjoy a uniquely named iPhone that truly represents you!
Changing Your iPhone’s Name with iCloud
If you prefer to change your iPhone’s name using iCloud, you can do so by following these simple steps:
- Ensure that your iPhone and the device you’re using to access iCloud are connected to the internet.
- On your iPhone, go to the “Settings” app and tap on your name at the top of the settings menu to access your Apple ID settings.
- In your Apple ID settings, tap on “iCloud.”
- Look for the “Name” option and tap on it.
- Delete the existing name and enter a new name for your iPhone using the on-screen keyboard.
- Once you’ve entered the desired name, tap on “Done” to save the changes.
- Your iPhone’s name will now be updated across all your Apple devices when connected to the internet.
That’s it! You have successfully changed your iPhone’s name using iCloud. The new name you entered will be reflected on your device and synced across all your Apple devices.
Using iCloud to change your iPhone’s name offers the convenience of automatic syncing, ensuring that the new name is consistent across all connected devices. This is especially useful if you have multiple Apple devices and want them to share the same name.
Remember to choose a name that resonates with you and makes your device easily identifiable. Whether it’s your initials, a personalized nickname, or a descriptive name, pick something that reflects your style and preferences.
Now that you know how to change your iPhone’s name using iCloud, take this opportunity to customize it to your liking. Enjoy a seamlessly synchronized and uniquely named iPhone that represents you!
Changing Your iPhone’s Name with Finder on macOS Catalina
If you’re using macOS Catalina or later, you can easily change your iPhone’s name using Finder on your Mac. Follow these steps to rename your iPhone:
- Connect your iPhone to your Mac using a USB cable.
- Open Finder on your Mac. You can typically find it in your Dock or by selecting it from the Applications folder.
- In the Finder sidebar, locate your iPhone under the “Locations” section. Click on it to select it.
- In the top menu bar, click on the “File” option and then select “Get Info” from the dropdown menu. Alternatively, you can right-click on your iPhone’s name and choose “Get Info.”
- A new window will appear showing detailed information about your iPhone. Look for the name field at the top and click on it to make it editable.
- Type in the new name for your iPhone.
- Once you’ve entered the desired name, press the “Enter” key on your keyboard to save the changes.
- You can now safely disconnect your iPhone from your Mac by either clicking on the eject icon next to your iPhone’s name in the Finder sidebar or using the appropriate method for your Mac’s operating system.
That’s it! Your iPhone’s name is now updated using Finder on macOS Catalina. You can verify the change by checking the name on your iPhone itself or in the Finder sidebar on your Mac.
Changing your iPhone’s name with Finder offers a seamless and convenient method for those who prefer managing their device settings directly from their Mac. It allows you to quickly personalize your iPhone’s name without the need for additional software or tools.
As you choose a new name for your iPhone, consider selecting something that reflects your personality or distinguishes your device from others. Whether it’s a creative, professional, or meaningful name, make it your own.
Now that you know how to change your iPhone’s name with Finder on macOS Catalina, go ahead and customize it to your liking. Enjoy a uniquely named iPhone that suits your preferences and style!
Why Should You Change Your iPhone’s Name?
Changing the default name of your iPhone might seem like a simple customization, but it can bring about several benefits and enhance your overall user experience. Here are some compelling reasons why you should consider changing your iPhone’s name:
- Personalization: By giving your iPhone a unique name, you can add a personal touch to your device. It allows you to express your individuality and make your iPhone truly yours.
- Easy Identification: If you own multiple Apple devices or often find yourself in environments with other iPhone users, changing your iPhone’s name can help you quickly identify your device. You can choose a name that reflects its purpose or include your initials for easy recognition.
- Enhanced Security: Changing your iPhone’s name can serve as an additional layer of security. Hackers and unauthorized individuals often target devices with generic names. By customizing your iPhone’s name, you make it more difficult for potential attackers to identify and target your device.
- Device Management: Changing your iPhone’s name can simplify device management, especially in shared environments. With a unique and recognizable name, you can easily locate and manage your iPhone when using management tools or apps.
- Reflection of Personality: Your iPhone is an extension of your personality, so why not let it reflect who you are? Changing the name allows you to showcase your style, interests, or even a witty sense of humor.
- Organization and Clarity: If you use various Apple services, such as iCloud or Apple Music, changing your iPhone’s name can help you stay organized. It ensures that your devices are labeled clearly and makes it easier to manage and locate them within these services.
Changing your iPhone’s name is a simple and effective way to personalize your device, improve security, and simplify device management. It adds a touch of uniqueness and allows your iPhone to stand out among the crowd.
Keep in mind that changing your iPhone’s name is a reversible process. If you ever want to revert to the default or choose a different name, you can easily do so using the same methods discussed previously.
Now that you understand the reasons to change your iPhone’s name, take the opportunity to make it your own. Enjoy the personalized experience and show off your individuality with a distinct and memorable iPhone name!
Tips to Choose the Perfect Name for Your iPhone
When it comes to choosing a name for your iPhone, the possibilities are endless. Here are some helpful tips to consider as you select the perfect name:
- Reflect your personality: Your iPhone is an extension of your individuality. Choose a name that reflects your personality, interests, or style. It could be something fun, creative, or meaningful to you.
- Keep it concise and unique: Opt for a name that is easy to remember and stands out. Avoid using generic or common names that might confuse your device with others around you.
- Purpose-driven: Consider the purpose of your iPhone. If you use one device for work and another for personal use, adding a descriptive term such as “Work” or “Personal” can help distinguish between them.
- Include your initials: If you share your household with others or have multiple Apple devices, adding your initials to the name can be helpful for quick identification and management.
- Motivational or inspirational: Choose a name that inspires you or motivates you. It can be a reminder of your goals or a reflection of your aspirations.
- Get creative: Don’t be afraid to think outside the box. Consider adding a playful nickname, a fictional character’s name, or a clever wordplay that captures your imagination.
- Consider your ecosystem: If you use other Apple devices or services, think about choosing a name that aligns with your ecosystem. This can help you stay organized across all your devices and services.
- Test it out: Before finalizing the name, say it out loud and see if it feels right. Make sure it rolls off the tongue easily and feels natural to you.
- Experiment: Don’t be afraid to change your iPhone’s name if you decide it doesn’t suit you anymore. Experiment with different names until you find the one that resonates with you the most.
Remember, the name you choose for your iPhone is a reflection of your personal style and preferences. It’s a way to make your iPhone uniquely yours and bring a touch of personalization to your device.
Now that you have these tips in mind, go ahead and choose a name that speaks to you. Enjoy the process of finding the perfect name and transforming your iPhone into a device that truly represents your identity!
Troubleshooting Common Issues When Changing Your iPhone’s Name
While changing your iPhone’s name is a straightforward process, you may encounter some common issues along the way. Here are a few troubleshooting tips to help you overcome these challenges:
- Name not updating across devices: If you’ve changed your iPhone’s name, but it’s not updating on your other Apple devices, ensure that they are all connected to the same iCloud account. Additionally, check that the devices are connected to the internet and sync your iCloud settings to trigger the name update.
- iPhone name not saving: If you’re unable to save the new name on your iPhone, make sure you’re following the correct steps. Double-check that you’re tapping “Done” or pressing “Enter” after entering the new name. If the issue persists, try restarting your iPhone and attempting the process again.
- Connection issues with iTunes or Finder: If you’re having trouble connecting your iPhone to iTunes or Finder on your Mac, ensure that you’re using a compatible cable and that both your iPhone and Mac are running the latest software updates. Also, try plugging the cable into a different USB port or using a different cable if available.
- Name change not reflected in apps: After changing your iPhone’s name, certain apps may still display the old name. This is typically because the app hasn’t refreshed its data. Try closing and reopening the app or restarting your iPhone to force a refresh. If the problem persists, contact the app’s developer for further assistance.
- Sync issues with iCloud: If your iPhone’s name change doesn’t sync properly across your devices through iCloud, ensure that iCloud syncing is enabled for your iPhone. You can check this by going to “Settings,” tapping your Apple ID, selecting iCloud, and verifying that the “iCloud Drive” toggle is turned on. If the issue persists, sign out and back into iCloud on your devices.
If you continue to experience issues despite troubleshooting, it’s advisable to consult Apple Support or visit an authorized service provider for further assistance. They can provide personalized guidance and help resolve any technical challenges specific to your device.
Remember, changing your iPhone’s name is a customization process, and occasional issues may occur. However, with some troubleshooting steps and patience, you can overcome these challenges and enjoy a successfully renamed iPhone.
Now that you’re aware of these common troubleshooting tips, feel confident in tackling any issues that may arise as you change your iPhone’s name. Customize your device with ease and embrace a personalized iPhone experience!
Final Thoughts and Additional Considerations
Changing your iPhone’s name is a simple yet impactful way to add a personal touch to your device. By customizing its name, you can enhance its individuality, improve security, and simplify device management. Here are a few final thoughts and additional considerations to keep in mind:
Relevance and Purpose: When choosing a name for your iPhone, consider its purpose and how it will be used. If you primarily use your iPhone for work, a professional-sounding name might be appropriate. On the other hand, a more creative or expressive name could be fitting for personal use.
Consistency across devices: If you own multiple Apple devices, it can be helpful to keep the names consistent across all devices. This ensures easy identification and seamless synchronization between your devices.
Privacy: While personalizing your iPhone’s name can be fun, it’s important to consider privacy implications. Avoid using names or details that could be easily associated with you or reveal personal information.
Regular Updates: Over time, you might want to update or change your iPhone’s name again. Feel free to explore new names that better reflect your evolving preferences or capture a different aspect of your personality. Changing your iPhone’s name is reversible and can be done whenever you desire.
Compatibility and Support: Ensure that you are using compatible software versions and following the appropriate steps based on your device and operating system. If you encounter any issues or have specific questions, don’t hesitate to reach out to Apple Support or consult online resources for further guidance.
Ultimately, changing your iPhone’s name is a personal choice that allows you to make your device truly yours. Whether you opt for something meaningful, creative, or descriptive, the name you choose adds a personal touch to your iPhone and enhances your overall user experience.
Now that you have a comprehensive understanding of how to change your iPhone’s name and the benefits it brings, start exploring different names that reflect your style and preferences. Customize your iPhone and enjoy the unique experience of owning a device that is uniquely yours!