
Why should you bookmark all tabs in Chrome on Android?
Bookmarking all tabs in Chrome on your Android device can be a useful and time-saving feature. It allows you to quickly access and organize multiple websites or webpages that you want to revisit later. Here are a few reasons why you should consider using this feature:
1. Save time and effort: When you come across a set of webpages or websites that you want to revisit or reference later, bookmarking all tabs saves you the hassle of individually bookmarking each one. Instead, you can bookmark them all at once and access them with just a few clicks.
2. Preserve your browsing session: Have you ever found yourself in a situation where you have opened multiple tabs related to a specific task or topic, but you need to close the Chrome browser for some reason? By bookmarking all tabs, you can preserve your browsing session and easily pick up where you left off when you reopen Chrome.
3. Keep important information handy: Whether you are conducting research, working on a project, or planning a trip, bookmarking all tabs allows you to keep all relevant information in one place. No more sifting through numerous open tabs or bookmark folders to find the webpage you need.
4. Access bookmarks across devices: By syncing your bookmarks with your Google account, you can access them on other devices such as your laptop or tablet. This means that any tabs you bookmark on your Android device will be available to you wherever you go, providing a seamless browsing experience.
5. Stay organized: When you bookmark all tabs, Chrome automatically creates a folder with the current date, making it easy to locate and manage your saved tabs. You can also rename the folder to better reflect the content or category of the tabs for even more efficient organization.
6. Reduce clutter: Let’s face it, having too many open tabs can quickly clutter your browsing experience. By bookmarking all tabs, you can close unnecessary tabs and declutter your browser window, making it easier to focus on the tabs that are important and relevant to your current task.
7. Improve productivity: By efficiently managing and organizing your bookmarked tabs, you can increase your productivity by minimizing the time spent searching for websites, articles, or resources. Accessing your saved tabs is just a few clicks away, allowing you to work more efficiently.
How to bookmark all tabs on Chrome Android [Method 1: Using the Bookmarks Manager]
If you want to bookmark all tabs in Chrome on your Android device, you can easily do so using the built-in Bookmarks Manager. Here’s how:
- Open Chrome on your Android device and make sure you have multiple tabs open that you want to bookmark.
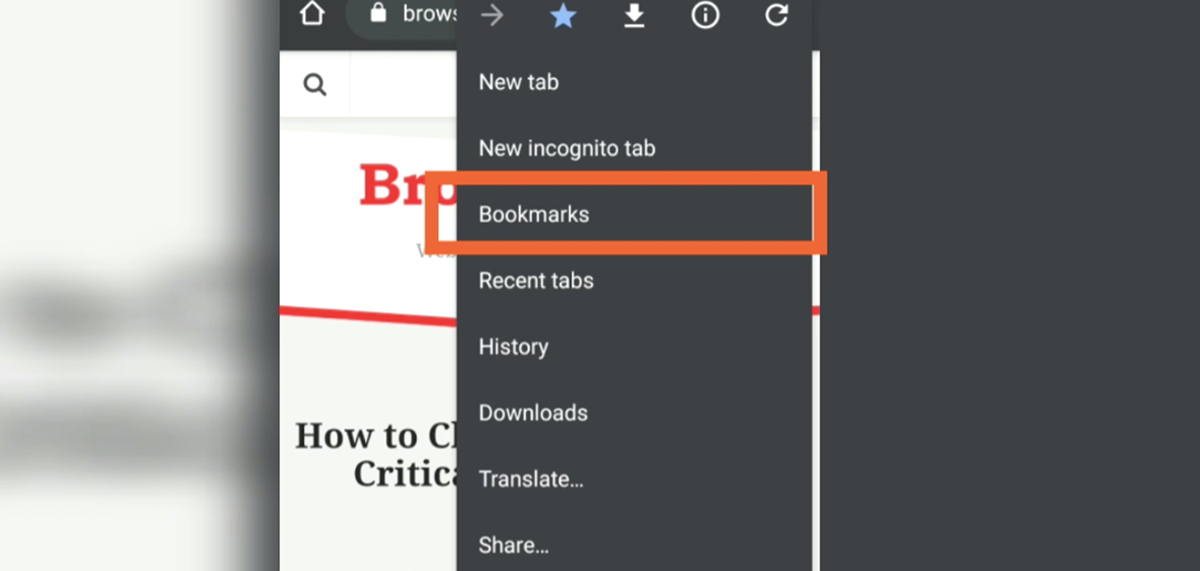
- Tap on the more options icon (three dots) at the top right corner of the Chrome window.
- In the dropdown menu, select the “Bookmarks” option.
- A new window will open, showing your bookmarks. Tap on the “Tabs” option at the top of the window.
- On the Tabs page, you will see a list of all the open tabs on your device. Tap on the three-dot icon at the top right corner of the window.
- In the dropdown menu, select the “Bookmark all tabs” option.
- A dialog box will appear, allowing you to choose the location where you want to save the bookmarked tabs.
- Select the desired folder or create a new one by tapping on the “Create folder” option.
- Give the folder a name and tap on the “Save” button.
- Chrome will now save all the open tabs as bookmarks in the chosen folder.
That’s it! You have successfully bookmarked all tabs in Chrome on your Android device using the Bookmarks Manager. You can access these bookmarks at any time by going to the Bookmarks Manager and navigating to the folder where you saved them.
Remember, by default, Chrome creates a folder with the current date when you bookmark all tabs. However, you can rename the folder to something more specific or organize your bookmarks in a way that makes sense to you.
Using the Bookmarks Manager is a quick and convenient way to bookmark all your open tabs in Chrome on Android. It allows you to save time and easily access your favorite websites or important webpages whenever you need them.
How to bookmark all tabs on Chrome Android [Method 2: Using the Tab Group feature]
If you prefer a more visually organized way of bookmarking all tabs in Chrome on your Android device, you can utilize the Tab Group feature. This feature allows you to group related tabs together and bookmark them as a group. Here’s how you can do it:
- Open Chrome on your Android device and ensure that you have multiple tabs open.
- Long-press on one of the tabs to bring up the context menu.
- In the menu that appears, select “Add to new group.”
- A colored dot will appear on the tab to indicate that it has been added to a group.
- Repeat steps 2 and 3 to add the remaining tabs to the same group.
- Once you have added all the desired tabs to the group, tap on the colored dot on any of the tabs to bring up the Group Options menu.
- In the Group Options menu, tap on the “Bookmark group” option.
- A dialog box will appear, allowing you to choose the location where you want to save the bookmarked tab group.
- Select the desired folder or create a new one by tapping on the “Create folder” option.
- Give the folder a name and tap on the “Save” button.
That’s it! You have now bookmarked all tabs in the group using the Tab Group feature in Chrome on Android. The bookmarks will be saved in the specified folder, and you can access them anytime by navigating to the Bookmarks Manager.
The Tab Group feature not only helps you bookmark multiple tabs at once but also keeps them visually organized and easily accessible. You can collapse or expand the tab group as needed, allowing for better navigation and a clutter-free browsing experience. Plus, with the ability to customize the color of each tab group, you can visually distinguish between different groups based on their content or purpose.
By utilizing the Tab Group feature, you can efficiently manage and bookmark all your tabs in Chrome on Android, making it easier to switch between different sets of tabs and access them later with just a few taps.
How to organize your bookmarks efficiently
Having a well-organized bookmark collection can make it easier for you to find and access your favorite websites or important resources. Here are some tips and techniques to help you efficiently organize your bookmarks:
- Create folders: Start by creating folders to categorize your bookmarks. You can create folders based on topics, projects, or any other criteria that make sense to you. To create a new folder, go to the Bookmarks Manager in Chrome and click on the “Add new folder” button.
- Use subfolders: If you have a large number of bookmarks within a particular category, consider creating subfolders to further organize them. This can help you drill down into specific topics or sub-topics easily.
- Assign appropriate names: Give each folder and bookmark a descriptive and meaningful name. This will make it easier for you to identify the content of each bookmark without having to open it.
- Utilize bookmark tags: Tags can be a powerful tool in bookmark organization. Assign relevant tags to your bookmarks to further categorize and label them. For example, you can use tags like “work,” “personal,” “research,” or specific keywords related to the content of the bookmark.
- Sort bookmarks alphabetically: Arrange your bookmarks in alphabetical order within each folder to establish a consistent and structured system. This makes it easier to find specific bookmarks when browsing through your collection.
- Regularly clean up and delete: Periodically review your bookmark collection and remove any outdated or irrelevant bookmarks. This helps keep your collection streamlined and ensures that you have quick access to the websites that are most relevant to you.
- Backup and sync: Enable bookmark syncing in Chrome to ensure that your bookmarks are backed up and accessible across all your devices. This way, you can have your bookmarks available whenever you need them, regardless of the device you are using.
- Utilize bookmark manager extensions: Consider using browser extensions or plugins that enhance the functionality of the bookmark manager. These extensions can offer features like advanced search capabilities, enhanced organization options, and bookmark syncing with other services.
- Regularly revisit and update: Set aside time on a regular basis to review and update your bookmarks. Websites and resources may change or become unavailable over time, so it’s important to ensure that your bookmarks are up to date and still valuable to you.
By employing these techniques, you can efficiently organize your bookmarks and create a system that works best for you. A well-structured bookmark collection not only saves you time but also helps you stay organized, productive, and focused while browsing the web.
Keeping your bookmarks synced across devices
One of the advantages of using Chrome is the ability to sync your bookmarks across multiple devices. This ensures that you have access to your bookmarks wherever you go, whether you’re using your Android device, laptop, or tablet. Here’s how to keep your bookmarks synced across devices:
- Sign in to your Google Account: Make sure you’re signed in to the same Google Account on all your devices. This will enable Chrome to sync your bookmarks and other browsing data seamlessly.
- Enable bookmark syncing: On your Android device, open Chrome and tap on the more options icon (three dots) at the top right corner of the window. Go to Settings and select your Google Account. Scroll down to the “Sync and Google services” section and make sure the “Sync” toggle is turned on. This will sync your bookmarks across devices.
- Check sync settings on other devices: On your other devices, such as your laptop or tablet, open Chrome and go to Settings. Ensure that the sync settings are enabled, and that bookmarks syncing is turned on for your Google Account.
- Wait for sync to complete: After enabling bookmark syncing, give Chrome some time to sync your bookmarks across devices. This may take a few moments, especially if you have a large number of bookmarks.
- Access bookmarks on other devices: Once syncing is complete, you can start accessing your bookmarks on any of your devices. Simply open Chrome and click or tap on the bookmarks icon to view your synced bookmarks. They should be organized in the same folders and structure as you set them up on your Android device.
- Make changes and edits: Any changes you make to your bookmarks – adding, deleting, or organizing them – will automatically sync across all your devices. This ensures that your bookmark collection stays up to date and consistent across all platforms.
By keeping your bookmarks synced across devices, you can seamlessly transition between different devices while maintaining access to your favorite websites and resources. This syncing feature also provides a reliable backup of your bookmarks, so you don’t have to worry about losing them if you switch devices or if something happens to your Android device.
Remember to regularly check your sync settings and ensure that you’re signed in to your Google Account on all your devices to ensure seamless and consistent bookmark syncing. This way, you can enjoy a unified browsing experience across all your devices, making it easier to access your saved websites and resources whenever you need them.
Tips and tricks for managing a large number of bookmarks
As your collection of bookmarks grows, it’s important to have effective strategies in place to manage and navigate through them efficiently. Here are some tips and tricks for managing a large number of bookmarks:
- Use bookmark folders: Create folders based on different categories or topics to keep your bookmarks organized. This helps you find specific bookmarks quicker and avoids clutter.
- Utilize nested folders: If you have multiple subtopics within a category, consider creating nested folders. This allows for a more granular organization of your bookmarks.
- Use descriptive names: Give your bookmarks descriptive names that clearly indicate the content or purpose of the website. This makes it easier to locate bookmarks without having to open them.
- Assign tags: Tags are a great way to further classify and organize your bookmarks. Assign relevant tags to your bookmarks to make searching and filtering easier.
- Regularly declutter: Periodically review your bookmarks and remove any that are no longer relevant or useful. This keeps your bookmark collection up to date and reduces clutter.
- Utilize bookmark manager extensions: Explore browser extensions or plugins that enhance the functionality of your bookmark manager. These extensions can offer advanced search options, bookmark organization tools, and more.
- Sort bookmarks: Consider sorting your bookmarks alphabetically or by other criteria that make sense for your needs. This can help you quickly locate specific bookmarks.
- Create bookmark shortcuts: If you have frequently visited websites, you can create shortcuts on your browser’s bookmarks bar for quick access.
- Utilize bookmark syncing: Enable bookmark syncing across devices to ensure that you have access to your bookmarks no matter which device you’re using. This helps keep your bookmarks consistent and up to date.
- Regularly backup your bookmarks: Make regular backups of your bookmarks to prevent any data loss. You can export your bookmarks as an HTML file or use a backup service.
By implementing these tips, you can effectively manage a large number of bookmarks and ensure they remain organized and easily accessible. Experiment with different strategies and find the ones that work best for you. With a well-managed collection of bookmarks, you can navigate the web more efficiently and maximize your productivity.