
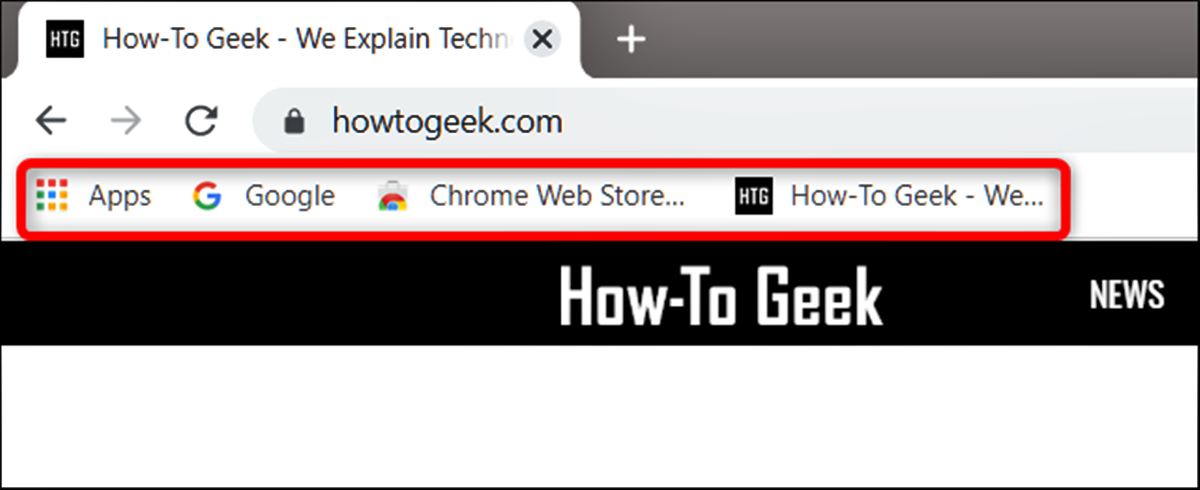
Reasons to Show the Bookmarks Bar in Google Chrome
Google Chrome is one of the most popular web browsers, known for its speed, reliability, and user-friendly interface. One of its standout features is the Bookmarks Bar, a handy toolbar that allows quick access to your favorite websites. While the Bookmarks Bar may seem like a small feature, it can greatly enhance your browsing experience. Here are a few reasons why you should consider showing the Bookmarks Bar in Google Chrome:
- Easy Access to Favorite Websites: The Bookmarks Bar provides a convenient way to access your most frequently visited websites. Instead of typing in the web address or searching for the site, you can simply click on the bookmarked link on the toolbar, saving you time and effort.
- Organized and Personalized Bookmarks: The Bookmarks Bar allows you to organize your bookmarks into folders and subfolders, making it easier to find specific websites. You can also customize the names and icons of your bookmarks, personalizing them to your preferences.
- Visual Reminder: Seeing your bookmarked websites on the Bookmarks Bar serves as a visual reminder of the sites you frequently visit or need to check regularly. It eliminates the need to remember web addresses or search for them, ensuring you never miss out on important updates or information.
- Efficient Workflow: If you use certain websites for work or research purposes, having the Bookmarks Bar visible allows for a more efficient workflow. With just a click, you can navigate between different tabs and access the resources you need, improving productivity and reducing distractions.
- Synchronization Across Devices: Google Chrome offers synchronization options that allow you to access your bookmarks across different devices. By showing the Bookmarks Bar, you can easily sync your bookmarks and have them readily available on your computer, tablet, or mobile phone.
By considering these reasons, you can see how showing the Bookmarks Bar in Google Chrome can streamline your browsing experience, save time, and improve productivity. It’s a small feature with big benefits, enhancing the way you interact with your favorite websites. So why not give it a try and start enjoying the convenience of the Bookmarks Bar in Google Chrome?
How to Show the Bookmarks Bar by Using the Keyboard Shortcut
In Google Chrome, there is a simple keyboard shortcut that allows you to show or hide the Bookmarks Bar with ease. By using this shortcut, you can toggle the visibility of the Bookmarks Bar whenever you need it. Here’s how to do it:
- Open Google Chrome on your computer.
- Press the Ctrl + Shift + B keys simultaneously on your keyboard.
After following these two simple steps, the Bookmarks Bar will appear at the top of your browser window. To hide the Bookmarks Bar again, simply repeat the keyboard shortcut Ctrl + Shift + B.
This keyboard shortcut is a quick and convenient way to show or hide the Bookmarks Bar in Google Chrome. It can be especially useful if you frequently switch between displaying and hiding the Bookmarks Bar based on your browsing needs. By mastering this simple keyboard shortcut, you can have easy access to your favorite websites whenever you need it.
How to Show the Bookmarks Bar by Using the Settings Menu
If you prefer using the settings menu to show or hide the Bookmarks Bar in Google Chrome, you can easily do so by following these steps:
- Open Google Chrome on your computer.
- In the top-right corner of the browser window, click on the three vertical dots to open the Chrome menu.
- Hover your cursor over the “Bookmarks” option in the menu.
- A submenu will appear. From the submenu, click on the “Show Bookmarks Bar” option.
Once you click on the “Show Bookmarks Bar” option, the Bookmarks Bar will immediately become visible at the top of your browser window.
If you want to hide the Bookmarks Bar again using the settings menu, simply follow the same steps, but this time click on the “Hide Bookmarks Bar” option in the submenu instead.
Using the settings menu to show or hide the Bookmarks Bar provides an alternative method to quickly access your bookmarks. Whether you prefer using keyboard shortcuts or the settings menu, Google Chrome offers flexibility to suit your preferences.
How to Show the Bookmarks Bar on Mac
If you’re using a Mac computer and want to show the Bookmarks Bar in Google Chrome, follow these simple steps:
- Open Google Chrome on your Mac.
- In the top menu bar, click on “View”.
- From the dropdown menu, hover your cursor over “Always Show Bookmarks Bar”.
- A submenu will appear. Click on “Show Bookmarks Bar” to enable it.
Once you click on “Show Bookmarks Bar”, the Bookmarks Bar will instantly appear below the address bar in your Google Chrome browser window.
If you want to hide the Bookmarks Bar on your Mac in the future, simply follow the same steps and click on “Hide Bookmarks Bar” in the submenu that appears when you hover over “Always Show Bookmarks Bar”.
Showing the Bookmarks Bar on your Mac in Google Chrome is a straightforward process. By following these steps, you can customize your browser’s appearance and have easy access to your favorite bookmarks.
How to Show the Bookmarks Bar on a Windows Computer
If you’re using a Windows computer and want to show the Bookmarks Bar in Google Chrome, you can follow these simple steps:
- Open Google Chrome on your Windows computer.
- In the top-right corner of the browser window, click on the three vertical dots to open the Chrome menu.
- From the menu, hover your cursor over “Bookmarks” to open the submenu.
- Click on the “Show Bookmarks Bar” option in the submenu.
After selecting “Show Bookmarks Bar,” the Bookmarks Bar will become visible below the address bar in your Google Chrome browser window.
If you want to hide the Bookmarks Bar on your Windows computer, simply follow the same steps and click on “Hide Bookmarks Bar” in the submenu that appears when you hover over “Bookmarks”.
Showing the Bookmarks Bar on a Windows computer in Google Chrome is a quick and easy process. By following these steps, you can have your Bookmarks Bar readily accessible and make your browsing experience more convenient.
How to Show the Bookmarks Bar on a Chromebook
If you’re using a Chromebook and want to show the Bookmarks Bar in Google Chrome, follow these simple steps:
- Open Google Chrome on your Chromebook.
- At the top-right corner of the browser window, click on the three vertical dots to open the Chrome menu.
- From the menu, hover your cursor over “Bookmarks” to open a submenu.
- Click on the “Show Bookmarks Bar” option in the submenu.
Once you click on “Show Bookmarks Bar,” the Bookmarks Bar will immediately appear underneath the address bar in your Google Chrome browser window.
If you ever want to hide the Bookmarks Bar on your Chromebook, simply follow the same steps and click on “Hide Bookmarks Bar” in the submenu that appears when you hover over “Bookmarks”.
Showing the Bookmarks Bar on a Chromebook using Google Chrome is a simple process that can quickly enhance your browsing experience. By following these steps, you can keep your favorite bookmarks easily accessible and navigate the web more efficiently.
How to Show the Bookmarks Bar on an Android Device
If you’re using the Google Chrome app on your Android device and want to show the Bookmarks Bar, you can follow these steps:
- Open the Google Chrome app on your Android device.
- In the top-right corner of the app interface, tap on the three vertical dots to open the Chrome menu.
- Scroll down in the menu and tap on “Settings”.
- In the Settings menu, tap on “Appearance”.
- Find the option labeled “Show bookmarks bar” and toggle the switch next to it.
Once you toggle the switch to enable “Show bookmarks bar”, the Bookmarks Bar will become visible at the top of the Google Chrome app interface on your Android device.
If you ever want to hide the Bookmarks Bar on your Android device, simply follow the same steps and toggle the switch next to “Show bookmarks bar” to disable it.
By following these steps, you can easily show or hide the Bookmarks Bar on your Android device while using the Google Chrome app. This allows for quick access to your favorite websites and improves your browsing experience on the go.
How to Show the Bookmarks Bar on an iPhone or iPad
If you’re using the Google Chrome app on your iPhone or iPad and want to show the Bookmarks Bar, you can follow these steps:
- Open the Google Chrome app on your iPhone or iPad.
- In the bottom-right corner of the app interface, tap on the three dots to open the Chrome menu.
- Scroll down in the menu and tap on “Settings”.
- In the Settings menu, tap on “Appearance”.
- Find the option labeled “Show bookmarks bar” and toggle the switch next to it.
By toggling the switch to enable “Show bookmarks bar”, the Bookmarks Bar will appear at the top of the Google Chrome app interface on your iPhone or iPad.
If you decide to hide the Bookmarks Bar on your iPhone or iPad in the future, simply follow the same steps and toggle the switch next to “Show bookmarks bar” to disable it.
Following these steps allows you to easily show or hide the Bookmarks Bar on your iPhone or iPad while using the Google Chrome app. This feature provides quick access to your favorite websites and enhances your browsing experience on your mobile device.
How to Customize the Bookmarks Bar in Google Chrome
The Bookmarks Bar in Google Chrome allows you to not only access your favorite websites with a single click but also customize its appearance to suit your preferences. Here’s how you can customize the Bookmarks Bar:
- Open Google Chrome on your computer.
- If the Bookmarks Bar is not visible, you can show it by using one of the methods mentioned earlier.
- Right-click on an empty space on the Bookmarks Bar.
- A context menu will appear with various options.
- From the context menu, you can choose to add a new bookmark, create new bookmark folders, or rearrange your existing bookmarks.
- To add a new bookmark, click on “Add New Bookmark”. A dialog box will open, allowing you to enter the name and URL of the website you want to bookmark.
- To create a new bookmark folder, click on “Add New Folder”. You can then give the folder a name and drag bookmarks into it for better organization.
- To rearrange your bookmarks, click on “Bookmark Manager”. This will open a new tab with the Bookmark Manager where you can drag and drop bookmarks to rearrange their order on the Bookmarks Bar.
Additionally, you can also customize the appearance of the Bookmarks Bar by right-clicking on it, selecting “Show Apps Shortcut” to display the Apps Shortcut in the Bookmarks Bar, or “Always Show Text” to display the text of the bookmarks instead of just the icons.
Customizing the Bookmarks Bar in Google Chrome allows you to personalize it according to your browsing habits and preferences. By organizing your bookmarks, adding new ones, and rearranging them, you can create a Bookmarks Bar that is tailored to your needs and makes accessing your favorite websites even more convenient.