
Understanding Camera Flash Problems
Camera flash can be a powerful tool for capturing well-lit and vibrant images, but it can also lead to a range of common problems that can hinder the quality of your photographs. Understanding these flash-related issues is crucial for every photographer to overcome and produce stunning results. In this section, we will delve into some of the most common camera flash problems and provide insights on how to avoid or address them.
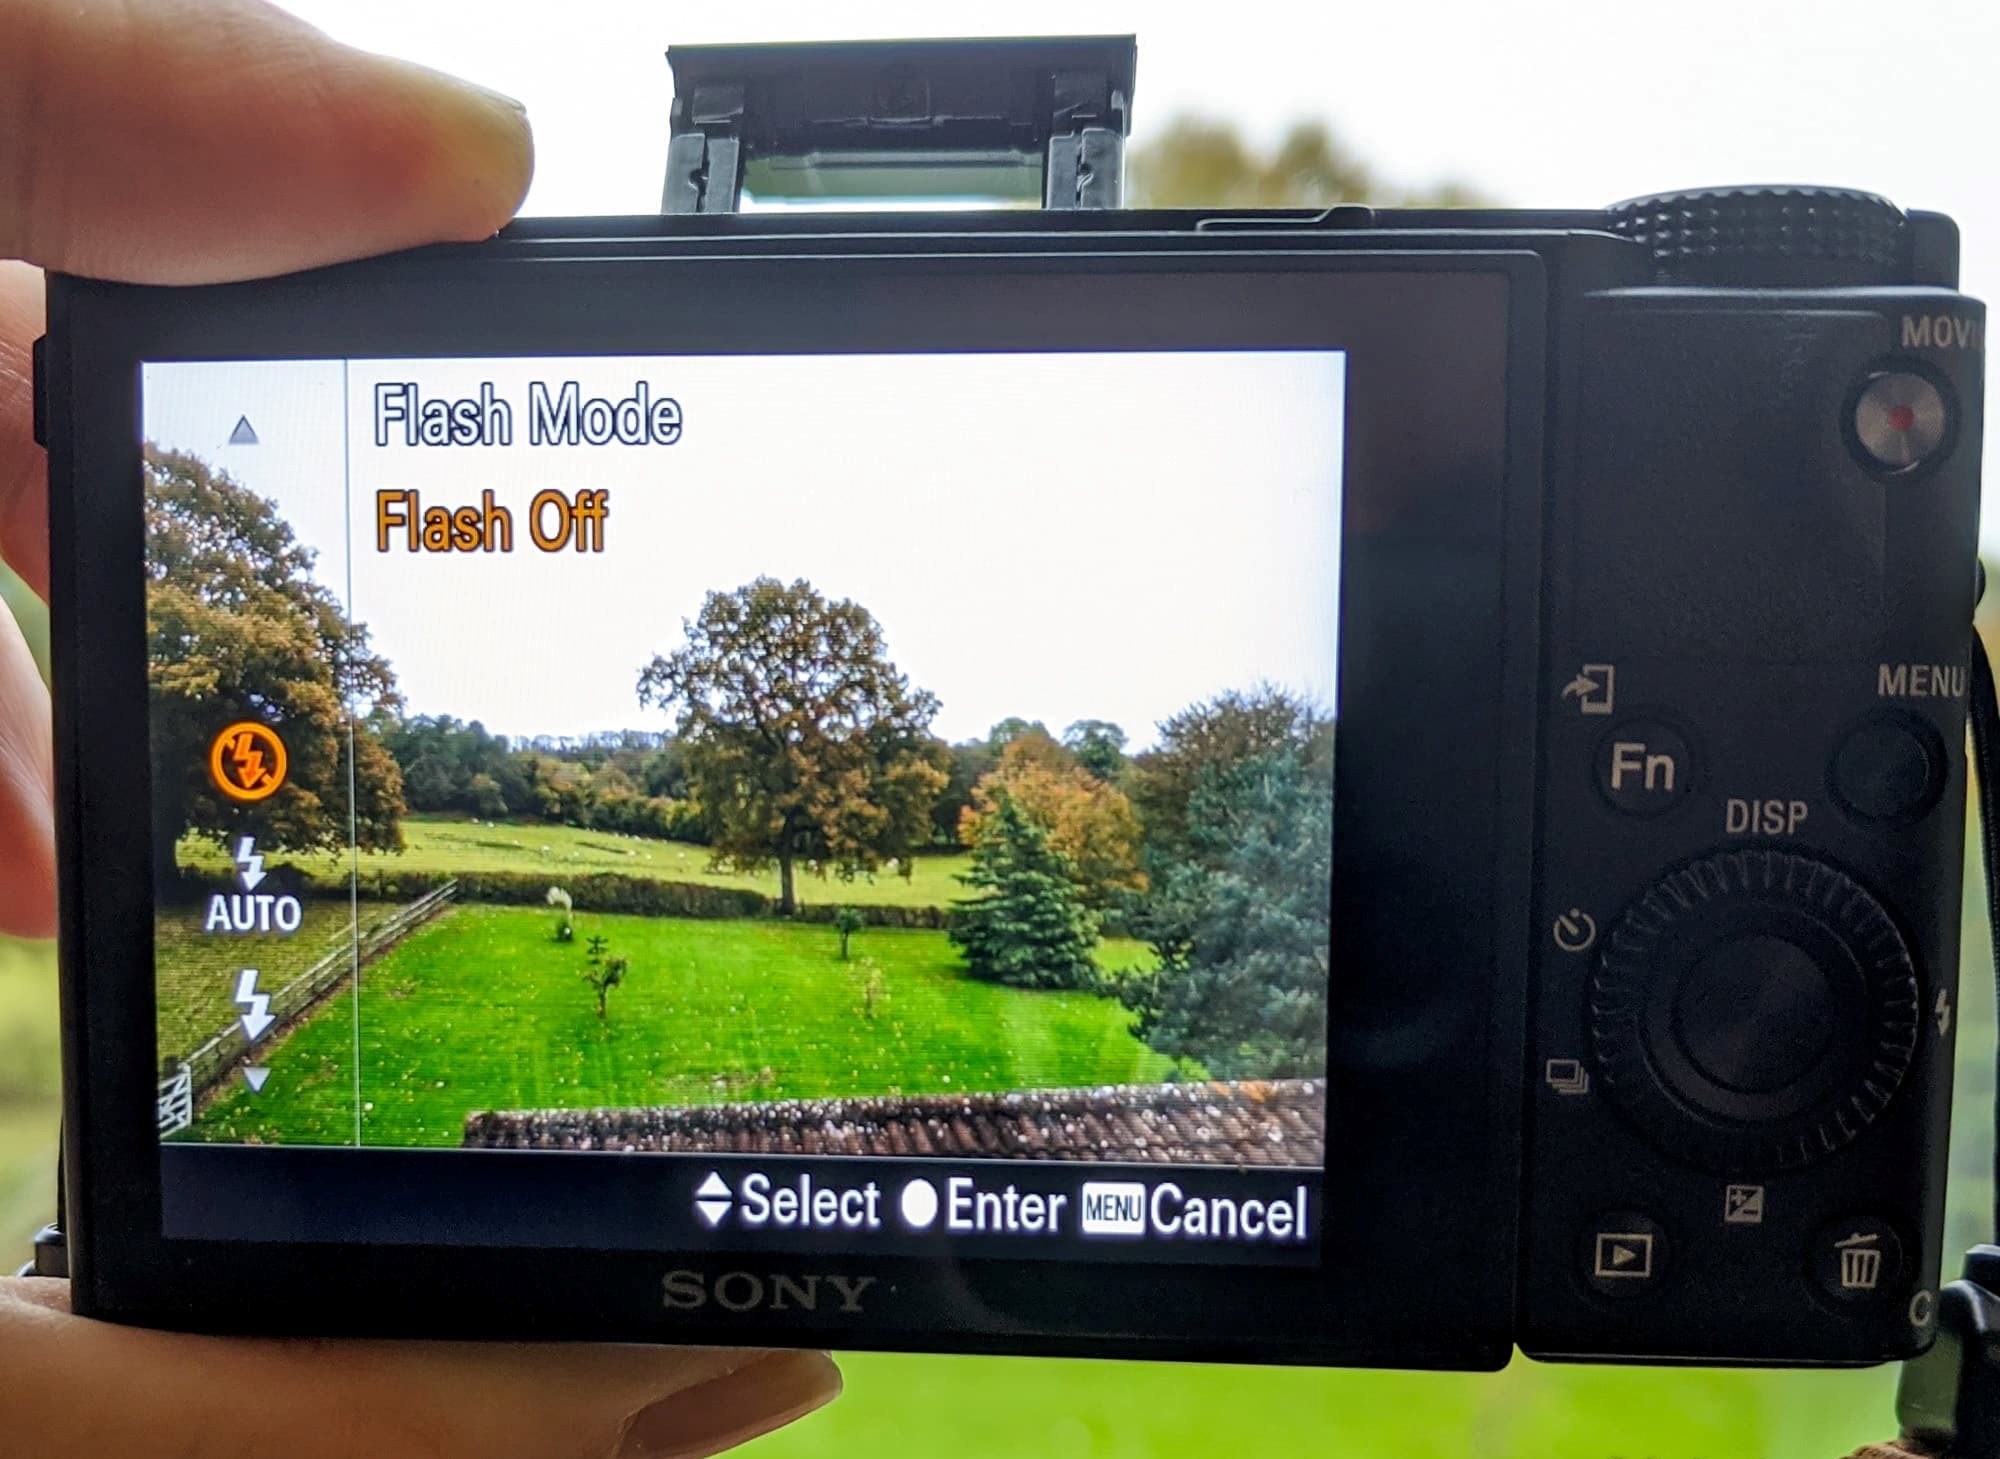
1. Camera not firing when using the flash: This issue can occur due to various reasons, such as low battery power, incorrect flash settings, or a faulty flash unit. Ensure that your camera’s flash is activated, the batteries are fully charged, and the flash mode is set correctly. Additionally, check if the camera’s flash trigger or hot shoe is properly connected.
2. Blurry images caused by camera shake: In low-light conditions, a slow shutter speed is often used with flash photography to capture more light. However, this can result in blurry images if the camera is not stabilized. To overcome this, use a tripod or stabilize your camera by resting it on a steady surface. Alternatively, increase the ISO setting to allow for a faster shutter speed.
3. Red-eye in portraits: Red-eye occurs when the flash reflects off the subject’s retina, causing their eyes to appear red in the photo. To minimize or eliminate this effect, try using the red-eye reduction mode on your camera, or position the flash farther away from the lens. Additionally, consider asking the subject to look slightly away from the camera.
4. Uneven lighting and harsh shadows: Direct flash can create unflattering shadows and produce uneven lighting. To overcome this, utilize external flash units with bounce capabilities or attach diffusers to soften the light. Bouncing the flash off walls or ceilings can also help to produce a more diffused and natural-looking light.
5. Overexposure and washed-out images: When the flash is too powerful or positioned too close to the subject, it can result in an overexposed image with washed-out details. Adjusting the flash exposure compensation or reducing the flash power can help to rectify this issue. Alternatively, try using fill-flash or adding ambient light to balance the exposure.
6. Unwanted reflections and glare: Reflective surfaces, such as glass or shiny objects, can cause unwanted reflections and glare in photographs. To minimize this, change the angle or position of the flash, use a polarizing filter, or adjust the composition to avoid direct reflection.
7. Unnatural skin tones in photographs: Flash can sometimes result in unnatural skin tones, especially when photographing people. To achieve more accurate skin tones, consider using a warm/cool color filter or adjusting the white balance settings on your camera.
8. Dealing with flash sync issues: Flash sync problems may occur when the flash does not synchronize properly with the camera’s shutter speed. Refer to your camera’s manual to ensure you are using the correct flash sync mode. If the issue persists, consider using an external flash with high-speed sync capabilities.
9. Correcting flash exposure compensation: If your photos appear consistently overexposed or underexposed when using the flash, adjust the flash exposure compensation settings on your camera. This allows you to manually control the amount of flash output for better exposure balance.
10. Using diffusers and bounce techniques to soften the flash: Diffusers and bounce techniques are effective in softening the harshness of direct flash. Use a flash diffuser attachment or bounce the flash off a nearby surface, such as a ceiling or wall, to create a more diffused and natural-looking light.
By understanding these common camera flash problems and implementing the appropriate techniques and adjustments, you can overcome these challenges and capture stunning images with well-balanced lighting and enhanced visual appeal.
Camera Not Firing When Using the Flash
One of the frustrating issues that photographers sometimes face is when their camera fails to fire the flash when it’s supposed to. There can be several reasons for this problem, and knowing how to troubleshoot and fix it can save you from missing out on important shots. Let’s explore some common causes and solutions for this issue.
Low battery power: The most straightforward reason for a flash not firing is low battery power. Check the battery level indicator on your camera or flash unit to ensure that the batteries have enough charge. If they are running low, replace them with fresh batteries before attempting to use the flash again.
Incorrect flash settings: Another common reason is incorrect flash settings. Ensure that the flash is turned on and activated in the camera’s settings. Some cameras have specific flash modes such as auto, fill flash, or rear curtain sync. Make sure you have selected the appropriate mode for your shooting situation.
Faulty flash unit: If the flash still doesn’t fire after checking the battery and settings, the issue may lie with the flash unit itself. Inspect the flash for any visible damage or loose connections. Try attaching the flash to a different camera or using a different flash unit on your camera to determine if the problem lies with the flash or the camera.
Flash trigger or hot shoe connection: Sometimes, the flash may not fire due to a loose or faulty connection between the camera and the flash unit. Check the hot shoe or flash trigger to ensure that they are securely connected. If there is any dirt or debris on the contacts, gently clean them with a soft cloth or a cotton swab moistened with rubbing alcohol.
Sync speed and compatibility: Certain cameras have specific flash sync speed limitations. If your camera’s shutter speed exceeds the maximum sync speed, the flash may not fire. Refer to your camera’s manual to determine the correct sync speed for flash photography. Additionally, ensure that the flash unit is compatible with your camera model, as not all flashes are universally compatible.
Wireless flash setup issues: If you are using a wireless flash setup, ensure that the flash units and triggers are properly synced and set to the correct channels. Sometimes, radio interference or signal obstructions can prevent the flash from firing consistently. Troubleshoot and adjust your wireless setup accordingly.
By checking and addressing these possible causes, you can troubleshoot and resolve the issue of your camera not firing when using the flash. Remember to always read your camera and flash unit manuals for specific instructions and consult professional support when needed. With a little patience and attention to detail, you’ll be back to capturing stunning photos with your flash in no time.
Blurry Images Caused by Camera Shake
One of the common problems photographers encounter when using a camera flash is capturing blurry images caused by camera shake. This issue usually arises when shooting in low-light conditions, where the camera’s shutter speed is slower to capture enough light. When the camera moves even slightly during the exposure, it results in blurred photographs. Let’s explore some tips and techniques to overcome camera shake and capture sharper images with flash photography.
Use a Tripod: One of the most effective ways to eliminate camera shake is to use a tripod. A tripod provides a stable base for your camera, preventing it from moving during exposure. Set up the tripod on a solid surface and attach your camera securely. Adjust the height and position of the tripod to achieve the desired composition. Ensure that the tripod is level and stable to minimize any vibrations during the shot.
Stabilize Your Camera: If you don’t have a tripod available, you can still stabilize your camera by holding it properly. Hold the camera with both hands and brace your elbows against your chest or a stable surface. This adds stability and reduces the chances of camera shake. Additionally, use your camera’s built-in image stabilization feature or lens stabilization if available.
Increase the ISO: In low-light situations, you may need to use a slower shutter speed to allow more light into the camera. However, a slow shutter speed increases the risk of camera shake. To combat this, increase the ISO sensitivity of your camera. Higher ISO values make the camera’s sensor more responsive to light, enabling you to use a faster shutter speed and minimize the chances of camera shake.
Use Flash Sync Options: Some cameras have specific flash sync options that help reduce camera shake when using flash photography. These options include rear curtain sync or slow sync. Rear curtain sync fires the flash just before the shutter closes, while slow sync combines a longer exposure time with the flash to capture both ambient light and the main subject. Experiment with these options to achieve the desired effect and reduce camera shake.
Breathe and Relax: Camera shake can sometimes be caused by the photographer’s own movements and vibrations. Take a deep breath, relax your body, and gently press the shutter button. Avoid sudden movements or jerks when taking the shot. Practicing mindfulness and maintaining a steady posture can significantly reduce camera shake.
Consider External Flash: External flash units with additional features like auto zoom or TTL (Through-The-Lens) metering can help reduce the need for slower shutter speeds. These flashes provide more power and coverage, allowing you to use faster shutter speeds while maintaining proper exposure. External flash units also offer better control over the direction and intensity of the light, which can contribute to sharper images.
By implementing these techniques, you can minimize camera shake and capture sharper images when using a camera flash. Remember to experiment, practice, and adjust your settings based on the specific shooting conditions. With patience and attention to detail, you’ll be able to capture stunning and sharp images even in low-light situations.
Red-eye in Portraits
One common issue encountered in portrait photography when using a camera flash is the presence of red-eye. Red-eye occurs when the flash reflects off the subject’s retina, resulting in red-colored eyes in the photographs. This can be distracting and diminish the overall quality of the portrait. However, there are several techniques and precautions you can take to minimize or eliminate red-eye in your portraits.
Check the Flash Position: The distance between the flash and the camera lens plays a significant role in minimizing red-eye. When the flash is too close to the lens, the light directly enters the subject’s pupils and reflects back, causing red-eye. Try to position the flash farther away from the lens, either by using an off-camera flash or a flash bracket. This distance reduces the chance of light reflecting off the retinas and causing red-eye.
Use the Red-Eye Reduction Mode: Many cameras offer a red-eye reduction mode, which emits a series of pre-flashes before the actual exposure. These pre-flashes cause the subject’s pupils to contract, reducing the chances of red-eye. Enable this mode in your camera settings, and it will typically be automatically activated when the flash is fired. However, be aware that using this mode can also increase the time between pressing the shutter button and capturing the image.
Ask the Subject to Look Away: Another effective technique is to ask your subject to look slightly away from the camera. This ensures that the light from the flash does not directly enter their pupils, reducing the likelihood of red-eye. Experiment with different angles and positions to find the most flattering and natural-looking perspective for your portraits.
Use External Lighting: Instead of relying solely on the camera’s built-in flash, consider using external lighting options. External flash units with a bounce feature or diffusers can help diffuse the light and reduce the intensity of direct flash. Bouncing the flash off a nearby wall or ceiling can also help to create a more pleasing and indirect light source, minimizing the chance of red-eye in your portraits.
Edit in Post-Processing: If red-eye still occurs in your portraits, don’t worry. Most photo editing software offers a red-eye removal tool that can easily fix the issue. With just a few clicks, you can accurately detect and remove red-eye from your images, restoring the natural eye color of your subjects.
Advise on Costumes and Makeup: Certain factors, such as bright colors or reflective surfaces in the eye area, can increase the likelihood of red-eye. Advising your subjects to avoid wearing clothing or accessories that may contribute to red-eye can help prevent the issue. Additionally, if your subjects wear glasses, ensure that there are no reflections from the flash bouncing off the lenses that could cause red-eye.
By following these techniques and suggestions, you can effectively minimize or eliminate red-eye in your portrait photography. Experiment with different methods and combinations to find the approach that works best for you and your subjects. With careful planning and attention to detail, you can capture stunning portraits without the distraction of red-eye.
Uneven Lighting and Harsh Shadows
When using a camera flash, one of the common challenges photographers face is dealing with uneven lighting and harsh shadows. Direct flash can often create unflattering and unnatural-looking lighting, leaving portions of the subject overexposed while casting harsh shadows. However, with the right techniques and tools, you can overcome these issues and achieve more even and pleasing lighting in your photographs.
External Flash with Bounce Capabilities: Using an external flash unit with bounce capabilities is one effective method to soften the light and minimize harsh shadows. By directing the flash’s output indirectly, such as bouncing it off a ceiling or wall, you create a larger light source that produces more diffused and natural lighting. Adjusting the angle and distance of the bounced flash can help achieve the desired lighting effect.
Use a Flash Diffuser: Another way to soften the light and reduce shadows is by using a flash diffuser. Attach a diffuser to your flash unit to scatter and spread the light, resulting in a more even and diffused illumination. Diffusers come in different forms, such as softboxes or diffuser caps, and can be purchased or homemade using materials like white plastic or tissue paper.
Consider an External Reflective Surface: Using an external reflective surface, such as a reflector or white foam board, can help bounce additional light onto the subject, reducing shadows and creating a more balanced lighting. Position the reflective surface opposite the flash, angling it to redirect the light onto the subject. Experiment with different angles and positions to achieve the desired lighting effect.
Combine Flash with Ambient Light: Another technique to achieve more even lighting is to combine flash with ambient light. By adjusting your camera settings to capture enough ambient light and using the flash as fill light, you can balance the exposure and minimize harsh shadows. This technique is especially useful in situations where the ambient light is dim, and the flash alone may result in a stark contrast between subject and background.
Use Light Modifiers: Light modifiers, such as umbrellas or softboxes, can be attached to the flash to create a larger and softer light source. These modifiers help to spread the light more evenly and diffuse any harsh shadows. Experiment with different types and sizes of light modifiers to achieve the desired lighting effect for your specific subject and scene.
Modify Flash Output: Adjusting the flash output power and using flash exposure compensation can also help to alleviate uneven lighting. Reducing the flash power can help prevent overexposure and reduce the intensity of the light, resulting in a more balanced lighting. Flash exposure compensation allows you to manually adjust the flash output, providing better control over exposure and minimizing harsh shadows.
By implementing these techniques and using the right tools, you can overcome the challenges of uneven lighting and harsh shadows when using a camera flash. Remember to experiment with different angles, settings, and equipment to find the approach that best suits your subject and desired outcome. With practice and attention to detail, you can achieve beautifully lit photographs with a more even distribution of light.
Overexposure and Washed-Out Images
One of the common camera flash problems photographers encounter is overexposure and washed-out images. This occurs when the flash is too powerful or positioned too close to the subject, resulting in an excessive amount of light hitting the sensor. However, with proper techniques and adjustments, you can avoid overexposure and capture well-exposed images with sufficient detail and tonal range.
Flash Exposure Compensation: Many cameras have a flash exposure compensation feature that allows you to adjust the flash output. By reducing the flash power, you can decrease the amount of light emitted by the flash, preventing overexposure and maintaining proper exposure for your subject. Experiment with different flash exposure compensation values to achieve the desired exposure balance.
Fill-Flash Technique: The fill-flash technique is effective in balancing ambient light and flash exposure. Rather than relying solely on the flash for illumination, use it as a supplementary light source to fill in the shadows created by ambient light. This technique helps to preserve details in both highlights and shadows, resulting in a more well-exposed image with natural-looking tones.
Use Flash Diffusers: Flash diffusers are accessories that help to soften and distribute the light emitted by the flash, reducing the harshness and intensity that can lead to overexposure. Attach a diffuser over the flash head to create a more diffused and even light source. This will help to prevent hot spots and deliver a more pleasing illumination in your photographs.
Move the Flash Off-Camera: If possible, consider using off-camera flash to reduce the risk of overexposure. Positioning the flash at different angles or distances from the subject can help achieve a more balanced and controlled lighting. Utilize wireless triggers or flash extension cords to move the flash away from the camera, allowing for more creative lighting setups and reducing the likelihood of overexposure.
Adjust Camera Settings: Apart from flash-specific adjustments, you can also make changes to your camera settings to combat overexposure. One approach is to use a smaller aperture (higher f-stop number) to limit the amount of light entering the camera. Additionally, adjusting the ISO sensitivity can help control the camera’s overall sensitivity to light, allowing for better exposure control when using flash.
Use Flash Gels: Flash gels are colored filters that can be placed over the flash head to modify the color temperature of the light. They can help achieve more accurate color reproduction and avoid the washed-out look that can occur when using the flash. Experiment with different gel colors to find the right balance and enhance the overall aesthetics of your images.
Preview and Histogram: Utilize the preview screen on your camera to check the exposure of your images after using the flash. Pay attention to the histogram, which provides a graphical representation of the distribution of tones in the image. Avoid blinking highlights or spikes at the extreme ends of the histogram, as it indicates overexposure. Adjust your camera or flash settings accordingly until you achieve a well-exposed image.
By implementing these techniques and making the necessary adjustments, you can prevent overexposure and capture properly exposed images with your camera flash. Practice and experimentation are key to mastering the art of flash photography and achieving consistent and well-balanced results.
Unwanted Reflections and Glare
When using a camera flash, photographers often encounter unwanted reflections and glare in their photographs. These reflections can be caused by reflective surfaces, such as glass, shiny objects, or even the subject’s own skin. They can detract from the overall quality of the image and create distractions. However, with careful consideration and a few techniques, you can minimize or eliminate these unwanted reflections and glare.
Change the Angle or Position of the Flash: One of the simplest ways to minimize reflections and glare is to change the angle or position of the flash. Tilting the flash slightly upwards or downwards can help redirect the light away from reflective surfaces. Additionally, moving the flash off-camera or to the side can eliminate direct reflections and create a more diffused lighting effect.
Use a Polarizing Filter: A polarizing filter is a helpful tool for reducing unwanted reflections and glare. It works by blocking specific polarized light waves that cause reflections. Attach a polarizing filter to the front of your lens and adjust it to the desired position to minimize reflections from shiny or reflective surfaces. Keep in mind that polarizing filters can also darken the overall image, so adjust the filter accordingly.
Avoid Direct Reflections: Positioning yourself or the subject in a way that avoids direct reflections can significantly reduce unwanted glare. Be mindful of shiny or reflective surfaces in the environment and adjust your composition accordingly. Changing the angle or moving closer to the subject can help minimize the chance of capturing unwanted reflections.
Modify the Composition: If you’re unable to eliminate reflections or glare entirely, consider modifying the composition to incorporate them creatively rather than having them as distractions. Use reflections to add depth or interest to your images. Experiment with different angles and perspectives to find unique ways to incorporate the reflections into your composition.
Use a Lens Hood: A lens hood is primarily used to block stray light from entering the lens and causing lens flare. However, it can also help in reducing reflections and glare. Attach a lens hood to your lens to shield it from direct light sources and minimize unwanted reflections. Ensure that the lens hood is correctly fitted to avoid vignetting or blocking the flash’s coverage.
Modify the Lighting Setup: Modifying the lighting setup can also help reduce unwanted reflections and glare. By using softer and more diffused lighting sources, such as umbrellas, softboxes, or diffusers, you can minimize the intensity of the light hitting reflective surfaces. Diffusing the light helps to scatter it more evenly, reducing the chances of creating unwanted reflections and glare.
Adjust the Camera Angle: Another technique to combat reflections is to adjust the camera angle. By changing your positioning or angle in relation to the subject and the reflective surface, you can find a position where reflections are minimal or less noticeable. Experiment with different angles and perspectives to find the most flattering and reflection-free composition.
By applying these techniques and taking proper precautions, you can reduce or eliminate unwanted reflections and glare in your photographs. Remember to be mindful of your surroundings, adjust your lighting setup, and experiment with different angles and positions to achieve the desired effect. With practice and attention to detail, you can capture images free from distracting reflections and glare.
Unnatural Skin Tones in Photographs
When using a camera flash, one common issue photographers face is capturing photographs with unnatural skin tones. Flash photography can sometimes result in skin appearing too washed out, too yellow, or too cool, causing subjects to look unflattering or unnatural. However, with proper techniques and adjustments, you can achieve more accurate and pleasing skin tones in your photographs.
Adjust White Balance: The white balance setting on your camera plays a crucial role in determining the overall color tone of your photographs. Different lighting conditions require different white balance settings to ensure accurate color reproduction. Experiment with different white balance presets or manually adjust the white balance settings to match the lighting conditions and achieve natural skin tones.
Use a Warm/Cool Color Filter: Depending on the situation, using a warm or cool color filter over your flash can help balance the color temperature during flash photography. Warm color filters, such as amber or orange gels, add warmth to the light and help counterbalance the cool tones often associated with flash photography. Cool color filters, such as blue gels, can help neutralize warmer light sources or create a specific stylistic effect.
Modify Flash Output: The intensity of the flash can affect the skin tones in your photographs. If you find that the flash output is too harsh and results in unnatural skin tones, consider reducing the flash power or dialing down the flash exposure compensation. This will help to soften the light and produce more natural-looking skin tones.
Use a Diffuser or Bounce Flash: Direct flash can create harsh and unflattering lighting, leading to unnatural skin tones. To soften the light and achieve a more flattering effect, consider using a diffuser attachment over the flash or opt for bounce flash techniques. Diffusers scatter the light, while bounce flash bounces the light off a nearby reflective surface such as a wall or ceiling. Both methods help to create a more diffuse and natural-looking light source.
Correct in Post-Processing: If you find that your photographs still have unnatural skin tones, you can use post-processing software to correct them. Adjust the white balance or color temperature settings in your editing software to fine-tune the skin tones and achieve a more accurate representation. Take care not to overcorrect, as this can lead to artificial-looking results.
Take Test Shots and Review: It is important to take test shots and review the images during your shoot. Check the skin tones on the camera’s LCD screen to ensure that they appear natural. Pay attention to any color cast or imbalance, and make necessary adjustments to your flash power, white balance, or filters after reviewing the test images.
Communicate and Collaborate: If you are photographing people, communication is key to achieving natural skin tones. Talk to your subjects and make them feel comfortable. Make adjustments based on their feedback and work together to achieve the desired result. Be open to their suggestions and preferences regarding their skin tones.
By implementing these techniques and considering the adjustments mentioned above, you can capture photographs with more accurate and natural-looking skin tones. Experiment with different settings, filters, and lighting techniques to find the approach that works best for your specific shooting conditions and creative vision.
Dealing with Flash Sync Issues
Flash sync issues can be a frustrating problem that photographers encounter when using a camera flash. These issues occur when the flash fails to synchronize properly with the camera’s shutter speed, resulting in uneven lighting or partial exposure. Understanding and troubleshooting flash sync problems can help you overcome these issues and achieve consistent and well-exposed images.
Understanding Flash Sync Modes: Familiarize yourself with the different flash sync modes available on your camera. Most cameras offer a variety of options such as front curtain sync, rear curtain sync, and high-speed sync. Front curtain sync fires the flash at the beginning of the exposure, while rear curtain sync fires the flash just before the shutter closes. High-speed sync allows you to use faster shutter speeds while still synchronizing with the flash. Choose the appropriate sync mode based on your shooting scenario and desired effect.
Matching Flash Sync Speed: Each camera has a specific maximum flash sync speed, which is the fastest shutter speed at which the camera can synchronize with the flash. It’s important to set your camera’s shutter speed to or below this maximum sync speed to avoid partial exposure or black bars in your images. Consult your camera’s manual or check the settings menu to determine the correct sync speed for flash photography.
Check for External Factors: External factors such as wireless signals or electronic interference can sometimes cause sync issues. Avoid shooting in areas with strong wireless signals or electrical sources that may interfere with the synchronization between the flash and the camera. If possible, relocate to a different spot or adjust your position to minimize potential interference.
Ensure Proper Flash Connection: Double-check the connections between your camera and flash unit to ensure they are secure. Any loose or faulty connections can result in poor synchronization. Clean the contacts on both the camera and the flash with a soft cloth to remove any dirt or debris that may hinder proper communication. If you are using wireless triggers, confirm that they are properly paired and functioning correctly.
Use High-Speed Sync (HSS) if Available: High-Speed Sync (HSS) is a valuable feature available on some camera and flash combinations. HSS allows you to use flash at extremely high shutter speeds beyond the typical maximum sync speed, enabling you to capture well-exposed images even in bright conditions. Activate HSS mode in your camera settings and ensure that your flash unit supports this feature as well.
Experiment with Flash Placement: The position of your flash unit can affect the synchronization with the camera. Keep in mind that the further the flash is from the camera, the longer it takes for the flash to reach the subject. Experiment with different flash placements to find the optimal position for synchronization and desired lighting effect.
Use Manual Flash Mode: When experiencing synchronization issues, switch to manual flash mode. This mode allows you to manually control the flash power output, eliminating any potential communication problems between the camera and the flash. Adjust the flash power settings to achieve proper exposure and maintain consistent lighting throughout your shots.
Consult the Camera and Flash Manuals: If you have tried various troubleshooting methods and are still experiencing flash sync issues, refer to the manuals for both your camera and flash unit. These manuals often provide specific instructions and tips for troubleshooting sync issues and may offer solutions for the specific equipment you are using.
By understanding the various flash sync modes, ensuring proper connections, utilizing high-speed sync when available, and experimenting with flash placement and settings, you can overcome flash sync issues and capture well-exposed images with consistent lighting. Remember to consult your camera and flash manuals for specific guidance, and don’t hesitate to seek professional assistance if you’re unable to resolve the issue on your own.
Correcting Flash Exposure Compensation
Flash exposure compensation is a valuable tool that allows photographers to adjust the output of the flash to achieve the desired exposure. However, there are situations where the default flash exposure compensation settings may not result in the desired outcome. Understanding how to correct flash exposure compensation can help you achieve more accurately exposed images when using a camera flash.
Understanding Flash Exposure Compensation: Flash exposure compensation allows you to manually adjust the flash output while maintaining proper exposure for your subject. It is often measured in stops, with positive values increasing the flash output and negative values decreasing it. This adjustment can help you achieve better exposure balance, especially when the default flash output is too strong or too weak for the given scene.
Evaluate Your Test Shots: Assess the initial test shots to determine if any adjustment to the flash exposure compensation is necessary. Review the exposure on your camera’s LCD screen, paying attention to details in both the highlights and shadows. Adjust the flash exposure compensation if the test shots appear overexposed or underexposed, ensuring a more balanced exposure across the entire image.
Experiment and Observe: Observe how changes in flash exposure compensation affect the resulting images. Experiment with different increments, typically ranging from -2 to +2 stops, to find the optimal adjustment for your subject and shooting conditions. Take regular test shots and refine your flash exposure compensation settings until you achieve the desired exposure and lighting effects.
Consider the Ambient Light: Keep in mind that flash exposure compensation not only affects the flash output but also the balance between the flash and ambient light. Consider the ambient light conditions when adjusting the flash exposure compensation. Increase the flash output compensation when the ambient light is bright or overpowering, and decrease it when the ambient light is low or dim.
Use the Histogram: The histogram is a useful tool for evaluating the exposure of your images. It provides a graphical representation of the distribution of tones, allowing you to identify areas of overexposure or underexposure. Utilize the histogram to assess the impact of your flash exposure compensation adjustments and make further adjustments if necessary to achieve proper exposure.
Bracket Your Shots: To ensure you capture the correct exposure, consider bracketing your shots by taking multiple images at different flash exposure compensation settings. This technique allows you to capture a range of exposures and select the best image during post-processing, giving you more flexibility and control over the final results.
Review and Refine: After each series of shots, review and analyze the results. Look for patterns or consistent exposure issues across your images. If you consistently find overexposed or underexposed areas, adjust your flash exposure compensation accordingly and continue refining until you achieve the desired exposure balance.
Monitor Ambient Light Changes: Be mindful of any changes in the ambient light during your shoot. As lighting conditions change, adjust your flash exposure compensation accordingly to maintain proper exposure balance between the flash and ambient light.
Correcting flash exposure compensation is a valuable tool in achieving accurate and well-exposed images when using a camera flash. By evaluating your test shots, experimenting with different adjustments, using the histogram as a guide, and monitoring the ambient light, you can refine and fine-tune your flash exposure compensation settings to suit the specific shooting conditions and creative goals of your photography.
Using Diffusers and Bounce Techniques to Soften the Flash
When using a camera flash, one of the common challenges photographers face is dealing with the harsh and direct lighting that can come from the flash. However, there are techniques you can use to soften the flash and create a more diffused and natural-looking light source. Two popular methods for achieving this are using diffusers and bounce techniques.
Using Diffusers: Diffusers are accessories that attach to the front of the flash and help to scatter and soften the light emitted from the flash head. They work by dispersing the light and reducing its intensity, resulting in a more even and diffused illumination. Diffusers come in various forms, such as softboxes or diffuser caps, and can be purchased or homemade using materials like white plastic or tissue paper. Simply attach the diffuser over the flash head to create a softer light source.
Diffusers are particularly effective in close-up or portrait photography, where a softer and more flattering light is desired. They help to reduce harsh shadows, minimize strong highlights, and create a more even illumination on the subject’s face. Diffused lighting also helps to make skin appear smoother and more natural, improving the overall quality of the image.
Bounce Techniques: Bounce flash is another technique used to soften the light emitted from the flash. Instead of pointing the flash directly at the subject, you redirect the light by bouncing it off a nearby surface, such as a wall or ceiling. Bounce flash creates a larger, softer light source by utilizing the reflected light from the surface. This technique helps to diffuse the light and reduce harsh shadows, resulting in a more natural and flattering illumination.
When using bounce flash, it’s essential to consider the color and texture of the surface you are bouncing off. Light-colored and neutral surfaces tend to produce the most natural results. Experiment with different angles, positions, and surfaces to achieve the desired effect. Remember to adjust the flash exposure compensation or flash power to compensate for any light loss that may occur when bouncing the light.
Bounce flash can be particularly useful in indoor settings where the ceiling acts as an excellent surface for redirecting the light. By bouncing the flash off the ceiling, you can create a soft and diffused light that mimics natural overhead lighting. This technique is especially beneficial in situations where the ceiling is lighter in color, as it helps to avoid color casts or tinted lighting.
Using diffusers and applying bounce techniques are effective ways to soften the flash and achieve more pleasing lighting in your photographs. Both methods help to minimize harsh shadows, reduce direct reflections, and create a more diffused light source, resulting in improved image quality. Experiment with different diffusers, surfaces, and angles to find the combination that works best for your specific shooting conditions and creative goals.