
Common Nikon Camera Problems
When it comes to capturing beautiful moments, Nikon cameras are renowned for their high quality and advanced features. However, like any electronic device, they can encounter issues that may hinder your photography experience. In this section, we will explore some common Nikon camera problems and provide troubleshooting tips to help you resolve them.
One of the most frustrating issues is when your Nikon camera fails to turn on. This could be due to a drained battery, faulty power source, or a software glitch. To resolve this, ensure that the battery is fully charged and properly inserted. Try using a different power source or USB cable to rule out any connection problems. If the camera still doesn’t turn on, a factory reset might be necessary.
Another problem photographers encounter is autofocus issues. If your Nikon camera is struggling to focus, make sure the AF/MF switch on the lens is set to autofocus. Clean the lens contacts and ensure there are no obstructions interfering with the autofocus system. Additionally, check if the focus mode is set correctly and experiment with different autofocus modes to see if it improves the focusing performance.
Some Nikon camera users may face difficulties when trying to capture images. If your camera isn’t taking pictures, first check if the memory card is properly inserted. Ensure that the storage capacity of the memory card is not full and format it if needed. If the problem persists, try resetting the camera settings to default or consult the camera’s manual for further troubleshooting steps.
Another common issue is when the built-in flash fails to work. Start by checking the flash settings on your camera. If it’s set to “Off” or “Fill Flash”, change it to the appropriate setting. Ensure that the flash is in the raised position and not obstructed by any obstacles. If the problem persists, try using an external flash unit or seek professional assistance.
When using a Nikon camera, error messages can sometimes appear on the LCD screen. These can be related to memory card errors, lens communication errors, or general system malfunctions. To troubleshoot this, try taking out the memory card and reinserting it. If that doesn’t work, try using a different memory card or lens. If the error message persists, it’s advisable to contact Nikon customer support or visit a service center for assistance.
Battery drain is another common issue that Nikon camera users may face. To address this, first ensure that you are using a compatible battery and that it is fully charged. Disable any unnecessary features like Wi-Fi or GPS that may contribute to battery drain. If the problem continues, it’s worth checking for any firmware updates for your camera, as these can often address battery performance issues.
Nikon cameras freezing or hanging can cause frustration during shoots. To resolve this, try removing the battery for a few minutes and then reinsert it. Make sure to use a memory card with a fast writing speed, as slower cards can sometimes cause the camera to freeze. If the problem persists, consult the user manual or contact Nikon support for further assistance.
Lens issues such as focus inconsistency, noisy autofocus, or zoom problems can also occur. Ensure that the lens is properly attached and check for any debris or dust on the lens contacts. Try using a different lens to determine if the issue lies with the lens or the camera body. For complex lens problems, it’s recommended to seek assistance from a professional Nikon service center.
SD card errors are a common occurrence for Nikon camera users. If you encounter this problem, first remove the memory card and inspect it for physical damage. Clean the card contacts with a soft cloth and reinsert it into the camera. If the error persists, try using a different memory card to see if the problem lies with the card itself. It’s also crucial to regularly format the memory card to maintain its optimal performance.
Overheating can be problematic, especially during prolonged shooting sessions or in hot weather conditions. If your Nikon camera overheats, turn it off and allow it to cool down before resuming use. Avoid direct sunlight and excessive heat sources. Consider reducing the video recording duration or using an external cooling device to prevent overheating.
Connectivity issues, including problems with USB connection, Wi-Fi, or Bluetooth, can also impact your camera’s functionality. Ensure that the cables are securely connected and that your camera is within range of the Wi-Fi or Bluetooth signal. Restart both the camera and the device you’re trying to connect with. If the problem persists, consult the camera’s manual for specific troubleshooting steps.
Lastly, some users may encounter difficulties with their camera’s settings and menu options. If you are unable to access certain settings or experience unusual behavior, perform a camera reset to restore the default settings. It’s also advisable to keep your camera’s firmware updated to ensure optimal functionality.
By identifying and troubleshooting these common Nikon camera problems, you can continue capturing stunning images and unforgettable moments without interruptions. Remember, if the issue persists or if you are uncertain about any steps, don’t hesitate to seek professional assistance to ensure the proper functioning of your Nikon camera.
Troubleshooting Tips for Nikon Camera Not Turning On
One of the most frustrating issues a Nikon camera user can encounter is when the camera fails to turn on. This can prevent you from capturing precious moments and can be quite disheartening. However, before assuming the worst, there are a few troubleshooting steps you can take to resolve this problem.
The first thing to check is the battery. Ensure that the battery is fully charged and properly inserted into the camera. If you have a spare battery, try swapping it out to see if that resolves the issue. Sometimes, the battery may not make proper contact with the camera’s terminals, so gently cleaning the battery contacts with a soft cloth can also help.
If the battery is not the problem, it could be an issue with the power source. Check the power cable or AC adapter to ensure there are no loose connections or damages. Try using a different power outlet or USB cable to rule out any potential problems with the power source.
If the camera still doesn’t turn on, it’s worth trying a hard reset. To do this, remove the battery from the camera and leave it out for a couple of minutes. Then, reinsert the battery and try turning the camera on again. This can help reset any software glitches that may be causing the issue.
If none of the above steps resolve the problem, it’s advisable to check for any firmware updates for your camera. Manufacturers release firmware updates to address bugs and improve performance. Visit the Nikon website and search for your camera model to see if there are any available updates. Follow the instructions provided to update your camera’s firmware.
If all else fails, it’s recommended to contact Nikon customer support or visit a service center for assistance. They have the expertise to diagnose and fix more complex issues that may be causing the camera to not turn on. They can also provide guidance on any potential repairs or replacements that may be necessary.
Remember, troubleshooting steps may vary depending on the specific Nikon camera model you own, so always refer to your camera’s user manual for model-specific instructions. By following these troubleshooting tips, you can overcome the frustration of a Nikon camera not turning on and get back to capturing stunning photos and videos.
Troubleshooting Tips for Nikon Camera Not Focusing
Having trouble with autofocus on your Nikon camera can be frustrating, as it can result in blurry or out-of-focus images. However, before you panic, there are several troubleshooting tips you can try to resolve this issue.
First, check the AF/MF (autofocus/manual focus) switch on your lens. Ensure that it is set to autofocus mode. Sometimes, accidental changes to the switch can cause the camera to not focus properly. Double-check that the switch is in the correct position.
Next, clean the lens contacts. Dust, fingerprints, or debris on the lens contacts can disrupt communication between the camera and lens, affecting autofocus performance. Use a soft microfiber cloth to gently wipe the lens contacts, ensuring they are clean and free from any obstructions.
Pay attention to the focus mode settings on your camera. Depending on your shooting scenario, different focus modes may yield better results. Experiment with different autofocus modes, such as single point focus or continuous focus, to see if it improves the focusing performance. Refer to your camera’s user manual for specific instructions on how to change the autofocus mode.
In low-light situations, your Nikon camera may struggle to autofocus accurately. Consider using manual focus or assistive tools like a flashlight or focus assist lamp to help the camera better detect focus. Also, if you’re using a lens with a narrow aperture, such as a telephoto lens, it can affect autofocus performance, especially in low-light conditions.
If you’re attempting to focus on a subject that is too close to the camera, the lens may have difficulty achieving proper focus. Most lenses have a minimum focusing distance, so make sure you are within the recommended range for the lens you’re using. If you’re using a macro lens, refer to the lens manual for specific instructions on how to achieve proper focus at close distances.
Another troubleshooting step is to perform a camera reset to restore the autofocus settings to their default values. Refer to your camera’s user manual for instructions on how to perform a factory reset. Keep in mind that this will also reset other camera settings, so make sure to save any custom settings before resetting.
If you have access to another lens, try using a different lens to determine if the autofocus problem is lens-related or camera-related. This can help identify whether the issue lies with the lens itself or the autofocus system of the camera. If the problem persists with multiple lenses, it’s advisable to contact Nikon customer support or visit a service center for further assistance.
It’s important to note that different Nikon camera models may have different autofocus systems and settings, so refer to your camera’s user manual or consult Nikon’s website for specific troubleshooting steps related to your camera model.
By following these troubleshooting tips, you can address autofocus issues on your Nikon camera and achieve sharp and well-focused images. Don’t hesitate to seek professional assistance if the problem persists or if you’re unsure about any steps. Capture stunning photos with confidence by resolving Nikon camera focusing issues.
Troubleshooting Tips for Nikon Camera Not Taking Pictures
Encountering issues where your Nikon camera refuses to take pictures can be highly frustrating, especially when you’re trying to capture important moments. However, there are several troubleshooting tips you can employ to resolve this problem and get your camera back up and running.
First, check if the memory card is properly inserted into the camera. Sometimes, a loose or improperly inserted memory card can prevent the camera from taking pictures. Remove the memory card and reinsert it securely, ensuring that it clicks into place.
Next, inspect the storage capacity of the memory card. If the card is full, it can prevent the camera from capturing new images. Delete any unnecessary photos or videos from the card or replace it with a larger capacity card, if needed. It’s also a good practice to format the memory card regularly to maintain optimal performance.
If you have recently made changes to the camera settings, it’s possible that some settings may be preventing the camera from taking pictures. Resetting the camera to its default settings can help rectify this issue. Refer to your camera’s user manual for instructions on how to perform a factory reset.
Ensure that you are using a compatible and fully charged battery in your Nikon camera. Low battery levels or incompatible batteries can prevent the camera from functioning properly. Try charging the battery fully or using a spare battery to determine if the issue lies with the battery.
Another troubleshooting step is to check the shooting mode. Depending on the mode you are using, the camera may be set to self-timer or remote control, which can prevent immediate photo capture. Switch to a different shooting mode, such as single-shot mode, and try to take a picture again.
If you’re experiencing problems with the camera’s autofocus, it may prevent the camera from taking pictures. Review the autofocus troubleshooting tips mentioned earlier to ensure that the camera is focusing properly before attempting to take a photo.
Sometimes, the camera firmware may need to be updated to resolve any software issues that could be interfering with the camera’s functionality. Check the Nikon website for any available firmware updates for your camera model and follow the provided instructions to update your camera’s firmware.
If none of the above steps resolve the issue, it’s advisable to contact Nikon customer support or visit a service center for further assistance. They have the expertise to diagnose and fix more complex camera problems that may be preventing it from taking pictures.
Keep in mind that troubleshooting steps may vary depending on the specific Nikon camera model you own, so always consult your camera’s user manual for model-specific instructions. By following these troubleshooting tips, you can get your Nikon camera back on track and resume capturing beautiful images.
Troubleshooting Tips for Nikon Camera Flash Not Working
Having issues with your Nikon camera flash not working can significantly affect your ability to capture well-lit photographs, especially in low-light situations. Fortunately, there are several troubleshooting tips you can try to resolve this problem and get your flash functioning again.
First, check the flash settings on your camera. Ensure that the flash is not set to “Off” or “Fill Flash” mode, as this will prevent the flash from firing. Switch the flash mode to the appropriate setting for your shooting scenario, such as “Auto” or “TTL” (through-the-lens), to ensure that the flash fires when necessary.
Make sure that the flash is in the raised position and not obstructed by any obstacles. Some Nikon camera models have a button or lever that allows you to manually raise or lower the flash. Ensure that the flash is fully raised and not blocked by your finger, a lens hood, or other accessories that may interfere with its operation.
Check if the flash is set to “Front Curtain Sync” mode. In some cases, the flash may not work if it is set to “Rear Curtain Sync” or other specialized modes. Change the flash mode to “Front Curtain Sync” and test if the flash fires correctly.
Inspect the flash contacts on both the camera and the flash unit. Dust, dirt, or oxidization on the contacts can hinder proper communication between the camera and flash, resulting in the flash not firing. Use a soft, dry cloth or an alcohol swab to gently clean the contacts on both the camera and flash unit. Ensure that they are clean and free from any debris.
Consider checking the flash compensation settings on your camera. If the flash compensation is set too low, it may prevent the flash from firing at full power. Adjust the flash compensation settings to ensure that the flash output is set to the desired level of brightness.
If your Nikon camera has a built-in diffuser or bounce card, ensure that it is properly attached and not blocking the flash. Sometimes, a misaligned diffuser or bounce card can interfere with the flash’s operation. Check if they are securely attached and aligned correctly.
Ensure that your camera battery has sufficient charge. Insufficient battery power can affect the flash’s ability to fire at full power. If the battery is low, try charging it fully or replacing it with a fully charged battery to see if that resolves the issue.
If the issue persists, it’s worth trying an external flash unit. Connecting an external flash to your camera can help determine if the problem lies with the camera’s internal flash or if it is a more complex issue. If the external flash works properly, it may indicate that there is a problem with the camera’s internal flash unit.
If all troubleshooting steps fail to resolve the issue, it’s advisable to contact Nikon customer support or visit a service center for further assistance. They have the expertise to diagnose and fix more complex flash-related problems and can provide guidance on any potential repairs or replacements that may be necessary.
Remember, troubleshooting steps may vary depending on the specific Nikon camera model you own, so always consult your camera’s user manual for model-specific instructions. By following these troubleshooting tips, you can overcome issues with your Nikon camera flash not working and ensure that your photographs are properly illuminated.
Troubleshooting Tips for Nikon Camera Showing Error Messages
It can be frustrating when your Nikon camera displays error messages, as it can prevent you from taking photos or accessing certain functions. However, by following a few troubleshooting tips, you may be able to resolve these error messages and get your camera back to working condition.
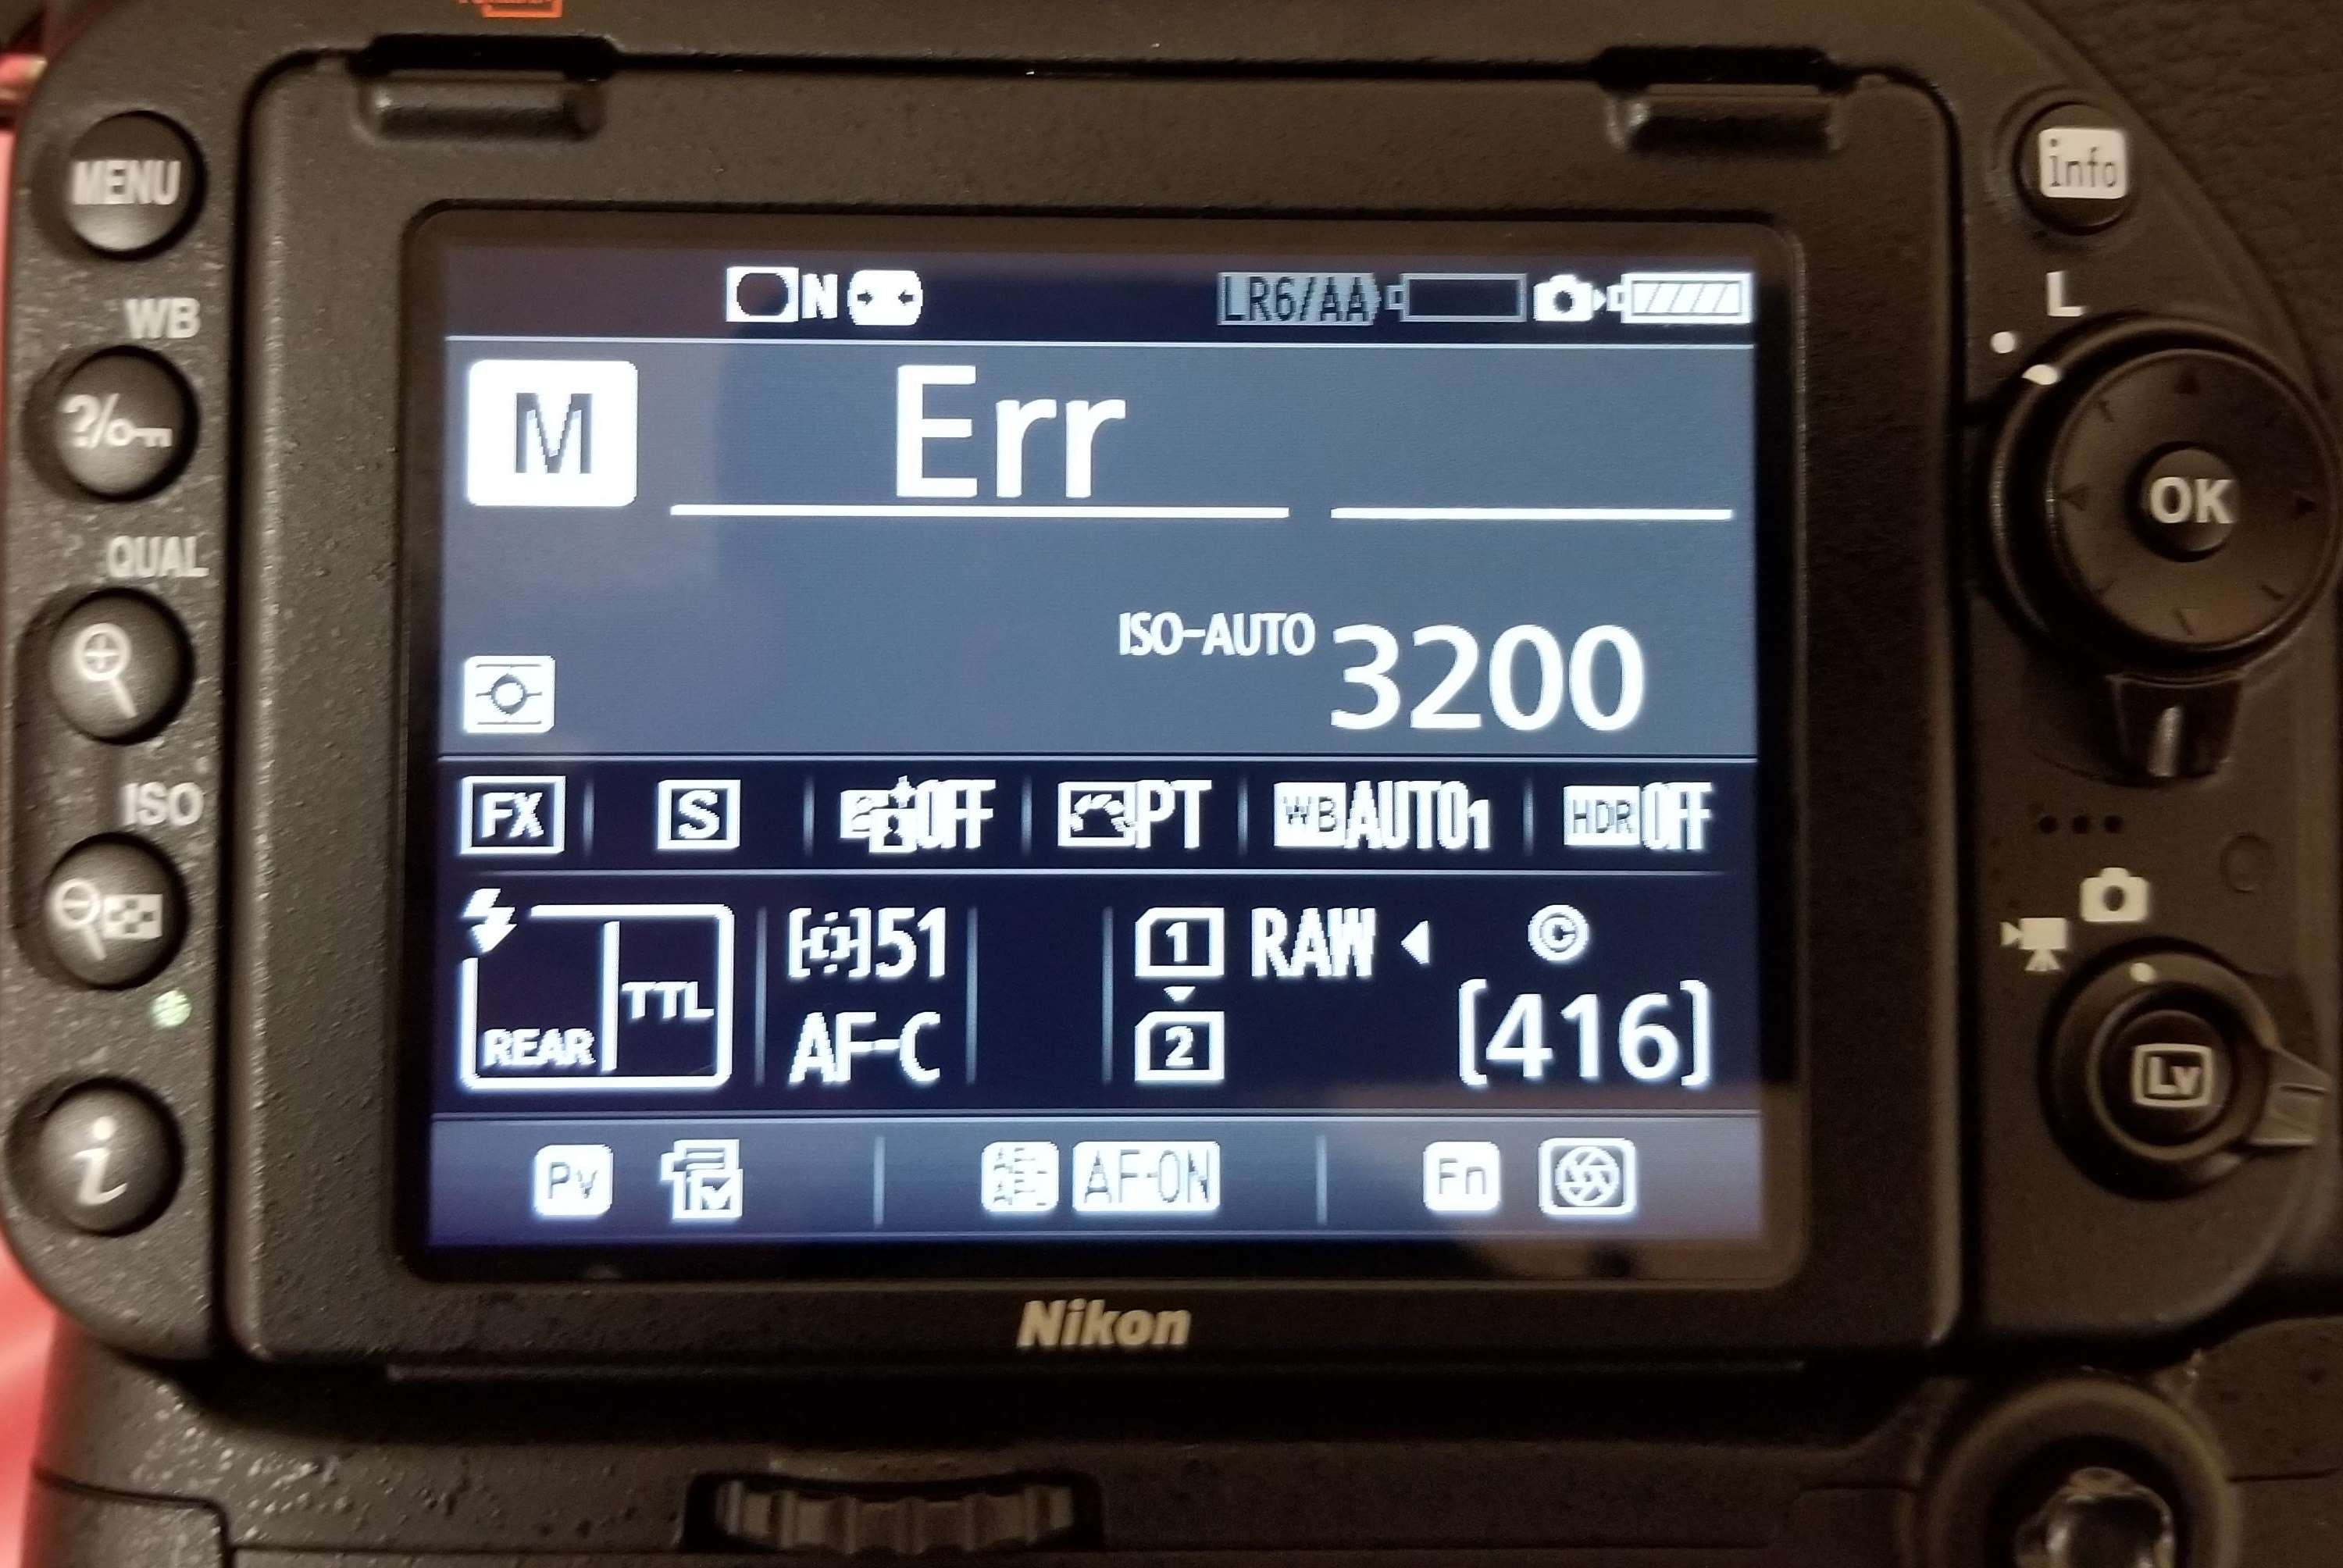
The first step is to carefully read and understand the error message displayed on your Nikon camera’s LCD screen. Error messages can indicate various issues, such as memory card errors, lens communication errors, or general system malfunctions. Understanding the specific error message can help you identify the underlying problem.
If you encounter a memory card error message, start by removing the memory card from the camera and inspecting it for physical damage or dirt. Clean the card contacts with a soft cloth, then reinsert the card into the camera and see if the error message disappears. If the issue persists, try using a different memory card to determine if the problem lies with the card itself.
For lens communication errors, begin by removing the lens from the camera and inspecting the lens contacts for any dirt, dust, or debris. Clean the lens contacts with a soft cloth to ensure a good connection with the camera. Reattach the lens and check if the error message persists. If it does, try using a different lens to determine if the issue lies with the lens or the camera body.
If the error message does not specify a particular issue, it could be a general system error. In such cases, try turning off the camera and removing the battery for a few minutes. Then, reinsert the battery and turn on the camera to see if the error message clears. Performing a camera reset to restore the default settings can also help resolve system-related errors. Consult your camera’s user manual for instructions on how to perform a factory reset.
It’s also advisable to check for any firmware updates for your Nikon camera. Manufacturers release firmware updates to address bugs and improve performance. Visit the Nikon website and search for your camera model to see if there are any available updates. Follow the instructions provided to update your camera’s firmware, as this may resolve certain error messages.
If the error message persists or is not resolved by the above troubleshooting steps, it’s recommended to contact Nikon customer support or visit a service center. They have specialized expertise and tools to diagnose and fix more complex issues that may be causing the error messages. They can also provide guidance on any potential repairs or replacements that may be necessary.
Remember, different Nikon camera models may display different error messages, so it’s crucial to refer to your camera’s user manual for specific troubleshooting steps and error code explanations. By following these troubleshooting tips, you can address error messages on your Nikon camera and ensure smooth and uninterrupted operation.
Troubleshooting Tips for Nikon Camera Battery Drain
Experiencing excessive battery drain on your Nikon camera can be frustrating, especially when you’re out capturing moments and suddenly run out of power. However, there are several troubleshooting tips you can try to mitigate battery drain and extend your camera’s battery life.
First, ensure that you are using a compatible and fully charged battery in your Nikon camera. Using non-genuine or low-quality batteries can contribute to faster battery drain. It’s recommended to use Nikon-approved batteries or reputable third-party alternatives that are compatible with your camera model.
Disable any unnecessary features and settings that may be consuming more power than necessary. Features like Wi-Fi, GPS, or continuous auto-focus can drain the battery quickly. Disable these features when they are not required, and only enable them when needed to conserve battery life.
Adjust the camera’s sleep timer settings to automatically power off the camera after a certain period of inactivity. This helps conserve battery power when the camera is not being actively used.
Dim the camera’s LCD screen brightness or set it to auto-brightness if available. The LCD screen is a power-hungry component, and reducing its brightness level can significantly extend battery life. Additionally, using the viewfinder instead of relying heavily on the LCD screen can also help conserve battery power.
Regularly check for firmware updates for your Nikon camera. Manufacturers often release firmware updates that optimize battery performance and address any known issues. Visit the Nikon website and search for your camera model to see if there are any available updates. Follow the instructions provided to update your camera’s firmware.
Keep the camera and battery in a moderate temperature range. Extreme temperatures, whether too hot or too cold, can affect battery performance and drain the battery more quickly. Avoid exposing your camera to direct sunlight or leaving it in a car on a hot day.
If you notice that battery drain is significantly higher than usual, it’s worth checking for any apps or processes that may be running in the background and consuming power. Close any unnecessary apps or processes to minimize battery drain. Additionally, consider restarting the camera, as it can help free up any stuck processes that may be causing excessive battery usage.
Investing in spare batteries is also a good solution to combat battery drain. Carrying extra batteries allows you to swap them out when one battery gets depleted, ensuring uninterrupted shooting sessions.
If you have tried all of the above troubleshooting tips and battery drain still persists, it’s advisable to contact Nikon customer support or visit a service center for further assistance. They have the expertise to diagnose and fix potential hardware issues that may be contributing to the excessive battery drain.
By implementing these troubleshooting tips, you can minimize battery drain on your Nikon camera and extend the battery life, ensuring that you have ample power to capture all the moments that matter.
Troubleshooting Tips for Nikon Camera Freezing or Hanging
Experiencing instances where your Nikon camera freezes or hangs can be incredibly frustrating, interrupting your photography workflow and potentially causing you to miss important shots. Fortunately, with a few troubleshooting tips, you may be able to resolve these issues and get your camera back to working normally.
If your Nikon camera freezes or hangs, the first step is to remove the battery and memory card. This will effectively perform a “hard reset” of the camera, clearing any temporary glitches that may be causing the freezing or hanging issue. Leave the battery and memory card out for a few minutes before reinserting them and turning the camera back on.
Monitor the temperature of your camera during extended shooting sessions or in high ambient temperatures. Excessive heat buildup can cause the camera’s internal components to overheat, leading to freezing or hanging. If you suspect the issue is related to overheating, allow the camera to cool down before resuming use. You can also try using an external cooling device or reducing the duration of continuous shooting to mitigate heat build-up.
Review the firmware version of your Nikon camera and check if updates are available. Manufacturers regularly release firmware updates to address bugs, improve performance, and resolve freezing or hanging issues. Visit the Nikon website and search for your camera model to see if there are any available updates. Follow the provided instructions to update your camera’s firmware.
If you frequently experience freezing or hanging issues while using a specific memory card, there may be compatibility or performance issues. Try using a different memory card or formatting the existing card to rule out any potential card-related problems. Ensure that you are using a memory card that meets the recommended specifications for your Nikon camera model.
If freezing or hanging issues persist, it’s recommended to perform a camera reset. This will restore the camera’s settings to their default values. Backup any important settings or custom configurations before resetting, as this process will erase them. Refer to your camera’s user manual for instructions on how to perform a factory reset.
Regularly clean the camera’s battery contacts and memory card contacts. Dust, dirt, or debris on these contacts can interfere with proper electrical connections and potentially lead to freezing or hanging issues. Gently clean the contacts using a soft cloth or an alcohol swab, ensuring they are free from any obstructions.
For more complex freezing or hanging issues that persist, it’s advisable to contact Nikon customer support or visit a certified service center. They have the expertise to diagnose and resolve hardware-related problems that may be causing the freezing or hanging. They can also provide guidance on any potential repairs or replacements that may be necessary.
Remember, troubleshooting steps may vary depending on the specific Nikon camera model you own, so always refer to your camera’s user manual for model-specific instructions. By following these troubleshooting tips, you can address freezing or hanging issues with your Nikon camera and ensure smooth and uninterrupted photography sessions.
Troubleshooting Tips for Nikon Camera Lens Issues
If you’re encountering issues with your Nikon camera lens, such as focus inconsistency, noisy autofocus, or zoom problems, there are several troubleshooting tips you can try to resolve the issue before seeking professional assistance. By following these steps, you may be able to address common lens-related problems and restore optimal performance.
First, ensure that the lens is properly attached to the camera. Sometimes, a loose or improperly mounted lens can cause connection issues and affect focus or other lens functions. Remove the lens and securely reattach it, making sure it clicks into place.
If you have a lens with a physical switch or button for focus modes, check that it is set to the appropriate autofocus mode. Ensure that the AF/MF (autofocus/manual focus) switch on the lens is set to autofocus mode. Also, ensure that the camera is not set to manual focus mode within the camera settings.
Inspect the contacts between the camera and the lens. Dust, dirt, or debris on these contacts can disrupt communication and affect autofocus or other lens functions. Clean the contacts using a soft, dry cloth or an alcohol swab, gently wiping away any buildup. Repeat the process for both the camera and lens contacts.
If your lens has an internal motor for autofocus, listen for any unusual noise or grinding sounds during autofocus operation. Unusual noises can indicate a problem with the lens motor. In such cases, it’s advisable to consult a professional Nikon service center for further assistance and possible repair.
If you notice inconsistent autofocus or focus issues, especially in low-light conditions, try using the camera’s assistive focus features. For example, the focus assist lamp or using manual focus with focus peaking can help you achieve accurate focus. Experiment with different focus modes, such as single-point focus or continuous focus, to find the most reliable option for your specific shooting scenario.
If you’re experiencing problems with the lens zoom, inspect the zoom ring for any debris or obstructions. Gently rotate the zoom ring back and forth to see if it smoothens out any stiffness or interference. If the zoom ring remains stiff or feels gritty, it may require professional servicing to address underlying mechanical issues.
If the lens issue persists, it’s advisable to consult the lens manual or contact Nikon customer support for further guidance. They can provide specific troubleshooting steps or recommend service options based on the lens model and the nature of the problem.
Remember, troubleshooting steps may vary depending on the specific Nikon camera and lens model you own, so always refer to the respective user manuals for model-specific instructions. By following these troubleshooting tips, you can address lens-related issues and optimize the performance of your Nikon camera lens.
Troubleshooting Tips for Nikon Camera SD Card Errors
Encountering SD card errors with your Nikon camera can be frustrating and may prevent you from capturing or accessing your photos. However, there are several troubleshooting tips you can try to address these errors and get your camera back in working order.
The first step is to remove the SD card from the camera and inspect it for any physical damage or dirt. Clean the card contacts using a soft, lint-free cloth to ensure good electrical connections. Reinsert the card securely into the camera and check if the error message disappears.
If the error persists, try using a different SD card. Sometimes, SD card compatibility or performance issues can cause errors. Insert a different SD card into your Nikon camera to determine if the problem lies with the original card. Ensure that the SD card complies with the specifications recommended by Nikon for your specific camera model.
Formatting the SD card can also help resolve certain errors. However, keep in mind that formatting erases all data on the card, so make sure to back up any important files before proceeding. To format the SD card, navigate to the camera’s menu settings and choose the format option. Follow the on-screen prompts to complete the formatting process.
Regularly check for firmware updates for your Nikon camera. Manufacturers often release firmware updates to address bugs, improve performance, and resolve compatibility issues with SD cards. Visit the Nikon website and search for your camera model to see if there are any available updates. Follow the provided instructions to update your camera’s firmware.
If you still encounter SD card errors, try inserting the card into a computer or laptop and using SD card diagnostic software. This software can scan and repair any potential errors or file system issues on the card. There are various free SD card diagnostic tools available online that you can use for this purpose.
In some cases, SD card errors can be caused by the camera’s SD card slot itself. Inspect the card slot for any physical damage or dirt. Gently blow into the slot or use compressed air to remove any debris that may be interfering with the card’s proper insertion or connection. Be careful not to introduce more dust or debris into the slot during this process.
It’s worth noting that SD cards have a limited lifespan, and they can wear out over time. If you experience recurring SD card errors across multiple cards, it may be an indication that your camera’s SD card slot is failing. In such cases, contacting Nikon customer support or visiting a service center for further assistance is recommended.
Remember to always handle SD cards with care, keeping them protected from moisture, extreme temperatures, and physical damage. Regularly backing up your photos helps prevent data loss in the event of a card failure or error.
By following these troubleshooting tips, you can address SD card errors on your Nikon camera and ensure smooth and trouble-free use of your memory cards.
Troubleshooting Tips for Nikon Camera Overheating
Dealing with overheating issues on your Nikon camera can be concerning and can disrupt your photography sessions, especially during prolonged use or in hot weather conditions. However, by following a few troubleshooting tips, you may be able to mitigate overheating and protect your camera from potential damage.
If you notice that your Nikon camera is getting excessively hot, the first step is to turn off the camera and allow it to cool down. Avoid attempting to use the camera while it is overheating, as this can further exacerbate the issue and potentially lead to more severe problems.
During extended shooting sessions, limit the use of continuous shooting and video recording, as these activities can generate more heat. Prolonged and continuous use of these features can cause the camera’s internal components to heat up rapidly. Take breaks between shooting sessions to allow the camera to cool down.
If you’re shooting in hot weather conditions, provide proper ventilation and airflow for your camera. Avoid leaving the camera exposed directly to sunlight for extended periods. Consider using a camera shade or umbrella to provide shade and reduce exposure to direct sunlight.
Keep the camera’s firmware up to date, as manufacturers often release firmware updates to optimize performance and address potential overheating issues. Check the Nikon website for any available firmware updates for your camera model and follow the provided instructions to update the firmware.
Using an external cooling solution can greatly help in preventing overheating. Attach an external fan or cooling device specifically designed for cameras to help regulate the temperature. Position the fan strategically to provide airflow around the camera body and vents.
When shooting for extended periods, consider using an AC power adapter instead of relying solely on battery power. This reduces the camera’s internal power consumption, which can contribute to overheating. Be cautious and ensure that the power adapter is compatible with your specific camera model.
Regularly clean the camera’s vents and ensure they are free from dust, lint, or debris. A buildup of these particles can restrict air circulation and contribute to overheating. Use a dry and soft brush or a can of compressed air to gently remove any obstructions from the camera vents.
If you’re shooting with a lens that has a narrow aperture, such as a telephoto lens, it can generate more heat due to the restricted light intake. Switching to a wider aperture lens or reducing the duration of continuous shooting can help minimize the risk of overheating.
If you have tried the above troubleshooting tips and the camera continues to overheat, it’s advisable to contact Nikon customer support or visit a service center. They have the expertise to diagnose and resolve any underlying issues that may be causing excessive overheating.
Remember, different Nikon camera models may have different heat dissipation systems, so it’s essential to refer to your camera’s user manual for specific instructions and recommendations regarding overheating prevention and management.
By following these troubleshooting tips and adopting preventive measures, you can effectively manage and minimize overheating issues with your Nikon camera, ensuring extended and trouble-free photography sessions.
Troubleshooting Tips for Nikon Camera Connectivity Issues
Experiencing connectivity issues with your Nikon camera can be frustrating, especially when you’re trying to transfer files, connect to a computer, or establish a wireless connection. However, there are several troubleshooting tips you can try to resolve these connectivity issues and ensure seamless communication with your Nikon camera.
If you’re encountering connectivity issues when trying to connect your camera to a computer or laptop, start by checking the USB cable. Ensure that it is securely plugged into both the camera and the computer’s USB port. Try using a different USB cable or a different USB port on the computer to rule out any potential cable or port issues.
Confirm that the USB mode on your camera is set to the correct option for your desired connection method. Depending on your camera model, it may have options such as Mass Storage, MTP (Media Transfer Protocol), or PTP (Picture Transfer Protocol). Connect the camera to the computer and navigate to the camera’s menu settings to verify and adjust the USB mode if necessary.
If you’re experiencing Wi-Fi or Bluetooth connectivity issues, ensure that the camera’s wireless function is properly enabled. Double-check that the camera’s Wi-Fi or Bluetooth feature is turned on. You may also need to refer to your camera’s user manual for specific instructions on how to connect the camera to a wireless network or pair it with a device via Bluetooth.
Make sure that the camera is within range of the Wi-Fi or Bluetooth signal. If the connection is weak or intermittent, try moving closer to the wireless router or device you’re trying to connect with. A weak signal can lead to connectivity issues.
Review the network settings on your camera and ensure that they are correctly configured. Check that the SSID and password for the Wi-Fi network you’re attempting to connect to are entered correctly. Additionally, ensure that your network’s security settings are compatible with the camera’s wireless capabilities.
Restart both the camera and the device you’re trying to connect with. Sometimes, a simple reboot can resolve connection issues. Turn off both devices, wait for a few seconds, and then turn them back on. Attempt to establish the connection again and see if the issue is resolved.
If you continue to experience connectivity issues, check for any firmware updates for your Nikon camera. Manufacturers often release firmware updates to address compatibility issues and improve wireless functionality. Visit the Nikon website and search for your camera model to see if there are any available updates. Follow the provided instructions to update your camera’s firmware.
If the problem persists or if you’re uncertain about any troubleshooting steps, it’s advisable to contact Nikon customer support or visit a service center for further assistance. They have the expertise to diagnose and resolve more complex connectivity issues and can provide guidance on any potential repairs or settings adjustments that may be necessary.
Remember, troubleshooting steps may vary depending on the specific Nikon camera model you own, so it’s crucial to refer to your camera’s user manual for model-specific instructions. By following these troubleshooting tips, you can address connectivity issues with your Nikon camera and establish a reliable connection for transferring files and accessing remote control features.
Troubleshooting Tips for Nikon Camera Settings and Menu Problems
Encountering issues with the settings and menu on your Nikon camera can be frustrating, as it can prevent you from accessing specific features or customizing your camera to your preferences. However, by following a few troubleshooting tips, you may be able to resolve these problems and regain control over your camera’s settings and menu.
If you’re experiencing issues navigating through the camera’s menu or if certain menu options are not accessible, try performing a camera reset. This will restore the camera’s settings to their default values. Keep in mind that a factory reset will erase any custom settings or configurations, so make sure to back up any important settings before proceeding. Consult your camera’s user manual for instructions on how to perform a factory reset.
Check for any firmware updates for your Nikon camera. Manufacturers often release firmware updates to address bugs, improve performance, and resolve software-related issues. Visit the Nikon website and search for your camera model to see if there are any available updates. Follow the provided instructions to update your camera’s firmware.
Ensure that you are correctly navigating through the camera’s menu and using the appropriate buttons and dials. Different Nikon camera models may have slightly different menu layouts and button configurations. Consult your camera’s user manual to familiarize yourself with the specific menu navigation instructions and button usage for your camera model.
If you’re encountering issues with specific settings, double-check that you’re following the correct steps to access or modify them. Make sure you’re accessing the appropriate menu section and sub-menus for the specific setting you want to adjust. Consult your camera’s user manual for detailed instructions on how to access and modify different settings.
Inspect the camera buttons and dials for any debris or obstructions that may interfere with their functionality. Use a soft, lint-free cloth to gently clean the buttons and dials, ensuring they move freely and respond properly when pressed or turned.
If the camera’s settings or menu problems persist, try removing the camera battery for a few minutes and then reinserting it. This can help reset any temporary glitches that may be causing the issues. Ensure that the battery is fully charged before inserting it back into the camera.
Consider using a different memory card in your Nikon camera. In some cases, a faulty or incompatible memory card can cause settings and menu problems. Remove the existing memory card and try using a different one to determine if the issue lies with the memory card.
If none of the troubleshooting steps resolve the settings and menu problems, it’s advisable to contact Nikon customer support or visit a service center for further assistance. They have the expertise to diagnose and fix more complex software or hardware-related issues and can provide guidance on any potential repairs or settings adjustments that may be necessary.
Remember, troubleshooting steps may vary depending on the specific Nikon camera model you own, so always refer to your camera’s user manual for model-specific instructions. By following these troubleshooting tips, you can address settings and menu problems with your Nikon camera and regain control over its functionality and customization options.
Troubleshooting Tips for Nikon Camera Video Recording Problems
Encountering video recording problems with your Nikon camera can be frustrating, as it hinders your ability to capture smooth and high-quality videos. However, there are several troubleshooting tips you can try to resolve these problems and ensure successful video recording with your Nikon camera.
First, check the camera’s video settings to ensure that they are configured correctly for your desired recording mode. Make sure that the video resolution, frame rate, and file format are suitable for your needs. Incorrect settings can result in video recording issues. Refer to your camera’s user manual for specific instructions on how to adjust the video settings.
Ensure that you have sufficient available storage space on your SD card. If the card is nearly full, the camera may encounter recording problems or stop recording prematurely. Transfer or delete any unnecessary files from the SD card to create more space for video recording.
If you’re experiencing video recording issues when using autofocus, try adjusting the autofocus settings. Select a suitable autofocus mode for your shooting scenario, such as continuous autofocus for moving subjects, or use manual focus for more precise control. Experiment with different autofocus modes to find the one that works best for your specific situation.
Check the battery level on your camera. Low battery power can impact video recording performance. Ensure that the battery is sufficiently charged or consider using an AC power adapter for prolonged video recording sessions to avoid battery-related issues.
Inspect the camera’s heat dissipation system. Extended video recording sessions can generate heat, which may cause the camera to shut down or encounter recording issues. Allow the camera to cool down periodically during long recording sessions to mitigate heat buildup. Consider using an external cooling solution, such as a fan, to regulate temperatures and extend recording durations.
Make sure that you are using a compatible and high-speed SD card for video recording. Using a low-quality or slow SD card can result in recording problems or dropped frames. Choose an SD card with a high write speed to ensure smooth video recording.
Regularly check for firmware updates for your Nikon camera. Manufacturers often release firmware updates that address video recording bugs, improve compatibility, and enhance performance. Visit the Nikon website and search for your camera model to see if there are any available updates. Follow the provided instructions to update your camera’s firmware.
If the problem persists, try resetting the camera to its default settings. This can help resolve any software-related issues that may be causing the video recording problems. Consult your camera’s user manual for instructions on how to perform a factory reset.
If you have tried the above troubleshooting tips and the video recording problems persist, it’s advisable to contact Nikon customer support or visit a service center for further assistance. They have the expertise to diagnose and fix more complex hardware or software-related issues that may be affecting your camera’s video recording capabilities.
Remember, troubleshooting steps may vary depending on the specific Nikon camera model you own, so it’s crucial to refer to your camera’s user manual for model-specific instructions. By following these troubleshooting tips, you can address video recording problems with your Nikon camera and ensure smooth and successful video capture.
Troubleshooting Tips for Nikon Camera Autofocus Problems
Encountering autofocus problems with your Nikon camera can greatly affect your ability to capture sharp and well-focused images. However, there are several troubleshooting tips you can try to resolve these issues and ensure accurate autofocus performance with your Nikon camera.
First, confirm that the AF/MF (autofocus/manual focus) switch on your lens is set to autofocus mode. Sometimes, accidental changes to the switch can cause the camera to focus manually instead of using autofocus. Double-check that the switch is in the correct position.
Check the focus mode settings on your camera. Depending on your shooting scenario, different focus modes may yield better results. Experiment with different autofocus modes, such as single-point focus or dynamic-area focus, to see if it improves the focusing performance. Refer to your camera’s user manual for specific instructions on how to change the autofocus mode.
Ensure that the autofocus points are correctly selected. Some Nikon cameras allow you to manually select the autofocus points to control which areas of the frame the camera should focus on. If the camera is consistently focusing on the wrong subjects or struggling to acquire focus, manually selecting the autofocus points might help.
Clean the lens contacts on both the camera and the lens. Dust, dirt, or debris on these contacts can disrupt communication between the camera and lens, affecting autofocus performance. Use a soft microfiber cloth to gently wipe the contacts, ensuring they are clean and free from any obstructions.
Consider using the focus-assist feature, if available on your Nikon camera. This feature helps the camera achieve accurate focus, especially in low-light situations. It may use a light beam, a spotlight, or an illuminator to assist the autofocus system in low-light conditions.
If you’re having difficulty achieving focus on a specific subject, try toggling between different autofocus modes. Some Nikon cameras offer modes like continuous autofocus (AF-C) or single autofocus (AF-S). Experimenting with these modes can help you find the most suitable focusing method for your specific subject and shooting conditions.
Ensure that your camera’s firmware is up to date. Manufacturers often release firmware updates to improve autofocus performance and address any known issues. Visit the Nikon website and search for your camera model to see if there are any available updates. Follow the provided instructions to update your camera’s firmware.
Inspect the autofocus motor and gears on the lens. If you notice any unusual noises or if the autofocus seems slower or less responsive than usual, it may indicate a problem with the lens itself. In such cases, consider seeking assistance from a professional Nikon service center or lens technician for diagnosis and potential repair.
If none of the troubleshooting steps resolve the autofocus problems, it’s advisable to contact Nikon customer support or visit a service center for further assistance. They have the expertise to diagnose and address more complex autofocus issues that may require professional attention.
Remember, troubleshooting steps may vary depending on the specific Nikon camera model and lens combination you own, so always refer to your camera’s user manual and lens documentation for model-specific instructions. By following these troubleshooting tips, you can address autofocus problems with your Nikon camera and capture sharp and well-focused images.
Troubleshooting Tips for Nikon Camera Image Quality Issues
Dealing with image quality issues on your Nikon camera can be frustrating, as it can result in blurry, noisy, or poorly exposed photos. However, there are several troubleshooting tips you can try to improve image quality and ensure that your Nikon camera captures stunning photos.
First, check the camera’s autofocus system. Ensure that your camera is focused correctly on your subject. Experiment with different focus modes, such as single-point focus or dynamic-area focus, to see which mode yields the best results for your specific shooting scenario.
Inspect the lens for any smudges, fingerprints, or dirt. Clean the lens using a lens cleaning solution and a microfiber cloth to ensure that it is free from any debris. Additionally, check for any scratches or damage to the lens glass that may affect image quality. In such cases, consider seeking assistance from a professional Nikon service center or lens technician for repair or replacement.
If you’re experiencing issues with exposure, check the camera’s exposure settings. Ensure that the exposure compensation is properly set, especially when shooting in challenging lighting conditions. Adjusting the exposure compensation can help to correctly expose the image and improve overall image quality.
Ensure that the ISO setting is appropriate for the lighting conditions. A high ISO can introduce noise and result in poor image quality, particularly in low-light situations. Experiment with different ISO settings to find the optimal balance between capturing enough light and minimizing noise.
Review the camera’s white balance settings. Incorrect white balance can result in color casts and affect the overall image quality. Confirm that the white balance setting is appropriate for the lighting conditions or consider using a custom white balance for accurate color reproduction.
Inspect the camera’s image quality settings. Adjust the image quality settings to capture in a RAW format if available. RAW files offer greater flexibility in post-processing and can help improve image quality during editing. However, keep in mind that working with RAW files requires post-processing software.
Regularly check for firmware updates for your Nikon camera. Manufacturers often release firmware updates to address image quality issues and optimize camera performance. Visit the Nikon website and search for your camera model to see if there are any available updates. Follow the provided instructions to update your camera’s firmware.
Experiment with different shooting modes and settings to find the best settings for your desired image quality. Explore different scene modes, picture styles, or custom settings that might enhance specific types of photos or shooting scenarios. Take the time to understand and experiment with the various features and settings available on your specific Nikon camera model.
If the image quality issues persist and you have exhausted all the troubleshooting steps, it’s advisable to contact Nikon customer support or visit a service center. They have the expertise to diagnose and address more complex image quality issues that may require professional attention.
Remember, troubleshooting steps may vary depending on the specific Nikon camera model you own, so always refer to your camera’s user manual for model-specific instructions. By following these troubleshooting tips, you can identify and address image quality issues with your Nikon camera, helping you capture stunning photos with the desired level of quality.