
Understanding the Basics of a Stereo Audio Equalizer
An audio equalizer is a device or software tool used to manipulate and adjust the frequency response of an audio signal. It allows you to enhance or attenuate specific frequencies, helping you achieve the desired sound quality for various types of audio content, such as music, movies, or podcasts.
At its most basic level, a stereo audio equalizer consists of several bands or frequency ranges, each representing a different section of the audio spectrum. The most common types of bands are bass (low frequencies), midrange (mid frequencies), and treble (high frequencies).
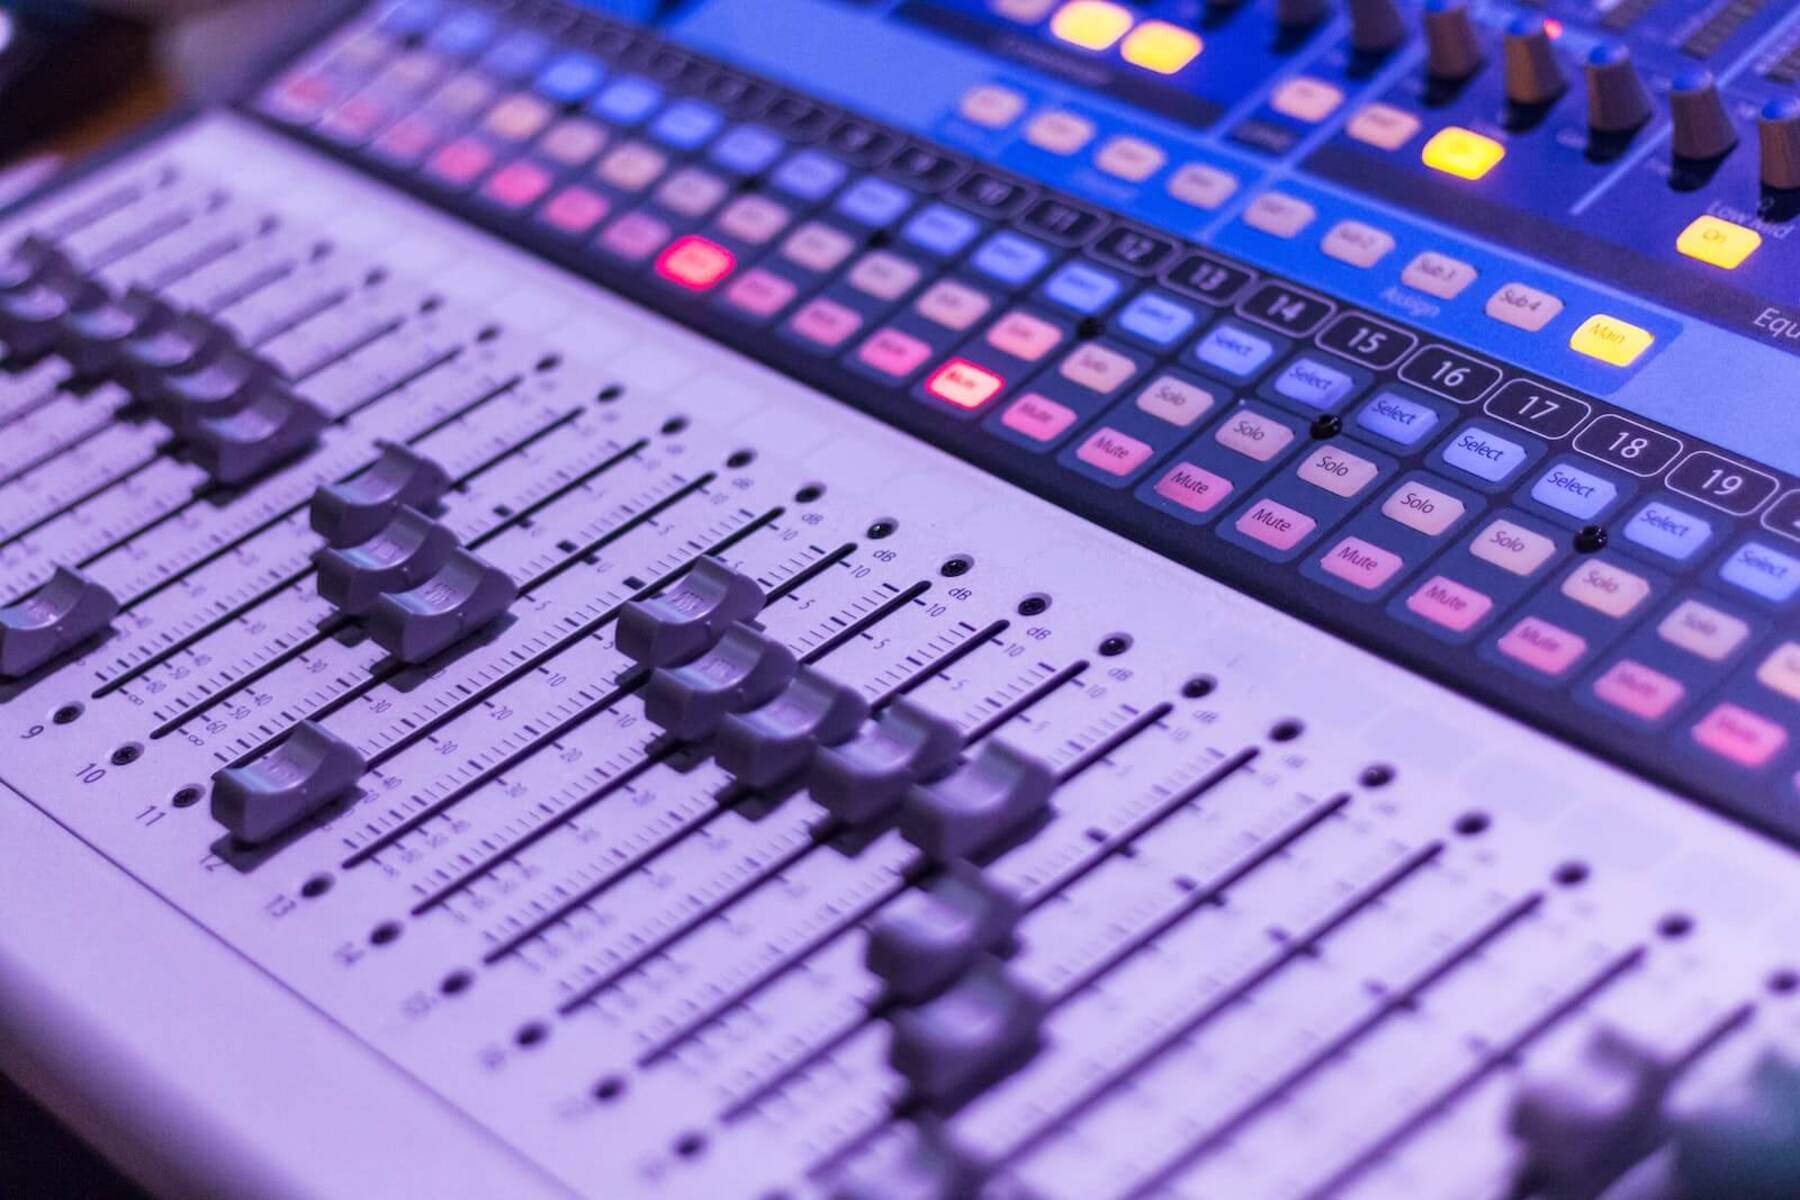
Equalizers are typically displayed graphically, showing a set of sliders or knobs that correspond to each frequency band. These sliders allow you to increase or decrease the level of a specific frequency, adjusting the overall sound balance to your liking.
The key to using a stereo audio equalizer effectively is understanding the characteristics of different frequencies. For example, bass frequencies generally contribute to the richness and depth of the audio, while treble frequencies add clarity and brightness.
Equalizers also have a Q factor or bandwidth control, which determines the width of the frequency range affected by an adjustment. A narrower Q factor affects a smaller range of frequencies, while a wider Q factor affects a broader range.
By manipulating the sliders or knobs on a stereo audio equalizer, you can shape the sound to suit your preferences or compensate for any audio imbalances in the original recording. Whether you want to boost the bass for a more impactful listening experience, enhance the vocals in a podcast, or adjust the overall sound signature, an equalizer provides the flexibility to tailor the audio to your taste.
It’s important to note that while equalizers can be powerful tools for audio customization, excessive adjustments can lead to distortion or an unnatural sound. It’s recommended to make subtle modifications and listen carefully to the changes in order to achieve a balanced and pleasing audio output.
Identifying the Different Frequencies on a Stereo Audio Equalizer
Before you can make adjustments on a stereo audio equalizer, it’s crucial to understand the different frequencies and the role they play in the audio spectrum. By familiarizing yourself with the various frequency ranges, you can effectively target specific areas for enhancement or attenuation.
Here are the commonly recognized frequency ranges on a stereo audio equalizer:
- Sub-bass (20Hz – 60Hz): This is the lowest range of frequencies, responsible for the deep rumbling bass sounds. Adjustments within this range can create a sense of depth and impact in the audio.
- Bass (60Hz – 250Hz): This range contains the lower end of the audible spectrum, where the thump and punch of bass instruments reside. Boosting the bass frequencies can add warmth and richness to the audio.
- Low-midrange (250Hz – 500Hz): This range affects the body and fullness of instruments and vocals. Adjustments in this range can impact the overall clarity and presence of the audio.
- Midrange (500Hz – 2kHz): The midrange is critical for intelligibility and definition in vocals and instruments. Enhancements or reductions in this range can significantly shape the overall tonal balance of the audio.
- Upper-midrange (2kHz – 4kHz): This range adds clarity and articulation to vocals and helps instruments cut through the mix. Adjustments within this range can enhance or reduce the perceived presence and detail of the audio.
- Treble (4kHz – 20kHz): The treble range consists of high frequencies that contribute to the sparkle, airiness, and brilliance in audio. Boosting the treble can add clarity and definition to instruments and vocals.
By identifying these different frequency ranges on a stereo audio equalizer, you can have a better understanding of where to focus your adjustments based on the desired sound outcome. Whether you want to add more bass impact, enhance vocal clarity, or fine-tune the overall tonal balance, knowing the specific frequencies will guide you in making precise and effective changes to the audio.
Adjusting the Bass Frequencies on a Stereo Audio Equalizer
The bass frequencies play a crucial role in providing depth and impact to audio. Adjusting the bass on a stereo audio equalizer can help you achieve a well-balanced and immersive listening experience. Here’s how you can adjust the bass frequencies:
1. Identify the bass frequency range: The bass frequencies typically range from 60Hz to 250Hz. These frequencies are responsible for the low-end tones and vibrations in the audio.
2. Boost or attenuate the bass: Using the sliders or knobs on the equalizer, increase or decrease the level of the bass frequencies. If you want more bass impact, raise the sliders or turn the knobs upward. On the other hand, if the bass is overpowering, reduce the level to achieve a more balanced sound.
3. Listen and make adjustments: As you make changes to the bass frequencies, listen carefully to the audio output. Take note of any improvements or noticeable changes in the sound. It’s important to strike a balance where the bass is present and impactful without overpowering other elements of the audio.
4. Consider the context: Keep in mind the type of audio content you’re working with. Different genres of music or types of audio may require different bass adjustments. For example, electronic music with deep basslines may benefit from a higher boost, while classical music may require a more subtle enhancement to maintain clarity and balance.
5. Be aware of room acoustics: The characteristics of your listening environment can also affect how the bass frequencies are perceived. Factors such as room size, furnishings, and speaker placement can impact the overall bass response. Adjustments on the equalizer can help compensate for any room-related deficiencies and achieve a more accurate representation of the audio.
Remember, when adjusting the bass frequencies on a stereo audio equalizer, moderation is key. Excessive boosting can lead to distortion or an unnatural sound. It’s essential to find the right balance that suits your preferences and maintains the integrity of the audio. Experimentation and attentive listening will help you fine-tune the bass frequencies to achieve the desired audio quality and optimize your listening experience.
Enhancing the Midrange Frequencies on a Stereo Audio Equalizer
The midrange frequencies in audio are crucial for achieving clarity and presence in vocals and instruments. Enhancing the midrange on a stereo audio equalizer allows you to bring out the finer details and make the sound more intelligible. Follow these steps to enhance the midrange frequencies:
1. Identify the midrange frequency range: The midrange frequencies typically span from 500Hz to 2kHz. Within this range, there is a significant portion of the audio spectrum that contributes to the tonal balance and definition.
2. Adjust the midrange sliders or knobs: Use the sliders or knobs on the equalizer to increase the level of the midrange frequencies. Slowly raise the sliders or turn the knobs upward to boost the presence and clarity of vocals and instruments.
3. Listen and make fine adjustments: As you make changes to the midrange frequencies, listen carefully to the impact on the audio. Pay attention to how the vocals and instruments become more distinct and prominent in the mix. Make small adjustments until you find the sweet spot where the midrange is enhanced without overpowering other frequency ranges.
4. Consider the audio content: Keep in mind the genre or type of audio you are working with. Different styles may have specific requirements for midrange enhancements. For example, in a vocal-heavy track, you may want to prioritize boosting the midrange to showcase the clarity and emotion in the singer’s voice.
5. Be mindful of balance: As you enhance the midrange frequencies, ensure that the overall tonal balance remains intact. Avoid creating a sound where the midrange dominates the other frequency ranges. Find a balance where the midrange is enhanced without sacrificing the presence of the bass and treble frequencies.
6. Experiment and refine: Take the time to experiment with different settings on the equalizer. Each audio source may require slight adjustments to achieve the desired outcome. Trust your ears and keep refining the settings until you achieve a pleasing and balanced midrange enhancement.
By enhancing the midrange frequencies on a stereo audio equalizer, you can bring greater clarity, definition, and presence to the vocals and instruments in your audio. With careful adjustments and attentive listening, you can fine-tune the midrange to create a more immersive and enjoyable listening experience.
Tweaking the Treble Frequencies on a Stereo Audio Equalizer
The treble frequencies in audio are responsible for adding sparkle, airiness, and clarity to the overall sound. Tweaking the treble on a stereo audio equalizer allows you to fine-tune and enhance the higher frequencies. Follow these steps to tweak the treble frequencies:
1. Identify the treble frequency range: The treble frequencies typically range from 4kHz to 20kHz. Within this range, there is a significant portion of the audio spectrum that contributes to the brightness and detail in vocals and instruments.
2. Adjust the treble sliders or knobs: Use the sliders or knobs on the equalizer to increase or decrease the level of the treble frequencies. Slowly raise the sliders or turn the knobs upward to boost the sparkle and clarity of the audio. Conversely, lower the sliders or turn the knobs downward to reduce any harshness or sibilance in the high frequencies.
3. Listen and make fine adjustments: As you make changes to the treble frequencies, listen attentively to the impact on the audio. Notice how instruments and vocals become more vibrant and detailed. Make subtle adjustments until you achieve the desired balance where the treble is enhanced without overpowering the other frequency ranges.
4. Consider the audio content: Keep in mind the genre or type of audio you are working with. Different styles may benefit from different treble adjustments. For example, in a classical piece, you may want to enhance the treble to bring out the delicate nuances in string instruments. In contrast, for a rock track, you may adjust the treble to lend more edge and bite to the electric guitars.
5. Maintain overall tonal balance: When tweaking the treble frequencies, ensure that the overall tonal balance remains intact. Avoid creating a sound where the treble becomes too dominant, overshadowing the bass and midrange frequencies. Strive for a balanced sound where the treble enhancement adds clarity and detail without causing any harshness or fatigue to the ears.
6. Experiment and trust your ears: Every audio source is unique, and as such, may require individual adjustments to achieve the desired result. Experiment with different settings on the equalizer and trust your ears. Listen carefully and make refinements until the treble enhancement enhances the overall audio quality and brings out the desired characteristics.
By tweaking the treble frequencies on a stereo audio equalizer, you can add sparkle, clarity, and detail to your audio. With careful adjustments and attentive listening, you can fine-tune the treble to create a more balanced and engaging listening experience.
Fine-tuning the Sub-bass Frequencies on a Stereo Audio Equalizer
The sub-bass frequencies are responsible for the deep rumbling and impactful bass sounds in audio. Fine-tuning the sub-bass on a stereo audio equalizer allows you to achieve a balanced and immersive low-end experience. Follow these steps to fine-tune the sub-bass frequencies:
1. Identify the sub-bass frequency range: The sub-bass frequencies typically range from 20Hz to 60Hz. Within this range, there is a significant portion of the audio spectrum that adds depth and intensity to the low-end response.
2. Adjust the sub-bass sliders or knobs: Use the sliders or knobs on the equalizer to increase or decrease the level of the sub-bass frequencies. Slowly raise the sliders or turn the knobs upward to increase the impact and rumble of the bass. Conversely, lower the sliders or turn the knobs downward to reduce any excessive booming or muddiness in the low-end frequencies.
3. Listen and make precise adjustments: As you make changes to the sub-bass frequencies, listen attentively to the impact on the audio. Pay attention to how the deep bass sounds become more pronounced and powerful. Make small adjustments until the sub-bass is finely tuned to enhance the overall low-end response without overpowering the rest of the audio.
4. Consider the audio content and personal preference: Take into account the type of audio you are listening to and your personal preference for bass. Different genres may benefit from varying levels of sub-bass. For example, electronic music or hip-hop might benefit from a more pronounced sub-bass, while classical music may require a more subtle adjustment to maintain clarity and balance.
5. Avoid excessive adjustments: Be mindful not to excessively boost the sub-bass frequencies. Excessive adjustments can lead to distortion or an unbalanced sound. Fine-tune the sub-bass to find the sweet spot where the low-end response is impactful and immersive but still cohesive with the rest of the audio.
6. Consider room acoustics: Take into account the characteristics of your listening environment. Factors such as room size, furnishings, and speaker placement can impact the way sub-bass frequencies are perceived. Adjustments on the equalizer can help compensate for any room-related deficiencies and optimize the sub-bass response for a more accurate and enjoyable listening experience.
By fine-tuning the sub-bass frequencies on a stereo audio equalizer, you can achieve a well-balanced and immersive low-end experience. With careful adjustments and attentive listening, you can optimize the sub-bass response to enhance the overall audio quality and create a more impactful and enjoyable listening experience.
Applying Filters and Adjusting the Q Factor on a Stereo Audio Equalizer
Filters and the Q factor are essential features on a stereo audio equalizer that allow for precise and selective adjustments to the frequency response. Understanding how to apply filters and adjust the Q factor can help you achieve a more tailored and refined audio experience. Here’s how you can utilize these features:
1. Filters: Filters on a stereo audio equalizer allow you to focus on specific frequency ranges or eliminate unwanted frequencies.
- High-pass filter: A high-pass filter allows frequencies above a specified cutoff point to pass through while attenuating lower frequencies. This filter is commonly used to remove rumble and unwanted low-end noise.
- Low-pass filter: A low-pass filter allows frequencies below a specified cutoff point to pass through while attenuating higher frequencies. It is useful for reducing high-frequency noise or taming overly bright audio.
- Band-pass filter: A band-pass filter allows a specific range of frequencies to pass through while attenuating both higher and lower frequencies. It can be used to isolate a particular frequency band for adjustment or to reduce interference from unwanted adjacent frequencies.
- Notch filter: A notch filter, also known as a band-reject filter, reduces or eliminates a narrow range of frequencies. It is useful for removing unwanted resonances or unwanted frequencies that may be causing harshness or feedback in the audio.
2. Q factor: The Q factor, also known as the bandwidth control, determines the width of the frequency range affected by an adjustment made on the equalizer. A higher Q factor narrows the affected frequency range, while a lower Q factor broadens it.
By adjusting the Q factor, you can fine-tune the level of control over a specific frequency range. For example, a narrower Q factor can allow you to focus on a specific problem area without affecting the surrounding frequencies, while a wider Q factor can create a more subtle adjustment that encompasses a larger portion of the audio spectrum.
3. Experimentation and refinement: When applying filters and adjusting the Q factor, it’s important to experiment and refine your settings until you achieve the desired results. Listen attentively to the audio, making note of any improvements or changes as you make adjustments. Trust your ears and continue to refine the settings until you achieve the desired tonal balance and sonic characteristics.
By utilizing filters and adjusting the Q factor on a stereo audio equalizer, you can have greater precision and control over the frequency response of your audio. Whether it’s eliminating unwanted frequencies, fine-tuning problem areas, or creating a more tailored sound signature, these features allow you to customize and optimize your audio experience.
Creating Custom EQ Settings on a Stereo Audio Equalizer
A stereo audio equalizer provides the flexibility to create custom EQ settings tailored to your preferences and specific audio content. By understanding how to create and adjust these settings, you can effectively shape the sound according to your desired tonal balance. Follow these steps to create custom EQ settings on a stereo audio equalizer:
1. Start with a flat EQ: Begin by setting all the sliders or knobs on the equalizer to their neutral or flat position. This resets the frequency response to a baseline level.
2. Analyze the audio content: Carefully listen to the audio content you want to customize. Pay attention to the strengths and weaknesses in the frequency response. Identify areas where you may want to enhance certain frequencies or attenuate others.
3. Work on one frequency band at a time: Focus on adjusting one frequency band at a time to avoid overwhelming changes. Start with the bass frequencies and work your way up to the midrange and treble frequencies.
4. Make subtle adjustments: Using the sliders or knobs, make small and incremental adjustments to the desired frequency band. Listen attentively to the impact each adjustment has on the overall sound. Aim for subtle modifications rather than excessive boosts or cuts.
5. Listen and evaluate: After making adjustments to each frequency band, listen to the overall sound and evaluate if the changes improve the audio quality. Pay attention to the tonal balance, clarity, and any noticeable improvements or issues.
6. Tweak and refine: Continue to fine-tune your custom EQ settings by making further adjustments as needed. Trust your ears and make refinements until you achieve the desired sound signature that enhances the audio content and pleases your personal preferences.
7. Test across different audio sources: Make sure to test your custom EQ settings across various audio sources, such as different genres of music, movies, or podcasts. This will help you ensure that the settings work well across different types of content and provide consistent audio quality.
8. Save and name your custom EQ settings: Many stereo audio equalizers allow you to save your custom EQ settings. Take advantage of this feature to store and easily recall your preferred EQ settings for future use. Give each setting a unique name to easily identify and switch between them.
Creating custom EQ settings on a stereo audio equalizer allows you to have a tailored and optimized audio experience. By following these steps and regularly experimenting with different settings, you can unlock the full potential of your audio equipment and personalize the sound to suit your unique preferences.
Using Preset EQ Settings on a Stereo Audio Equalizer
A stereo audio equalizer often comes with preset EQ settings that are designed for various audio scenarios or genres. These presets provide a convenient starting point for enhancing the sound based on specific preferences or content types. Here’s how you can effectively use preset EQ settings on a stereo audio equalizer:
1. Explore the preset options: Familiarize yourself with the available preset EQ settings on your stereo audio equalizer. They may be labeled by genre, content type (music, movies, gaming, etc.), or specific audio enhancement goals (bass boost, vocal clarity, etc.).
2. Select a preset: Choose a preset EQ setting that aligns closely with your listening needs or the type of audio content you’re currently enjoying. Consider the genre, intended audio experience, and your personal preferences.
3. Listen and evaluate: Play the audio and carefully listen to the effect of the selected preset. Pay attention to how it enhances different frequency ranges, improves clarity, or alters the overall tonal balance. Consider whether the preset meets your expectations and enhances your listening experience.
4. Make fine adjustments: After applying a preset, you may find that certain aspects of the sound need further tweaking. Feel free to make small adjustments to the individual frequency bands or other settings on the equalizer to tailor the sound to your personal preference. This allows you to customize the preset to better suit your audio environment and specific preferences.
5. Try different presets: Experiment with different presets to discover which ones work best for different audio scenarios or content types. For example, you may find that a preset designed for movies provides a more cinematic experience, while a preset tailored for jazz music enhances the realism of instruments.
6. Create your own presets: If you frequently find yourself making similar adjustments to the EQ settings, consider creating your own custom presets. Save these settings on your stereo audio equalizer as your go-to options for specific preferences or audio types.
7. Keep an open mind: While presets are convenient, be open to exploring different options and making adjustments as needed. Every audio source is unique, and personal preferences may differ, so feel free to fine-tune the settings to achieve the best sound for you.
Using preset EQ settings on a stereo audio equalizer provides a quick and easy way to enhance the sound according to specific audio scenarios or preferences. Take advantage of these presets as starting points and be willing to make minor tweaks to fully optimize the sound and create an immersive and enjoyable listening experience.