
Connecting Google Calendar to Task Management Apps
Managing tasks efficiently is crucial for staying organized and productive. While Google Calendar is a powerful tool for scheduling and managing events, it lacks the built-in capability for task management. Thankfully, there are various task management apps that seamlessly integrate with Google Calendar to provide a comprehensive solution. Here’s how you can connect Google Calendar to popular task management apps.
1. Todoist: Todoist is a popular task management app that offers seamless integration with Google Calendar. By connecting Todoist to Google Calendar, you can sync your tasks, deadlines, and priorities, allowing you to easily view and manage your tasks alongside your schedule. To connect Todoist to Google Calendar, simply navigate to Todoist’s settings, select “Integrations,” and follow the prompts to grant access to your Google Calendar.
2. Microsoft To Do: Microsoft To Do, formerly known as Wunderlist, is another excellent task management app that can be integrated with Google Calendar. By syncing your Microsoft To Do tasks with Google Calendar, you can keep track of your tasks and due dates directly from your Google Calendar interface. To connect Microsoft To Do to Google Calendar, access the app’s settings, select “Integrations,” and follow the instructions to link your Google Calendar account.
3. Any.do: Any.do is a feature-rich task management app that offers seamless integration with Google Calendar. By connecting Any.do to Google Calendar, you can sync your tasks, subtasks, and due dates, allowing you to have a comprehensive view of your schedule and tasks in one place. To link Any.do with Google Calendar, access Any.do’s settings, select “Integrations,” and follow the steps to authorize access to your Google Calendar.
4. Asana: Asana is a powerful project management app that also offers integration with Google Calendar. By connecting Asana to Google Calendar, you can sync your project tasks and deadlines to your Google Calendar, ensuring that you stay on top of all your tasks and deadlines. To link Asana with Google Calendar, access Asana’s settings, select “Apps,” and follow the instructions to connect your Google Calendar.
By connecting your preferred task management app to Google Calendar, you can streamline your workflow and have a unified view of your schedule and tasks. This integration allows you to efficiently prioritize and manage your tasks, ensuring that no deadlines are missed and productivity is maximized.
Manually Adding Tasks to Google Calendar
Google Calendar not only allows you to schedule events and appointments but also lets you manually add tasks to help you stay organized and on top of your to-do list. Here’s how you can manually add tasks to Google Calendar.
1. Open Google Calendar: Start by opening Google Calendar on your web browser or mobile app. Sign in to your Google account if you haven’t already.
2. Create a new task: On the web version of Google Calendar, click on the “+” icon next to “Add a new calendar” on the left sidebar. Then, select “Task” from the dropdown menu. On the mobile app, tap on the red “+” icon at the bottom right corner and choose “Task.”
3. Enter task details: A pop-up window will appear where you can enter the task details, including the task title, date, and time. Provide a descriptive title for the task to easily identify it later. You can also set specific due dates and times or make the task an all-day event. If necessary, you can add additional notes or details in the description field.
4. Assign a calendar: By default, the task will be added to your primary calendar. However, if you have multiple calendars, you can choose a specific calendar to add the task by using the dropdown menu labeled “Calendar.” This allows you to keep track of different categories or projects separately.
5. Save the task: Once you have entered all the necessary information, click on the “Save” button on the web version or tap on the checkmark icon on the mobile app. The task will now be added to your Google Calendar.
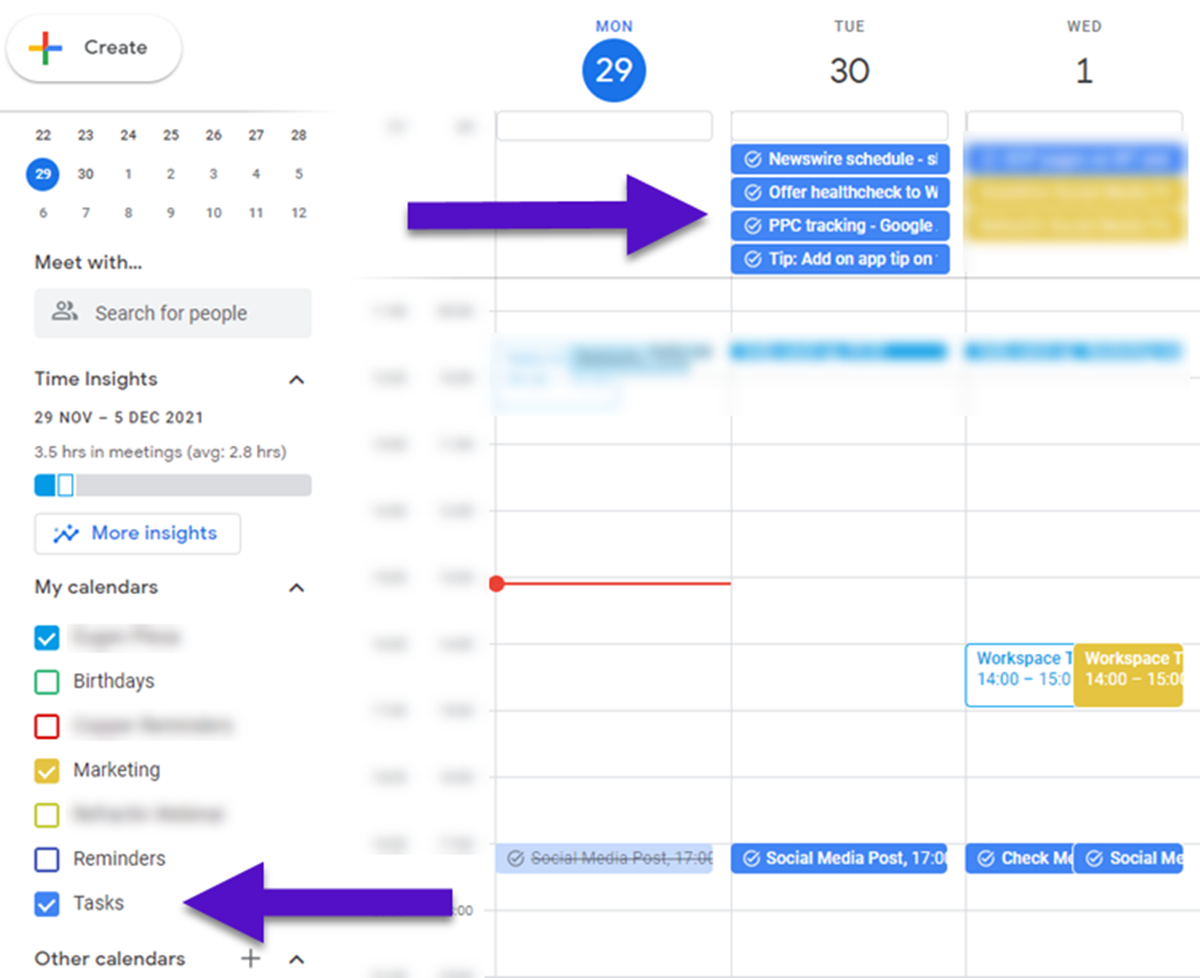
6. View and manage tasks: To view and manage your tasks, click on the “Tasks” link on the right sidebar of the web version of Google Calendar. On the mobile app, tap on the three-line menu icon at the top left corner, then select “Tasks” from the menu. You will see a list of all your tasks with their due dates and details. You can prioritize tasks, mark them as completed, or edit them as needed.
By manually adding tasks to Google Calendar, you can easily visualize your to-do list alongside your daily schedule. This helps you stay organized and ensures that tasks are not overlooked or forgotten. Whether it’s a personal task or a work-related assignment, adding tasks to Google Calendar is a convenient way to stay on top of your responsibilities.
Adding Tasks from Gmail to Google Calendar
Google offers seamless integration between Gmail and Google Calendar, allowing you to easily convert emails into tasks and add them directly to your calendar. This feature is particularly useful for turning important emails or actionable items into scheduled tasks. Here’s how you can add tasks from Gmail to Google Calendar.
1. Open Gmail and select an email: Start by logging in to your Gmail account and selecting the email that contains the task or information you want to convert into a task. It could be an email with a deadline, a reminder, or any other actionable item.
2. Click on the More options button: In the toolbar above the email, you will find a button with three vertical dots. Click on it to open the dropdown menu.
3. Select “Create event”: From the dropdown menu, select the “Create event” option. This will open a new tab with Google Calendar and automatically populate the event details based on the email content.
4. Edit task details: In the Google Calendar tab, you can review the event details and make any necessary changes. Modify the title, date, time, duration, or any other relevant information to ensure it accurately represents the task from the email. You can also add additional notes or reminders if needed.
5. Choose a calendar: If you have multiple calendars, you can select the calendar where you want the task to be added. Use the dropdown menu labeled “Calendar” to choose the appropriate calendar. This allows you to keep your tasks organized and separate them according to different projects or categories.
6. Save the task: Once you have reviewed and edited the task details, click on the “Save” or “Add” button to save the task to your Google Calendar. The task will now appear as an event at the specified time and date.
By adding tasks from Gmail to Google Calendar, you can seamlessly convert important emails into actionable items. This feature helps you stay organized and ensures that essential tasks and deadlines are not overlooked. Whether it’s a work-related project, a personal reminder, or a deadline from a client, Gmail integration with Google Calendar makes it convenient to turn emails into scheduled tasks efficiently.
Adding Tasks from Google Keep to Google Calendar
Google Keep is a versatile app that allows you to create and manage notes, reminders, and tasks. If you prefer using Google Keep to keep track of your tasks, you can easily integrate it with Google Calendar to ensure all your important tasks are scheduled and visible in one place. Here’s how you can add tasks from Google Keep to Google Calendar.
1. Open Google Keep: Start by opening the Google Keep app on your mobile device or by visiting keep.google.com on your web browser. Sign in to your Google account if prompted.
2. Create a new task in Google Keep: In Google Keep, create a new task by tapping the “+” icon on the mobile app or clicking on the “Take a note” field on the web version. Enter the task title and any additional details or notes.
3. Add a reminder to the task: After creating the task, tap on the small hand icon on the mobile app or the bell icon on the web version. Set the reminder date and time for the task. This will ensure that you receive a notification or email reminder when the task is due.
4. Open the task details: Tap on the task in Google Keep to open its details. You will see various options, including the reminder date and time, labels, and collaboration options.
5. Tap on the three dots menu: On the mobile app, tap on the three dots menu icon. From the options that appear, select “Send,” followed by “Copy to Google Calendar.” On the web version, click on the three dots menu icon and choose “Copy to Google Calendar.”
6. Edit task details in Google Calendar: You will be redirected to Google Calendar, where you can further edit and customize the task details. Adjust the task title, date, time, or any other information as needed. You can also add additional notes or reminders to provide more context to the task.
7. Save the task in Google Calendar: After making the necessary adjustments, click on the “Save” or “Add” button to save the task in Google Calendar. The task will now appear in your calendar view at the specified date and time with the corresponding reminder set.
By adding tasks from Google Keep to Google Calendar, you can seamlessly integrate your note-taking and task management processes. This integration ensures that all your tasks and reminders from Google Keep are conveniently visible in Google Calendar, allowing you to effectively plan and manage your schedule. Whether it’s a personal errand, a work task, or a reminder for an upcoming event, adding tasks from Google Keep to Google Calendar keeps you organized and on top of your responsibilities.
Adding Tasks from Google Tasks to Google Calendar
Google Tasks is a simple and intuitive task management tool that integrates seamlessly with other Google applications. By adding tasks from Google Tasks to Google Calendar, you can have all your tasks and deadlines in one place, making it easier to stay organized and on top of your to-do list. Here’s how you can add tasks from Google Tasks to Google Calendar.
1. Open Google Tasks: Start by accessing Google Tasks through the web version or the mobile app. Sign in to your Google account if necessary.
2. Create a new task: On the web version, click on the “+” icon to create a new task. On the mobile app, tap on the “+” button at the bottom right corner. Enter the task details, such as the task title and any additional notes or subtasks.
3. Set a due date: After creating the task, click on the task to open its details. On the web version, click on the calendar icon to set a due date for the task. On the mobile app, tap on the due date field and select the desired date from the calendar.
4. Open the task menu: Click on the vertical ellipsis (three dots) icon next to the task on the web version, or swipe the task left on the mobile app to access the task menu.
5. Select “Add to Calendar”: From the task menu, select the option to “Add to Calendar.” This will automatically create an event in Google Calendar based on the task details.
6. Customize the event details: You will be redirected to Google Calendar, where you can further customize the event details. Modify the event title, date, time, or any other relevant information as necessary. You can also add additional notes, set reminders, or assign the event to a specific calendar.
7. Save the event: Once you have edited the event details, click on the “Save” or “Add” button, depending on the interface, to save the event in Google Calendar. The task from Google Tasks will now appear as an event in your calendar view.
By adding tasks from Google Tasks to Google Calendar, you can streamline your task management process and have a clear overview of your schedule. This integration allows you to effectively prioritize your tasks and allocate time for their completion. Whether it’s a personal task, a work assignment, or a reminder, adding tasks from Google Tasks to Google Calendar ensures that you stay organized and on track with your responsibilities.
Using Shortcut Keys to Quickly Add Tasks to Google Calendar
Google Calendar offers a range of keyboard shortcuts that can significantly speed up the process of adding tasks. Instead of manually navigating through various menus and options, you can quickly create tasks and events using a combination of keyboard commands. Here’s how you can use shortcut keys to quickly add tasks to Google Calendar.
1. Open Google Calendar: Start by opening Google Calendar on your web browser. Sign in to your Google account if necessary.
2. Create a new task: To create a new task, press “c” on your keyboard. This will open a pop-up window where you can enter the task details, such as the task title, date, and time.
3. Enter task details: In the pop-up window, enter the task details as required. Use the arrow keys to navigate between fields, and press “Enter” to save the task.
4. Set the date and time: To quickly set the date and time for the task, use the following shortcuts:
- For today’s date, press “t”.
- For tomorrow’s date, press “1”.
- For the current week’s Monday, press “2”.
- For the current week’s Friday, press “6”.
5. Add additional details: If desired, you can add additional details to the task by pressing “Tab”. This will navigate you to the description field where you can enter any relevant notes or information.
6. Save the task: Once you have entered all the necessary details for the task, press “Enter” to save the task. The task will now be added to your Google Calendar.
By utilizing shortcut keys, you can efficiently add tasks to Google Calendar without the need for manual navigation. This saves you time and effort, allowing you to quickly capture important tasks and deadlines. Whether you’re managing personal tasks, work assignments, or reminders, using shortcut keys in Google Calendar ensures a streamlined and accelerated task management process.
Setting Reminders and Notifications for Tasks in Google Calendar
One of the key features of Google Calendar is the ability to set reminders and receive notifications for your tasks and events. By configuring reminders and notifications, you can ensure that you never miss an important task or deadline. Here’s how you can set reminders and notifications for tasks in Google Calendar.
1. Open Google Calendar: Start by opening Google Calendar on your web browser or mobile app. Sign in to your Google account if necessary.
2. Create a new task: To create a new task, select the desired date and time on your calendar and click or tap on the corresponding time slot. Enter the task details in the pop-up window, including the task title and any additional information.
3. Set reminders: In the task details window, look for the “Reminders” option. Click or tap on the drop-down menu to choose how you would like to be reminded of the task. You can choose options such as “Pop-up,” “Email,” or “Notification” to receive reminders in various formats.
4. Customize reminder timing: Depending on the selected reminder option, you can further customize the timing of the reminder. For example, if you choose a pop-up reminder, you can set it to occur a specific number of minutes, hours, or days before the task’s start time. Similarly, if you select an email reminder, you can choose how far in advance you want to receive the email notification.
5. Save the task: Once you have set the desired reminder options, click or tap on the “Save” or “Add” button to save the task with the configured reminders. The task will now have the set reminders associated with it.
6. Receive reminders and notifications: As the set reminders approach their specified timings, you will receive the configured notifications. These can include pop-up reminders, emails, or push notifications on your mobile device, depending on your chosen settings. Follow the prompts or notifications to stay informed about upcoming tasks and deadlines.
By setting reminders and notifications for tasks, you can effectively manage your schedule and stay on top of your to-do list. The reminders ensure that you are alerted in advance, allowing you to prepare and allocate time for completing the tasks. Whether it’s a work task, a personal reminder, or an important deadline, utilizing reminders and notifications in Google Calendar helps you stay organized and on track with your responsibilities.
Assigning Different Labels and Colors to Tasks in Google Calendar
Google Calendar allows you to assign different labels and colors to your tasks, providing a visual and organized way to categorize and prioritize your to-do list. By customizing the labels and colors, you can quickly identify and differentiate between various tasks and categories. Here’s how you can assign different labels and colors to tasks in Google Calendar.
1. Open Google Calendar: Start by opening Google Calendar on your web browser or mobile app. Sign in to your Google account if necessary.
2. Create a new task: To create a new task, click or tap on the desired date and time on your calendar. Enter the task details in the pop-up window, including the task title and any additional information.
3. Assign a label: In the task details window, look for the option to assign a label or category to the task. This option may be labeled as “Label,” “Category,” or “Tag,” depending on the interface you are using. Click or tap on this option to select a pre-existing label or create a new one.
4. Customize label colors: Once you have selected a label, you can customize its color to make it more visually distinct. Click or tap on the color palette icon next to the label’s name and choose the desired color from the available options. This color will be associated with the task and be displayed on your calendar.
5. Save the task: After assigning the label and customizing its color, click or tap on the “Save” or “Add” button to save the task. The task will now be displayed on your calendar with the assigned label and color.
6. View tasks by labels: To easily view tasks based on their assigned labels, navigate to the calendar view and look for the “Agenda” or “Tasks” section on the side or bottom of the screen. You can filter tasks by labels, allowing you to focus on specific categories or priorities.
By assigning different labels and colors to tasks, you can effectively organize and prioritize your to-do list. The visual differentiation provided by labels and colors makes it easier to identify important tasks, upcoming deadlines, or specific categories of tasks. Whether it’s personal tasks, work-related assignments, or other commitments, customizing labels and colors in Google Calendar helps you visually manage and stay on top of your tasks and responsibilities.
Syncing Tasks from Other Apps with Google Calendar
Syncing tasks from other apps with Google Calendar is a valuable feature that allows you to centralize your task management and have a comprehensive view of all your tasks in one place. Whether you use a task management app, a to-do list app, or a project management tool, syncing tasks with Google Calendar ensures that you stay organized and on top of your to-do list. Here’s how you can sync tasks from other apps with Google Calendar.
1. Identify the app’s integration options: Firstly, determine if the app you are using offers integration with Google Calendar. Visit the app’s website or explore its settings to find out if there is an option to connect or sync with Google Calendar.
2. Enable integration: If the app offers integration, follow the instructions provided to enable the syncing of tasks with Google Calendar. This usually involves granting permission for the app to access your Google Calendar account.
3. Configure settings: After enabling the integration, you may have the option to customize how the tasks are synced with Google Calendar. For example, you might be able to choose which calendars to sync with or specify the time interval for recurring tasks.
4. Sync tasks: Once the integration is set up and the settings are configured, the tasks from the app will automatically sync with your Google Calendar. This ensures that all your tasks, deadlines, and reminders are visible in one central place.
5. Manage tasks in Google Calendar: Access Google Calendar to view and manage the synced tasks. You can easily edit or update task details, set reminders and due dates, and categorize tasks using labels or colors. Any changes made in Google Calendar will sync back to the original app as well.
6. Keep apps synced: To ensure that tasks are consistently synced between the app and Google Calendar, make sure both the app and Google Calendar are regularly updated. Stay mindful of any changes or updates to the integration settings to ensure optimal syncing functionality.
By syncing tasks from other apps with Google Calendar, you can streamline your task management process and have a unified view of all your tasks and deadlines. This integration eliminates the need to switch between multiple apps, providing a convenient and efficient way to stay organized. Whether you prefer using task management apps, to-do list apps, or project management tools, syncing tasks with Google Calendar ensures that you have a holistic and up-to-date overview of your tasks and responsibilities.
Tips and Tricks for Efficiently Managing Tasks in Google Calendar
Google Calendar is a powerful tool for managing tasks and staying organized. To maximize its efficiency, here are some helpful tips and tricks for efficiently managing tasks in Google Calendar.
1. Utilize drag and drop: To quickly reschedule tasks, simply click or tap on a task and drag it to a different date or time. This feature allows you to easily adjust your task schedule as needed.
2. Use keyboard shortcuts: Learn and utilize keyboard shortcuts to navigate and perform actions more quickly in Google Calendar. This includes shortcuts for creating new events, switching between day/week/month views, and more. Familiarize yourself with these shortcuts to increase your productivity.
3. Color-code tasks: Assign different colors to tasks based on their priority, category, or urgency. This visual differentiation helps you quickly identify and prioritize tasks at a glance. Create color-coded labels and apply them to tasks accordingly.
4. Set realistic reminders: It’s essential to set reminders that give you adequate time to prepare and complete tasks. Consider the nature and complexity of the task when setting reminders, and allow yourself enough time to stay focused and organized.
5. Use recurring tasks: If you have tasks that repeat regularly, such as weekly meetings or monthly bill payments, take advantage of Google Calendar’s recurring task functionality. Create a recurring task and set the appropriate frequency to save time and avoid forgetting these repetitive tasks.
6. Take advantage of notifications: Customize your notification preferences to receive reminders via email, push notifications on your mobile device, or pop-up notifications on your computer. Experiment with different notification options to find what works best for you.
7. Collaborate and share calendars: If you’re working on tasks with others, share your calendars with relevant team members. This allows for better coordination and visibility of everyone’s tasks and schedules.
8. Use the mobile app: Install the Google Calendar mobile app to access your tasks and schedule on the go. The app provides easy and convenient access to your tasks, allowing you to stay organized even when you’re away from your computer.
9. Integrate with other apps: Explore integrations with other apps and tools that enhance task management. For example, you can integrate task management apps, note-taking apps, or project management tools to sync tasks and deadlines with Google Calendar.
10. Regularly review and update: Take some time to review your tasks regularly. Remove completed tasks, adjust due dates, and reassess priorities to ensure your task list remains accurate and manageable.
By implementing these tips and tricks, you can efficiently manage your tasks in Google Calendar, stay organized, and maximize your productivity. Experiment with different features and settings to find the workflow that works best for you. By harnessing the full potential of Google Calendar, you can effectively stay on top of your tasks and responsibilities.