
What You Will Need
Before you can start adding your Nest Yale Lock to Google Home, there are a few things you will need to ensure a smooth and successful setup process. Here’s a list of the items you will need:
- A Nest Yale Lock – Make sure you have a compatible Nest Yale Lock that is ready to be connected to Google Home. If you don’t have one yet, you can purchase it online or at a local retailer.
- A Google Home Device – You will need either a Google Home, Google Home Mini, or Google Nest Hub to control your Nest Yale Lock using voice commands.
- A Wi-Fi Network – Your Nest Yale Lock and Google Home device will need to be connected to the same Wi-Fi network for them to communicate with each other.
- A Google Account – Ensure that you have a Google Account. This is necessary to access the Google Home app and connect your Nest Yale Lock.
Once you have gathered these items, you will be ready to proceed with the setup process. It is important to have everything prepared to make the process as smooth as possible. Now, let’s move on to the next steps and get your Nest Yale Lock connected with Google Home!
Note: The steps outlined in this guide are based on the latest version of the Google Home app and may vary slightly depending on your device and software version.
Step 1: Set up the Nest Yale Lock
The first step in adding your Nest Yale Lock to Google Home is to set up the lock itself. Follow these instructions to get started:
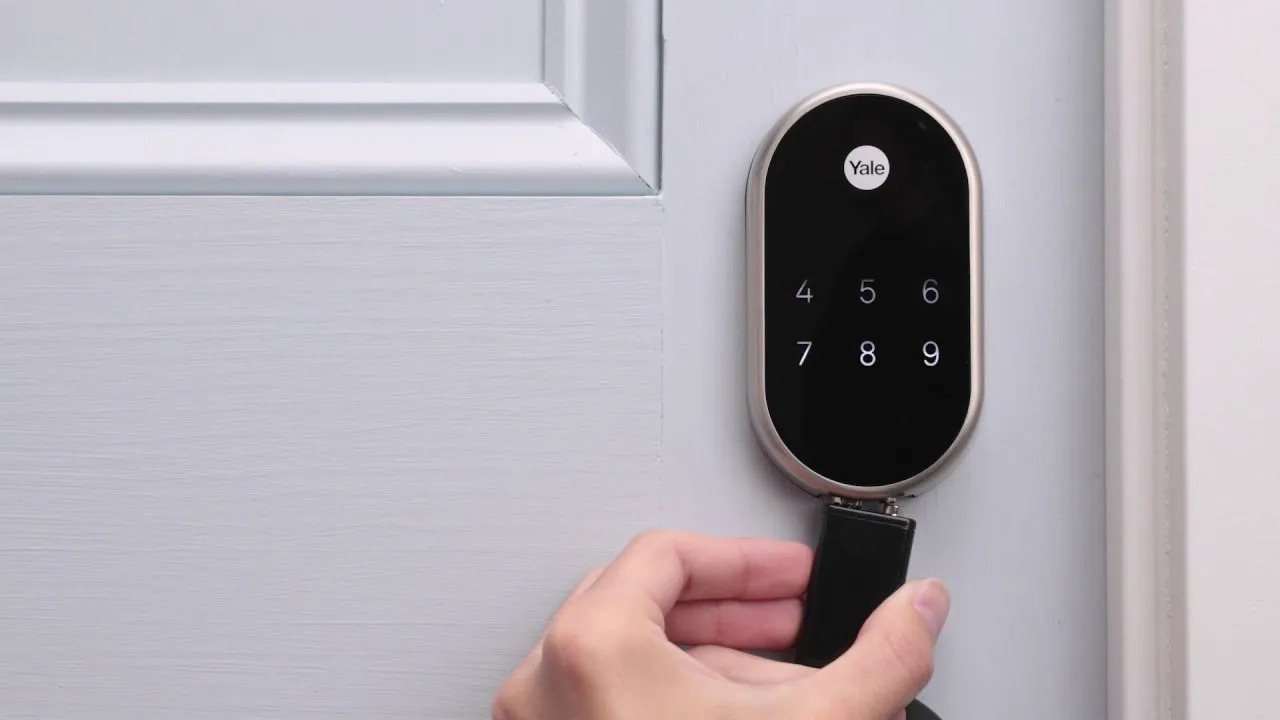
- Install the Lock: Begin by installing the Nest Yale Lock on your door according to the manufacturer’s instructions. Make sure it is properly aligned and securely attached.
- Insert Batteries: Open the battery compartment on the back of the lock and insert four AA batteries. Ensure they are inserted correctly, paying attention to the polarity markings.
- Set the Master Passcode: To secure your lock, you will need to set a master passcode. This is the primary code that will be used to unlock and lock the door. Follow the prompts on the lock’s keypad to choose a secure passcode that you can easily remember.
- Test the Lock: Once the master passcode is set, test the lock to ensure it is functioning correctly. Lock and unlock the door using the keypad and make sure it operates smoothly.
By completing these steps, you have successfully set up your Nest Yale Lock. Now, it’s time to connect it to your Wi-Fi network so that you can control it using Google Home. Please proceed to the next step for instructions on how to do this.
Step 2: Connect the Nest Yale Lock to Wi-Fi
Now that you have set up your Nest Yale Lock, the next step is to connect it to your Wi-Fi network. Here’s how you can do it:
- Launch the Nest App: Open the Nest app on your smartphone or tablet. If you don’t have the app installed, you can download it from the App Store or Google Play Store.
- Select the Lock: In the app, tap on the Nest Yale Lock that you want to connect to Wi-Fi. If this is your first time using the app, you will need to create a Nest account and add the lock to your account.
- Go to Settings: Once you have selected the lock, tap on the settings icon in the top right corner of the screen. This will take you to the lock settings page.
- Choose Wi-Fi Settings: On the lock settings page, scroll down and select “Wi-Fi Settings” to open the Wi-Fi setup options.
- Follow Wi-Fi Setup Instructions: The app will guide you through the process of connecting the lock to your Wi-Fi network. Make sure you have your Wi-Fi network name and password handy as you will need to enter them during the setup process.
- Wait for Connection: After entering the Wi-Fi network information, the lock will attempt to connect to the network. This may take a few moments, so be patient. Once the lock successfully connects to your Wi-Fi network, you will see a confirmation message on the app.
Congratulations! You have successfully connected your Nest Yale Lock to your Wi-Fi network. The next step is to add the lock to the Google Home app so that you can control it using voice commands. Continue to the next step for detailed instructions on how to do this.
Step 3: Add the Nest Yale Lock to the Google Home App
Now that your Nest Yale Lock is connected to your Wi-Fi network, the next step is to add it to the Google Home app. Follow the steps below to complete this process:
- Open the Google Home App: Launch the Google Home app on your smartphone or tablet. If you don’t have the app installed, you can download it from the App Store or Google Play Store.
- Tap the “+” Button: In the Google Home app, locate and tap on the “+” button to start the device setup process. This button is usually found at the top left or bottom right corner of the app’s main screen.
- Select “Set up Device”: From the list of options, choose “Set up device” to begin adding your Nest Yale Lock to the app.
- Choose “Have something already set up?”: On the “Set up device” screen, select “Have something already set up?” instead of the other available options.
- Find Nest on the list: Scroll through the list of supported brands and select “Nest” as the brand of your device. If you can’t find it, you can use the search function to locate it quickly.
- Log in to Nest Account: If prompted, log in to your Nest account using your Google credentials. This will allow the Google Home app to connect to your Nest Yale Lock.
- Authorize Google Home: Review the permissions requested by the Google Home app and authorize it to access your Nest devices. This will enable you to control your Nest Yale Lock using the app.
- Follow Setup Prompts: The app will guide you through the setup process for your Nest Yale Lock. Make sure you have your Nest account credentials handy, as you may need to enter them during the setup.
- Assign a Name: Give your Nest Yale Lock a name that is easy to remember and identify within the Google Home app. This will be the name you use to control the lock using voice commands.
- Complete the Setup: Once you have followed all the setup prompts, the Google Home app will finalize the setup process and add your Nest Yale Lock to the app. You will see a confirmation message when the process is complete.
Great job! You have successfully added your Nest Yale Lock to the Google Home app. The next step is to connect Google Assistant to the lock so that you can use voice commands to control it. Continue to the next step to learn how to do this.
Step 4: Connect Google Assistant to the Nest Yale Lock
Now that you have added your Nest Yale Lock to the Google Home app, the next step is to connect Google Assistant to the lock. This will allow you to control the lock using voice commands. Follow these instructions to complete this step:
- Open the Google Home App: Launch the Google Home app on your smartphone or tablet if it’s not already open.
- Access the Device Settings: Tap on the icon representing your Nest Yale Lock in the app’s main screen to access its settings.
- Select “Google Assistant Settings”: On the lock settings page, scroll down and tap on “Google Assistant Settings” to open the Google Assistant integration options.
- Link Google Assistant: In the Google Assistant settings, select “Link” or “Link to Google” to initiate the linking process.
- Log in to Google Account: If prompted, log in to your Google account using your credentials. This will allow the Google Assistant to access your Nest Yale Lock.
- Authorize Google Assistant: Review the permissions and authorizations requested by Google Assistant. Grant the necessary permissions to enable the Assistant to control the lock.
- Confirm Linking: Follow the prompts to confirm the linking process and finalize the connection between Google Assistant and your Nest Yale Lock.
Once you have successfully connected Google Assistant to your Nest Yale Lock, you can start using voice commands to control it. You can say commands like “Hey Google, lock the front door” or “Hey Google, unlock the back door” to control your lock hands-free.
Congratulations! You have now connected Google Assistant to your Nest Yale Lock, allowing for convenient and easy control using voice commands. The next step is to assign a room and location to your lock within the Google Home app. Continue to the next step to learn how to do this.
Step 5: Assign a Room and Location to the Nest Yale Lock
After connecting your Nest Yale Lock to Google Assistant, it’s time to assign a room and location to the lock within the Google Home app. This step helps you organize your devices and control them more efficiently. Follow these steps to complete the process:
- Open the Google Home App: Launch the Google Home app on your smartphone or tablet.
- Locate the Nest Yale Lock: On the main screen of the app, find the Nest Yale Lock among your connected devices. You may need to scroll or swipe left/right to find it.
- Tap on the Lock: Select the Nest Yale Lock to access its settings.
- Go to Room Settings: Within the lock settings, tap on the “Room settings” or “Assign room” option to define the lock’s location.
- Select a Room: Choose a pre-existing room from the list or create a new room to assign to the lock.
- Save the Room Assignment: Once you’ve selected a room, tap “Save” or “Done” to save the room assignment for the lock. It will now be associated with the designated room within the Google Home app.
- Define the Location: To further enhance the accuracy of voice commands, you can also specify the location of the lock within the assigned room. This can be helpful if you have multiple doors or windows in the same room.
- Save the Location: After defining the location, save the changes to ensure the lock is correctly identified within the assigned room and location.
By assigning a room and location to your Nest Yale Lock, you can efficiently control it within specific areas in your home. This feature enables you to control multiple devices by room or location groups using voice commands or the Google Home app.
Great work! You have now assigned a room and location to your Nest Yale Lock within the Google Home app. The final step is to test the lock’s functionality with Google Home to ensure everything is working smoothly. Continue to the next step to learn how to do this.
Step 6: Test the Nest Yale Lock with Google Home
After completing the setup process and assigning a room and location to your Nest Yale Lock within the Google Home app, it’s time to test the lock’s functionality. Follow these steps to ensure everything is working correctly:
- Launch Google Home App: Open the Google Home app on your smartphone or tablet.
- Access the Lock: Locate the Nest Yale Lock in the list of connected devices on the main screen of the app.
- Lock and Unlock: Tap on the lock to access its controls. Use the on-screen buttons or try voice commands to lock and unlock the door. For example, say “Hey Google, lock the front door” or “Hey Google, unlock the back door”.
- Confirm Actions: As you control the lock, visually confirm that it is responding correctly to the commands. You should see the lock physically lock or unlock as desired.
- Test Smart Features: If your Nest Yale Lock has additional smart features, such as auto-locking or notifications, test these features to ensure they are functioning as intended.
- Verify Room Control: If you assigned a room to the lock, try using room-specific commands like “Hey Google, lock the front door in the living room”. This ensures that Google Home recognizes the specific location you have defined.
- Repeat as Needed: Test the lock’s functionality multiple times to ensure consistent results. This helps confirm that the connection between your Nest Yale Lock and Google Home is stable.
If everything is functioning correctly during testing, congratulations! Your Nest Yale Lock is successfully integrated with Google Home and ready for convenient, hands-free control using voice commands.
In the event that you encounter any issues or the lock doesn’t respond as expected, consult the troubleshooting tips below or refer to the product documentation for further assistance.
Troubleshooting Tips
If you encounter any issues while setting up or using your Nest Yale Lock with Google Home, try these troubleshooting tips to resolve the problem:
- Check Wi-Fi Connection: Ensure that both your Nest Yale Lock and Google Home device are connected to a stable Wi-Fi network. Weak or unstable connections can cause communication issues.
- Restart Devices: Restart your Nest Yale Lock, Google Home device, and your Wi-Fi router. Power cycling the devices can help resolve temporary glitches or connectivity problems.
- Update Firmware and Apps: Make sure that the firmware for your Nest Yale Lock and the Google Home app are up to date. Keeping your devices and apps updated often resolves compatibility issues.
- Re-Link Accounts: If the connection between your Nest Yale Lock and Google Home gets disrupted, try unlinking and relinking your accounts. This can refresh the connection and fix any configuration issues.
- Reset the Lock: If all else fails, you can try resetting your Nest Yale Lock to its factory settings. Check the manufacturer’s documentation for instructions on how to perform a factory reset, as this process may vary.
- Contact Support: If you have tried the above steps and are still experiencing issues, reach out to the customer support for both Nest and Google Home. They will be able to provide further guidance and assistance specific to your situation.
Remember to double-check all your settings, connections, and configurations before seeking support. Sometimes, a small oversight can be the cause of the problem.
By following these troubleshooting tips, you should be able to resolve common issues and ensure a smooth operation of your Nest Yale Lock with Google Home.