
Why Add Music to Your Facebook Profile?
Adding music to your Facebook profile is a fantastic way to express your personality, showcase your favorite tunes, or set a specific mood for your profile visitors. Music has a powerful influence on our emotions and can evoke nostalgia, uplift our spirits, or even transport us to a different time and place. By incorporating music into your Facebook presence, you can create a more immersive and engaging experience for yourself and those who visit your profile.
First and foremost, adding music to your Facebook profile allows you to share your favorite songs and artists with your friends and followers. It’s a great way to connect with others who share similar musical tastes and discover new tracks through their recommendations. By showcasing the music you love, you are giving others a glimpse into your personality and interests, making it easier to initiate discussions or bond over shared musical experiences.
Additionally, music has the power to set a specific ambiance or mood. If you’re feeling nostalgic, you can add a classic ballad. If you’re energized and ready to party, you can include an upbeat dance track. The possibilities are endless. By curating a collection of songs that reflect your current mood or interests, you can create a more dynamic and authentic representation of yourself on your Facebook profile.
Moreover, adding music to your Facebook profile can also spark conversations and connections. When someone visits your profile and sees a song they love or recognize, it can serve as an icebreaker and lead to meaningful interactions. Whether it’s reminiscing about shared memories associated with a specific song or discussing your mutual appreciation for an artist, music serves as a common ground that can deepen your connections with others.
Lastly, adding music to your Facebook profile allows you to express your creativity. You can carefully curate playlists for different occasions, such as a workout playlist, a throwback ’90s jams collection, or a soothing instrumental mix for relaxation. This creative outlet not only showcases your musical taste but also demonstrates your ability to curate content and create a unique and captivating online persona.
In summary, adding music to your Facebook profile is a powerful tool for self-expression, connection, and creating a more immersive and dynamic online presence. Through music, you can engage with others, showcase your favorite tunes, set a specific mood, and express your creativity. So why wait? Let the music play and bring life to your Facebook profile!
Step 1: Update Your Facebook App
Before you can start adding music to your Facebook profile, it is essential to ensure that you have the latest version of the Facebook app installed on your mobile device. Facebook frequently releases updates with new features and bug fixes, so by updating the app, you are ensuring that you have access to all the tools necessary for adding music.
To update your Facebook app, follow these simple steps:
- Open the app store on your mobile device. If you are using an iPhone, open the App Store, and if you are using an Android device, open the Google Play Store.
- Search for “Facebook” in the app store’s search bar.
- If an update is available, you will see an “Update” button next to the Facebook app. Tap on the “Update” button to start the updating process. If there is no “Update” button, it means that you already have the latest version installed.
- Wait for the update to download and install on your device. The time required for the update will depend on your internet connection speed.
- Once the update is complete, open the Facebook app to ensure that it is functioning properly.
Updating your Facebook app is crucial as it ensures you have access to the latest features and bug fixes. It also prevents any potential compatibility issues that may arise when adding music to your profile. So, before you proceed with the next steps, take a moment to update your Facebook app to optimize your music adding experience.
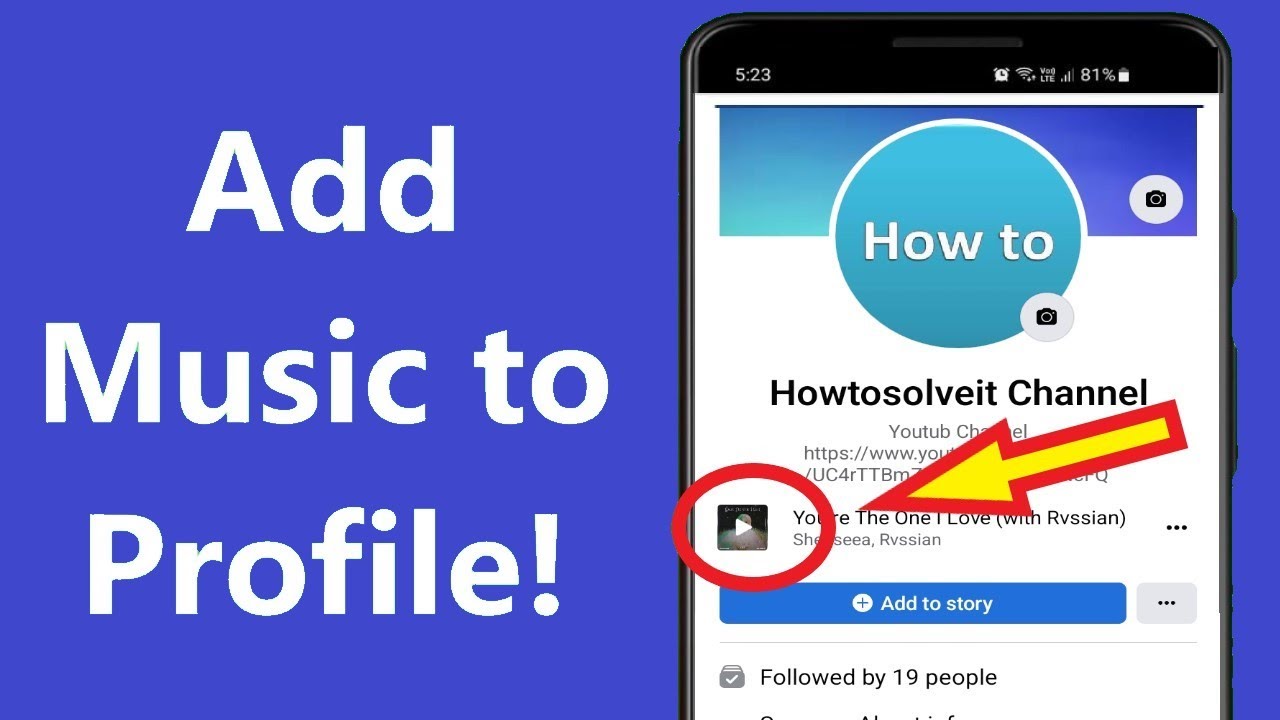
Step 2: Open Your Profile and Tap on Your Profile Picture
Once you have updated your Facebook app, it’s time to open your profile and start the process of adding music. Follow these simple steps to get started:
- Launch the Facebook app on your mobile device and log in to your account if you haven’t already.
- Tap on the profile icon located at the bottom right corner of the screen. This will take you to your Facebook profile page.
- On your profile page, locate your profile picture. It is typically displayed at the center of the page or at the top left corner.
- Tap on your profile picture. This action will bring up a menu with various options related to your profile.
Tapping on your profile picture is an important step because it allows you to access the settings and features related to your profile. By opening your profile picture, you are preparing to customize your profile by adding music.
Keep in mind that the steps may slightly vary depending on the version of the Facebook app you are using. If you cannot find the profile picture or encounter any difficulties, refer to the app’s help section or consult the Facebook support team for assistance.
Now that you have successfully opened your profile and tapped on your profile picture, you are ready to move on to the next step: adding the desired music to your Facebook profile. Exciting times ahead!
Step 3: Click on “Add a Song”
After opening your profile and tapping on your profile picture, it’s time to add music to your Facebook profile. Follow these simple steps:
- On the menu that appears after tapping your profile picture, locate and click on the option that says “Add a Song.” This option is usually located under the “Edit Profile” or “Edit Picture” section.
- Clicking on “Add a Song” will take you to the music selection screen. Here, you can browse through various music options to find the perfect song to represent your profile.
- Depending on your device and Facebook app version, you may be presented with different ways to add music. You might see options like “Search for Songs,” “Browse Popular Music,” or “Connect to a Music Streaming Service.”
- Select the option that suits you best. If you know the specific song you want to add, use the search feature to find it. If you’re open to exploring new music, browse through the popular selections or connect to a music streaming service to access your personal playlists.
Clicking on “Add a Song” is a crucial step as it grants you access to a wide range of music options to personalize your profile. Whether you prefer popular hits or niche genres, this step allows you to select the music that resonates with you and reflects your unique style.
Take your time to explore the available music choices and consider the kind of mood or atmosphere you want to create for your profile visitors. Remember, the song you select will help set an impression and reveal a part of your personality to others.
Now that you have clicked on “Add a Song,” it’s time to move on to the next step and choose the perfect song that will leave a lasting impact on your Facebook profile visitors.
Step 4: Browse and Select Your Desired Song
Once you have clicked on “Add a Song” and accessed the music selection screen, it’s time to browse through the options and choose the perfect song that represents your personality and sets the desired tone for your Facebook profile. Follow these steps to find and select your desired song:
- On the music selection screen, you will be presented with various ways to browse and discover music. You may see categories such as “Trending,” “Top Genres,” or “Recommended for You.” Take your time to explore these options and see if any songs catch your attention.
- If you already have a specific song in mind, use the search feature to find it. Type in the song’s title, artist, or a few lyrics to narrow down the search results.
- As you browse through the available songs, you can listen to previews to get a sense of their sound and style. This allows you to make an informed decision about which song best represents your preferences.
- If you find a song that you like, click on it to select it as your desired choice.
When selecting your desired song, consider factors such as personal relevance, emotional connection, or the overall vibe you want to convey. The song you choose should resonate with you and reflect your unique taste in music.
Remember that the selection of your desired song is a crucial step as it is the core element that will add a musical touch to your Facebook profile. Take your time, explore the options, and choose wisely.
Now that you have browsed through the available songs and selected your desired track, it’s time to move on to the next step and choose the perfect segment of the song to showcase on your profile.
Step 5: Choose 15 to 30 Seconds of the Song
Once you have selected your desired song, it’s time to choose a specific segment of that song to showcase on your Facebook profile. Facebook allows you to select a 15 to 30-second snippet of the song, which will play when someone visits your profile. Follow these steps to choose the perfect segment:
- On the song selection screen, you will see a timeline representing the duration of the song.
- Drag the handles on the timeline to select the starting and ending points of the segment you want to feature. You can move the handles back and forth to fine-tune the selection. Keep in mind that the chosen segment should be between 15 to 30 seconds in length.
- As you adjust the handles, you can listen to a preview of the selected segment to ensure it captures the essence of the song.
- Take your time to find the most captivating part of the song that will make a strong impact on your profile visitors. It could be a catchy chorus, an instrumental hook, or a memorable lyric.
Choosing the right segment of the song is crucial as it will represent a brief glimpse into your musical tastes. The selected segment should be captivating, engaging, and reflect your personal connection to the song.
Keep in mind that the chosen segment should also comply with the guidelines set by Facebook regarding copyright and intellectual property. Avoid selecting segments that infringe upon any legal restrictions or violate the rights of the artist or copyright holder.
Now that you have chosen a 15 to 30-second segment of the song, it’s time to add a custom message to accompany the music on your Facebook profile. Let’s proceed to the next step!
Step 6: Add a Custom Message (Optional)
Adding a custom message to accompany the music on your Facebook profile is an excellent way to provide context, share your thoughts, or express your emotions regarding the chosen song. It allows you to add a personal touch and further engage your profile visitors. Follow these steps to add a custom message:
- On the music selection screen or the song preview page, you will usually find an option to add a custom message. Look for a text box or an area labeled “Add a message” or something similar.
- Click on the text box or area and enter your desired message. You can share why you chose the song, what it means to you, or any other information you want to convey to your profile visitors.
- Keep in mind that there is usually a character limit for the custom message, so try to be concise and impactful with your words.
- If you change your mind and want to remove the custom message, you can usually find an option to clear or delete the text.
Adding a custom message is optional, but it can enhance the overall experience and provide additional insight into your musical preferences. It allows you to share your thoughts, spark conversations, or create an emotional connection with your profile visitors.
Consider the message you want to convey and the impact you hope to achieve. You can keep it short and simple, or you can delve into deeper explanations or personal anecdotes related to the song. The choice is yours!
Now that you have the option to add a custom message, it’s time to share the story of your chosen song and make it more meaningful on your Facebook profile. Let’s proceed to the next step!
Step 7: Share Your Story
Now that you have chosen your desired song and potentially added a custom message, it’s time to share the story behind the music. This step allows you to provide additional context, share your personal connection, or engage your profile visitors on a deeper level. Follow these steps to share your story:
- On the music selection screen or the song preview page, you may find an option or prompt to share your story or thoughts about the song. Look for a text box or an area labeled “Share your story” or something similar.
- Click on the text box or area and start typing your story. You can share the significance of the song in your life, the emotions it evokes, or any personal experiences associated with it.
- Consider being authentic, genuine, and engaging in your storytelling. Share anecdotes, memories, or reflections that will resonate with your profile visitors and create a stronger connection.
- While sharing your story, keep in mind that there may be character limits for the text. Strive to deliver a concise and compelling narrative that captures the essence of your connection to the music.
- If you change your mind or want to remove the shared story, there is usually an option to clear or delete the text.
Sharing your story adds a personal touch to your Facebook profile and allows you to foster a deeper connection with your profile visitors. It gives them insight into your experiences, passions, or memories related to the chosen song and encourages meaningful conversations.
Remember to be mindful of your audience and choose details that are appropriate for sharing publicly. If there are sensitive or personal aspects of your story that you prefer to keep private, feel free to focus on the broader impact the song has had on your life.
Now that you have the opportunity to share your story, it’s time to bring your Facebook profile to life and create a more meaningful experience for your visitors. Let’s proceed to the next step!
Step 8: Select Who Can See Your Song
When adding music to your Facebook profile, it’s important to consider the privacy settings and choose who can see the song on your profile. Facebook provides options to control the visibility of your music, allowing you to customize your audience and share it with specific groups of people. Follow these steps to select who can see your song:
- After completing the previous steps of adding the song, custom message, and sharing your story, look for the privacy settings option. This option is typically located either on the same page or in the profile settings menu.
- Click on the privacy settings option to access the available visibility options.
- Facebook provides different privacy settings, such as “Public,” “Friends,” “Friends except acquaintances,” “Only me,” or custom lists you have created. Choose the option that aligns with your preferences.
- If you select “Public,” anyone who visits your profile will be able to see the song. If you choose “Friends,” only your approved friends will have access to it. Other options give you more control and allow you to further customize your audience.
- Once you have chosen the desired visibility option, save the settings, and your song will be visible to the selected audience.
By selecting who can see your song, you have control over who can enjoy the music on your Facebook profile. This provides a sense of privacy and allows you to curate your music-sharing experience according to your comfort level.
Consider your relationship with your Facebook friends, your desired level of exposure, and the overall purpose of adding music to your profile. You may want to share a particular song with everyone or limit it to a select group of individuals who will appreciate it the most.
Now that you have chosen who can see your song, it’s time to preview and post your song on your Facebook profile. Let’s move on to the final step!
Step 9: Preview and Post Your Song
After going through the previous steps of adding music, customizing your message, sharing your story, and selecting the desired visibility, it’s time to preview and post your song on your Facebook profile. This final step allows you to make sure everything looks and sounds just right before sharing it with the world. Follow these steps to preview and post your song:
- Before posting, take a moment to preview how your song will appear on your Facebook profile. Look for a preview option or a “Preview” button to get a glimpse of how it will be showcased to your profile visitors.
- Listen to the preview and make sure the chosen segment of the song plays accurately and captures the essence of your musical selection.
- Check the visibility settings and ensure that your song is set to be seen by the intended audience, whether it’s public, friends, or a custom list of individuals.
- If you are satisfied with the preview, click on the “Post” or “Save” button to finalize the addition of your song to your Facebook profile.
- After posting, take a moment to visit your profile as a visitor to see how the song appears to others. This will give you a better understanding of the overall experience and ensure that everything is displayed as you intended.
Previewing and posting your song allows you to fine-tune any details and make sure that the chosen music and accompanying elements align with your vision for your Facebook profile.
Pay attention to how the song complements your profile, what message it conveys to your visitors, and how it enhances the overall aesthetic. If anything seems off or needs adjustments, feel free to go back and make the necessary changes before sharing it with a wider audience.
Now that you have previewed and posted your song, congratulations! Your Facebook profile is now enriched with music, personalization, and a captivating story. Enjoy the musical experience and the connections it may bring to your profile visitors!