
Checking Wi-Fi Compatibility
Before setting up Wi-Fi on your Google Home device, it’s important to ensure that your Wi-Fi network is compatible. Here are a few key factors to consider:
Wi-Fi Network Name (SSID): Your Wi-Fi network must have a unique name or SSID that is discoverable by your Google Home device. You may need to check your router settings or contact your Internet service provider (ISP) to obtain this information.
Wi-Fi Frequency: Google Home devices support both 2.4 GHz and 5 GHz Wi-Fi frequencies. While 2.4 GHz provides better range, 5 GHz offers faster speeds, lower interference, and is ideal for streaming media. Ensure that your network supports either or both of these frequencies.
Wi-Fi Encryption: To protect your network and data, ensure that your Wi-Fi network uses a secure encryption method, such as WPA2. Avoid using outdated and less secure encryption methods like WEP.
Minimum Internet Speed: Google Home devices require a minimum internet speed of 1 Mbps for normal functionality. However, for optimal performance, higher speeds are recommended, especially for activities like streaming music, videos, or controlling smart home devices.
Router Compatibility: While Google Home devices generally work with most routers, it’s advisable to check the product specifications of your router for any compatibility issues. Some routers may have specific configuration requirements or limitations.
Network Coverage: It’s important to have a strong Wi-Fi signal throughout your home, especially in areas where you plan to use your Google Home device. Consider using Wi-Fi range extenders or mesh networks to ensure coverage in every corner of your house.
By verifying these compatibility factors, you can ensure a smooth setup process and optimal performance for your Google Home device. If you encounter any issues, consult the user manual of your router or contact your ISP for further assistance.
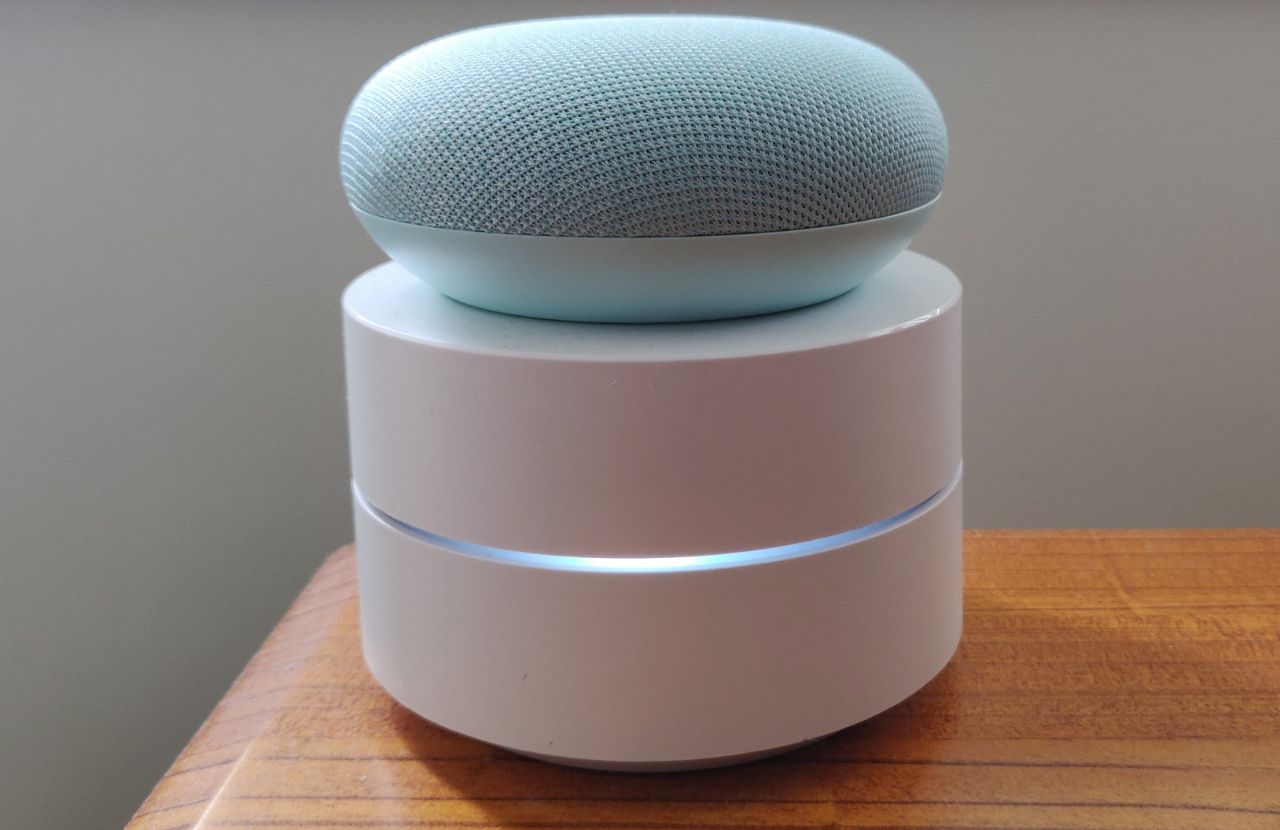
Connecting to Power
Once you have confirmed Wi-Fi compatibility, the next step in setting up your Google Home device is connecting it to a power source. Follow these steps to ensure a successful power connection:
1. Locate the Power Port: Identify the power port on your Google Home device. It is typically located on the back or bottom of the device.
2. Use the Provided Power Cable: Connect one end of the provided power cable to the power port on the Google Home device.
3. Connect to a Power Outlet: Plug the other end of the power cable into a working power outlet. Ensure that the outlet is easily accessible and not obstructed by furniture or other objects.
4. Power On: Once connected to power, your Google Home device will automatically turn on. Look for any indication lights or sounds to confirm that the device is powered up.
5. Wait for Initialization: Depending on your device, it may take a few moments to initialize and become ready for setup. Be patient and wait until the device is fully operational.
Note: It’s important to use the power cable that comes with your device. Avoid using third-party cables or adapters that may not provide the correct power requirements, as this can lead to performance issues or damage the device.
By properly connecting your Google Home device to a power source, you ensure that it has the necessary power supply to function correctly. Once your device is powered on and ready, you can proceed to the next step of the setup process, which involves downloading the Google Home app.
Downloading the Google Home App
In order to set up and manage your Google Home device, you will need to download the Google Home app on your smartphone or tablet. Follow these steps to download and install the app:
1. Device Compatibility: Ensure that your smartphone or tablet meets the compatibility requirements for the Google Home app. It is available for both iOS and Android devices.
2. App Store: For iOS users, open the App Store on your device. For Android users, open the Google Play Store.
3. Search for the App: In the search bar of the respective app store, type “Google Home” and tap the search icon.
4. Select the App: From the list of search results, locate the official Google Home app and tap on it to open the app’s page.
5. Install the App: On the app’s page, tap the “Install” or “Get” button to initiate the installation process. Follow any on-screen prompts, such as granting permissions, if required.
6. Wait for Installation: Once you have initiated the installation, wait for the app to download and install onto your device. The installation time may vary depending on your internet speed.
7. Open the App: After the installation is complete, locate the Google Home app on your device’s home screen or app drawer and tap on it to open the app.
Note: If you already have the Google Home app installed on your device, ensure that it is updated to the latest version for optimal compatibility with your Google Home device.
Now that you have installed the Google Home app, you are ready to proceed with the setup process for your Google Home device. The app will guide you through the remaining steps, including connecting your device to Wi-Fi and customizing your settings.
Setting Up Your Google Home
Now that you have downloaded the Google Home app, it’s time to set up your Google Home device. Follow these steps to get started:
1. Launch the Google Home App: Open the Google Home app on your smartphone or tablet. Make sure that your device is connected to the same Wi-Fi network you want to connect your Google Home device to.
2. Tap on “Add” or “+” Icon: Look for the “Add” or “+” icon in the top-left corner of the app’s home screen. Tap on it to begin adding your Google Home device.
3. Select “Set Up Device”: From the list of options, choose “Set Up Device” to start the setup process.
4. Choose “New Device”: On the next screen, select “New Device” to indicate that you are setting up a new Google Home device.
5. Select Your Home: If you have multiple homes set up in the app, choose the home where you want to install the Google Home device. If this is your first device, the app will prompt you to create a new home.
6. Connect to Wi-Fi: The app will now guide you through the process of connecting your Google Home device to your Wi-Fi network. Follow the on-screen instructions to select your network, enter the Wi-Fi password if required, and allow the device to establish a connection.
7. Customize Your Device: After successfully connecting to Wi-Fi, you can customize your Google Home device by giving it a name and choosing its location within your home. This will help you easily identify and control the device in the future.
8. Finish Setup: Once you have customized your device settings, the Google Home app will finalize the setup process. It may prompt you to update the software of your device if a newer version is available, so make sure to follow any instructions provided.
After completing the setup process, your Google Home device is now ready to use. You can start enjoying its features and functionalities, such as playing music, controlling smart home devices, setting reminders, and much more. Additionally, the Google Home app allows you to further personalize and manage your device settings at any time.
Connecting to Wi-Fi
Once you have set up your Google Home device, the next crucial step is connecting it to your Wi-Fi network. Follow these steps to establish a stable and reliable Wi-Fi connection:
1. Open the Google Home App: Launch the Google Home app on your smartphone or tablet. Ensure that your device is connected to the same Wi-Fi network you want to connect your Google Home device to.
2. Locate Your Device: On the app’s home screen, you will see an overview of all your connected devices. Locate and tap on the Google Home device you want to connect to Wi-Fi.
3. Tap on the Settings: From the device settings page, tap on the gear or three-dot icon in the top-right corner to access the device settings menu.
4. Select “Wi-Fi” or “Device Settings”: In the settings menu, look for the option labeled “Wi-Fi” or “Device Settings.” Tap on it to proceed.
5. Connect to Wi-Fi: The app will display a list of available Wi-Fi networks. Select your preferred network from the list. If your network requires a password, enter it when prompted.
6. Acquiring IP Address: After selecting the Wi-Fi network, Google Home will attempt to connect to it. It may take a few moments for the device to acquire an IP address from your router.
7. Successful Connection: Once the connection is established, you will receive a notification confirming the successful connection of your Google Home device to the Wi-Fi network.
Note: If you encounter any issues during the connection process, ensure that you have entered the correct Wi-Fi password and that your Wi-Fi network is functioning properly. You may also try restarting your router and Google Home device to resolve any connectivity problems.
By connecting your Google Home device to your Wi-Fi network, you enable it to access the internet, stream music and podcasts, answer questions, provide news and weather updates, and perform various other tasks. Now that your device is connected, you can explore its full range of features and start enjoying the convenience it brings to your smart home ecosystem.
Troubleshooting Wi-Fi Connection Issues
Experiencing difficulty connecting your Google Home device to your Wi-Fi network can be frustrating. Fortunately, there are several troubleshooting steps you can take to resolve common Wi-Fi connection issues. Here are some solutions to consider:
1. Check Wi-Fi Signal Strength: Ensure that your Google Home device is within range of your Wi-Fi router. A weak signal can cause connection problems. Try moving your device closer to the router to see if the signal improves.
2. Restart Your Router: Sometimes, a simple router restart can resolve temporary connectivity issues. Unplug your router, wait for a few seconds, and then plug it back in. Once the router has restarted, attempt to connect your Google Home device again.
3. Verify Wi-Fi Credentials: Double-check that you are entering the correct Wi-Fi network name (SSID) and password. Typos or incorrect information can prevent a successful connection. If necessary, try resetting your Wi-Fi password and re-entering it in the Google Home app.
4. Check Router Settings: Review your router settings to ensure that they are compatible with your Google Home device. Make sure that MAC address filtering or other security settings are not preventing your device from connecting to the network.
5. Router Firmware Update: Outdated router firmware can sometimes cause compatibility issues. Check for any available firmware updates on your router’s manufacturer website and follow their instructions to update the firmware if necessary.
6. Change Wi-Fi Channel: If you are experiencing interference from other devices on the same Wi-Fi channel, changing the channel on your router can help improve signal stability. Access your router’s settings and switch to a less congested or interference-free channel.
7. Reset Your Google Home Device: If all else fails, you can try resetting your Google Home device to its factory settings. This will remove any saved Wi-Fi network information. You can then go through the setup process again to establish a fresh Wi-Fi connection.
Remember, each Wi-Fi network environment is unique, and the solutions that work for one person may not always work for another. If your Wi-Fi connection issues persist, consider contacting your internet service provider (ISP) or the customer support for your router or Google Home device for further assistance.
By troubleshooting Wi-Fi connection issues, you can ensure a stable and reliable connection between your Google Home device and your Wi-Fi network. This will enable you to fully enjoy the benefits of your Google Home device and seamlessly control your smart home devices, play music, and access various services through voice commands.
Managing Your Wi-Fi Settings
Managing your Wi-Fi settings effectively is crucial for maintaining a stable and secure connection for your Google Home device. Here are some tips to help you manage your Wi-Fi settings:
1. Router Access: Gain access to your router’s settings by typing the router’s IP address into a web browser. This allows you to make changes to Wi-Fi settings and security features. The default IP address is usually printed on the router or can be found in the user manual.
2. Wi-Fi Network Name (SSID): Consider changing the default SSID to a unique name that is easily identifiable and not shared by nearby networks. This can help avoid confusion and potential interference issues.
3. Wi-Fi Password: Choose a strong and secure password for your Wi-Fi network. Use a combination of upper and lowercase letters, numbers, and special characters to make it difficult to guess. Regularly update your password to enhance security.
4. Guest Network: If your router supports it, set up a separate guest network that allows visitors to connect to the internet without accessing your main network. This protects your privacy and security by keeping guests isolated from your personal devices and data.
5. Wi-Fi Range Extenders: If you have areas in your home with weak Wi-Fi signals, consider using Wi-Fi range extenders or mesh systems. These devices help boost the signal range and ensure a strong connection across your entire home.
6. Band Steering: If your router supports dual-band (2.4 GHz and 5 GHz) connectivity, enable band steering. This feature automatically connects devices to the optimal frequency based on their capabilities, providing better performance and reducing congestion.
7. MAC Address Filtering: Enable MAC address filtering if your router supports it. This feature allows you to create a whitelist of approved devices that can connect to your network, enhancing security by blocking unauthorized devices.
8. Firmware Updates: Regularly check for firmware updates for your router and install them as they become available. These updates often include bug fixes, performance enhancements, and security patches, ensuring the best Wi-Fi experience.
By effectively managing your Wi-Fi settings, you can optimize your network performance, enhance security measures, and ensure a seamless connection for your Google Home device. Regularly review and update your Wi-Fi settings to adapt to the changing needs of your home network.
Tips for a Stronger Wi-Fi Signal
A strong and reliable Wi-Fi signal is essential for maximizing the performance and connectivity of your Google Home device. Here are some tips to help you achieve a stronger Wi-Fi signal:
1. Router Placement: Position your Wi-Fi router in a central location within your home to ensure optimal coverage. Avoid placing it in corners or behind furniture, as these can obstruct the signal.
2. Reduce Interference: Keep your router away from other electronic devices that may interfere with the signal, such as cordless phones, microwave ovens, and baby monitors. These devices can disrupt Wi-Fi signals and weaken the connection.
3. Update Router Firmware: Regularly check for firmware updates for your router and install them. Firmware updates often include performance improvements and bug fixes that can enhance your Wi-Fi signal.
4. Use Wi-Fi Range Extenders: If you have areas in your home with weak Wi-Fi signals, consider using Wi-Fi range extenders or mesh systems. These devices amplify the signal and extend coverage to eliminate dead zones.
5. Channel Selection: Choose the least congested Wi-Fi channel to avoid interference from neighboring networks. You can use Wi-Fi analyzer apps or access your router’s settings to select a less crowded channel.
6. Optimize Router Antennas: If your router has adjustable antennas, experiment with different positions and orientations to find the optimal signal strength. Rotating or positioning the antennas at different angles can sometimes improve the Wi-Fi reception.
7. Upgrade Router Antennas: If your router allows for removable antennas, consider upgrading to higher-gain antennas. These can provide better signal range and penetration, resulting in a stronger Wi-Fi signal throughout your home.
8. Secure your Network: Ensure that your Wi-Fi network is password protected to prevent unauthorized access. By keeping your network secure, you can prevent others from connecting to your Wi-Fi and potentially impacting your signal strength.
9. Limit Bandwidth Usage: Avoid excessive bandwidth usage by limiting the number of devices connected simultaneously. Streaming high-definition videos, large file downloads, and online gaming can strain your Wi-Fi network and impact signal quality.
10. Regular Router Maintenance: Periodically reboot your router to clear temporary network issues and refresh the connection. Additionally, keeping your router clean from dust and debris can prevent overheating and maintain optimal performance.
By implementing these tips, you can significantly improve your Wi-Fi signal strength and enhance the overall performance of your Google Home device. A strong and reliable Wi-Fi signal will ensure seamless connectivity and a smooth user experience for all your smart home activities.