
Why Clearing Your Computer Cache Is Important
Clearing the cache on your desktop computer is an essential maintenance task that can significantly enhance your computer’s performance and overall browsing experience. The cache is a storage area where your computer stores temporary files, images, scripts, and other website data while you browse the internet. Although the cache is designed to speed up your browsing by loading previously visited pages more quickly, it can also accumulate over time and become bloated with unnecessary data.
When the cache becomes too large and congested, it can negatively impact your computer’s performance. It can slow down your browsing speed, cause websites to load slowly, and even lead to browser crashes or freezes. Moreover, an overloaded cache can consume unnecessary storage space on your computer’s hard drive, reducing its available capacity for other important files and applications.
Clearing your computer cache regularly helps mitigate these issues and provides several benefits:
1. Improved Performance: Clearing the cache frees up valuable memory and storage space, allowing your computer to run faster and smoother. By removing the excess data, your browser can load web pages more efficiently and respond to your commands promptly.
2. Enhanced Browsing Experience: Cache clearing ensures that you always experience websites as they are intended by fetching the latest version of the site’s content. This means you won’t encounter outdated images, old versions of web pages, or previously cached scripts that may no longer be compatible with the current website structure.
3. Privacy and Security: Cached files may contain sensitive information, such as login credentials or personal data. By clearing the cache regularly, you reduce the risk of unauthorized access to this information. Additionally, clearing the cache can help remove any tracking cookies or temporary files that advertisers or malicious websites may use to track your online activities.
4. Troubleshooting: Clearing the cache is also a useful troubleshooting step when encountering website-related issues, such as broken links, missing images, or loading errors. Sometimes, outdated cached files can interfere with the proper functioning of a website. By clearing the cache, you can ensure that you are starting with a clean slate and eliminate any potential conflicts.
How Does Cache Accumulate on Your Desktop Computer
The cache on your desktop computer accumulates as you browse the internet and interact with different websites and applications. Here’s a breakdown of how cache accumulates on your computer:
1. Web Browsers: Every time you visit a website, your web browser stores various elements of that site in its cache. This includes HTML files, images, JavaScript files, CSS stylesheets, and other resources necessary for the webpage to load quickly on subsequent visits. As you continue browsing, the cache grows larger with each new website you visit.
2. Application Data: Some applications on your computer, such as email clients, office suites, or creative software, also utilize cache to enhance performance. These applications may store temporary files, attachments, or preview images in cache to facilitate faster access and improve overall responsiveness.
3. System Updates: When your operating system or installed software receives updates, the update files are often stored in the cache temporarily. This allows for faster installation and easier rollback if necessary. These update files can accumulate over time and consume valuable storage space if not cleared regularly.
4. Downloaded Files: When you download files from the internet, such as documents, images, videos, or software installers, your computer may store temporary copies of these files in the cache. This enables quicker access to the files when you open or view them again, especially if the original download location is inaccessible.
5. Streaming Media: If you frequently stream videos, music, or other media online, your computer may store temporary copies of the streamed content in the cache. This allows for smoother playback and the ability to rewind or skip parts without re-downloading the entire file.
6. Cookies and Login Information: Websites often use cookies to enhance user experience and provide personalized content. These cookies may contain login information, preferences, or browsing history. While clearing the cache does not necessarily delete login credentials saved in cookies, it can remove unnecessary or outdated cookies for improved privacy and security.
7. Cached Redirections: When a webpage or file is moved to a different location, your web browser often stores a redirect in its cache. This redirection helps direct you to the new location without sending you to the outdated or broken link. However, these redirects can accumulate and cause confusion if the website structure changes frequently.
It’s worth noting that cache accumulation is necessary for faster and more efficient browsing. However, regular cache clearing can prevent it from becoming too bloated and causing performance issues.
Benefits of Clearing the Cache on Your Desktop Computer
Clearing the cache on your desktop computer offers several important benefits that can improve your overall browsing experience and enhance your computer’s performance. Here are the key advantages of regularly clearing your computer cache:
1. Improved Performance: Over time, the cache on your computer can become filled with unnecessary data and files, which can slow down your browsing speed and overall system performance. By clearing the cache, you free up valuable memory and storage space, allowing your computer to run faster and smoother. This results in quicker website loading times and more responsive application performance.
2. Enhanced Privacy and Security: The cache stores temporary copies of web pages, images, and other online content. This can include sensitive information like login credentials or personal data. By clearing the cache regularly, you reduce the risk of unauthorized access to this information. Additionally, clearing the cache removes cookies and temporary files that advertisers or malicious websites may use to track your online activities, ensuring better privacy and security while browsing.
3. Accurate Website Rendering: Clearing the cache ensures that your web browser fetches the latest versions of web pages, images, stylesheets, and scripts. This eliminates the possibility of viewing outdated or cached versions of websites. It also helps prevent any conflicts that could arise from using outdated scripts with current website structures. By clearing the cache, you can experience websites as they are intended, ensuring accurate rendering and functionality.
4. Troubleshooting Website Issues: Sometimes, browsing issues can occur due to cached files that are outdated or corrupted. By clearing the cache, you start with a clean slate, eliminating any potential conflicts that may hinder the proper functioning of websites. It’s an effective troubleshooting step for resolving issues like broken links, missing images, or website loading errors.
5. Reduced Storage Usage: Cache accumulation can consume a significant amount of storage space on your computer’s hard drive. This can leave you with less available space for other important files, documents, or applications. By regularly clearing the cache, you can free up and reclaim that storage space, ensuring you have enough room for your desired files and programs.
6. Better User Experience: By clearing the cache, you can ensure a seamless and uninterrupted browsing experience. Websites will load faster, media will play smoothly, and applications will respond promptly. This ultimately leads to a more enjoyable and efficient use of your desktop computer.
Overall, regularly clearing the cache on your desktop computer is a simple yet effective maintenance task that can offer significant benefits. It optimizes performance, enhances privacy and security, resolves website issues, reduces storage usage, and improves the overall user experience. Incorporating cache clearing as part of your computer maintenance routine can help ensure that your desktop computer operates smoothly and efficiently.
Step-by-Step Guide to Clearing Cache on Windows
Clearing the cache on a Windows computer can be done easily by following these step-by-step instructions:
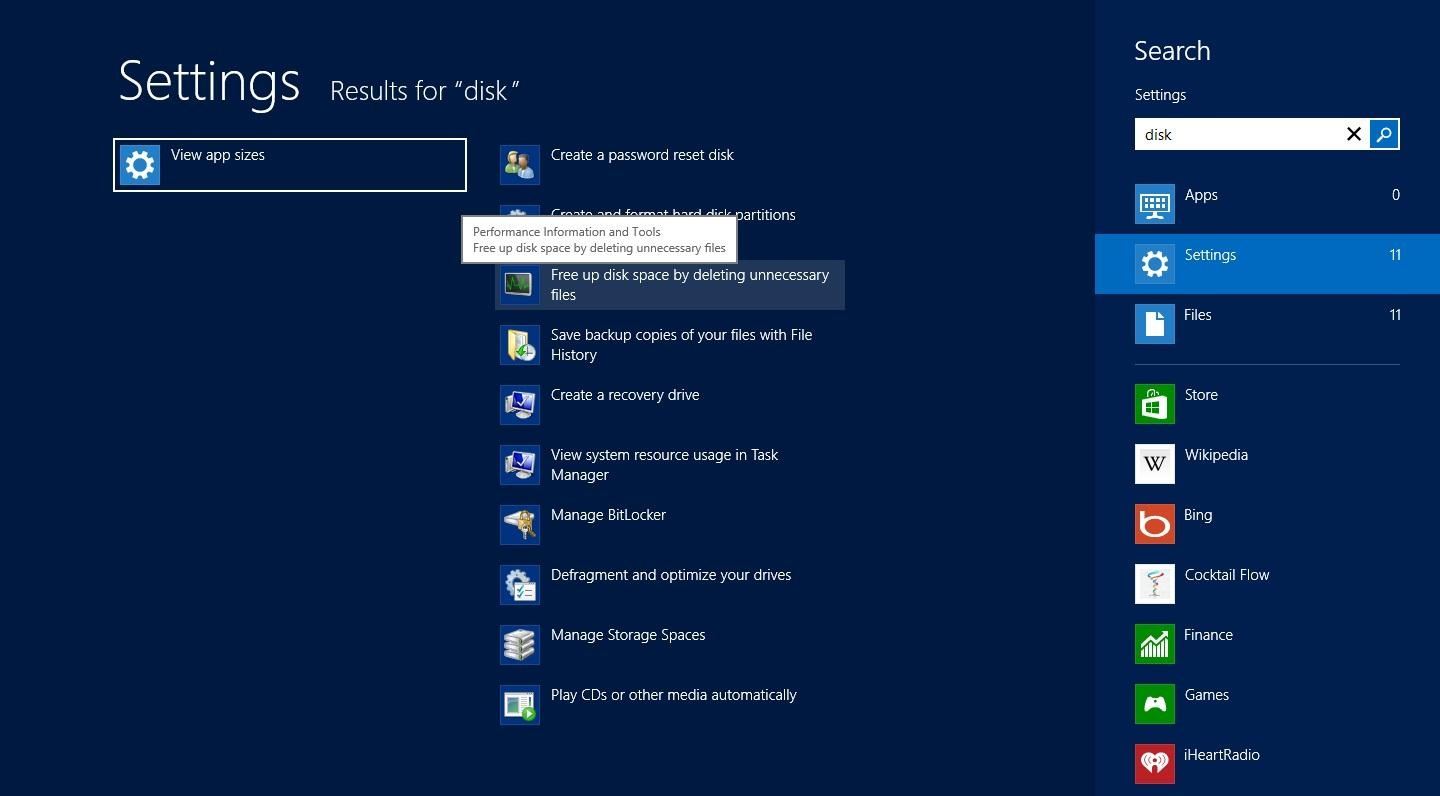
Step 1: Open the Settings Menu: Click on the “Start” button on the bottom left corner of your screen and select the gear-shaped icon to open the Windows Settings menu.
Step 2: Access the System Settings: In the Windows Settings menu, click on the “System” option to access the system settings.
Step 3: Open the Storage Settings: In the system settings, click on the “Storage” option. This will take you to the storage settings, where you can manage your computer’s storage.
Step 4: Clear Temporary Files: In the storage settings, click on the “Temporary files” option. This will open the list of temporary files that can be cleared from your computer.
Step 5: Check the Box for “Temporary Files”: Scroll through the list of temporary files and locate the checkbox next to “Temporary files.” Check the box to select it for deletion.
Step 6: Clear the Cache: After selecting the “Temporary files” option, click on the “Remove files” button. This will initiate the process of clearing the selected temporary files from your computer’s cache.
Step 7: Confirm the Deletion: A confirmation prompt will appear asking if you want to permanently delete these files. Click on the “Remove files” button to confirm and proceed with the deletion.
Step 8: Wait for the Process to Complete: The clearing process may take a few moments, depending on the amount of data to be deleted. Wait for the process to complete; you may see a progress bar indicating the deletion progress.
Step 9: Restart Your Computer: Once the cache is cleared, it is recommended to restart your computer to ensure all changes take effect. Click on the “Start” button and select “Restart” from the power options.
Step 10: Clear Cache in Web Browsers: Cache clearing in Windows also involves clearing the cache in web browsers individually. It’s recommended to follow the specific steps for each browser you use to clear their respective caches, as browser cache can contribute significantly to storage usage.
By following these steps, you can easily clear the cache on your Windows computer, improving its performance and creating more storage space for your important files and applications.
Step-by-Step Guide to Clearing Cache on Mac
If you’re using a Mac computer and want to clear the cache to improve performance and free up storage space, you can follow these step-by-step instructions:
Step 1: Open the Safari Browser: Launch the Safari browser by clicking on the Safari icon in the Dock or by searching for Safari in the “Applications” folder.
Step 2: Access the Preferences: In the top menu bar, click on “Safari” and select “Preferences” from the drop-down menu. Alternatively, you can use the keyboard shortcut “Command + comma” to open the Preferences window.
Step 3: Navigate to the Privacy Tab: In the Preferences window, click on the “Privacy” tab located at the top. This tab contains options related to website data and cache.
Step 4: Manage Website Data: In the Privacy tab, click on the “Manage Website Data” button. This will open a new window displaying all the website data stored in Safari’s cache.
Step 5: Remove Cache Data: Click on the “Remove All” button to delete all the website data stored in the cache. Alternatively, you can select specific websites and click on the “Remove” button to delete cache data for those sites only.
Step 6: Confirm the Deletion: A confirmation prompt will appear asking if you want to delete the selected website data. Click on the “Remove Now” button to confirm and proceed with the deletion.
Step 7: Clear Cache in Other Browsers: If you use browsers other than Safari, such as Google Chrome or Mozilla Firefox, you will need to clear their caches individually. Refer to the browser’s settings or preferences menu to find the cache clearing options.
Step 8: Restart Your Computer: After clearing the cache in Safari and any other browsers you use, it is recommended to restart your Mac. This ensures that all changes take effect and helps optimize the overall performance of your computer.
Note: If you use apps other than web browsers that store cache files on your Mac, such as email clients or creative software, you may need to consult the specific app’s documentation or preferences to clear their caches as well.
By following these steps, you can easily clear the cache on your Mac, improving its performance and freeing up storage space. Regular cache clearing is a good practice to ensure smooth and efficient operation of your Mac computer.
Clearing Cache in Different Web Browsers
Clearing the cache in web browsers is essential for improving performance and resolving website-related issues. Here’s a guide on how to clear the cache in different popular web browsers:
Clearing Cache in Google Chrome:
To clear the cache in Google Chrome:
- Click on the three-dot menu icon in the top-right corner of the browser window.
- Select “More tools” and then “Clear browsing data”.
- In the “Basic” tab, choose the time range to clear the cache (e.g., “Last hour”, “Last day”, “All time”).
- Select “Cached images and files” and any other data you want to clear.
- Click on the “Clear data” button to clear the cache.
Clearing Cache in Mozilla Firefox:
To clear the cache in Mozilla Firefox:
- Click on the three-bar menu icon in the top-right corner of the browser window.
- Choose “Options” and then “Privacy & Security” in the left sidebar.
- In the “Cookies and Site Data” section, click on the “Clear Data” button.
- Ensure that “Cached Web Content” is selected and click on the “Clear” button.
Clearing Cache in Safari:
To clear the cache in Safari:
- Click on “Safari” in the top menu bar and select “Preferences”.
- In the Preferences window, go to the “Privacy” tab.
- Click on “Manage Website Data” and then “Remove All” to clear the cache.
Clearing Cache in Microsoft Edge:
To clear the cache in Microsoft Edge:
- Click on the three-dot menu icon in the top-right corner of the browser window.
- Select “Settings” and then “Privacy, search, and services” in the left sidebar.
- Under “Clear browsing data”, click on “Choose what to clear”.
- Select “Cached images and files” and any other data you want to clear.
- Click on the “Clear” button to clear the cache.
Clearing Cache in Internet Explorer:
To clear the cache in Internet Explorer:
- Click on the gear icon in the top-right corner of the browser window.
- Select “Internet options”.
- In the “General” tab, under “Browsing history”, click on “Delete”.
- Ensure that “Temporary Internet files and website files” is selected and click on the “Delete” button.
Clearing Cache in Opera:
To clear the cache in Opera:
- Click on the O menu icon in the top-left corner of the browser window.
- Select “Settings” and then “Advanced” in the left sidebar.
- In the “Privacy and security” section, click on “Clear browsing data”.
- Choose the time range and select “Cached images and files” and any other data you want to clear.
- Click on the “Clear” button to clear the cache.
Remember to customize the cache clearing options based on your preferences and specific needs. Regularly clearing the cache helps ensure optimal performance, privacy, and smooth browsing experience in your favorite web browsers.
Clearing Cache in Google Chrome
Google Chrome is one of the most popular web browsers, and clearing the cache in Chrome can help improve performance and resolve browsing issues. Here is a step-by-step guide on how to clear the cache in Google Chrome:
- Click on the three-dot menu icon in the top-right corner of the browser window. This will open a drop-down menu.
- Select “More tools” from the menu, and then choose “Clear browsing data”. This will open the “Clear browsing data” window.
- In the “Basic” tab of the “Clear browsing data” window, you can choose the time range for which you want to clear the cache. You can select options like “Last hour,” “Last 24 hours,” “Last 7 days,” or “All time” based on your preference.
- Tick the checkbox next to “Cached images and files”. You can also select other data types you want to clear, such as browsing history, cookies, or download history.
- Review the other options in the “Clear browsing data” window and make sure they are set according to your needs. For example, you can choose to clear cookies, passwords, autofill data, and more.
- Click on the “Clear data” button to initiate the clearing process.
- Wait for Chrome to clear the cache and other selected data. The time it takes will depend on the amount of data to be cleared.
- Once the clearing process is complete, you will see a notification at the bottom-right corner of the browser window confirming the cache clearance.
It is important to note that clearing cache in Google Chrome will also clear other data types, such as cookies and browsing history. You can customize what data you want to clear in the “Clear browsing data” window for a more tailored experience.
Additionally, you can use the keyboard shortcut “Ctrl + Shift + Delete” to directly access the “Clear browsing data” window in Google Chrome.
Regularly clearing the cache in Google Chrome helps improve browsing speed, resolve website compatibility issues, and ensure a smoother and more enjoyable browsing experience.
Clearing Cache in Mozilla Firefox
Mozilla Firefox is a widely used web browser known for its speed and customizability. Clearing the cache in Firefox can help improve performance, resolve website issues, and ensure an optimized browsing experience. Follow this step-by-step guide to clear the cache in Mozilla Firefox:
- Click on the three-bar menu icon located in the top-right corner of the browser window. This will open the Firefox menu.
- Select “Options” from the menu. This will open the Firefox Options page in a new tab.
- In the left sidebar of the Options page, click on “Privacy & Security”. This will navigate you to the Privacy & Security settings.
- Scroll down to the “Cookies and Site Data” section. Click on the “Clear Data” button next to it.
- In the Clear Data window, ensure that the checkbox next to “Cached Web Content” is selected. You can also choose to clear other data types, such as cookies and site preferences.
- Click on the “Clear” button to initiate the cache clearing process.
- Wait for Firefox to clear the cache. The time it takes will depend on the amount of data to be cleared.
- Once the clearing process is complete, you can click on the “OK” button to close the Clear Data window.
Alternatively, you can use the keyboard shortcut “Ctrl + Shift + Delete” to access the Clear Data window directly in Mozilla Firefox.
By clearing the cache in Mozilla Firefox, you can optimize browsing performance, resolve website-related issues, and ensure that you are viewing the most up-to-date content when visiting websites.
It’s worth noting that clearing the cache in Firefox will also clear other browsing data such as cookies and history. You can customize the clearing options in the Clear Data window to suit your preferences.
Regularly clearing the cache in Mozilla Firefox is a good practice for maintaining a smooth and efficient browsing experience.
Clearing Cache in Safari
Safari is the default web browser for Apple devices, and clearing the cache in Safari can help improve performance, resolve browsing issues, and ensure a smoother browsing experience. Here’s a step-by-step guide on how to clear the cache in Safari:
- Click on “Safari” in the top menu bar and select “Preferences” from the drop-down menu. This will open the Preferences window.
- In the Preferences window, go to the “Privacy” tab.
- Click on the “Manage Website Data” button. This will open a new window displaying all the website data stored in Safari’s cache.
- In the Manage Website Data window, you can see the list of websites and their corresponding cache sizes. You can select specific websites by clicking on them or use the “Remove All” button to clear all the cache data.
- If you want to remove cache data for specific websites only, select the desired websites and click on the “Remove” button. To remove cache data for all websites, click on the “Remove All” button.
- A confirmation prompt will appear, asking if you want to remove the selected website data. Click on the “Remove Now” button to confirm and proceed with the deletion.
It’s worth noting that clearing the cache in Safari will also remove other browsing data, such as cookies and website preferences.
You can also use the keyboard shortcut “Command + Alt/Option + E” to access the “Manage Website Data” window quickly.
Regularly clearing the cache in Safari helps optimize performance, ensure accurate website rendering, and create a hassle-free browsing experience on your Apple device.
Clearing Cache in Microsoft Edge
Microsoft Edge is a popular web browser that comes pre-installed on Windows devices. Clearing the cache in Edge can help improve performance, resolve website issues, and ensure a smoother browsing experience. Here is a step-by-step guide on how to clear the cache in Microsoft Edge:
- Click on the three-dot menu icon located in the top-right corner of the browser window. This will open the Edge menu.
- Select “Settings” from the menu. This will open the Settings page in a new tab.
- In the left sidebar of the Settings page, click on “Privacy, search, and services”. This will display privacy and browsing data options.
- Under the “Clear browsing data” section, click on the “Choose what to clear” button. This will open a new window with various clearing options.
- In the new window, select “Cached images and files” along with any other data types you want to clear, such as cookies or browsing history.
- Review the other options in the clearing window and ensure they are set according to your preferences.
- Click on the “Clear” button to initiate the cache clearing process.
- Wait for Microsoft Edge to clear the cache. The time it takes will depend on the amount of data to be cleared.
- Once the clearing process is complete, you can close the clearing window and continue using Microsoft Edge.
It is important to note that clearing the cache in Microsoft Edge will also clear other browsing data, such as cookies and history. You can customize the clearing options in the clearing window to suit your preferences.
By clearing the cache in Microsoft Edge, you can optimize browsing performance, resolve website-related issues, and ensure that you are viewing the most up-to-date content when visiting websites.
Regularly clearing the cache in Microsoft Edge is a good practice to maintain a smooth and efficient browsing experience on your Windows computer.
Clearing Cache in Internet Explorer
Internet Explorer, although less commonly used today, is still utilized by some users. Clearing the cache in Internet Explorer can help improve performance, resolve website issues, and ensure a smoother browsing experience. Here’s a step-by-step guide on how to clear the cache in Internet Explorer:
- Click on the gear icon located in the top-right corner of the browser window. This will open the Tools menu.
- Select “Internet options” from the menu. This will open the Internet Options window.
- In the General tab, under the Browsing history section, click on the “Delete” button. This will open the Delete Browsing History window.
- Ensure that the checkbox next to “Temporary Internet files and website files” is selected. You can also choose to clear other data types, such as cookies or browsing history.
- Click on the “Delete” button to initiate the cache clearing process.
- Wait for Internet Explorer to clear the cache. This process may take a few moments, depending on the amount of data to be cleared.
- Once the clearing process is complete, you can close the Internet Options window and continue using Internet Explorer.
It’s important to note that clearing the cache in Internet Explorer will also remove other browsing data, such as cookies or history.
Regularly clearing the cache in Internet Explorer can help optimize performance, resolve website-related issues, and ensure a smoother browsing experience on your Windows computer.
Clearing Cache in Opera
Opera is a popular web browser known for its speed and unique features. Clearing the cache in Opera can help improve performance, resolve website issues, and ensure a smoother browsing experience. Follow this step-by-step guide to clear the cache in Opera:
- Click on the O menu icon located in the top-left corner of the browser window. This will open the Opera menu.
- Select “Settings” from the menu. This will open the Settings page.
- In the left sidebar of the Settings page, click on “Advanced”.
- In the Advanced settings, click on “Privacy & security”. This will display privacy and browsing data options.
- Under the “Clear browsing data” section, click on the “Clear data” button. This will open a new window with various clearing options.
- In the new window, select “Cached images and files” and any other data types you want to clear, such as cookies or browsing history.
- Review the other options in the clearing window and ensure they are set according to your preferences.
- Click on the “Clear” button to initiate the cache clearing process.
- Wait for Opera to clear the cache. The time it takes will depend on the amount of data to be cleared.
- Once the clearing process is complete, you can close the clearing window and continue using Opera.
It’s important to note that clearing the cache in Opera will also clear other browsing data, such as cookies and history. You can customize the clearing options in the clearing window to suit your preferences.
By regularly clearing the cache in Opera, you can optimize browsing performance, resolve website-related issues, and ensure that you are viewing the most up-to-date content when visiting websites.
Clearing Cache for Specific Applications and Programs
In addition to web browsers, various applications and programs on your computer can accumulate cache over time. Clearing the cache for specific applications is important to optimize their performance and resolve any issues related to cached data. Here are a few examples of how to clear cache for specific applications and programs:
Clearing Cache for Microsoft Office Programs:
To clear the cache for Microsoft Office programs such as Word, Excel, or PowerPoint:
- Open the specific Office program.
- Click on the “File” tab in the top menu bar.
- Select “Options” or “Preferences” from the dropdown menu.
- In the Options or Preferences window, navigate to the “Advanced” or “General” section.
- Look for an option to clear the cache or temporary files.
- Click on the “Clear” or “Delete” button to remove the cached files.
Clearing Cache for Adobe Creative Cloud:
To clear the cache for Adobe Creative Cloud applications like Photoshop or Illustrator:
- Open the Creative Cloud application.
- Click on the profile icon or your account name in the upper-right corner of the window.
- In the dropdown menu, select “Preferences” or “Settings”.
- Navigate to the “Creative Cloud” or “Storage” section.
- Look for an option to clear the cache.
- Click on the “Clear” or “Delete” button to remove the cached files.
Clearing Cache for Gaming Platforms:
To clear the cache for gaming platforms such as Steam or Epic Games Store:
- Open the gaming platform.
- Navigate to the settings or preferences.
- Look for an option related to cache or temporary files.
- Click on the “Clear” or “Delete” button to remove the cached files.
It’s important to note that the steps to clear the cache for specific applications may vary. It is recommended to refer to the documentation or help resources specific to the application or program you are using to find accurate instructions on clearing the cache.
Regularly clearing the cache for specific applications can contribute to maintaining smooth performance and resolving any issues that may arise from cached data.
Clearing Cache for Microsoft Office Programs
Clearing the cache for Microsoft Office programs, such as Word, Excel, or PowerPoint, can help optimize their performance and resolve any issues related to cached data. Here’s how you can clear the cache for Microsoft Office programs:
- Open the specific Microsoft Office program you want to clear the cache for, such as Word or Excel.
- Click on the “File” tab located in the top menu bar.
- Select “Options” or “Preferences” from the dropdown menu. The specific option name may vary slightly depending on the Office program version.
- In the Options or Preferences window that appears, navigate to the “Advanced” or “General” section.
- Look for an option that mentions cache or temporary files.
- Click on the “Clear” or “Delete” button associated with the cache or temporary files option. This will remove the cached files from the program.
- Confirm the action if prompted, and wait for the cache clearing process to complete.
It’s important to note that the steps for clearing the cache may differ slightly between different versions of Microsoft Office programs. The options may be located in different tabs or have varied names. If you can’t locate the cache clearing option, consider referring to the official Microsoft Office support documentation or searching online for specific instructions related to your version of the program.
Clearing the cache for Microsoft Office programs can help improve their overall performance by removing any potential conflicts or outdated temporary files. It can also resolve issues related to corrupted cache data that may cause program crashes, slow response times, or unexpected behavior.
Remember to regularly clear the cache for Microsoft Office programs as part of your computer maintenance routine to ensure optimal performance and a smooth user experience.
Clearing Cache for Adobe Creative Cloud
Clearing the cache for Adobe Creative Cloud applications, such as Photoshop, Illustrator, or Premiere Pro, can help optimize their performance and resolve any issues related to cached data. Here’s how you can clear the cache for Adobe Creative Cloud:
- Open the Creative Cloud application on your computer.
- Click on the profile icon or your account name in the upper-right corner of the Creative Cloud window.
- In the dropdown menu, select “Preferences” or “Settings”.
- Navigate to the “Creative Cloud” or “Storage” section, depending on the version of Creative Cloud you are using.
- Look for an option that mentions clearing cache or temporary files.
- Click on the “Clear” or “Delete” button associated with the cache or temporary files option. This will remove the cached files from Creative Cloud.
- Confirm the action if prompted, and wait for the cache clearing process to complete.
The specific steps for clearing the cache may vary slightly depending on the version of Adobe Creative Cloud you are using. If you are having trouble finding the cache clearing option, consider referring to the official Adobe support documentation or searching online for specific instructions related to your version of Creative Cloud.
Clearing the cache for Adobe Creative Cloud applications can help free up storage space, improve application performance, and resolve any issues that may arise from outdated or corrupted cached files. It can also ensure that you have access to the most up-to-date and accurate content when working on your creative projects.
Remember to regularly clear the cache for Adobe Creative Cloud applications as part of your computer maintenance routine to maintain optimal performance and a smooth user experience.
Clearing Cache for Gaming Platforms
Clearing the cache for gaming platforms, such as Steam or Epic Games Store, can help optimize their performance, resolve gameplay issues, and ensure a smoother gaming experience. Here’s how you can clear the cache for gaming platforms:
Clearing Cache for Steam:
- Launch the Steam client on your computer.
- Click on “Steam” in the top-left corner of the Steam client window.
- From the dropdown menu, select “Settings”.
- In the Settings window, navigate to the “Downloads” tab.
- Click on the “Clear Download Cache” button.
- A confirmation prompt will appear. Click on “OK” to proceed with clearing the cache.
Clearing Cache for Epic Games Store:
- Launch the Epic Games Store client on your computer.
- Click on your username displayed in the bottom-left corner of the Epic Games Store client.
- From the dropdown menu, select “Settings”.
- In the Settings window, select the “Web Browser” tab.
- Click on the “Clear Cache” button.
- A confirmation prompt will appear. Click on “OK” to proceed with clearing the cache.
It’s important to note that the steps for clearing the cache may differ slightly between different gaming platforms. If you are using a different gaming platform, consider referring to the official documentation or support resources provided by the platform to find accurate instructions on clearing the cache.
Clearing the cache for gaming platforms can help free up storage space, optimize performance, and resolve any issues that may arise from cached data. It ensures that you have a smooth gaming experience, with up-to-date content and minimized performance bottlenecks caused by outdated or corrupted cache files.
Remember to periodically clear the cache for gaming platforms as part of your gaming maintenance routine to maximize performance and ensure an enjoyable gaming experience.
Tips and Best Practices for Clearing Cache on Your Desktop Computer
Clearing the cache on your desktop computer is an important maintenance task for optimizing performance and ensuring a smooth browsing experience. Here are some useful tips and best practices to keep in mind when clearing the cache on your desktop computer:
1. Regularly Clear the Cache: Make it a habit to clear the cache on your computer regularly. Depending on your browsing habits, aim to clear the cache at least once a month or more frequently if you notice performance issues or encounter website errors.
2. Clear Cache in Web Browsers: In addition to clearing the cache at the system level, remember to clear the cache in your web browsers individually. Each browser has its own cache storage, and clearing it can help improve browsing speed and accuracy. Follow the specific instructions for each browser to clear their respective caches.
3. Consider Clearing Other Browsing Data: Along with the cache, you may also want to consider clearing other browsing data like cookies, history, and saved form data. This helps maintain privacy, remove clutter, and ensure a fresh start when interacting with websites.
4. Be Selective about Cache Clearing: When clearing the cache, be selective with the types of data you remove. While clearing the cache itself is beneficial, selectively clearing other data, such as passwords or autofill information, may inadvertently inconvenience you. Review the options carefully before proceeding with cache clearing.
5. Backup Important Data: Before clearing the cache, back up any important data or files stored within specific applications or programs that may be affected by cache clearing. This ensures that you don’t accidentally delete any essential information, such as login credentials or customized settings.
6. Restart Your Computer: After clearing the cache, it’s a good practice to restart your computer. This allows all changes to take effect and helps ensure that any cached data previously in use is fully cleared from memory.
7. Stay Up-to-Date: Keep your desktop computer’s operating system, web browsers, and applications up-to-date. Updates often include performance improvements and bug fixes that can address cache-related issues and enhance overall system performance.
8. Use Cache Tools: Some applications and utilities offer specialized cache management tools. Consider using these tools to gain more control over your computer’s cache and optimize your system’s performance. Be sure to research and choose reliable and reputable cache management tools.
9. Customize Cache Settings: Depending on the applications or browsers you use, you may be able to customize cache settings. Explore these settings to adjust the cache size or cache retention period based on your specific needs and preferences.
10. Clear Cache on Devices Connected to Your Computer: If you use other devices connected to your computer, such as smartphones or tablets, it’s beneficial to clear the cache on these devices as well. Clearing cache across all devices helps maintain consistency in performance and ensures a seamless browsing experience.
By following these tips and best practices, you can effectively clear the cache on your desktop computer, optimize performance, and enjoy a smoother browsing experience. Regular cache maintenance is essential for keeping your system running efficiently and maintaining privacy and security.
Common Issues and Troubleshooting When Clearing Cache
Clearing the cache on your computer is generally a straightforward process, but occasionally, you may encounter some issues or experience unexpected behavior. Here are some common issues that you may encounter when clearing the cache and some troubleshooting steps to help resolve them:
1. Incomplete Cache Clearance: Sometimes, the cache may not be cleared completely, leaving behind remnants of stored data. If you notice that cache clearance is not fully resolving issues, try restarting your computer and clearing the cache again. You can also consider using specialized cache-cleaning tools or utilities to ensure a more thorough cache clearance.
2. Temporary Browser Setting Changes: Clearing the cache may reset certain browser settings, such as zoom levels, homepage preferences, or default search engines. If you experience any unintended changes, navigate to the browser settings and tweak them back to your desired configuration.
3. Saved Login Credentials: Clearing the cache does not automatically delete saved login credentials stored in your web browser. If you want to remove saved passwords or autofill information, access the browser settings, and clear these data manually.
4. Website Compatibility Issues: Occasionally, clearing the cache may result in temporary website compatibility issues. This can happen if websites have introduced updates, and your browser is fetching older cached files. If you encounter such issues, try refreshing the page, clearing the cache again, or using private browsing or incognito mode to access the website.
5. Slow Loading Times after Clearing Cache: After clearing the cache, you may experience slightly longer loading times as the browser rebuilds the cache with updated files. This is normal behavior and should improve as you continue to browse. If the slow loading times persist, consider restarting your computer and checking your internet connection for any potential issues.
6. Loss of Browser Extensions or Customizations: In some cases, clearing the cache may cause certain browser extensions or customizations to be disabled or reset. If you experience this issue, re-enable or reinstall the extensions or restore your preferred browser customizations manually.
7. Corrupted Cache Files: In rare cases, the cache files themselves may become corrupted, leading to unusual behavior or errors. If you encounter consistent issues after clearing the cache, consider completely uninstalling and reinstalling the affected application or browser to eliminate any underlying cache-related problems.
8. System Stability Issues: Although rare, clearing the cache may trigger system stability issues on some computers. If you encounter frequent crashes or freezes after cache clearance, make sure your operating system and drivers are up to date, as outdated software can sometimes cause compatibility issues.
If you encounter persistent issues when clearing the cache, consider seeking further assistance from official support forums, documentation, or contacting the software/application provider for specific guidance on troubleshooting cache-related problems.
Remember, while clearing the cache is generally a safe and effective practice, it’s essential to proceed with caution and ensure you have backups of any important data before performing any significant cache modifications.
When and How Often Should You Clear Cache on Your Desktop Computer
Clearing the cache on your desktop computer is an important maintenance task to optimize performance and ensure a smooth browsing experience. However, exactly when and how often you should clear the cache depends on several factors. Here are some guidelines to help you determine when and how often to clear the cache on your desktop computer:
Frequency:
In general, it is recommended to clear the cache on your desktop computer:
- At least once a month: Regularly clearing the cache helps prevent it from becoming bloated with unnecessary data and ensures optimal performance.
- More frequently if experiencing issues: If you notice performance issues, slow loading times, or encounter website errors, consider clearing the cache more often to resolve these problems.
- After major system updates: After installing major updates to your operating system or applications, clearing the cache can help ensure compatibility and stability by starting fresh with updated files.
Trigger Events:
You may consider clearing the cache on your desktop computer when:
- Switching to a new browser: If you switch from one web browser to another, clearing the cache in the previous browser ensures a clean start in the new browser and prevents any potential conflicts or data overlap.
- Experiencing website-related issues: If you encounter website-specific problems like broken links, missing images, or formatting errors, clearing the cache can help resolve these issues by fetching updated files from the server.
- Running low on storage space: If your computer’s storage space is limited, clearing the cache can free up valuable storage, creating more room for important files and applications.
- Concerns about privacy and security: Clearing the cache can help remove cookies and temporary files that may contain sensitive information or be used for tracking your online activities, enhancing privacy and security.
Methods:
When it comes to clearing the cache on your desktop computer, you have several options:
- Clearing the cache manually: Most web browsers and applications have built-in cache-clearing options accessible through their settings or preferences. Use these options to clear the cache for specific programs and browsers.
- Using cache cleaning tools: There are third-party cache cleaning tools available that can help automate and streamline the cache-clearing process. These tools often provide additional functionality, such as cleaning system junk files and optimizing overall system performance.
Remember, while clearing the cache is generally a safe practice, be cautious when clearing other data types like cookies or saved passwords, as they may affect your browsing experience or require you to re-enter certain information.
By considering the frequency, trigger events, and methods mentioned above, you can determine the ideal timing and approach to clear the cache on your desktop computer, ensuring an optimized and enjoyable computing experience.