
Choosing the Right Microphone for Your Camcorder
When it comes to recording high-quality audio with your camcorder, choosing the right microphone is crucial. The microphone you select can make a significant difference in the clarity and overall sound of your recordings. To help you make an informed decision, here are some factors to consider when choosing a microphone for your camcorder.
Type of Microphone: There are various types of microphones available, each designed for different recording situations. The three most common types are on-camera microphones, external microphones, and wireless microphones. Understanding the purpose and usage of each type will help you determine which one suits your needs best.
Recording Environment: Consider the environment in which you typically record. If you often shoot outdoors or in noisy environments, you might want to consider a shotgun microphone. It offers a narrow pickup pattern, effectively capturing sound from your subject while minimizing background noise.
Audio Quality: It’s important to ensure that the microphone you choose delivers excellent audio quality. Look for microphones with a wide frequency response range and low self-noise. These features will ensure that your recordings are crisp, clear, and free from unwanted noise.
Budget: Set a budget for your microphone purchase. Keep in mind that while higher-priced options may offer superior quality, there are also affordable microphones that deliver excellent results. Research and read reviews to find the best microphone within your budget range.
Compatibility: Check the compatibility of the microphone with your camcorder. Some microphones are specifically designed for certain camera models or have specific connection requirements. Ensure that the microphone you choose will work seamlessly with your camcorder.
User Reviews: Take the time to read user reviews and testimonials for the microphones you are considering. Real-world feedback from other users can provide valuable insights into the performance, durability, and overall satisfaction with the microphone.
Consider Your Needs: Finally, consider your specific recording needs. Are you primarily recording interviews, vlogs, or music performances? The type of content you create will influence the microphone you choose. For example, if you frequently conduct interviews, a lavalier microphone might be a more practical option.
Incorporating these factors into your decision-making process will help you choose the right microphone for your camcorder. Remember to thoroughly research and compare different options before making a final purchase, as investing in a high-quality microphone can greatly improve the audio recordings from your camcorder.
Understanding Different Types of Microphones
When it comes to capturing high-quality audio with your camcorder, it’s crucial to have an understanding of the different types of microphones available. Each type has its own unique characteristics and applications. Here, we’ll explore three common types of microphones: on-camera microphones, external microphones, and wireless microphones.
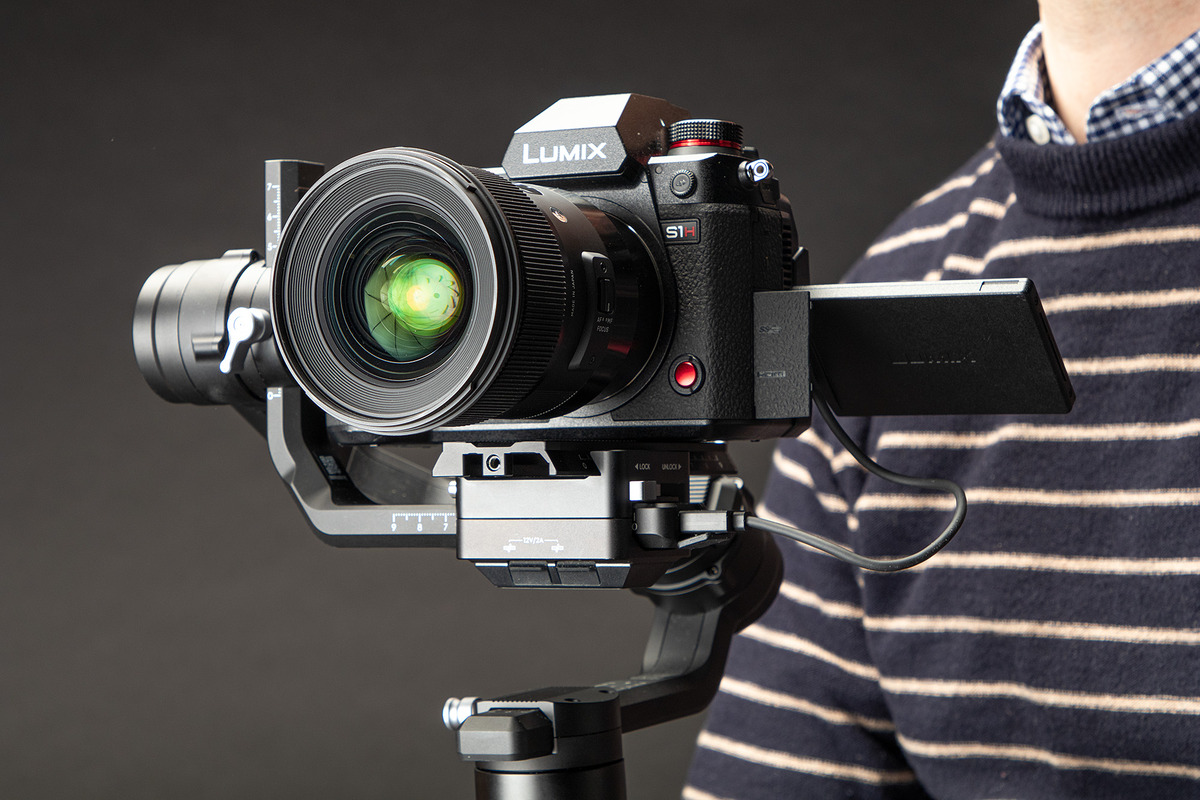
On-Camera Microphones: As the name suggests, on-camera microphones attach directly to your camcorder. They are a convenient option for capturing audio while recording video. These microphones are generally compact and lightweight, making them ideal for videographers on the go. However, the audio quality can be affected by handling noise and the distance between the microphone and the subject.
External Microphones: External microphones are designed to be used separately from the camcorder. They offer greater flexibility and often deliver higher audio quality than on-camera microphones. External microphones can be mounted on a boom pole or held by a boom operator, allowing for precise positioning and capturing audio from a specific direction. They are commonly used in professional video production settings, such as film shoots or documentaries.
Wireless Microphones: Wireless microphones provide the freedom to move around while recording audio. They consist of a transmitter that is attached to the person speaking or performing, and a receiver that is connected to the camcorder. Wireless microphones are commonly used in situations where the subject needs to move freely while speaking, such as interviews, presentations, or live performances. They offer convenience and flexibility, but it’s important to ensure good signal strength and battery life.
Each type of microphone has its strengths and drawbacks, and the choice depends on your specific recording needs. If you mainly shoot run-and-gun style videos or capture spontaneous moments, an on-camera microphone may be sufficient. However, if you require more control over audio quality and positioning, an external microphone would be a better option. For situations that demand mobility and freedom of movement, wireless microphones are the way to go.
When choosing a microphone, it’s important to consider factors such as budget, audio quality, and compatibility with your camcorder. Reading reviews and seeking recommendations from professionals can also help guide you in making an informed decision. By understanding the different types of microphones and their applications, you can select the most suitable microphone for capturing clear and professional audio with your camcorder.
On-Camera Microphone vs. External Microphone
When it comes to capturing high-quality audio with your camcorder, two common options are on-camera microphones and external microphones. Each has its own advantages and considerations. Let’s take a closer look at the differences between these two types of microphones.
On-Camera Microphones: On-camera microphones are designed to attach directly to your camcorder. They offer convenience and ease of use, as they eliminate the need for separate audio recording equipment. These microphones are typically compact and lightweight, making them ideal for run-and-gun style videography or situations where portability is crucial.
One of the benefits of on-camera microphones is that they are powered by the camcorder itself, so there is no need for additional batteries or power sources. They also provide a simple plug-and-play solution, as they usually connect directly to the camcorder’s microphone input.
However, on-camera microphones have a few limitations. Firstly, their audio quality may not be as high as that of external microphones. This is because on-camera microphones are often susceptible to handling noise and unwanted vibrations. Additionally, the distance between the microphone and the subject can affect the sound quality, as these microphones typically have a limited pickup range.
External Microphones: External microphones, as the name implies, are separate microphones that are not attached to the camcorder. These microphones offer greater flexibility and often deliver superior audio quality compared to on-camera microphones.
One of the advantages of using an external microphone is the ability to position it closer to the sound source. This allows for more precise audio capture and minimizes the impact of unwanted background noise. External microphones can be mounted on a boom pole or held by a boom operator, giving you greater control over the audio recording process.
However, external microphones require additional equipment and setup. In most cases, they require a separate audio recorder or a microphone preamp to connect to the camcorder. They also require additional power sources, such as batteries or phantom power from an audio interface.
Choosing between an on-camera microphone and an external microphone depends on your specific needs and the type of content you are recording. If you are shooting casual videos or need a lightweight and hassle-free solution, an on-camera microphone may be sufficient. On the other hand, if you require more control over audio quality and positioning, especially in professional video production settings, an external microphone would be a better choice.
Consider factors such as budget, audio quality requirements, and the conditions in which you’ll be recording to make an informed decision. Consulting with professionals or conducting thorough research can also help guide you in choosing the most suitable microphone for your camcorder setup.
Using a Shotgun Microphone for Enhanced Audio Recording
When it comes to capturing clear and focused audio with your camcorder, a shotgun microphone can be a powerful tool. Shotgun microphones are highly directional, making them ideal for recording audio in environments with high levels of background noise. Let’s explore how you can use a shotgun microphone to enhance your audio recordings.
What is a Shotgun Microphone?
A shotgun microphone, also known as a boom microphone, features a narrow pickup pattern that effectively captures sound from a specific direction while minimizing noise from other directions. This makes it particularly useful in situations where you want to isolate your subject’s audio from surrounding ambient noise.
Proper Positioning:
The key to properly using a shotgun microphone is to position it correctly. In general, the microphone should be aimed directly at the sound source, typically your subject’s mouth or the main source of sound. The closer the microphone is to the sound source, the better the audio quality and the more isolated the desired sound will be.
Minimizing Background Noise:
Shotgun microphones excel at minimizing background noise due to their highly directional pickup pattern. To further reduce unwanted noise, consider using a windscreen or a foam cover on the microphone. These accessories help to minimize wind noise and other unwanted sounds, improving the overall clarity of your recordings.
Using a Boom Pole:
To enhance the versatility and flexibility of a shotgun microphone, consider using a boom pole. A boom pole allows you to position the microphone closer to the subject without being in the frame. This is especially useful for interviews or capturing dialogue in film and video production. With a boom pole, you can easily move the microphone closer or farther away from the subject as needed.
Monitoring the Audio:
It is essential to monitor the audio levels while recording with a shotgun microphone. Ensure that the audio levels are not too high, leading to distortion, or too low, resulting in poor audio quality. Use headphones to monitor the audio and make adjustments as necessary to achieve the desired sound.
Shotgun microphones can significantly enhance your audio recordings by helping to isolate and capture the desired sound while minimizing background noise. They are particularly useful in outdoor settings or crowded environments where there is a lot of ambient noise. When used in combination with proper positioning techniques and monitoring, a shotgun microphone can make a noticeable difference in the clarity and quality of your audio recordings.
Consider investing in a high-quality shotgun microphone that suits your needs and budget. Research and read reviews to find a reliable option that will complement your camcorder and enable you to capture professional-grade audio for your videos.
Using a Lavalier Microphone for Hands-Free Recording
When it comes to recording audio with convenience and flexibility, a lavalier microphone can be a game-changer. Also known as a lapel microphone, it allows you to achieve hands-free recording while capturing clear and high-quality audio. Let’s dive into how you can effectively use a lavalier microphone for your recording needs.
What is a Lavalier Microphone?
A lavalier microphone is a small, discreet microphone that can be clipped onto clothing, typically near the collar or lapel. It provides a close and direct source of audio, ensuring clear sound reproduction. Lavalier microphones are commonly used in interviews, presentations, vlogs, and other situations where hands-free recording is essential.
Proper Placement:
When using a lavalier microphone, correct placement is crucial for optimal audio quality. Position the microphone as close to the sound source as possible, typically near the speaker’s mouth or on their clothing. Avoid placing it too close to fabric or accessories that may cause rubbing or rustling noises.
Securing the Microphone:
To ensure that the lavalier microphone stays securely in place during recording, use the included clip or a dedicated mic clip to attach it to the clothing. Make sure it’s firmly attached to prevent any movement or rattling sounds. You can also use adhesive tapes or accessories like mic mufflers to further secure the microphone and reduce mechanical noise.
Using a Windscreen:
When recording outdoors or in windy environments, use a windscreen to minimize wind noise and protect the microphone from excessive wind gusts. A foam windscreen or a furry wind cover, also known as a deadcat, can be effective in reducing unwanted noise caused by wind interference.
Equipment Compatibility:
Ensure that the lavalier microphone you choose is compatible with your camcorder or recording device. Check the connector type, such as TRS or TRRS, and make sure it matches the input on your device. Some lavalier microphones also require power, so be aware of the power requirements and ensure compatibility with your recording setup.
Monitoring Audio Levels:
While using a lavalier microphone, it’s crucial to monitor the audio levels to avoid clipping or distortion. Use headphones to listen to the audio being recorded and adjust the levels accordingly. Ensure that the audio remains clear and the levels are within an acceptable range.
Lavalier microphones provide the convenience and flexibility of hands-free recording while delivering clear and professional-grade audio. They are an excellent choice for interviews, presentations, and any scenario where freedom of movement is essential. With proper placement, securing, and monitoring of audio levels, you can achieve impressive results with a lavalier microphone.
Investing in a high-quality lavalier microphone that suits your recording needs is crucial. Research different options, read user reviews, and consider factors such as audio quality, compatibility, and budget. By using a lavalier microphone effectively, you can take your audio recordings to the next level and enhance the overall quality of your videos.
Using a Wireless Microphone for Mobility
When it comes to recording audio with mobility and freedom of movement, a wireless microphone can be a game-changer. Whether you’re conducting interviews, giving presentations, or recording live performances, a wireless microphone allows you to move around without being tethered to your recording device. Let’s explore how you can effectively use a wireless microphone for enhanced mobility.
How Does a Wireless Microphone Work?
A wireless microphone consists of two main components: a transmitter and a receiver. The transmitter is typically attached to the person speaking or performing, while the receiver is connected to your recording device, such as a camcorder. The transmitter wirelessly sends the audio signal to the receiver, allowing you to capture clear and uninterrupted audio without the use of long cables.
Enhanced Mobility:
One of the primary advantages of using a wireless microphone is the freedom of movement it provides. Without the need to stay connected to your recording device through cables, you can move around freely and interact with your subjects or audience. This makes wireless microphones ideal for capturing dynamic or live performances, presentations, and events where mobility is key.
Choosing the Right Frequency:
When using a wireless microphone, it’s important to select the right frequency. Wireless microphones operate on specific frequency bands, so it’s crucial to choose a frequency that is not congested by other devices or wireless signals in your environment. This will help minimize interference and ensure a reliable signal connection.
Maintaining Line-of-Sight:
To maintain a strong and uninterrupted signal, it’s recommended to maintain a clear line-of-sight between the transmitter and the receiver. Obstacles such as walls or large objects can potentially weaken the signal or introduce interference. Position your receiver in a location that allows for optimal signal reception and ensure that the transmitter is within range.
Battery Life and Signal Strength:
Prior to recording, ensure that both the transmitter and receiver have sufficient battery life. Weak batteries can lead to dropouts in the audio signal or even a complete loss of signal. Additionally, make sure to test the signal strength before recording to ensure a stable and reliable connection.
Monitoring the Audio:
When using a wireless microphone, it’s important to monitor the audio levels to ensure optimum sound quality. Use headphones to monitor the audio being captured and make adjustments as necessary. This will help you identify any issues, such as low volume or background noise, and make real-time adjustments for a better recording.
A wireless microphone provides unmatched mobility and flexibility when it comes to recording audio. Whether you’re shooting videos, conducting interviews, or delivering presentations, the freedom it offers allows you to capture clear and professional-grade sound while moving around freely. Just remember to choose the right frequency, maintain a clear line-of-sight, monitor the battery life, and consistently monitor the audio levels to achieve excellent results with your wireless microphone.
Investing in a high-quality wireless microphone that suits your recording needs is essential. Consider factors such as range, battery life, compatibility, and budget when making your selection. With the right wireless microphone, you can take your audio recordings to new heights and unleash your creativity without limitations.
Tips for Properly Positioning Your Microphone
Proper positioning of your microphone plays a crucial role in capturing high-quality audio. The sound quality, clarity, and overall effectiveness of your recording depend on how well you position your microphone. Here are some tips to help you achieve optimal microphone placement.
Consider the Type of Microphone:
The type of microphone you are using will influence its ideal placement. For example, if you are using a shotgun microphone, pointing it directly at the sound source will yield the best results. If you are using a lavalier microphone, place it as close to the sound source as possible, typically near the collar or lapel.
Maintain a Consistent Distance:
To ensure consistent audio levels and clarity, it is important to maintain a consistent distance between the microphone and the sound source. Getting too close or too far from the microphone can result in distorted or weak audio. Experiment with the distance to find the sweet spot for optimal audio capture.
Reduce Background Noise:
To minimize background noise and achieve a clean recording, position the microphone as close to the sound source as possible. This will ensure that the desired audio is prioritized, while unwanted ambient noise is minimized. Consider using a directional microphone or a microphone with a narrow pickup pattern for better noise rejection.
Avoid Obstructions:
Avoid placing any objects or obstructions between the microphone and the sound source. Objects such as clothing, accessories, or devices can block or muffle the sound, resulting in poor audio quality. Be mindful of where the microphone is positioned and ensure a clear path for sound to reach the microphone.
Test and Adjust:
Every recording environment is different, so it’s essential to test and adjust the microphone placement to achieve the desired sound. Take time to listen to test recordings and make adjustments as needed. Move the microphone closer or farther away, adjust angles, or even experiment with different microphones to find the optimal position for your specific recording situation.
Use Headphones for Monitoring:
When positioning your microphone, use headphones to monitor the audio in real-time. This will allow you to identify any issues, such as background noise, distortion, or low volume, as you position the microphone. Adjust the positioning accordingly to achieve the best possible sound quality.
Consider Acoustic Environment:
The acoustic environment in which you are recording can impact microphone placement. Be mindful of the room acoustics, reflections, and reverberations. Experiment with microphone placement to find the position that minimizes unwanted echoes and enhances the sound quality.
Practice and Experience:
Proper microphone positioning is a skill that can be sharpened with practice and experience. Experiment with different techniques, positions, and microphone types to gain a better understanding of what works best for different recording scenarios. The more you practice and experiment, the better you’ll become at capturing high-quality audio.
Remember, the proper positioning of your microphone is crucial for achieving excellent audio recordings. Take your time to experiment, test, and adjust until you find the ideal placement that captures the best sound quality for your specific recording needs.
Adjusting the Audio Levels on Your Camcorder
Properly adjusting the audio levels on your camcorder is essential to capture clear and balanced audio in your recordings. The audio levels determine the volume and intensity of the sound being recorded. Here are some tips to help you effectively adjust the audio levels on your camcorder.
Understanding Audio Levels:
First, it’s important to understand the concept of audio levels. Audio levels are represented by decibels (dB) and indicate the intensity or volume of the sound being recorded. Adjusting the audio levels allows you to control the strength of the recorded audio signal.
Monitor the Audio Levels:
Most camcorders provide a built-in audio level meter or a visual indicator that displays the audio levels in real-time. Make use of this meter to monitor the audio levels while recording. The meter usually displays a scale from low to high or -infinity to 0 dB. Aim to keep the audio levels within a suitable range, typically between -12dB and -6dB, to avoid distortion or clipping.
Set the Proper Input Gain:
The input gain or sensitivity control on your camcorder allows you to adjust the level at which the audio is captured. Too high of a gain can result in distorted or “clipped” audio, while too low of a gain can cause the recorded audio to be too weak or indistinguishable. Find the right balance by adjusting the input gain to a level that captures clear, undistorted audio.
Use a Manual Audio Mode:
Many camcorders offer both automatic and manual audio modes. While automatic mode may be convenient, it lacks the precision and control that manual mode provides. Switching to manual audio mode allows you to have more control over the audio levels, adjusting them according to the specific recording conditions and desired sound quality. Manual mode also helps maintain consistent audio levels throughout the recording.
Avoid Sudden Level Changes:
It is important to make smooth and gradual adjustments to the audio levels rather than sudden changes. This ensures a seamless and natural audio transition in the recording. Sudden level changes can be distracting or jarring to the listener, so make changes slowly and gradually when necessary.
Consider External Audio Controls:
In some cases, using an external audio control device, such as a field mixer or an audio interface, can provide more precise control over the audio levels. These devices offer advanced features and dedicated controls for adjusting the audio levels, making it easier to fine-tune the recording to your desired specifications.
Test and Adjust:
Before beginning a recording, it’s important to test the audio levels and make any necessary adjustments. Conduct sound checks with your subjects or in different recording environments to ensure that the audio levels are appropriate. Monitor the audio levels during the recording process and make adjustments as needed to maintain optimal sound quality.
By understanding audio levels, monitoring them during recording, and adjusting them accordingly, you can ensure that your camcorder captures clear and balanced audio. Take the time to experiment, practice, and become familiar with the audio controls on your camcorder to enhance the audio quality of your recordings.
Limiting Background Noise for Clear Recordings
Background noise can significantly degrade the quality of your audio recordings, making them unclear and less professional. Whether you’re capturing interviews, vlogs, or live performances, it’s essential to limit background noise and ensure that your recordings are clear and focused. Here are some effective techniques for reducing background noise.
Choose the Right Recording Environment:
When possible, select a quiet and controlled environment for your recordings. Avoid areas with excessive noise, such as busy streets, crowded cafes, or noisy machinery. Find a space that has minimal background noise, good acoustics, and is well-suited for capturing clear audio.
Minimize External Noise Sources:
Identify and minimize external noise sources that could interfere with your recordings. Close windows and doors to reduce outdoor noise infiltration. Turn off or move away from devices that generate noise, such as fans, air conditioners, or refrigerators. Taking these steps can significantly reduce the amount of background noise that finds its way into your recordings.
Use Soundproofing Materials:
If you’re unable to control external noise sources, consider using soundproofing materials to minimize their impact. Acoustic foam panels, noise-canceling curtains, or portable isolation shields can help absorb or block out unwanted noise. Place these materials strategically in the recording space to create a more controlled and quieter environment.
Position the Microphone Strategically:
Proper microphone placement is key to limiting background noise. Position the microphone as close to the desired sound source as possible while still maintaining a balanced audio capture. Experiment with the microphone’s angle and distance to maximize the signal-to-noise ratio and prioritize the sound you want to record while minimizing the background noise.
Use a Directional Microphone:
Consider using a directional microphone, such as a shotgun microphone, that has a focused pickup pattern. These microphones capture sound from a specific direction and reject sounds coming from other angles. By using a directional microphone, you can target the main sound source more effectively and minimize unwanted background noise.
Monitor and Adjust Audio Levels:
Regularly monitor the audio levels during recordings and adjust them accordingly. Background noise can sometimes cause the audio levels to be too low or too high. Make sure that the volume levels of the desired sound source are sufficient while keeping background noise at a minimum. Using headphones to monitor the audio can help you catch and adjust any discrepancies in real-time.
Use Noise Reduction Techniques in Post-Production:
If you’re unable to eliminate all background noise during the recording process, you can make use of noise reduction techniques during post-production. Audio editing software often offers tools to reduce background noise, such as noise gates or noise reduction filters. These tools can help to further minimize any remaining background noise and enhance the clarity of your recordings.
By implementing these techniques and strategies, you can significantly limit background noise and achieve clear and professional-sounding recordings. Remember to prioritize a quiet recording environment, use proper microphone placement, and take advantage of both physical and software-based noise reduction methods. With consistent efforts to minimize background noise, you can elevate the quality of your audio recordings and deliver clear and engaging content.
Properly Syncing Audio and Video in Post-Production
When recording audio separately from your video or when using multiple audio sources, it’s crucial to properly sync the audio and video in post-production. Proper synchronization ensures that the audio matches the corresponding video footage, resulting in a seamless and professional final product. Here are some tips for accurately syncing audio and video in your post-production process.
Clap or Use Sync Markers:
When recording, it’s helpful to include a distinct clap or use visual sync markers, such as a clapperboard, at the beginning of each take. This provides a clear reference point for syncing the audio and video in post-production. The sharp sound or the visible clap can be easily identified in both the audio and video files, making it easier to align them precisely.
Match Waveforms:
Matching waveforms is a common technique for syncing audio and video. Waveforms are visual representations of the audio, displaying its amplitude over time. In your video editing software, align the audio waveform with the corresponding visual cues, such as the clap or sync marker, by carefully adjusting the timeline. Zooming in on the waveform can help you achieve more accurate alignment.
Use Audio Scrubbing:
Many video editing software applications allow you to scrub through the audio, enabling you to listen to a specific point in time while dragging the playhead across the timeline. This feature can be beneficial for pinpointing specific audio cues or synchronizing the audio with visual elements in your video footage, enhancing the accuracy of audio-video synchronization.
Utilize Timecodes or Timestamps:
If your recording devices or audio sources support timecode or timestamps, it can simplify the syncing process. Timecodes and timestamps provide reference points that can be directly matched in your video editing software, significantly reducing the time and effort required for accurate synchronization.
Manually Adjust Timing:
In situations where the clap or sync markers are not available or reliable for syncing, you may need to manually align the audio and video tracks by adjusting their timing. To enhance precision, use visual cues within the video footage, such as lip movement or movement of hands or other objects, to align with corresponding audio cues. Use the zoom function and frame-by-frame navigation to ensure accurate synchronization.
Check and Adjust Throughout:
While syncing audio and video in post-production, be sure to play back the footage and listen carefully to ensure proper alignment. Pay attention to any desynchronization or noticeable lag between the audio and video. If adjustments are needed, re-sync the tracks, and repeat the process until the audio and video are seamlessly matched.
Properly syncing audio and video in post-production is crucial for creating professional-quality content. The techniques above can help you achieve accurate synchronization, ensuring that the audio matches the corresponding video seamlessly. By taking the time and care to properly align your audio and video tracks, you’ll enhance the overall quality and effectiveness of your video project.
Troubleshooting Audio Issues with Your Camcorder
While recording audio with your camcorder, you may encounter various audio issues that can affect the quality of your recordings. Understanding how to troubleshoot these issues can help you address and resolve them quickly. Here are some common audio problems that you may encounter, along with troubleshooting tips to help you resolve them.
Poor Audio Quality:
If you notice that the audio quality is poor, it may be due to several factors. Check the microphone connection to ensure it is securely plugged into the camcorder’s audio input. Ensure that the microphone is not damaged or faulty. Adjust the audio levels on your camcorder to avoid clipping or distortion. If using an external microphone, ensure it is compatible with your camcorder and is positioned correctly.
Background Noise and Interference:
Background noise and interference can diminish the clarity of your audio recording. To reduce background noise, record in a quiet environment and use a directional microphone to focus on the desired sound source. Minimize external sources of interference, such as electrical devices or wireless signals. Experiment with shielding or grounding techniques to minimize interference and improve audio quality.
Audio Dropouts:
If you experience intermittent audio dropouts or the audio suddenly cuts out, check the battery level on your microphone and camcorder. Weak batteries can cause signal loss or interruptions. Ensure that the microphone and camcorder are within a suitable range for wireless transmission. Additionally, check for any radio frequency interference or conflicting wireless devices in the area.
Mechanical Noise and Handling Noise:
Mechanical noise, such as the sound of buttons being pressed or the camcorder being handled, can be picked up by the microphone and affect the quality of the audio recording. Be mindful of your handling technique and try to minimize any unnecessary movement or contact with the camcorder. Consider using a shock mount or a stabilizing accessory to reduce handling noise and vibrations.
Unbalanced Audio Levels:
If you notice that the audio levels are unbalanced, with one channel being louder or softer than the other, check the audio settings on your camcorder. Ensure that the audio channels are set to the same level or adjust the balance if necessary. If using an external microphone, check its connections and ensure that it is functioning correctly.
No Sound or Low Volume:
If your recordings have no sound or extremely low volume, check the microphone connections first. Ensure that the microphone is plugged into the correct audio input and that it is not muted. Adjust the audio levels on your camcorder to a suitable level. Test the microphone with a different camcorder or audio device to determine if it is the source of the issue.
Monitoring Audio Levels:
One of the best practices for troubleshooting audio issues is to monitor the audio levels during recording. Use headphones to listen to the audio in real-time and make necessary adjustments to the microphone placement, audio levels, or any other settings to maintain optimal sound quality throughout the recording.
If you encounter persistent audio issues that cannot be resolved through troubleshooting, consider seeking professional assistance or consulting the manufacturer’s support for further guidance or repairs. Regular maintenance and cleaning of your camcorder and microphone can also help prevent audio issues from arising in the first place.
By understanding common audio problems and utilizing these troubleshooting tips, you can overcome audio issues and ensure high-quality sound recordings with your camcorder. Taking the time to troubleshoot and resolve these issues will enhance the overall audio experience and the effectiveness of your video productions.