
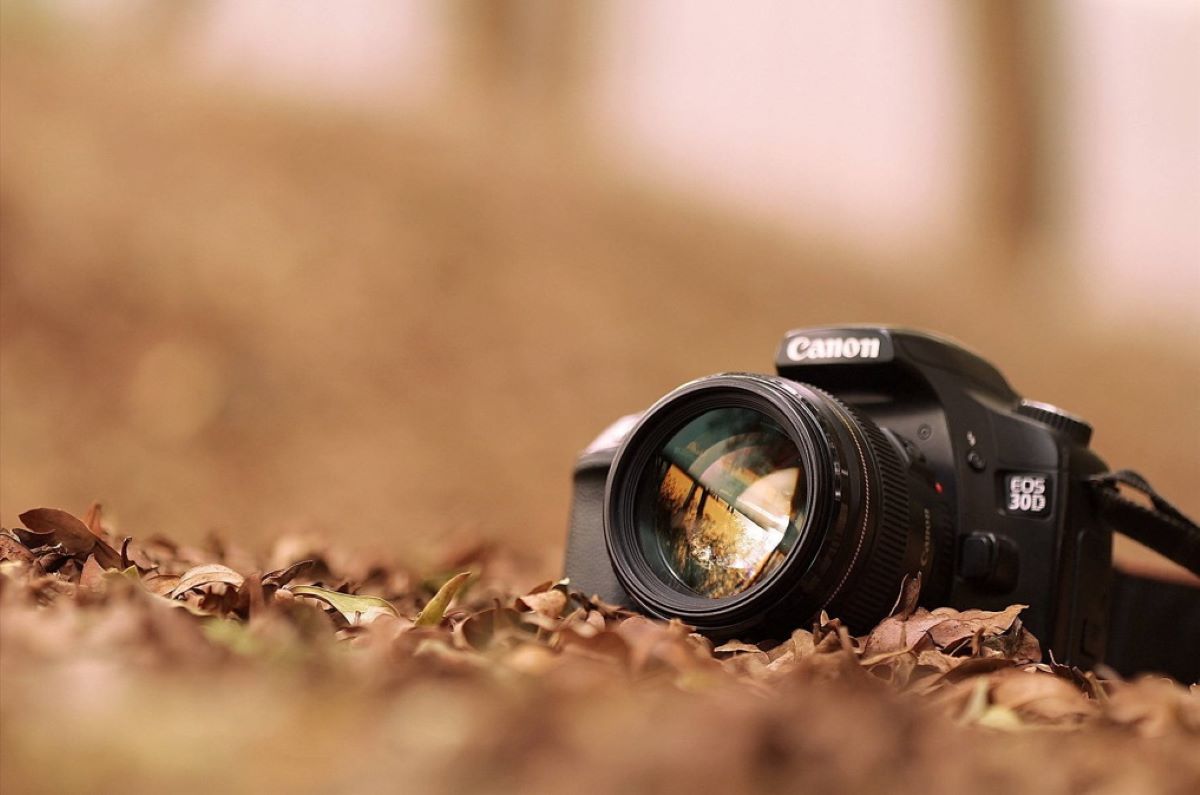
Choosing the Right HD Camcorder
When it comes to capturing high-quality videos, choosing the right HD camcorder is essential. With so many options available in the market, it can be overwhelming to make a decision. However, with a clear understanding of your needs and some basic knowledge about camcorders, you can make an informed choice. Here are some key factors to consider when selecting a camcorder:
1. Purpose: First and foremost, determine what you will primarily use the camcorder for. Are you planning to shoot professional videos, create vlogs, or capture family memories? Your purpose will dictate the features and specifications you should prioritize.
2. Budget: Set a realistic budget for your camcorder purchase. HD camcorders are available at various price points, so it’s important to weigh your options and find a balance between your desired features and your budget.
3. Video Quality: Consider the video resolution you need. Full HD (1080p) is the standard, but if you require higher quality, you might want to go for a 4K camcorder. Keep in mind that higher resolution might require more storage space and processing power.
4. Size and Portability: Think about where and how you will be using your camcorder. If you need something compact and lightweight for on-the-go shooting, go for a smaller model. However, if stability and advanced features are more important to you, consider a larger, professional-grade camcorder.
5. Zoom Capability: Pay attention to the camcorder’s zoom capabilities. Optical zoom provides better image quality and maintains clarity when zooming in, while digital zoom enlarges the image digitally and may result in decreased image quality.
6. Connectivity Options: Check the connectivity options available on the camcorder. Look for features like HDMI, USB, and Wi-Fi for easy transfer of files and remote control functionalities.
7. Battery Life: Consider the battery life of the camcorder, especially if you plan on shooting for extended periods. You don’t want to run out of battery in the middle of an important moment.
8. User Interface: Take the time to navigate the camcorder’s menu system and see if it is user-friendly and intuitive. A complicated interface can make your shooting experience frustrating.
9. Image Stabilization: Look for a camcorder with effective image stabilization features. This will ensure that your videos are steady, even when shooting handheld or in shaky conditions.
10. Reviews and Recommendations: Before making a final decision, read reviews and seek recommendations from trusted sources. Hearing experiences and opinions from other users can provide valuable insights into the pros and cons of different camcorder models.
By considering these factors, you can narrow down your options and choose the perfect HD camcorder that suits your needs and budget. Remember, each person’s requirements are unique, so take the time to assess what matters most to you in a camcorder.
Understanding the Basics: Video Resolution
When it comes to video quality, one of the most crucial factors to understand is video resolution. Video resolution refers to the number of pixels that make up the image in a video. The higher the resolution, the sharper and more detailed the video will appear. Here are the key aspects you need to know:
1. Standard Definition (SD): Standard Definition refers to video resolutions below 720p (1280 x 720 pixels). While SD videos may have been popular in the past, they are now considered outdated and lack the clarity and sharpness of higher resolutions.
2. High Definition (HD): High Definition videos start at 720p and offer a resolution of 1280 x 720 pixels. This is the minimum resolution for a video to be classified as HD. HD videos provide a noticeable improvement in image quality compared to SD videos, with higher levels of detail and clarity.
3. Full HD (1080p): Full HD videos provide a resolution of 1920 x 1080 pixels, known as 1080p. This resolution has become the standard for high-quality videos and is widely supported across devices and platforms. Full HD offers exceptional clarity and detail, making it ideal for capturing important moments or professional projects.
4. Ultra HD and 4K: Ultra HD, also known as 4K, offers a resolution of 3840 x 2160 pixels. This resolution provides stunning clarity and unparalleled detail, making it well-suited for cinematic productions and high-end videography. 4K videos are becoming increasingly popular, and many modern camcorders are equipped to capture videos in this resolution.
5. Higher Resolutions: Beyond 4K, there are higher resolutions like 5K and 8K, which offer even greater levels of detail and clarity. However, it’s important to note that higher resolutions require more storage space and processing power. Additionally, the availability of devices that can play or display these resolutions may be limited at the moment.
When considering the video resolution, it’s important to think about your intended use for the videos. If you plan to view them on a small screen or share them online, HD resolutions like 720p or 1080p are usually sufficient. If you want to showcase your videos on large high-resolution screens or for professional purposes, considering 4K or higher resolutions might be a better option.
Understanding video resolution is crucial in selecting the right HD camcorder. By knowing the various resolutions available and their differences, you can make an informed decision and choose the camcorder that best suits your needs and desired video quality.
Finding the Right Features
When choosing an HD camcorder, it’s important to consider the features that will enhance your video shooting experience and help you achieve the desired results. Here are some key features to look out for:
1. Autofocus: A good autofocus system ensures that your videos remain sharp and clear, even when subjects are moving. Look for a camcorder with fast and accurate autofocus capabilities to avoid blurry or out-of-focus shots.
2. Manual Controls: Manual controls allow you to have more creative control over your videos. Look for a camcorder that offers manual focus, exposure, and white balance controls. This will enable you to customize the settings to suit different shooting conditions and achieve the desired look.
3. Slow Motion and Time-Lapse: Consider whether you want the ability to shoot slow-motion or time-lapse videos. Not all camcorders have these features, so if they are important to you, make sure to check if the model you’re considering offers them.
4. Wi-Fi Connectivity: Wi-Fi connectivity allows you to easily transfer your videos to other devices or share them online. It also enables remote control of your camcorder through a smartphone or tablet, providing added convenience and flexibility.
5. Built-in Microphone: The quality of the built-in microphone can significantly impact the audio quality of your videos. Look for a camcorder with a high-quality microphone that can capture clear and crisp audio, reducing the need for additional external microphones.
6. External Mic Input: If you require professional-level audio recording or if you plan to use an external microphone, look for a camcorder with an external microphone input. This allows you to connect an external microphone to capture high-quality audio separately from the built-in microphone.
7. Image Stabilization: Image stabilization is crucial for producing smooth and steady videos. Look for a camcorder with optical or electronic image stabilization to minimize camera shake and ensure your videos are stable, even when shooting handheld or in motion.
8. Touchscreen: A touchscreen display adds convenience and ease of use to your camcorder. It allows for intuitive navigation through the menu options and makes it easier to adjust settings or focus by simply touching the screen.
9. Optical Zoom: Optical zoom is essential for capturing distant subjects without sacrificing image quality. Look for a camcorder with a decent optical zoom range to get closer to your subjects without compromising on clarity.
10. Battery Life: Consider the battery life of the camcorder, especially if you plan on shooting for long durations. Look for a model that offers long battery life or the ability to swap out batteries easily for uninterrupted shooting sessions.
By considering these features and their importance to your specific shooting needs, you can find the right HD camcorder that provides the functionalities and capabilities you require to capture outstanding videos.
Decoding the Jargon: Frame Rate and Bit Rate
When it comes to understanding video quality, two important technical terms to familiarize yourself with are frame rate and bit rate. These factors play a significant role in determining the smoothness and clarity of your videos. Let’s dive into what these terms mean:
1. Frame Rate: Frame rate refers to the number of individual frames (images) that are displayed per second in a video. It is typically expressed as FPS (Frames Per Second). A higher frame rate results in smoother motion and more fluid videos. The standard frame rates for most videos are 24, 30, and 60 FPS, with 60 FPS being more common for capturing fast-action sequences or creating slow-motion effects.
2. Bit Rate: Bit rate, on the other hand, refers to the amount of data used to represent each second of video footage. It is typically measured in Mbps (Megabits per second) or Kbps (Kilobits per second). The higher the bit rate, the better the video quality and the larger the file size. A higher bit rate allows for more intricate details to be captured and reduces image compression artifacts, resulting in a more visually pleasing video.
When it comes to frame rate and bit rate, it is important to consider the limitations of your recording device and the intended platform for your videos. For example, if you plan to upload your videos to a video-sharing website, they may have specific guidelines regarding acceptable frame rates and bit rates.
Here are a few key points to keep in mind:
Frame Rate:
- A frame rate of 24 FPS is commonly used in film and provides a cinematic look.
- A frame rate of 30 FPS is widely used for television and online content.
- A frame rate of 60 FPS is ideal for capturing fast-paced action or creating smooth slow-motion effects.
Bit Rate:
- A higher bit rate is preferable for capturing high-quality videos with intricate details and minimal compression artifacts.
- For online streaming, consider the recommended bit rates provided by the platform you will be using to ensure optimal playback and fast streaming speeds.
- For storage purposes, keep in mind that higher bit rates result in larger file sizes. Make sure to have sufficient storage capacity for your videos.
Ultimately, the ideal frame rate and bit rate depend on your specific requirements and the intended use of your videos. Understanding these technical aspects will help you make informed decisions when choosing an HD camcorder and setting up your video recording settings.
The Importance of Image Stabilization
Image stabilization is a vital feature in an HD camcorder that ensures your videos are smooth, steady, and free from unwanted camera shake. It compensates for the natural movements of your hands and reduces blur and distortion, resulting in professional-looking footage. Here’s why image stabilization is important:
1. Enhances Video Quality: Camera shake can ruin the quality of your videos. Image stabilization minimizes the effects of unintentional movements, allowing you to capture clear and sharp footage. Whether you’re shooting handheld or in a moving environment, image stabilization ensures that your videos appear professional and polished.
2. Improves Viewability: Shaky videos can be challenging to watch and may cause discomfort for viewers. By using image stabilization, you provide a more enjoyable and stable viewing experience. Whether your videos are intended for personal use or professional purposes, having smooth footage will engage your audience and keep their attention focused on the subject matter.
3. Expands Shooting Possibilities: With image stabilization, you can explore different shooting techniques and environments. Whether you’re filming while walking, capturing fast-action scenes, or shooting from a moving vehicle, image stabilization compensates for the movements and helps you create captivating and visually stunning videos.
4. Reduces Editing Effort: When your footage is stable and free from camera shake, there is less need for extensive editing to correct unwanted movements. This saves you time and effort during the post-production process, allowing you to focus on more creative aspects of editing, such as color grading and storytelling.
5. Versatility in Shooting Conditions: Image stabilization is especially valuable in situations where tripods or other stabilizing equipment may not be practical or readily available. It allows you to shoot on the go, whether you’re traveling, attending events, or capturing spontaneous moments, without sacrificing video quality.
6. Professional-Looking Videos: Whether you’re a professional videographer or an enthusiastic hobbyist, image stabilization adds a level of professionalism to your videos. The smooth and stable footage creates a sense of credibility and expertise, making your work stand out and leaving a lasting impression on your audience.
When selecting an HD camcorder, it’s crucial to prioritize image stabilization features. Look for camcorders with optical or electronic image stabilization, or even better, a combination of both. These technologies effectively reduce camera shake and provide the best possible results for your videos.
Remember, image stabilization plays a crucial role in capturing high-quality videos that are visually pleasing and enjoyable to watch. It not only enhances the overall video quality but also expands your creative possibilities, making image stabilization a must-have feature in any HD camcorder.
Exploring Different Recording Formats
When choosing an HD camcorder, understanding the different recording formats available is essential. The recording format determines the file type and codec used to store video data, which directly impacts the quality, compatibility, and flexibility of your videos. Here are some common recording formats to consider:
1. MPEG-2: MPEG-2 is a widely used recording format known for its compatibility and accessibility. It provides good video quality and is commonly used in DVDs and standard-definition broadcast television. However, it may not be the best choice for high-definition videos due to its limitations in preserving intricate details.
2. AVCHD: AVCHD (Advanced Video Coding High Definition) is a popular recording format for high-definition camcorders. It utilizes the H.264 codec to compress video data while maintaining excellent video quality. AVCHD files are generally smaller in size, making them suitable for storing and sharing HD videos.
3. MP4: MP4 is a versatile recording format that offers a good balance between file size and video quality. It is a widely supported format, making it easy to share and play videos across different devices and platforms. MP4 files are highly compatible and work well for both high-definition and standard-definition videos.
4. MOV: MOV is a recording format developed by Apple and commonly used in Mac-based workflows. It is capable of storing high-quality video data, making it suitable for professional and high-end video productions. MOV files are compatible with various video editing software and support different codecs, such as H.264 and ProRes.
5. XAVC, XAVC S: XAVC and XAVC S are recording formats that provide high-quality video and are commonly used in professional and advanced consumer-grade camcorders. XAVC offers even higher video quality with higher bit rates, while XAVC S is a more consumer-friendly version that balances quality and file size. These formats are ideal for filmmakers and videographers who prioritize video fidelity.
When selecting a camcorder, consider the recording formats it supports and whether they align with your intended use. It’s also essential to ensure that the recording format is compatible with your editing software and playback devices.
Keep in mind that different camcorders may offer additional recording formats or variations of the mentioned formats. Additionally, some camcorders may provide the option to record in multiple formats, allowing you to choose the format that best suits your needs.
Understanding the recording formats available will help you make an informed decision when choosing a camcorder, ensuring that your videos are stored in the best format possible for quality, compatibility, and versatility.
The Pros and Cons of Different Sensor Types
The image sensor is a critical component of an HD camcorder that captures light and converts it into a digital signal. Different sensor types offer unique advantages and limitations, which can significantly impact the image quality and performance of your videos. Let’s explore the pros and cons of different sensor types:
1. CCD (Charge-Coupled Device):
- Pros: CCD sensors typically offer better color accuracy, dynamic range, and low-light performance. They are known for producing more vibrant and noise-free images, making them suitable for professional videography.
- Cons: CCD sensors consume more power and make camcorders bulkier. They also tend to be more expensive compared to other sensor types.
2. CMOS (Complementary Metal-Oxide-Semiconductor):
- Pros: CMOS sensors are generally more energy-efficient, resulting in longer battery life. They also offer faster readout speeds, enabling advanced features like slow motion and higher frame rates. CMOS sensors are more affordable and commonly found in consumer-grade camcorders.
- Cons: CMOS sensors may exhibit more noise in low-light conditions and may have slightly lower color accuracy and dynamic range compared to CCD sensors.
3. BSI (Back-Side Illumination):
- Pros: BSI sensors are designed to improve low-light sensitivity by reversing the sensor’s architecture, allowing more light to reach the photosensitive area. They can provide better noise performance in challenging lighting conditions.
- Cons: BSI sensors may have reduced color accuracy and dynamic range compared to traditional CMOS sensors. Additionally, they are generally more expensive due to the advanced manufacturing process involved.
4. Hybrid Sensors:
- Pros: Hybrid sensors combine the strengths of different sensor technologies, such as using a combination of CCD and CMOS elements. They aim to provide improved image quality, dynamic range, and low-light performance.
- Cons: Hybrid sensors may have higher power consumption and cost compared to single-sensor types.
It’s important to note that the sensor type is just one aspect of image quality, and other factors like optics, image processing, and recording formats also contribute significantly. When choosing an HD camcorder, consider your specific needs and shooting conditions. If low-light performance and image quality are crucial, CCD or BSI sensors might be a good choice. If you prioritize affordability, fast readout speeds, and versatility, CMOS sensors are a solid option.
Ultimately, the best sensor type for you will depend on your specific requirements and the balance of image quality, performance, and budget that suits your needs.
Zoom In: Optical vs. Digital Zoom
Zoom capability is an essential feature to consider when choosing an HD camcorder. It allows you to get closer to your subjects and capture fine details, whether shooting a scenic landscape or recording a distant event. When it comes to zooming, there are two primary types to consider: optical zoom and digital zoom. Let’s explore the pros and cons of each:
1. Optical Zoom:
- Pros: Optical zoom uses the actual camera lens to magnify the image, allowing you to get closer to your subjects without sacrificing image quality. It offers true zoom capability, providing clear and detailed results. Optical zoom is considered the superior option for capturing high-quality footage.
- Cons: The zoom range of optical zoom is typically limited to the physical capabilities of the camera lens. Higher zoom ranges may result in larger and heavier camcorders. However, modern camcorders often offer impressive optical zoom ranges that can cater to a wide range of shooting scenarios.
2. Digital Zoom:
- Pros: Digital zoom enlarges the image digitally by cropping a portion of the frame and magnifying it. It provides additional zoom beyond the optical zoom range, allowing you to achieve even closer shots. Digital zoom is particularly useful when you need to zoom in on a subject that is beyond the reach of the optical zoom.
- Cons: The main drawback of digital zoom is a loss of image quality. When digital zoom is used, the image is magnified by interpolating the existing pixels, which can result in pixelation, loss of detail, and reduced clarity. The extent to which the image quality is affected will depend on the digital zoom range and the camcorder’s image processing capabilities.
When deciding between optical zoom and digital zoom, it’s important to assess your shooting requirements. If you prioritize image quality and capturing fine details, optical zoom is the preferred choice. It provides genuine magnification without compromising on image sharpness. However, if you anticipate situations where you need to zoom in beyond the limitations of the optical zoom, digital zoom can be a useful tool to extend your reach.
Many modern camcorders offer a combination of optical and digital zoom, allowing you to utilize both features. This gives you the flexibility to zoom in optically for the best image quality and switch to digital zoom only when necessary.
Ultimately, the right choice depends on your specific needs and preferences. Consider the level of zoom you require, the shooting scenarios you anticipate, and the importance of image quality in your videos. By understanding the differences between optical zoom and digital zoom, you can make an informed decision that best suits your shooting style and desired outcomes.
The Power of Manual Controls
When it comes to capturing videos with precision and creativity, having manual controls on your HD camcorder can make a world of difference. Manual controls provide you with the ability to adjust various settings, such as focus, exposure, and white balance, giving you complete control over the look and feel of your videos. Here’s why manual controls are so powerful:
1. Focus Control: Manual focus allows you to determine which parts of the video you want to emphasize and ensure they are sharp and clear. It gives you the flexibility to selectively focus on specific subjects or create intentional blur for artistic effects.
2. Exposure Control: Manual exposure control lets you adjust the amount of light entering the camera sensor. This is crucial for achieving proper exposure in various lighting conditions. By manually adjusting the exposure, you can avoid overexposed or underexposed footage and ensure the right level of brightness and detail in your videos.
3. White Balance Control: White balance affects the overall color temperature of your videos. With manual white balance control, you can accurately capture the colors as they appear in different lighting situations, ensuring accurate representation and avoiding unnatural color casts.
4. Shutter Speed Control: Manual control over the shutter speed allows you to adjust the duration of time the camera’s sensor is exposed to light. This is especially important when shooting fast-moving subjects or in low light conditions. By selecting the appropriate shutter speed, you can capture motion blur or freeze action, adding dynamics to your videos.
5. Aperture Control: Manual aperture control determines the size of the lens opening, affecting the depth of field in your videos. By adjusting the aperture, you can control how much of the scene is in focus, creating a shallow depth of field for a pleasing background blur or increasing depth of field to ensure everything is in focus.
6. Customization and Artistic Freedom: Manual controls provide a level of customization and artistic freedom that automated settings cannot achieve. They allow you to experiment with different settings and techniques, taking your videos to the next level and reflecting your unique style and vision.
While manual controls can be intimidating for beginners, they offer tremendous benefits to those willing to learn and explore. They give you the power to create videos that truly express your creativity and intent.
It’s important to note that not all camcorders offer extensive manual controls. When shopping for an HD camcorder, take into consideration the level of manual control provided and ensure that it aligns with your specific needs and preferences.
By harnessing the power of manual controls, you can elevate the quality and artistic appeal of your videos, showcasing your skills and achieving the desired results. Embrace the control and expand your horizons as a videographer.
Exploring Different Audio Options
While video quality is crucial, audio quality is equally important in creating captivating and immersive videos. The audio options available in an HD camcorder play a significant role in ensuring clear and high-quality sound. Let’s explore some different audio options to consider:
1. Built-in Microphone:
- Pros: Built-in microphones are convenient and eliminate the need for additional equipment. They are ideal for capturing general sound when shooting casually or in environments with moderate ambient noise.
- Cons: Built-in microphones do not offer the same level of audio quality and control as dedicated external microphones. They may pick up unwanted noise, have limited frequency response, and lack directional capabilities.
2. External Microphone Input:
- Pros: Camcorders with an external microphone input allow you to connect an external microphone for improved audio quality. This option provides enhanced audio control, reduces ambient noise, and allows for recording specific audio sources.
- Cons: The quality of the audio will depend on the external microphone used. It may require additional expenses to invest in a quality external microphone.
3. Microphone Jack:
- Pros: A microphone jack allows for greater flexibility in microphone selection. You can connect a wide range of external microphones, including shotgun microphones for focused audio capture or lavalier microphones for hands-free recording.
- Cons: Some lower-end camcorders may lack a microphone jack, limiting your options to use external microphones.
4. Wireless Microphone:
- Pros: A wireless microphone provides freedom of movement for the audio source. It eliminates cable constraints and allows you to capture clear and synchronized audio from a distance or in situations that require flexibility.
- Cons: Wireless microphones may add complexity to the setup and require additional equipment. There may also be a risk of interference or signal dropout in some environments.
5. Audio Controls:
- Pros: Look for camcorders that offer manual audio controls. These allow you to adjust audio levels, set gain, and monitor audio inputs. Manual controls provide the ability to fine-tune audio settings for optimal sound quality.
- Cons: Some entry-level camcorders may lack manual audio control options, limiting your ability to customize audio settings.
When considering audio options, it’s important to determine your specific audio needs and the intended use of your videos. If audio quality is a top priority or if you’re shooting in noisy environments, investing in an external microphone and utilizing manual audio controls can significantly enhance your audio recordings.
Ultimately, the choice of audio options depends on the level of control, convenience, and sound quality you require for your videos. Consider the specific audio situations you anticipate and choose an HD camcorder that offers the best audio options that suit your needs.
Tips for Better Video Composition and Lighting
Video composition and lighting are essential elements in creating visually appealing and engaging videos. They have a significant impact on the overall look and feel of your footage. Whether you’re a beginner or experienced videographer, here are some tips to elevate your video composition and lighting:
1. Rule of Thirds: The rule of thirds is a compositional guideline that suggests dividing the frame into a 3×3 grid and placing key elements along the gridlines or at the intersections. This adds balance and interest to your shots, making them more visually appealing.
2. Framing: Consider the placement and framing of your subjects. Pay attention to the background, avoid distracting elements, and make sure your subject is well positioned within the frame. Experiment with different angles and perspectives to find the most compelling composition.
3. Leading Lines: Utilize leading lines, such as roads, fences, or railings, to guide the viewer’s eye and create a sense of depth and perspective in your shots.
4. Use of Space: Be mindful of the negative space in your composition. Negative space refers to the areas in the frame that are not occupied by the primary subject. Utilize negative space strategically to enhance focus on your subject and create a sense of balance.
5. Lighting:
- Outdoor Lighting: Take advantage of natural lighting whenever possible. Shoot during the golden hour (early morning or late afternoon) when the light is soft and golden, resulting in warm, flattering tones. Avoid shooting in harsh midday sunlight as it can create unflattering shadows.
- Indoor Lighting: When shooting indoors, make use of available lighting sources like windows or lamps. Pay attention to the direction and quality of light, avoiding harsh, direct light that can cause unattractive shadows. Consider diffusing or bouncing light to create a softer and more even illumination.
- Three-Point Lighting: For more professional lighting setups, consider employing the three-point lighting technique. This involves using a key light (the main light source), a fill light (to reduce shadows), and a backlight (to separate the subject from the background). This technique enhances depth and adds dimensionality to your shots.
6. White Balance: Ensure correct white balance to accurately represent colors in your footage. Manually adjust the white balance settings on your camcorder or use custom white balance to match the lighting conditions.
7. Tripod or Stabilization: Use a tripod or stabilizer to maintain stability and avoid shaky footage. This is particularly important for capturing smooth pans, tilts, or steady shots. Stabilization equipment helps to maintain a professional and polished look.
8. Experiment and Learn: Don’t be afraid to experiment with composition and lighting techniques. Watch tutorials, study the work of other videographers, and practice regularly. Learning and refining these skills will ultimately help you develop your own style and produce visually compelling videos.
Remember, video composition and lighting are artistic choices that can greatly enhance the impact of your videos. By applying these tips and practicing regularly, you’ll be able to create visually stunning and captivating footage that engages your audience.
Understanding White Balance and Exposure
White balance and exposure are two crucial aspects of achieving proper color and brightness in your videos. Understanding and controlling these factors can greatly enhance the visual quality of your footage. Let’s take a closer look at white balance and exposure:
White Balance:
White balance refers to the adjustment of colors in your video to capture accurate and natural-looking hues, regardless of the lighting conditions. Different light sources have varying color temperatures, which can cause a shift in the color of your footage. Here’s what you need to know:
1. Color Temperature: Color temperature is measured in Kelvin (K) and quantifies the color of light. Lower color temperatures (around 2,700K) indicate warm, yellowish light, while higher temperatures (around 6,500K) indicate cooler, bluish light.
2. Preset White Balance: Most camcorders offer preset white balance settings for common lighting conditions, such as daylight, cloudy, or tungsten. These settings adjust the color balance to compensate for the dominant color temperature of the environment.
3. Custom White Balance: Custom white balance allows you to create a more accurate white balance setting by manually determining what white looks like under specific lighting conditions. This involves pointing the camera at a white or neutral gray object and setting it as the reference for accurate color reproduction.
Exposure:
Exposure refers to the overall brightness of your footage. Proper exposure ensures that the details in your videos are well-lit and not too dark or too bright. Here’s what you need to consider:
1. Histogram: Understanding the histogram of your camcorder can help you gauge the exposure levels in your footage. The histogram is a graphical representation of the distribution of brightness levels in your video, allowing you to ensure the exposure is balanced.
2. Zebras and Highlight Warnings: Some camcorders offer zebras or highlight warnings, which indicate areas of overexposure in your footage. This serves as a visual aid to help you avoid losing detail in bright areas.
3. Manual Exposure Control: Manual exposure control allows you to adjust the exposure settings manually, such as aperture, shutter speed, or ISO. This gives you greater control over the brightness levels in your videos, especially in challenging lighting situations.
4. Exposure Compensation: Exposure compensation allows you to adjust the exposure level based on your creative preferences. Use positive compensation to make the image brighter or negative compensation to make it darker, effectively overriding the camera’s auto exposure settings.
Understanding white balance and exposure ensures that your videos have accurate colors and optimal brightness. By controlling these factors, you can capture footage that looks true to life and visually appealing.
Experiment with different white balance settings, understand the exposure controls on your camcorder, and practice adjusting them to achieve the desired results. With practice and familiarity, you’ll be able to master white balance and exposure to create visually stunning videos that accurately represent the scene and captivate your viewers.
Navigating the Menu System
The menu system of an HD camcorder is the control center, allowing you to access and adjust various settings to customize your shooting experience. Navigating through the menu efficiently is key to maximizing the capabilities of your camcorder. Here are some tips to help you navigate the menu system:
1. Familiarize Yourself: Take the time to familiarize yourself with the menu layout and organization of your specific camcorder model. Understanding where to find different settings will save you time and frustration when you need to make adjustments quickly.
2. Read the Manual: Refer to the user manual provided with your camcorder. It contains specific instructions on navigating the menu system and provides valuable insights into the functions and features of your camcorder.
3. Main Menu and Submenus: Most camcorders have a main menu that provides access to different categories or submenus. The main menu acts as a gateway to adjust overall settings, while submenus offer more specific options within each category.
4. Navigation Buttons: Typically, camcorders have dedicated buttons or a control dial to navigate through menu options. Familiarize yourself with these buttons and their functions. Common navigation buttons include up, down, left, and right arrows or a multi-directional control dial.
5. Icons and Labels: Pay attention to the icons and labels on the menu screen. They provide visual cues and descriptions for different settings and options. Understanding the meaning of each icon or label will help you navigate more efficiently.
6. Shortcut Buttons: Some camcorders have dedicated buttons or shortcuts to frequently used settings, allowing you to access them directly without going through the menu system. Learn which buttons serve as shortcuts and take advantage of them to streamline your workflow.
7. Customizable Options: Some camcorders allow you to customize the menu layout or assign specific functions to shortcut buttons. Explore the customization options to tailor the menu system to your preferences and make it easier to access frequently used settings.
8. Experiment and Explore: Take the time to explore different menu options and settings. Experiment with different configurations and settings to find what works best for your shooting style and preferences. With practice, you’ll become more familiar with the menu system and make adjustments smoothly.
Remember, navigating the menu system is a skill that improves with time and practice. Don’t be afraid to consult the user manual or online resources for additional guidance. The more comfortable you become with navigating the menu system, the more efficiently you can access and utilize the features of your HD camcorder.
Transferring and Editing Your Videos
Once you’ve captured your videos with an HD camcorder, the next step is to transfer and edit them to bring your vision to life. Here are some tips to help you successfully transfer and edit your videos:
1. Transferring Videos:
- Connectivity Options: Check the available connectivity options on your camcorder, such as USB or HDMI. Choose the method that suits your needs and transfer your videos to a computer or storage device.
- File Organization: Create a system for organizing your video files. Create folders and use descriptive file names to easily locate and manage your footage.
- Backup your Files: It’s essential to back up your video files to prevent the loss of precious footage. Consider using cloud storage or external hard drives as additional backup options.
2. Video Editing Software:
- Choose the Right Software: Select a video editing software that suits your needs and level of expertise. There are various options available, ranging from beginner-friendly software to professional-grade editing suites.
- Importing Footage: Import your videos into the editing software. The process may vary depending on the software. Look for the import option and select the video files you want to work with.
- Basic Editing: Familiarize yourself with the basic editing tools and techniques. Trim clips, arrange them in a desired sequence, and delete any unnecessary footage.
- Adding Transitions and Effects: Enhance your videos by incorporating transitions between clips and applying visual effects, such as filters, color correction, or special effects. Use these tools creatively to enhance the story and visual appeal of your videos.
- Audio Editing: Pay attention to audio editing. Adjust the volume levels, add background music, or include voiceovers to improve the overall audio quality and impact of your videos.
3. Export and Sharing:
- Export Settings: Determine the desired output format and settings for your final video. Consider the platform or medium where you intend to share your videos to ensure optimal compatibility and quality.
- Finalizing the Edit: Review your edited video and make any necessary adjustments. Watch it with a critical eye to ensure your desired story and visual style are portrayed effectively.
- Sharing your Videos: Share your videos on social media platforms, video-sharing websites, or directly with friends and family. Consider privacy settings and copyright restrictions when sharing your work.
Remember, the editing process is a creative journey that allows you to shape your videos into a compelling story. Take the time to familiarize yourself with the editing software, experiment with different techniques, and continue learning and refining your skills.
By mastering the process of transferring and editing your videos, you can transform your raw footage into polished, expressive, and professionally crafted videos that captivate your audience.
Essential Accessories for HD Camcorders
While an HD camcorder is essential for capturing high-quality videos, there are several accessories that can enhance your shooting experience and provide additional functionality. Here are some essential accessories to consider:
1. Tripod: A tripod provides stability, allowing you to capture steady shots and smooth panning movements. It is especially useful for situations where you need to keep the camera steady for an extended period or achieve precise composition.
2. External Microphone: An external microphone improves audio quality by capturing clearer and more focused sound. It reduces background noise and allows for better control over audio levels. Choose a microphone that is suitable for your specific needs, such as a shotgun microphone for directional recording or a lavalier microphone for hands-free recording.
3. Camera Bag or Case: A camera bag or case protects your camcorder and accessories from dust, moisture, and accidental damage. Look for a bag that provides adequate padding, compartments, and easy accessibility to keep your gear organized and protected.
4. Extra Batteries and Charger: Having extra batteries ensures that you never run out of power during important shooting sessions. Invest in a reliable charger that can charge multiple batteries simultaneously, allowing you to stay powered up and ready to capture your footage.
5. Memory Cards: Memory cards provide storage space for your videos. Invest in high-capacity, high-speed memory cards to accommodate the large file sizes of HD videos. Having multiple cards is also useful for extended shooting sessions or backup purposes.
6. Lens Filters: Lens filters can enhance image quality and provide creative effects. A UV filter protects the camera lens from scratches and dust, while a polarizing filter helps reduce glare and enhance colors. ND filters are useful for controlling exposure in bright conditions.
7. External Hard Drive: An external hard drive offers additional storage space for your video files. It allows you to offload footage from your camcorder or computer, providing a backup and freeing up space for more recording sessions.
8. Cleaning Kit: A cleaning kit helps you maintain the cleanliness and performance of your camcorder. It includes items such as a blower, lens cleaning solution, microfiber cloth, and brushes, allowing you to remove dust, smudges, and fingerprints from the lens and other components.
9. Remote Control or Timer: A remote control or timer allows you to trigger the camcorder’s recording without physically touching it. It is useful for situations where you need to be in the shot or require precise control over the start and stop of recording.
10. Lighting Equipment: Consider investing in lighting equipment, such as a portable LED light, to improve the quality of your videos in low-light or challenging lighting conditions. This allows you to maintain proper exposure, reduce shadows, and enhance clarity and detail in your footage.
These essential accessories can enhance your shooting capabilities, improve the quality of your videos, and provide convenience and protection for your camcorder. Consider your specific shooting needs and budget to prioritize the accessories that will benefit you the most. With the right gear, you can take your videography to the next level and capture stunning footage.
Troubleshooting Common Issues
While using an HD camcorder, it’s not uncommon to encounter various issues that may affect the quality or functionality of your videos. Here are some common issues you may come across and how to troubleshoot them:
1. Blurry or Out-of-Focus Footage:
- Solution: Ensure that the autofocus is enabled on your camcorder. If the footage is still blurry, manually adjust the focus until the image appears sharp. Avoid excessive zooming or shooting in low-light conditions, as these can affect focus accuracy. If necessary, use a tripod or stabilization equipment to minimize camera shake.
2. Poor Audio Quality:
- Solution: If using the built-in microphone, ensure that the microphone is not obstructed or covered. Check the microphone settings on your camcorder and adjust the audio levels accordingly. If possible, consider using an external microphone for better audio capture and invest in a windscreen or deadcat to minimize wind noise during outdoor recordings.
3. Overexposed or Underexposed Footage:
- Solution: Adjust the exposure settings on your camcorder to achieve proper exposure. Use the exposure compensation feature to make manual adjustments if necessary. Pay attention to the histogram or highlight warnings in the viewfinder or LCD screen, ensuring that the highlights are not overly blown out or the shadows too dark.
4. Unstable Footage:
- Solution: If experiencing shaky footage, use a tripod, stabilizer, or other stabilization techniques to ensure stability. Slow down your movements and use smooth, deliberate camera motions. Avoid zooming in or out too quickly as it can amplify any shaking. If shooting handheld, consider improving your stance or grip to minimize camera wobble.
5. Battery Drain:
- Solution: Ensure that your battery is fully charged before starting a shoot. Carry spare batteries, especially during long shooting sessions. Double-check your camcorder settings, as certain features and options can drain the battery faster. If battery drain continues to be an issue, consider investing in higher-capacity batteries or an external battery pack.
6. Memory Card Issues:
- Solution: Ensure that your memory card is compatible with your camcorder and has sufficient capacity. Format the card in your camcorder before use. If encountering issues with the card, try reformatting it or using a different card. Always handle memory cards carefully and avoid removing them while the camcorder is still writing or reading data.
7. Playback or Export Problems:
- Solution: Ensure that you are using compatible software for playback or editing. Check compatibility and system requirements to ensure smooth operation. If encountering playback or export issues, try updating your software or trying different settings or codecs. Ensure that your computer or playback device meets the necessary specifications to handle HD video playback smoothly.
Remember, troubleshooting can vary depending on the specific make and model of your camcorder. Refer to the user manual or manufacturer’s website for model-specific troubleshooting tips and further assistance. When encountering issues, patience and persistence in problem-solving will ultimately help you overcome challenges and achieve the best possible results with your HD camcorder.
Frequently Asked Questions about HD Camcorders
1. What is HD video resolution?
HD video resolution refers to high-definition video quality, typically starting at 720p (1280 x 720 pixels) and progressing to Full HD (1080p) or even higher resolutions like 4K (3840 x 2160 pixels). HD resolution offers sharper and more detailed video footage compared to standard-definition videos.
2. What is the difference between optical zoom and digital zoom?
Optical zoom physically adjusts the camera lens to magnify the image, allowing you to get closer to the subject without sacrificing image quality. Digital zoom, on the other hand, enlarges the image digitally by cropping and interpolating the pixels, which can result in a loss of image quality and clarity.
3. Can I use external microphones with an HD camcorder?
Yes, many HD camcorders have an external microphone input, allowing you to connect compatible external microphones. External microphones can significantly improve audio quality and provide more control over capturing clear and focused sound.
4. How can I improve stability while shooting handheld?
To improve stability while shooting handheld, ensure that you have a firm grip on the camcorder. Stand with your feet shoulder-width apart and slightly bend your knees for stability. Consider using the image stabilization feature on your camcorder or invest in a tripod or a stabilizing rig for smoother footage.
5. What is the importance of manual controls?
Manual controls provide you with the ability to adjust settings such as focus, exposure, and white balance. They give you creative control over your videos, allowing you to achieve the desired look and feel. Manual controls offer versatility and customization options that automated settings may not provide.
6. How do I transfer and edit my videos?
To transfer your videos, connect your camcorder to a computer using the appropriate cable. Then, transfer the video files from your camcorder to your computer or storage device. To edit your videos, import them into video editing software of your choice, make adjustments and modifications, and then export the final edited video as per your desired specifications.
7. What accessories are essential for HD camcorders?
Essential accessories for HD camcorders include a tripod for stability, external microphones for improved audio quality, a camera bag or case for protection and portability, extra batteries and charger for continuous shooting, memory cards for storage, and cleaning kits to maintain the camcorder’s cleanliness.
8. Are all HD camcorders waterproof or weather-resistant?
No, not all HD camcorders are waterproof or weather-resistant. It’s important to check the specifications of the camcorder or consult the manufacturer to determine if it is suitable for use in challenging weather conditions or wet environments.
9. What should I consider when choosing an HD camcorder?
When choosing an HD camcorder, consider factors such as video resolution, zoom capabilities, image stabilization, audio quality and options, manual controls, battery life, connectivity options, and overall durability. Assess your specific shooting needs and budget to find a camcorder that best suits your requirements.
10. How do I achieve better lighting in my videos?
To achieve better lighting in your videos, make use of natural lighting when possible and avoid harsh midday sunlight. When shooting indoors, utilize available lighting sources and consider adding artificial lights or diffusers to improve illumination. Understanding white balance and using appropriate exposure settings can also help enhance lighting conditions in your videos.