
Choosing the Right Ethernet Cable
When setting up an Ethernet network, one of the crucial decisions you’ll need to make is choosing the right Ethernet cable. With several options available, it’s essential to understand the different types and their respective capabilities to ensure optimal network performance. Let’s explore some factors to consider when selecting Ethernet cables.
Cable Category: Ethernet cables are categorized based on their performance capabilities and specifications. The most common categories are Cat5e, Cat6, and Cat6a. Cat5e cables can handle speeds up to 1000Mbps and are suitable for most home and small office networks. Cat6 cables offer better performance with speeds up to 10Gbps, making them ideal for larger networks or environments with higher bandwidth demands. Cat6a cables are designed for even higher speeds and reduced crosstalk, making them suitable for professional setups and data centers.
Cable Length: It’s important to consider the distance between devices when choosing Ethernet cables. Cat5e cables can reliably transmit data up to 100 meters (328 feet) without significant loss of signal quality. Cat6 and Cat6a cables have similar capabilities but can offer better performance at longer distances. If you need to cover a larger area, it’s recommended to use Cat6 or Cat6a cables to ensure consistent network speeds.
Shielding: Ethernet cables can come with or without shielding. Shielded cables, also known as STP (Shielded Twisted Pair) cables, have an additional layer of insulation that helps reduce electromagnetic interference. This makes them suitable for environments with high levels of electrical noise, such as industrial settings. Unshielded cables, known as UTP (Unshielded Twisted Pair) cables, are sufficient for most residential and commercial applications where interference levels are low.
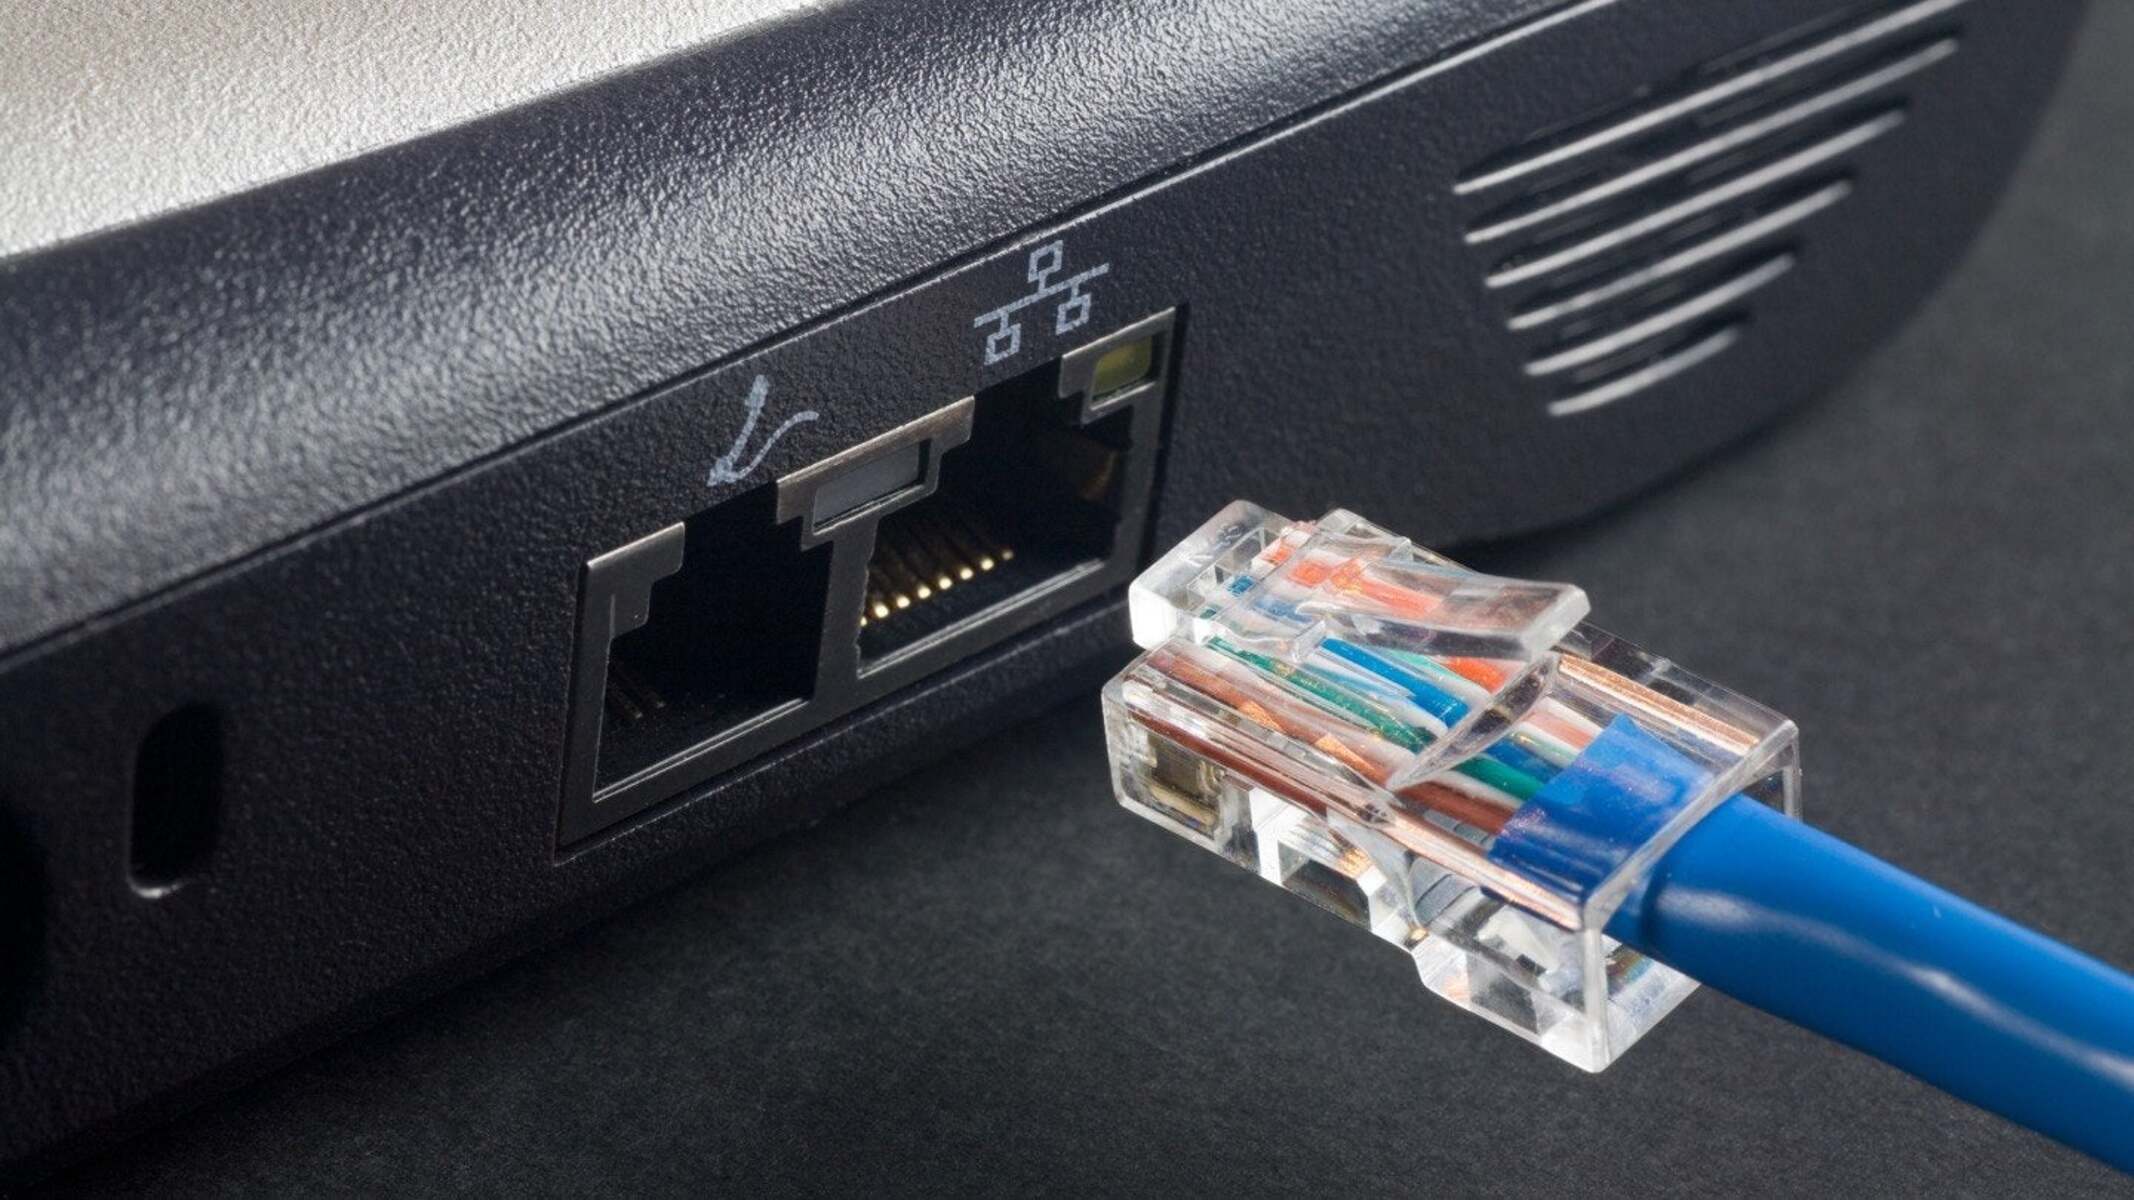
Connectors: Ethernet cables typically come with RJ-45 connectors, which are the standard connectors used in Ethernet networking. These connectors are easy to use and provide a secure connection. However, it’s essential to ensure that the cables and connectors are compatible with your devices, as some network equipment may require specific connector types.
Understanding Ethernet Speeds and Categories
When working with Ethernet networks, it’s crucial to have a clear understanding of Ethernet speeds and categories. This knowledge will help you make informed decisions when it comes to selecting the right equipment and optimizing network performance. Let’s delve into the details of Ethernet speeds and categories.
Ethernet Speeds: Ethernet speeds refer to the data transfer rates that a network can handle. The most commonly used Ethernet speeds include 10 Mbps (megabits per second), 100 Mbps, 1 Gbps (gigabit per second), and 10 Gbps. These speeds determine how quickly data can be transmitted and received within the network. It’s important to note that the actual speed achieved may depend on various factors, including the Ethernet cable, network equipment, and the capabilities of connected devices.
Ethernet Categories: Ethernet categories define the performance capabilities and specifications of Ethernet cables. The most prevalent categories are Cat5e, Cat6, and Cat6a. Cat5e cables support speeds up to 1000 Mbps and are commonly used in residential and small office networks. Cat6 cables can accommodate speeds up to 10 Gbps and offer improved performance and reliability. Cat6a cables, on the other hand, are designed for professional environments and can handle higher speeds with reduced crosstalk. It’s important to select the appropriate Ethernet category based on the network requirements.
Backward Compatibility: Ethernet categories are backward compatible, meaning that higher category cables can support lower category devices. For example, Cat6 and Cat6a cables can be used with devices that require Cat5e cables, but the network will only operate at the slower speed supported by the device. It’s advisable to use the highest category cable that is compatible with your devices to future-proof your network and ensure optimal performance as technology advances.
Factors Affecting Speed: While Ethernet speeds and cable categories play a significant role in network performance, other factors can impact the achieved speed. These include the quality and length of the Ethernet cable, the capabilities of the network equipment, the number of devices connected, and the overall network traffic. To maximize speed, it’s essential to use high-quality Ethernet cables, ensure proper cable management, and regularly update network equipment firmware.
Testing and Monitoring: To gauge the actual speed and performance of your Ethernet network, it’s recommended to perform regular speed tests using reliable tools and software. This will help identify any limitations or bottlenecks within the network and allow for necessary adjustments and optimizations.
Ethernet Cable Length Limitations
When setting up an Ethernet network, understanding the limitations of cable length is crucial for ensuring reliable and efficient connectivity. While Ethernet cables can transmit data over long distances, there are specific length limitations that need to be taken into account. Let’s explore the factors affecting Ethernet cable length and how to optimize network performance within these limitations.
Cable Category: The category of the Ethernet cable plays a significant role in determining the allowed cable length. Cat5e cables, which are widely used in most home and small office networks, can reliably transmit data up to 100 meters (328 feet). Cat6 and Cat6a cables offer similar performance but can potentially allow for longer cable runs while maintaining signal integrity. It’s important to choose the appropriate category of cable based on the desired cable length and network requirements.
Signal Degradation: As Ethernet signals travel through the cable, they naturally encounter a certain level of signal degradation due to attenuation. Attenuation refers to the loss of signal strength over distance, resulting in reduced signal quality. This degradation becomes more pronounced as the cable length increases. Therefore, it’s essential to consider the cable category and the distance between devices to ensure that the Ethernet signals maintain their integrity within acceptable limits.
Extending Cable Length: In cases where you need to span distances that exceed the recommended cable length, there are a few options available. One option is to use Ethernet extenders or repeaters, which amplify the signals and enable longer cable runs. These devices can help overcome the limitations imposed by cable length but may introduce a slight latency delay. Another option is to use Ethernet switches to connect multiple shorter cable lengths together, effectively extending the network’s reach. However, it’s crucial to maintain proper cable management and ensure that the switches are positioned strategically to prevent signal degradation.
Quality and Installation: The quality of the Ethernet cable and its installation can impact the maximum reliable cable length. Poorly made or damaged cables can introduce signal loss and interfere with network performance. It’s important to invest in high-quality cables made with proper shielding and connectors. Additionally, proper installation techniques, such as avoiding sharp bends or kinks in the cable and minimizing exposure to electrical interference, can help maintain signal integrity and optimize cable length.
Testing and Monitoring: Regularly testing and monitoring the Ethernet network can help identify and address any issues related to cable length limitations. Utilizing network testing tools and equipment can provide insights into signal strength, latency, and overall network performance. This allows for proactive troubleshooting and adjustments to maximize the network’s efficiency.
How to Install an Ethernet Wall Jack
Installing an Ethernet wall jack is a straightforward process that allows you to conveniently connect Ethernet-enabled devices to your network. Whether you’re setting up a new network or expanding an existing one, installing an Ethernet wall jack can help streamline your connectivity. Here’s a step-by-step guide to help you install an Ethernet wall jack.
Step 1: Gather the necessary tools and materials: Before you begin, make sure you have all the required tools and materials. You will need an Ethernet wall jack, a faceplate, an Ethernet cable, a network patch panel (optional), a punch-down tool, and a screwdriver.
Step 2: Choose a suitable location: Decide where you want to install the Ethernet wall jack. Typically, it’s best to place it in a central location, such as near a networking hub or where you anticipate the most Ethernet connections. Ensure that the location provides easy access and enough space for the wall jack and cables.
Step 3: Prepare the wall: Mark the spot where you want to install the wall jack. Use a stud finder to locate any studs or obstacles behind the wall to avoid interference. With a utility knife, cut a hole in the wall slightly larger than the dimensions of the wall jack.
Step 4: Install the wall jack: Insert the Ethernet cable through the hole in the wall. Connect the wires to the appropriate terminals on the back of the wall jack. Refer to the manufacturer’s instructions or follow the T568A or T568B wiring standards for proper wiring sequences. Use a punch-down tool to secure the wires in place, ensuring a secure connection.
Step 5: Attach the faceplate: Take the faceplate and align it with the wall jack. Insert the screws provided with the faceplate through the mounting holes in the faceplate and into the wall jack. Tighten the screws with a screwdriver until the faceplate is securely attached to the wall.
Step 6: Connect to the network: If using a network patch panel, connect one end of an Ethernet cable to the designated port on the patch panel and the other end to the Ethernet wall jack. If not using a patch panel, connect the Ethernet cable directly to the wall jack. Repeat this process for each Ethernet wall jack you wish to install.
Step 7: Test the connection: Once all the connections are made, test the Ethernet wall jack by plugging in an Ethernet-enabled device, such as a computer or a gaming console. Check for a stable connection and ensure that your device recognizes the network.
By following these steps, you can easily install an Ethernet wall jack and enjoy seamless connectivity throughout your network.
How to Terminate an Ethernet Cable
Terminating an Ethernet cable involves the process of correctly connecting the cables to the connectors at both ends, ensuring a secure and reliable connection. Whether you’re creating custom-length Ethernet cables or repairing existing ones, knowing how to terminate an Ethernet cable is a valuable skill. Here’s a step-by-step guide to help you terminate an Ethernet cable.
Step 1: Gather the necessary tools and materials: Before you begin, make sure you have all the required tools and materials. You will need an Ethernet cable, Ethernet connectors (RJ-45 connectors), a cable stripper, a crimper tool, and preferably a cable tester.
Step 2: Prepare the cable: Start by preparing the cable. Use a cable stripper to carefully remove about an inch of the outer jacket from the Ethernet cable. Be cautious not to cut into the individual wires inside. Once the outer jacket is removed, carefully untwist the pairs of wires, and arrange them according to the T568A or T568B wiring standards. Ensure that the wires are straight and without any kinks or damage.
Step 3: Trim and arrange the wires: Trim the excess length of the wires to ensure they are all even. Align the wires in the required order, referring to the T568A or T568B wiring standards. The order is usually white/orange, orange, white/green, blue, white/blue, green, white/brown, and brown. Make sure the wires are arranged in a straight line and are not crossed over each other.
Step 4: Insert the wires into the connector: Carefully insert the arranged wires into the RJ-45 connector, making sure they reach the end of the connector. Ensure that each wire is in the correct slot, according to the wiring standard you are following. Use a finger or a small tool to press down on the wires to ensure they are fully inserted.
Step 5: Crimp the connector: With the wires firmly in place, use a crimping tool to crimp the connector onto the cable. Apply enough pressure to secure the wires and connector together. Be careful not to apply excessive force that might damage the connector or the wires. Repeat the process for the other end of the cable, if necessary.
Step 6: Test the cable: Once both ends of the Ethernet cable are terminated, it’s advisable to test the cable for proper connectivity. Use a cable tester to check for any wiring faults or connectivity issues. Confirm that all the wires are correctly connected and that the cable can successfully transmit data.
By following these steps, you can confidently terminate an Ethernet cable, ensuring a reliable and functional connection for your networking needs.
Troubleshooting Ethernet Connection Issues
Ethernet connection issues can be frustrating, but with some troubleshooting techniques, you can quickly identify and resolve common problems that may arise. Whether you’re experiencing slow speeds, intermittent connectivity, or no connection at all, here are some steps to help you troubleshoot Ethernet connection issues.
Step 1: Check physical connections: Ensure that all Ethernet cables are securely plugged into the appropriate ports on both the network devices and the Ethernet wall jacks. Check for any loose connections or damage to the cables. If necessary, try reseating the cables to establish a better connection.
Step 2: Restart devices: Often, a simple reboot can resolve connectivity issues. Restart your modem, router, and computer or other connected devices. This can refresh the network settings and clear any temporary glitches that might be affecting your Ethernet connection.
Step 3: Check network settings: Verify that your network settings are configured correctly. Ensure that your computer or device is set to obtain IP addresses automatically via DHCP. Check that the subnet mask and default gateway settings are correct. Incorrect settings can lead to connectivity problems.
Step 4: Test with different cable or port: If possible, try using a different Ethernet cable or a different port on your router or network switch. This can help determine whether the issue is with the cable or a specific port. If the problem resolves with a different cable or port, it may indicate a faulty cable or hardware issue.
Step 5: Update network drivers: Ensure that your network interface card (NIC) drivers are up to date. Outdated or incompatible drivers can cause connectivity issues. Visit the manufacturer’s website to download and install the latest drivers for your network card.
Step 6: Disable security software: Temporarily disable any firewall or antivirus software running on your computer. Sometimes, overly strict security settings can prevent proper network connectivity. If disabling the security software resolves the issue, you may need to adjust the settings or seek alternative security solutions.
Step 7: Reset network equipment: If all else fails, try resetting your modem, router, or network switch to their default factory settings. Consult the user manual or contact the equipment manufacturer for specific instructions on how to perform a reset. Note that resetting will erase any custom settings, so be prepared to reconfigure your network if necessary.
Step 8: Seek professional help: If you’ve exhausted all troubleshooting steps and still can’t resolve the Ethernet connection issue, it may be time to seek assistance from a professional network technician. They can analyze the problem in-depth, identify any underlying issues, and provide an advanced resolution.
By following these troubleshooting steps, you can effectively diagnose and address common Ethernet connection issues, ensuring a reliable and stable network connection.
How to Set Up a Wired Ethernet Network
A wired Ethernet network provides a secure and reliable connection for your devices, offering faster speeds and lower latency compared to wireless networks. Setting up a wired Ethernet network may seem daunting, but with the right steps, you can easily establish a robust and efficient network. Here’s a guide to help you set up a wired Ethernet network.
Step 1: Gather the necessary equipment: Before you begin, ensure you have all the required equipment. You will need Ethernet cables, a modem, a router, and Ethernet wall jacks or switches. Make sure you have enough cables to connect all your devices.
Step 2: Connect the modem to the Internet: Start by connecting the modem to your internet service provider’s (ISP) network interface using a coaxial cable or fiber optic cable. Then, connect the modem to a power source and wait for it to establish a connection with your ISP.
Step 3: Connect the router to the modem: Take an Ethernet cable and connect one end to the LAN port on the modem and the other end to the WAN (Internet) port on the router. Power on the router and wait for it to boot up.
Step 4: Configure the router: Access the router’s administration settings by typing its default IP address into a web browser. Log in using the default username and password provided by the manufacturer. Follow the on-screen instructions to set up your network name (SSID) and security settings (e.g., WPA2 encryption).
Step 5: Connect devices via Ethernet: Use Ethernet cables to connect your devices, such as computers, gaming consoles, or smart TVs, to the available LAN ports on the router. Plug one end of the cable into the Ethernet wall jack or switch and the other end into the device’s Ethernet port.
Step 6: Test the network: Once all the connections are made, check if the devices are successfully connected to the network. Test the internet connection by opening a web browser and visiting a website. Ensure that all connected devices can communicate with each other and access network resources, such as shared files and printers.
Step 7: Configure additional settings: Depending on your network requirements, you may need to configure additional settings. This includes implementing port forwarding for specific applications, setting up a DHCP server to assign IP addresses automatically, or enabling Quality of Service (QoS) to prioritize traffic.
Step 8: Secure your network: Protect your wired Ethernet network by securing your Wi-Fi network with a strong password and encryption. Regularly update the firmware on your router to ensure it has the latest security patches. Consider implementing additional security measures, such as enabling a firewall and using network monitoring tools.
By following these steps, you can easily set up a wired Ethernet network, providing a fast and reliable connection for your devices. Take the time to plan your network layout and ensure proper cable management for a tidy and efficient setup.
Security Tips for Ethernet Networks
Ensuring the security of your Ethernet network is crucial to protect your sensitive data and maintain the integrity of your network infrastructure. Ethernet networks, both wired and wireless, can be vulnerable to various security threats if not properly secured. Here are some essential security tips to help you safeguard your Ethernet network.
1. Use Strong Passwords: Set strong and unique passwords for your network devices, including your router and any network switches. Avoid using default or easily guessable passwords. Include a combination of uppercase and lowercase letters, numbers, and special characters to enhance password strength.
2. Enable Network Encryption: Utilize encryption protocols, such as WPA2 (or higher), to encrypt data transmitted over your Ethernet network. Encryption adds an additional layer of security and prevents unauthorized access to your network. Regularly update your devices to support the latest encryption standards and ensure your network is using the strongest encryption available.
3. Update Firmware Regularly: Keep your network devices up to date with the latest firmware released by the manufacturer. Firmware updates often include security patches that address vulnerabilities and improve the overall security of your devices. Enable automatic firmware updates whenever possible to ensure ongoing protection.
4. Implement Network Segmentation: Consider segmenting your network by creating separate virtual LANs (VLANs) for different devices or user groups. This practice helps isolate and restrict the access of sensitive data, minimizing the impact of potential security breaches. Configure proper firewall rules and access control lists (ACLs) to manage the flow of traffic between different VLANs.
5. Enable MAC Address Filtering: Implement MAC address filtering on your network devices to allow only specific devices with pre-authorized MAC addresses to connect to your network. This prevents unauthorized devices from accessing your Ethernet network, even if they have the correct network password.
6. Disable Unused Services and Ports: Disable any unnecessary services or network ports on your network devices. Open ports and services can be potential entry points for attackers. By disabling unused services and closing unnecessary ports, you reduce the attack surface and minimize potential security risks.
7. Regularly Monitor Network Traffic: Utilize network monitoring tools to monitor and analyze your network traffic for any suspicious activities or unauthorized access attempts. Monitor logs and investigate any anomalies or alerts promptly. This enables you to identify and mitigate security incidents before they escalate.
8. Educate Users: Train your network users on best practices for network security. Educate them about the risks associated with phishing emails, social engineering attacks, and downloading malicious files. Encourage strong password hygiene and regular password updates. Foster a culture of security awareness among all network users.
9. Employ Intrusion Detection and Prevention Systems (IDPS): Install and configure IDPS systems to detect and block unauthorized network intrusion attempts. These systems monitor network traffic, analyze patterns, and detect potential threats in real-time, providing enhanced security for your Ethernet network.
10. Regularly Back Up Data: Implement a regular data backup strategy to ensure that critical data is protected in the event of a security breach or network failure. Store backups in secure, off-site locations to prevent data loss due to physical damage or theft.
By following these security tips, you can significantly enhance the security of your Ethernet network and protect your valuable data from unauthorized access and cyber threats.
How to Test Ethernet Speed and Performance
Testing the speed and performance of your Ethernet network is essential to ensure that it is operating at its optimal level. By conducting regular speed tests, you can identify potential bottlenecks, troubleshoot network issues, and make necessary adjustments to enhance performance. Here’s a step-by-step guide on how to test the speed and performance of your Ethernet network.
Step 1: Choose a reliable speed testing tool: There are various online speed testing tools available that allow you to measure your network’s download and upload speeds. Popular options include Speedtest.net, Fast.com, and Ookla. Choose a tool that provides accurate results and is known for its reliability.
Step 2: Connect directly via Ethernet: To obtain accurate speed test results, ensure that you are connected to your router or modem via an Ethernet cable instead of relying on a wireless connection. Connecting directly via Ethernet eliminates potential interference and provides a more stable and consistent connection for accurate testing.
Step 3: Close unnecessary applications and devices: To minimize any potential network congestion during the speed test, close any unnecessary applications or devices that are actively using the network. This includes streaming services, file downloads, or background updates that may impact the test results.
Step 4: Run the speed test: Load the speed testing tool in your web browser and initiate the speed test. The tool will measure your network’s download speed, upload speed, and ping (response time). Allow the test to complete its run, and the tool will present the results to you.
Step 5: Compare results to expected speeds: Compare the speed test results to the expected speeds provided by your internet service provider (ISP). This will give you an idea of whether your network is performing as it should or if there are any discrepancies that may require further investigation or troubleshooting.
Step 6: Consider multiple tests: To obtain a more accurate assessment of your network’s performance, consider running multiple speed tests at different times throughout the day. This helps account for variations in network traffic and provides a better understanding of your network’s average speed and performance levels.
Step 7: Analyze the results: Analyze the test results and pay attention to the download speed, upload speed, and ping. Compare the results to your expected speeds, and if there are significant deviations or consistently lower speeds, consider reaching out to your ISP for further assistance or troubleshooting.
Step 8: Optimize your network: If you notice lower-than-expected speeds or inconsistent performance, consider optimizing your network. This can include upgrading your network equipment, such as your router or modem, adjusting network settings, or repositioning devices to reduce interference and optimize signal strength.
By following these steps and regularly testing the speed and performance of your Ethernet network, you can effectively monitor its health, identify any potential issues, and take appropriate actions to ensure optimal performance and a seamless browsing experience.
Best Practices for Managing Ethernet Cables
Proper management of Ethernet cables is crucial for maintaining a well-organized and efficient network environment. By following best practices for managing Ethernet cables, you can minimize signal interference, reduce the risk of cable damage, and simplify troubleshooting and maintenance. Here are some key practices to consider:
1. Use cable management solutions: Invest in cable management solutions such as cable trays, raceways, or cable ties to keep your Ethernet cables organized and neatly routed. This helps prevent cable tangling, reduces the risk of accidental disconnections, and makes it easier to locate and trace specific cables when needed.
2. Label cables: Labeling Ethernet cables is beneficial, particularly in larger network setups. Use color-coded labels or tags to identify different cables, such as those connecting specific devices, specific switch ports, or cables running to different rooms or locations. This makes it easier to troubleshoot, perform maintenance, or manage network changes.
3. Avoid bending or twisting cables: Ethernet cables have a bend radius and are susceptible to damage if bent or twisted beyond their specifications. Avoid sharp bends or kinks in the cables and ensure they follow gentle curves when routing. Excessive bending or twisting can cause signal loss, interference, or even breakage, impacting the network performance.
4. Maintain cable length: Use the appropriate length of Ethernet cable for your network setup. Excessively long cables can result in increased signal degradation, while cables that are too short may restrict flexibility in device placement. Measure and cut cables to the appropriate length to minimize cable clutter and promote efficient cable management.
5. Avoid running cables near sources of interference: Keep Ethernet cables away from sources of potential interference, such as power cables, fluorescent lights, or other electrical equipment. These sources can introduce electromagnetic interference (EMI) and degrade the signal quality of Ethernet connections. Maintaining a separation between the Ethernet cables and potential EMI sources helps ensure optimal network performance.
6. Regularly inspect and replace damaged cables: Perform routine inspections of your Ethernet cables to identify any signs of wear, damage, or fraying. Damaged cables can negatively impact network performance and pose a safety risk. Replace any cables that show signs of damage or degradation to maintain a reliable and secure network connection.
7. Test cables and connections: Periodically test your Ethernet cables and connections to ensure they are functioning properly. Use cable testers or network diagnostic tools to check for continuity, cable integrity, and proper termination. Identifying and addressing any cable or connection issues promptly can help maintain optimal network performance.
8. Document and update cable configurations: Keep accurate records of your cable configurations and any changes made to the network setup. Documenting and updating cable layouts, connections, and labeling schemes can save time during troubleshooting, upgrades, or network expansions. It also assists in maintaining consistency and reduces the risk of errors or misconfigurations.
By implementing these best practices for managing Ethernet cables, you can ensure a well-organized and reliable network environment, minimizing potential issues and simplifying network maintenance and troubleshooting.
Ethernet vs Wi-Fi: Which is the Better Option?
Choosing between Ethernet and Wi-Fi for your network depends on various factors such as speed, reliability, security, and convenience. Both options have their advantages and disadvantages, and the better option ultimately depends on your specific needs and circumstances. Let’s compare Ethernet and Wi-Fi to help you make an informed decision.
Ethernet:
Ethernet offers several advantages that make it the preferred choice for many network setups:
Speed and reliability: Ethernet generally provides faster and more reliable network speeds compared to Wi-Fi. It offers consistent, low-latency connections, making it ideal for activities that require high bandwidth, such as data-intensive tasks, online gaming, or streaming 4K content.
Security: Ethernet connections are typically more secure than Wi-Fi because network access is physically limited to devices connected via cables. It is less susceptible to unauthorized access or interference from nearby devices and has lower vulnerability to hacking or signal interception.
Convenience in certain situations: Ethernet is generally preferred for stationary devices like desktop computers, game consoles, or media servers that don’t require frequent mobility. It provides a reliable and continuous connection without the need for additional authentication procedures or signal dropouts.
Wi-Fi:
Wi-Fi has become increasingly popular due to its convenience and flexibility:
Wireless mobility: Wi-Fi enables users to connect multiple devices to a network without the need for physical cables. This makes it suitable for mobile devices like smartphones, laptops, or tablets, allowing freedom of movement within the network’s range.
Easy network expansion: Unlike Ethernet, Wi-Fi allows for easy network expansion by adding more wireless access points or extenders. This flexibility is particularly beneficial in larger homes or offices where running Ethernet cables may be difficult or impractical.
Initial setup and convenience: Wi-Fi networks provide a hassle-free setup, requiring minimal cabling and allowing quick connections. The convenience of accessing the network from anywhere within the coverage area eliminates the need for physical connections and provides greater flexibility.
Summary:
Ultimately, Ethernet is the better option for stationary devices that require fast and reliable connections, such as gaming consoles, desktop computers, or media servers. It offers superior security and speed, making it ideal for data-intensive activities. On the other hand, Wi-Fi is more suitable for mobile devices, promotes wireless mobility, and allows for easy network expansion.
When deciding between Ethernet and Wi-Fi, consider your specific needs, the devices you use, the network environment, and the importance of factors like security, speed, and convenience. In some cases, a combination of both Ethernet and Wi-Fi may provide the best solution by leveraging their respective benefits in different areas of your network.
How to Connect Multiple Devices to Ethernet
Connecting multiple devices to Ethernet allows for faster and more reliable network connections, especially for activities that require high bandwidth. Whether you have a home or office network, connecting multiple devices to Ethernet is a straightforward process. Here’s a step-by-step guide to help you connect multiple devices to Ethernet.
Step 1: Set up an Ethernet switch or router: Ensure you have an Ethernet switch or router with enough available ports to accommodate the number of devices you want to connect. Locate a suitable spot where it’s easily accessible and has proper ventilation.
Step 2: Connect the Ethernet switch or router to your modem: Use an Ethernet cable to connect one end to the LAN (Ethernet) port of your modem and the other end to the WAN (Internet) port of your switch or router. This establishes the internet connection for all devices connected to the switch or router.
Step 3: Choose Ethernet cables: Select Ethernet cables of suitable length to connect each device to the Ethernet switch or router. Measure the distance between the devices and the switch/router and add a little extra length for flexibility.
Step 4: Connect devices to the switch or router: Connect one end of an Ethernet cable to an available port on the switch or router, and the other end to the Ethernet port of the device you want to connect. Repeat this step for each device you want to connect.
Step 5: Power on the switch or router: Plug in the switch or router to a power source and ensure it is powered on. Allow it a few moments to boot up and establish connections with the connected devices.
Step 6: Configure network settings (if necessary): In most cases, devices will automatically obtain network settings through DHCP. However, if required, configure the network settings manually on each device to ensure they are on the same network and can communicate with each other.
Step 7: Test the network connections: After connecting all devices, test the network connections by accessing the internet, transferring files between devices, or accessing shared network resources. Check that each device has a stable and reliable connection.
Step 8: Troubleshoot connection issues (if necessary): If you encounter any connectivity issues or devices are not recognizing the network, ensure that cables are securely connected and that the devices have proper network drivers. Restart devices if needed and check the switch or router settings for any potential misconfigurations.
By following these steps, you can easily connect multiple devices to Ethernet and enjoy fast and reliable connections across your network. Ethernet provides stable and secure connections, making it suitable for devices that require high-speed data transfer, online gaming, streaming, or other bandwidth-intensive activities.
Ethernet Cable Management Solutions
Proper cable management is essential for maintaining a tidy and organized network environment. With numerous Ethernet cables running between devices, it’s important to ensure they are well-organized, easily accessible, and protected from damage. Here are some Ethernet cable management solutions to help you achieve an efficient and clutter-free network setup.
Cable trays: Cable trays are commonly used in professional network installations. These metal or plastic trays mount to walls or ceilings and provide a platform for routing and organizing Ethernet cables. Cable trays keep cables elevated and separate, reducing the risk of tangling or accidental damage. They also allow for easy access during maintenance or troubleshooting.
Raceways: Raceways are plastic or metal channels that attach to walls, baseboards, or ceilings, providing an enclosed pathway for Ethernet cables. They keep cables neatly hidden and protected, improving the overall aesthetics of your network setup. Raceways are available in various sizes and configurations to accommodate different numbers of cables.
Cable ties and organizers: Cable ties are a simple yet effective solution for bundling and securing Ethernet cables together. They help maintain cable organization and prevent tangling. Velcro cable ties are particularly useful as they can be easily repositioned or undone when cable changes or additions are necessary. Cable organizers provide dedicated slots or hooks to hold Ethernet cables in place, keeping them neat and preventing them from slipping or becoming tangled.
Cable labels and tags: One of the most crucial aspects of cable management is proper labeling. Use color-coded labels or tags to identify different cables, such as those connecting specific devices, specific switch ports, or cables running to different rooms or locations. This makes it easier to trace cables, troubleshoot issues, or perform maintenance without confusion or unnecessary cable manipulation.
Rack-mount solutions: For larger network installations, rack-mount solutions provide a professional and organized approach to cable management. Rack-mount patch panels allow you to terminate and manage Ethernet connections within a server rack. Cable management arms and horizontal cable managers route and organize cables neatly within the rack, minimizing clutter and facilitating airflow for better equipment cooling.
Desk grommets and under-desk cable trays: For home or office setups, desk grommets are useful for managing Ethernet cables that run from desk-level devices to the floor or network equipment. They provide a hole or opening in the desk surface for routing cables, keeping them organized and preventing them from tangling or cluttering the workspace. Under-desk cable trays mount to the underside of desks, providing a hidden pathway for routing cables and keeping them out of sight.
Cable combs and clips: Cable combs and clips help maintain cable organization by aligning and separating Ethernet cables at regular intervals. Combs have multiple slots that hold cables parallel, while clips fasten cables to surfaces, such as walls or desks. These solutions reduce cable strain and tangling, making it easier to identify and trace specific cables when needed.
By implementing these Ethernet cable management solutions, you can enhance the organization and aesthetics of your network setup. Proper cable management not only improves the overall efficiency of your network but also simplifies maintenance, troubleshooting, and future network expansion.
What to Consider When Buying Ethernet Switches
Ethernet switches play a crucial role in network connectivity, providing the ability to expand the number of wired connections and improve network performance. When buying Ethernet switches, it’s important to consider several factors to ensure you select the most suitable switch for your network requirements. Here are some key considerations to keep in mind:
Port count and type: Determine the number of ports you need on the Ethernet switch. Consider both the current and future network requirements, such as the number of devices you plan to connect. Additionally, determine whether you need Gigabit Ethernet ports for higher-speed connections or if Fast Ethernet ports are sufficient for your network needs.
Network speed and performance: Assess the speed and performance capabilities of the Ethernet switch. Look for switches that support the desired data transfer rates, such as Gigabit or 10-Gigabit speeds, to accommodate the needs of your network. Consider any specific requirements, such as high bandwidth for data-intensive applications or low-latency for real-time communication.
Switching capacity and throughput: Consider the switching capacity and throughput of the Ethernet switch. The switching capacity indicates the maximum data the switch can handle at any given time, while throughput represents the actual amount of data the switch can process. Higher switching capacity and throughput ensure that the switch can handle heavy network traffic without experiencing bottlenecks.
Manageability: Decide whether you need a managed or unmanaged Ethernet switch. Unmanaged switches are simple to set up and use, requiring minimal configuration. They are ideal for basic network setups. Managed switches offer more advanced features, such as VLAN configuration, traffic prioritization, and remote management capabilities. Managed switches are suitable for larger networks that require greater control and customization.
Power over Ethernet (PoE) support: Determine whether you need Power over Ethernet functionality in your switch. PoE allows power and data to be transmitted over the Ethernet cable, eliminating the need for separate power supplies for devices such as IP cameras, wireless access points, or VoIP phones. If you have PoE-enabled devices, ensure the switch supports the appropriate PoE standard (e.g., PoE, PoE+, or PoE++) and supplies sufficient power to all connected devices.
Quality of Service (QoS) support: Consider whether the Ethernet switch supports Quality of Service features. QoS allows you to prioritize traffic and assign bandwidth to specific applications, ensuring critical data, such as video conferencing or VoIP calls, receives consistent performance. If your network requires real-time or latency-sensitive applications, QoS support on the switch is crucial.
Reliability and durability: Evaluate the reliability and durability of the Ethernet switch. Look for switches from reputable manufacturers known for producing reliable and durable networking equipment. Consider factors like build quality, cooling mechanisms to prevent overheating, and the availability of warranties or support services.
Scalability and future-proofing: Anticipate future network expansion when selecting an Ethernet switch. Assess the scalability options, such as the ability to stack switches to create larger virtual switches or the availability of additional module slots for expansion. Additionally, consider the switch’s compatibility with emerging technologies and future network advancements to ensure long-term viability.
By considering these factors when buying Ethernet switches, you can select the most suitable switch that meets your network requirements and provides the performance, manageability, and scalability needed for a reliable and efficient network infrastructure.
How to Extend Ethernet Network Range
Extending the range of your Ethernet network can be beneficial in situations where you need to connect devices that are physically distant from your network equipment. Fortunately, there are several methods you can use to extend the range of your Ethernet network. Here are some steps you can follow to accomplish this:
Method 1: Use Ethernet Extenders: Ethernet extenders are devices that extend the reach of Ethernet connections beyond the typical distance limitations. These devices extend the Ethernet signal using existing copper wiring, such as telephone lines or coaxial cables, allowing you to connect devices to your network at longer distances. Simply connect one Ethernet extender near your network equipment and another extender near the desired remote device, using the existing wiring infrastructure.
Method 2: Implement Powerline Adapters: Powerline adapters use your existing electrical wiring to transmit Ethernet signals throughout your home or office. These adapters typically come in pairs, with one adapter connecting to your router or network switch and being plugged into an electrical outlet, and the other adapter being plugged in near the remote device you want to connect. This provides a seamless Ethernet connection over your electrical wiring, effectively extending the network range.
Method 3: Utilize Wireless Bridges: Wireless bridges can extend the range of your Ethernet network by wirelessly connecting remote devices to your existing network. These devices receive the wireless signal from your router or access point, and then convert it back into Ethernet to provide a wired connection for devices in the remote location. Set up a wireless bridge by connecting one end to your router or network switch and the other end near the devices you want to connect.
Method 4: Install Additional Network Switches: If you have a large physical space or multiple rooms that require Ethernet connectivity, consider installing additional network switches strategically. Connect these switches to your main router or switch using Ethernet cables, and then connect the devices in each location to the corresponding switch. This method extends the range by physically extending the network infrastructure to reach remote devices.
Method 5: Deploy Wireless Access Points: If extending your Ethernet cables or using additional switches is not feasible, deploying wireless access points can provide an alternative solution. Wireless access points connect to your main router or switch via Ethernet and create a wireless network in the remote area, allowing devices to connect wirelessly while still being part of your Ethernet network. This method is effective for extending the range without the need for additional cabling.
Note: When extending your Ethernet network range, it’s important to ensure that the extended connections maintain adequate speed and performance. Factors such as the quality of wiring, signal interference, and the number of devices connected can impact the network’s overall performance. Regularly test the extended connections to verify their reliability and make necessary adjustments to optimize performance.
By following these methods, you can easily extend the range of your Ethernet network and connect devices that are located farther away from your network equipment, expanding the capabilities and coverage of your network infrastructure.