
Materials Needed
Creating your own DIY phone projector is an exciting and rewarding project that can elevate your movie nights and presentations to a whole new level. To embark on this creative endeavor, you will need a few essential materials to bring your vision to life. Here’s a list of the items you’ll need to get started:
- A sturdy cardboard box: Select a box that is large enough to accommodate your smartphone and the lens, while also providing ample space for light to pass through.
- A magnifying glass or a fresnel lens: This will serve as the projector lens, focusing and enlarging the images from your smartphone onto the viewing surface.
- A utility knife or scissors: These tools will be essential for cutting and shaping the cardboard to create the projector’s structure and components.
- A ruler and a pencil: These will help you measure and mark the precise dimensions for cutting and assembling the various parts of the projector.
- Strong adhesive or glue: You’ll need a reliable adhesive to securely join the different components of the projector together.
- Black electrical tape: This will be used to block out any stray light and create a dark, light-sealed environment within the projector.
- A protractor or angle measuring tool: This will aid in accurately positioning the lens and smartphone holder for optimal projection.
- A smartphone: Any modern smartphone with a clear and bright display will work perfectly for this DIY project.
- Optional: A small tripod or stand for your smartphone to ensure stability during projection.
By gathering these materials, you’ll be well-prepared to start constructing your very own DIY phone projector. Each item plays a crucial role in the creation and functionality of the projector, and when combined with your creativity and ingenuity, they will pave the way for an impressive and enjoyable viewing experience.
Step 1: Assembling the Box
As you begin your DIY phone projector project, the first step is to assemble the cardboard box that will form the main body of the projector. This box will serve as the framework for housing the lens, holding the smartphone, and directing the projected image. Follow these detailed instructions to construct the box:
- Prepare the box: Choose a sturdy cardboard box that is large enough to accommodate your smartphone and the lens with some extra space around them. Remove any existing flaps or openings from the box, leaving it open on one side. This open side will be the projector’s viewing window.
- Measure and mark: Using a ruler and pencil, carefully measure and mark the dimensions for the smartphone opening on one side of the box. Ensure that the opening is centered and aligned with the middle of the box’s viewing window.
- Cut the smartphone opening: With the help of a utility knife or scissors, cut out the marked smartphone opening on the side of the box. Take your time and use caution to create a neat and precise cut.
- Create a support stand: On the opposite side of the box, fashion a simple stand using cardboard pieces to support the smartphone from behind. This stand will hold the smartphone at the correct distance and angle for projection.
- Secure the lens opening: On the side opposite the smartphone opening, measure and cut out a hole for the lens. This hole should be the same diameter as the lens, allowing it to fit snugly and remain in place.
- Seal light leaks: Use black electrical tape to cover any gaps or seams in the box, ensuring that no external light enters the interior, which could interfere with the projected image.
Once you have completed these steps, you will have successfully assembled the basic structure of the projector box. This foundational component sets the stage for the subsequent steps in creating your DIY phone projector, bringing you one step closer to enjoying the magic of projected images from your smartphone.
Step 2: Creating the Lens Holder
With the projector box assembled, the next crucial step in your DIY phone projector project is creating a secure and adjustable holder for the lens. This component is essential for positioning the lens at the correct distance and angle to ensure clear and focused projection. Follow these detailed instructions to craft the lens holder:
- Measure the lens: Begin by measuring the diameter and depth of the lens to determine the dimensions needed for the holder. This will ensure a snug fit for the lens and prevent any movement or misalignment during use.
- Cut the holder pieces: Using sturdy cardboard, cut out two identical rectangular pieces that will form the main body of the lens holder. These pieces should be wide enough to support the lens and long enough to extend beyond the edges of the lens for stability.
- Create the support arms: Cut two additional cardboard pieces to serve as support arms for the lens holder. These arms will attach to the main body of the holder and provide a means for adjusting the lens position.
- Assemble the holder: Using strong adhesive or glue, attach the support arms to the main body of the lens holder, forming a secure and adjustable frame for the lens. Ensure that the lens fits comfortably and securely within the holder.
- Add angle adjustment: To enable angle adjustment for the lens, attach a protractor or angle measuring tool to the holder, allowing you to precisely position the lens for optimal projection.
- Test the fit: Before proceeding, test the fit of the lens within the holder and make any necessary adjustments to ensure a secure and stable placement.
Upon completing these steps, you will have successfully crafted a sturdy and adjustable holder for the lens, a pivotal component of your DIY phone projector. This holder will play a crucial role in directing and focusing the projected image, setting the stage for the next steps in bringing your projector to life.
Step 3: Attaching the Lens
With the lens holder in place, the next step in creating your DIY phone projector is to securely attach the lens to the holder. This process is crucial for ensuring that the lens is properly aligned and positioned to effectively project images from your smartphone onto the viewing surface. Follow these detailed instructions to attach the lens:
- Apply adhesive: Place a small amount of strong adhesive or glue around the edge of the lens where it will come into contact with the holder. Use caution to apply the adhesive evenly and avoid excess that could obstruct the lens’s functionality.
- Position the lens: Carefully place the lens into the designated space within the holder, ensuring that it fits securely and snugly. Take your time to align the lens properly, as its positioning will directly impact the quality of the projected image.
- Press and hold: Gently press the lens into the adhesive and hold it in place for the recommended time specified by the adhesive manufacturer. This will allow the adhesive to bond the lens securely to the holder.
- Check for alignment: After the adhesive has set, inspect the alignment and position of the lens within the holder. Ensure that it is centered and level, as any misalignment could result in a distorted or unfocused projection.
- Reinforce if necessary: If the lens does not feel adequately secure, consider applying additional adhesive or using a reinforcing material, such as tape, to further stabilize the lens within the holder.
By following these steps, you will have successfully attached the lens to the holder, a pivotal milestone in the construction of your DIY phone projector. The securely positioned lens sets the stage for the next phase of the project, bringing you closer to experiencing the magic of projected images from your smartphone.
Step 4: Making the Smartphone Holder
As you progress with your DIY phone projector project, creating a stable and adjustable holder for your smartphone is essential to ensure precise positioning and optimal projection. The smartphone holder will securely support your device and allow for easy adjustments to achieve the desired image alignment. Follow these detailed instructions to craft the smartphone holder:
- Measure the smartphone: Begin by measuring the dimensions of your smartphone to determine the size and shape of the holder needed to accommodate it securely. Consider the width, length, and thickness of your device in your measurements.
- Cut the holder pieces: Using sturdy cardboard, cut out two identical pieces that will form the main body of the smartphone holder. These pieces should be wide enough to support the smartphone and long enough to provide stability and adjustability.
- Create the support arms: Cut two additional cardboard pieces to serve as support arms for the smartphone holder. These arms will attach to the main body of the holder and provide a means for adjusting the smartphone’s position.
- Assemble the holder: Using strong adhesive or glue, attach the support arms to the main body of the smartphone holder, forming a secure and adjustable frame for the device. Ensure that the smartphone fits comfortably and securely within the holder.
- Add angle adjustment: To enable angle adjustment for the smartphone, attach a small hinge or a similar mechanism to the holder, allowing you to adjust the angle of the smartphone for optimal projection.
- Test the fit: Before proceeding, test the fit of the smartphone within the holder and make any necessary adjustments to ensure a secure and stable placement that allows for easy adjustments.
By following these steps, you will have successfully crafted a sturdy and adjustable holder for your smartphone, a critical component of your DIY phone projector. This holder will play a pivotal role in positioning your smartphone for seamless and precise projection, bringing you one step closer to enjoying the magic of projected images from your device.
Step 5: Testing and Adjusting the Projector
With the key components of your DIY phone projector in place, it’s time to test the functionality and make any necessary adjustments to ensure optimal performance. This crucial step will allow you to fine-tune the projector’s setup and settings, ensuring that it delivers clear and focused images from your smartphone onto the viewing surface. Follow these detailed instructions to test and adjust your DIY phone projector:
- Set up the projector: Position the projector on a stable surface, ensuring that it is level and free from any obstructions that could interfere with the projected image.
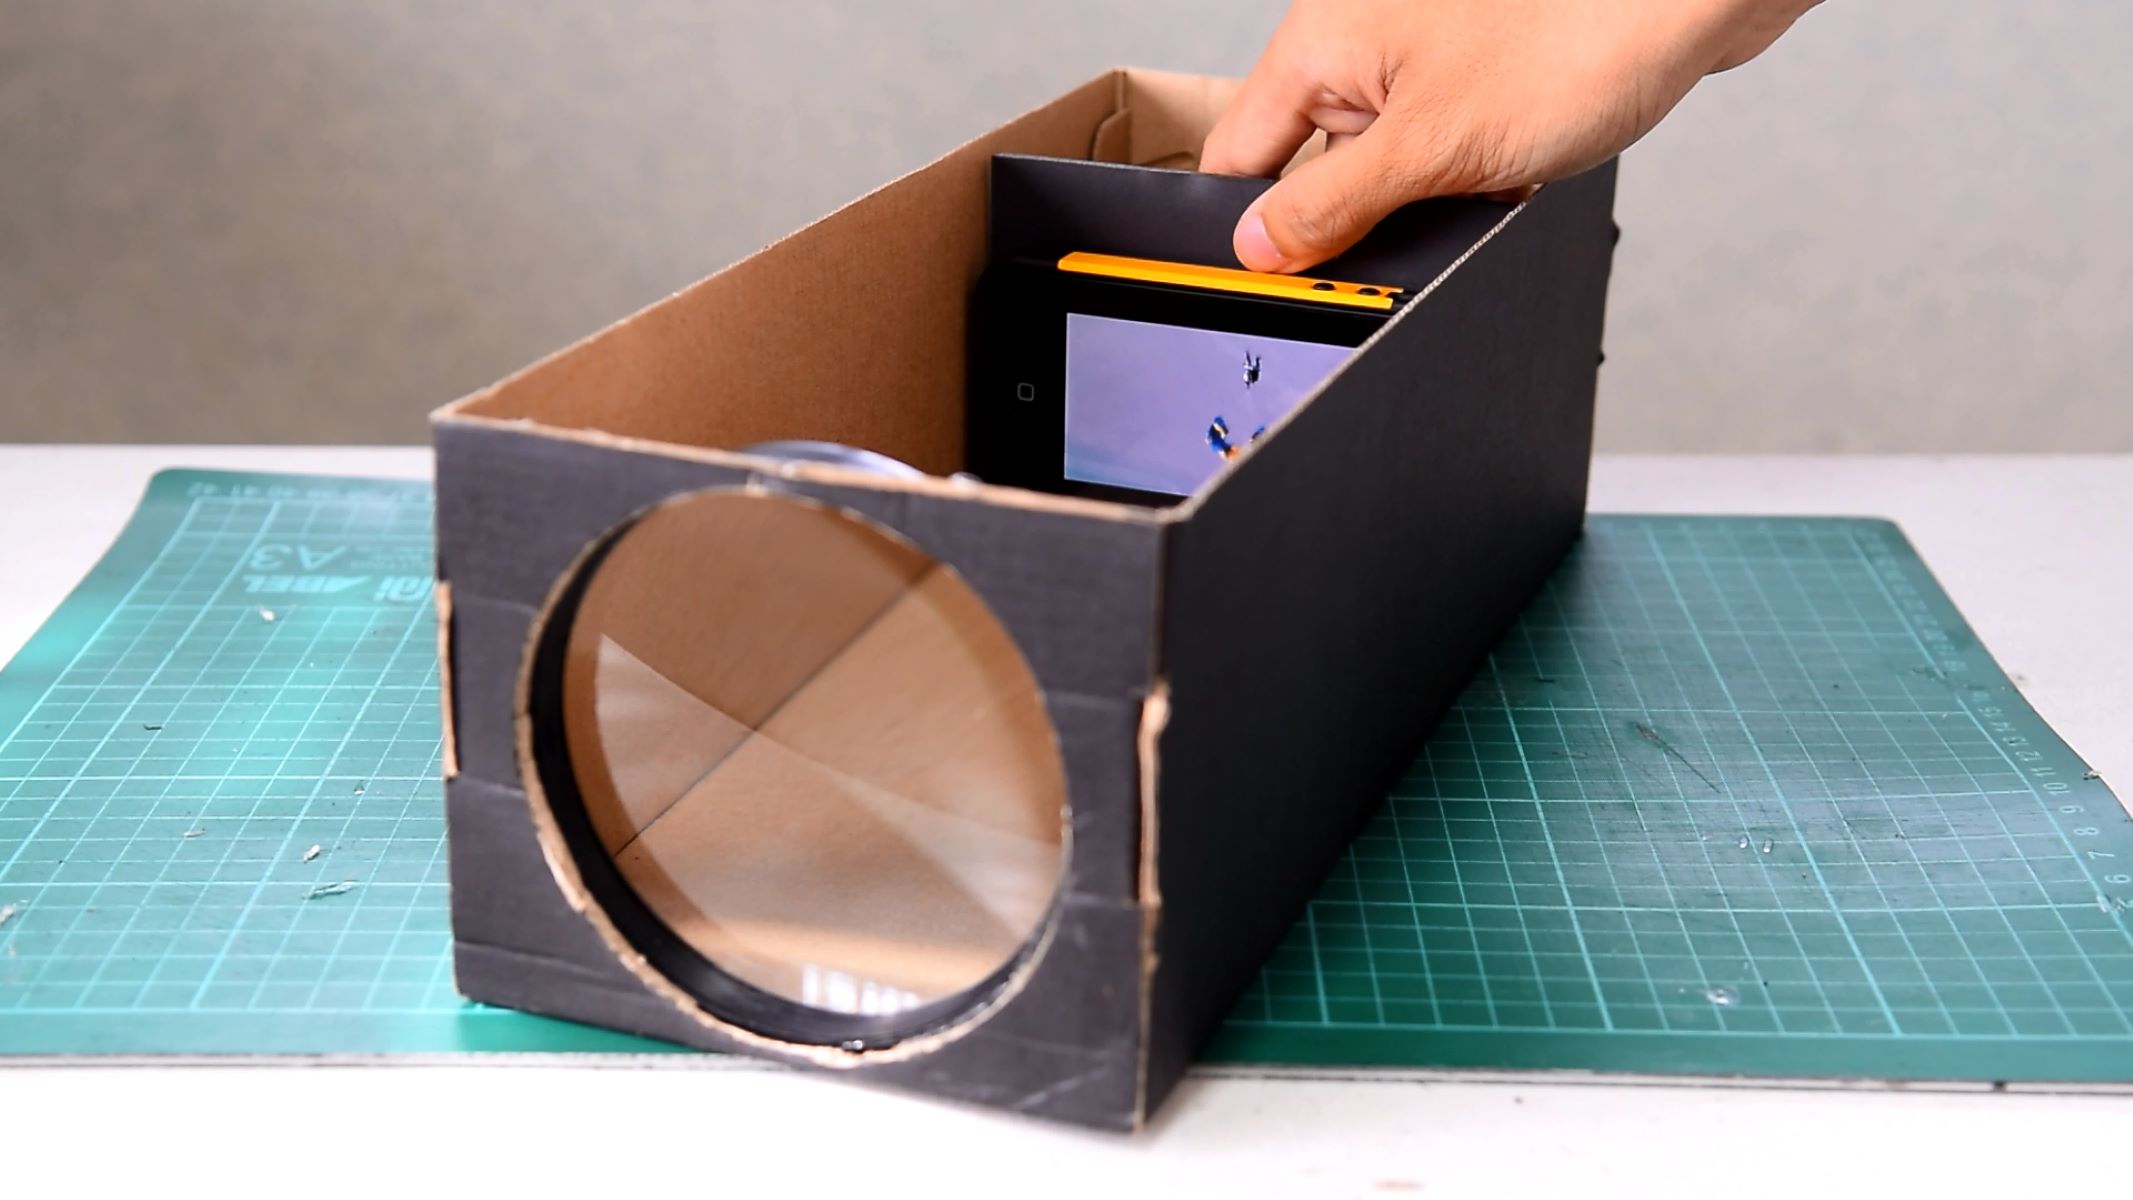
- Place the smartphone: Insert your smartphone into the designated holder, ensuring that it is securely positioned and aligned with the lens for projection.
- Adjust the lens position: Use the adjustable lens holder to fine-tune the position and angle of the lens, aiming for a clear and focused image on the viewing surface. Make gradual adjustments until the projected image appears sharp and well-defined.
- Check for image clarity: Activate a video or image on your smartphone and project it onto a flat, light-colored surface. Assess the clarity and focus of the projected image, making note of any areas that require further adjustment.
- Optimize the smartphone settings: Adjust the brightness, contrast, and orientation settings on your smartphone to enhance the quality of the projected image. Experiment with different settings to achieve the best results for projection.
- Test in various lighting conditions: Evaluate the projector’s performance in different lighting environments, including dim and well-lit settings, to gauge its versatility and adaptability to varying conditions.
- Make necessary adjustments: Based on your testing, make any required modifications to the projector’s components, smartphone positioning, or settings to optimize the quality and clarity of the projected image.
By diligently testing and adjusting your DIY phone projector, you will refine its setup and performance, ensuring that it delivers impressive and captivating projected images from your smartphone. This final step brings you closer to enjoying the immersive and cinematic experience of your own homemade projector.
Tips for Improving Your DIY Phone Projector
As you delve into the world of DIY phone projectors, there are several valuable tips and insights that can enhance the functionality and performance of your homemade projector. These tips are designed to help you optimize the projection quality, troubleshoot common issues, and elevate your overall viewing experience. Consider the following suggestions for improving your DIY phone projector:
- Opt for a high-quality lens: Investing in a high-quality magnifying glass or fresnel lens can significantly enhance the clarity and sharpness of the projected images. Look for a lens with minimal distortion and excellent light transmission for superior projection results.
- Maximize smartphone brightness: Adjust your smartphone’s brightness settings to the highest level when using it with the projector. A brighter screen will contribute to a more vibrant and impactful projected image, especially in dimly lit environments.
- Ensure precise lens positioning: Take the time to accurately position and align the lens within the holder, as even minor misalignments can affect the quality and focus of the projected image. Use a protractor or angle measuring tool for precision.
- Explore projection surfaces: Experiment with different projection surfaces, such as white walls, projector screens, or specialized reflective materials, to find the optimal surface that yields the best image quality and brightness.
- Minimize ambient light: Create a darkened environment for projection by dimming ambient lights and blocking out external light sources. This will enhance the contrast and visibility of the projected images, especially in low-light conditions.
- Utilize a smartphone stand: Consider using a small tripod or stand to stabilize your smartphone during projection, reducing the risk of movement or shaking that can impact the image stability and focus.
- Regularly clean the lens and smartphone screen: Keep the projector lens and your smartphone screen clean and free from dust or smudges to maintain optimal image clarity and sharpness during projection.
- Experiment with distance and focus: Adjust the distance between the smartphone and the lens, as well as the focus settings on your smartphone’s camera app, to find the ideal combination for achieving sharp and well-defined projected images.
By implementing these tips, you can refine and enhance the performance of your DIY phone projector, unlocking its full potential for delivering impressive and immersive projected images from your smartphone. Embrace these insights as you fine-tune your projector setup and elevate your viewing experiences.