
Reasons for Deleting All Contacts on iPhone 13
There are various reasons why you might consider deleting all contacts on your iPhone 13. While it may seem counterintuitive to remove all your contacts, there are situations where it can be a practical and necessary step. Here are some compelling reasons for doing so:
-
Starting Fresh: Over time, your contact list can become cluttered with outdated or irrelevant information. Deleting all contacts allows you to start with a clean slate, ensuring that your address book only contains current and meaningful connections.
-
Privacy and Security: In today's digital age, privacy and security are paramount. If you have concerns about the security of your contacts or suspect that your address book may have been compromised, deleting all contacts can provide peace of mind and mitigate potential risks.
-
Organizational Overhaul: As life evolves, so do our social and professional circles. Periodically clearing out your contacts can help you reorganize and streamline your address book, making it easier to locate and communicate with the individuals who matter most.
-
Syncing and Data Management: In some cases, contacts may not sync correctly across devices, leading to discrepancies and confusion. Deleting all contacts and re-syncing from a reliable source can resolve syncing issues and ensure that your contacts are consistent across all your devices.
-
Resolving Technical Glitches: Occasionally, technical glitches or software bugs can affect the performance of your contacts app. Deleting all contacts and re-populating the list can help troubleshoot and resolve any underlying technical issues.
-
Transitioning to a New Device: When upgrading to a new iPhone or switching to a different platform, such as Android, you may want to clear your contacts on the old device to prevent duplicate entries and ensure a seamless transition to the new device.
By understanding the reasons for deleting all contacts on your iPhone 13, you can make an informed decision based on your specific needs and circumstances. Whether it's for privacy, organization, or technical optimization, the process of clearing your contacts can lead to a more streamlined and secure digital experience.
How to Backup Contacts Before Deleting Them
Before embarking on the process of deleting all contacts on your iPhone 13, it's crucial to safeguard your valuable contact information through a comprehensive backup. By creating a backup, you can preserve your contacts and ensure that you have a safety net in case of accidental deletion or data loss. Here's how you can effectively backup your contacts before proceeding with the deletion process:
1. iCloud Backup
Apple's iCloud service offers a seamless and reliable method for backing up your contacts. To initiate an iCloud backup:
- Open the "Settings" app on your iPhone 13 and tap on your name at the top of the screen to access your Apple ID settings.
- Select "iCloud" and ensure that the "Contacts" toggle is switched on. This will enable automatic syncing and backup of your contacts to iCloud.
- To manually trigger a backup, navigate to "Settings" > [Your Name] > "iCloud" > "iCloud Backup" and tap "Back Up Now." This will initiate a comprehensive backup of your contacts and other essential data to iCloud.
2. Exporting Contacts to VCF File
Another effective method for backing up your contacts involves exporting them to a VCF (vCard) file, which can be easily imported into various platforms and devices. To export your contacts as a VCF file:
- Open the "Contacts" app on your iPhone 13 and tap on the contact you wish to export.
- Scroll down and select "Share Contact." From the options presented, choose "Share Contact" again to generate a VCF file.
- You can then save the VCF file to a cloud storage service, email it to yourself, or transfer it to a computer for safekeeping.
3. Third-Party Backup Apps
Numerous third-party apps are available on the App Store that specialize in contact backup and management. These apps offer advanced features for exporting, organizing, and securing your contacts. By leveraging a trusted third-party backup app, you can ensure that your contacts are safely backed up and easily accessible for future use.
By following these methods, you can create robust backups of your contacts, providing a layer of protection and peace of mind before proceeding with the deletion process. With your contacts securely backed up, you can confidently move forward with the next steps, knowing that your valuable contact information is safeguarded against any unforeseen circumstances.
Method 1: Deleting All Contacts on iPhone 13 Manually
Manually deleting all contacts on your iPhone 13 can be a straightforward yet meticulous process. While this method may seem time-consuming, it offers a hands-on approach to ensure that every contact is thoroughly removed from your device. Here's a step-by-step guide to manually delete all contacts on your iPhone 13:
-
Open the Contacts App: Begin by launching the "Contacts" app on your iPhone 13. This will grant you access to your entire contact list, displaying all the individuals and organizations stored in your address book.
-
Select All Contacts: Once inside the Contacts app, tap on the "All Contacts" option to display a comprehensive list of all your saved contacts. This step ensures that you have a complete view of your contacts before initiating the deletion process.
-
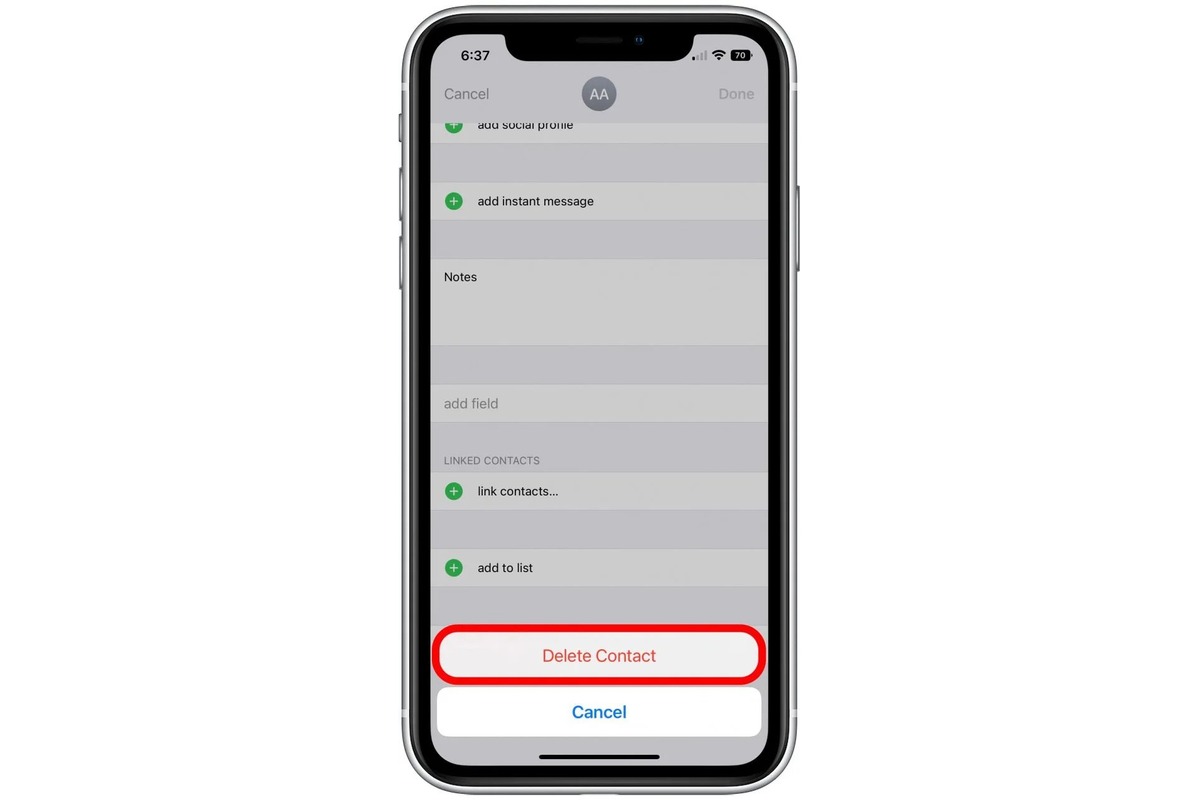
Delete Individual Contacts: While there isn't a direct "Delete All" option for contacts on the iPhone, you can manually delete each contact by tapping on the contact's name to view their details and then selecting the "Edit" option. From there, scroll down and choose "Delete Contact" to remove the individual from your address book. Repeat this process for each contact until all entries have been deleted.
-
Confirm Deletion: As you delete each contact, a confirmation prompt will appear to ensure that you intend to remove the contact. Confirm the deletion to proceed, and the contact will be permanently removed from your iPhone 13.
-
Repeat for All Contacts: It's important to systematically delete each contact to ensure that no entries are overlooked. This meticulous approach guarantees that every contact is thoroughly removed from your device, leaving you with a clean and empty address book.
-
Verify Deletion: After deleting all contacts, take a moment to verify that your address book is empty. This can be done by navigating back to the main Contacts screen and confirming that no contacts are displayed.
By following these steps, you can manually delete all contacts on your iPhone 13, ensuring that your address book is completely cleared. While this method requires patience and attention to detail, it provides a hands-on approach to meticulously removing every contact from your device.
Method 2: Using a Third-Party App to Delete All Contacts on iPhone 13
Utilizing a third-party app to delete all contacts on your iPhone 13 offers a convenient and efficient alternative to the manual deletion method. These apps are designed to streamline the process, allowing you to swiftly clear your entire contact list with minimal effort. Here's a detailed exploration of how you can leverage a third-party app to delete all contacts on your iPhone 13:
Research and Select a Trusted App
Begin by researching and selecting a reputable third-party app from the App Store that specializes in contact management and deletion. Look for apps with positive user reviews, a user-friendly interface, and a track record of reliability. Reading app descriptions and user feedback can provide valuable insights into the app's effectiveness and ease of use.
Install and Launch the App
Once you've identified a suitable app, download and install it on your iPhone 13. Launch the app to familiarize yourself with its features and interface. Many contact management apps offer a range of functionalities beyond contact deletion, such as contact backup, organization, and duplicate removal.
Access Contact Deletion Feature
Navigate to the specific feature or option within the app that allows for the deletion of all contacts. This may be prominently displayed on the app's main interface or located within the settings or management section. Ensure that you carefully review any instructions or prompts provided by the app to avoid unintended data loss.
Confirm Deletion Action
Upon initiating the contact deletion process, the app may prompt you to confirm your decision to delete all contacts. This serves as a safeguard against accidental deletions and provides a final opportunity to reconsider the action. Confirm the deletion as instructed by the app to proceed with clearing your contact list.
Verify Contact Deletion
After the deletion process is complete, take a moment to verify that all contacts have been successfully removed from your iPhone 13. Navigate to the native Contacts app or the app you used for deletion to ensure that your address book is now empty. This step is crucial for confirming that the deletion was executed as intended.
By leveraging a trusted third-party app, you can efficiently delete all contacts on your iPhone 13, streamlining the process and minimizing the manual effort required. These apps offer a user-friendly and intuitive approach to contact management, providing a viable solution for individuals seeking a swift and comprehensive method for clearing their contact list.
Method 3: Using iCloud to Delete All Contacts on iPhone 13
Utilizing iCloud to delete all contacts on your iPhone 13 offers a streamlined and efficient method for managing your address book. iCloud serves as a centralized platform for syncing and managing various types of data, including contacts, across your Apple devices. By leveraging iCloud's capabilities, you can seamlessly remove all contacts from your iPhone 13 with just a few simple steps.
Here's a comprehensive guide on how to use iCloud to delete all contacts on your iPhone 13:
Ensure iCloud Contact Syncing is Enabled
Before initiating the contact deletion process, it's essential to ensure that iCloud contact syncing is enabled on your iPhone 13. This ensures that your contacts are seamlessly backed up to iCloud and remain synchronized across your Apple devices. To confirm iCloud contact syncing:
- Open the "Settings" app on your iPhone 13 and tap on your name at the top of the screen to access your Apple ID settings.
- Select "iCloud" and ensure that the "Contacts" toggle is switched on. This enables automatic syncing and backup of your contacts to iCloud.
Access iCloud on a Web Browser
To delete all contacts using iCloud, you can utilize a web browser on a computer or mobile device to access the iCloud website. Follow these steps to access iCloud:
- Open a web browser and navigate to the iCloud website (www.icloud.com).
- Sign in using your Apple ID and password to access your iCloud account.
Navigate to Contacts
Once logged into iCloud, locate and click on the "Contacts" icon. This will grant you access to your complete list of contacts stored in iCloud.
Select All Contacts
Within the Contacts interface, use the keyboard shortcut "Command + A" on a Mac or "Ctrl + A" on a Windows PC to select all contacts. Alternatively, you can manually select all contacts by clicking and dragging to highlight the entire list.
Delete All Contacts
With all contacts selected, proceed to delete them by clicking on the settings icon (usually represented by a gear or three dots) and selecting the "Delete" option. Confirm the deletion when prompted to remove all selected contacts from iCloud.
Verify Deletion on iPhone 13
After deleting all contacts via iCloud, ensure that the changes are reflected on your iPhone 13. Open the Contacts app on your device to confirm that your address book is now empty, indicating that all contacts have been successfully removed.
By leveraging iCloud's robust syncing and management capabilities, you can efficiently delete all contacts on your iPhone 13, ensuring that your address book is cleared and synchronized across your Apple ecosystem. This method offers a convenient and centralized approach to contact management, aligning with Apple's seamless integration of services and devices.