
Clearing Private Data on Mac
Clearing your private data on your Mac is crucial for maintaining your online privacy and optimizing your device’s performance. By removing unnecessary data such as caches and cookies, you can ensure a smoother browsing experience and protect your sensitive information. Here’s a step-by-step guide on how to clear private data on your Mac.
1. Start by closing all the applications and web browsers that are currently running on your Mac.
2. Open the “Preferences” or “Settings” option in the application or web browser you want to clear the private data from. This can usually be found in the menu bar at the top of the screen.
3. Look for the “Privacy” or “Security & Privacy” tab. Click on it to access the privacy settings.
4. Within the privacy settings, you will find options to clear various types of private data, such as caches, cookies, browsing history, and more.
5. Select the data you want to clear. You can choose to clear all the data or selectively clear specific types of data.
6. Once you have selected the data you want to clear, click on the “Clear” or “Delete” button. This will initiate the process of removing the selected data from your Mac.
7. Depending on the amount of data you have selected to clear, the process may take a few seconds to a few minutes. Be patient and let the process complete.
8. After the process is complete, you can close the settings window and relaunch the application or web browser to see the effects of clearing the private data. You will notice improved performance and a fresh start without any stored data.
Remember to regularly clear your private data on your Mac to maintain optimal performance and protect your privacy. It is recommended to perform this cleaning process periodically, especially if you use your Mac for browsing and accessing sensitive information.
By following these steps, you can easily clear your private data on your Mac and enjoy a faster, more secure browsing experience.
Clearing Web Browser Caches on Mac
Clearing the web browser caches on your Mac is essential for optimizing your browsing experience and freeing up valuable storage space. Caches are temporary files stored by your browser to speed up the loading of webpages you frequently visit. However, over time, these caches can accumulate and slow down your browser. Here’s how to clear the web browser caches on your Mac.
Safari:
1. Open Safari and click on “Safari” in the menu bar at the top of the screen.
2. Select “Preferences” from the dropdown menu.
3. In the Preferences window, click on the “Advanced” tab.
4. Check the box next to “Show Develop menu in menu bar.”
5. Close the Preferences window and click on “Develop” in the menu bar.
6. Select “Empty Caches” from the dropdown menu.
Chrome:
1. Open Chrome and click on the three dots in the top-right corner of the browser window.
2. From the dropdown menu, select “Settings.”
3. Scroll down and click on “Privacy and Security” in the left-hand menu.
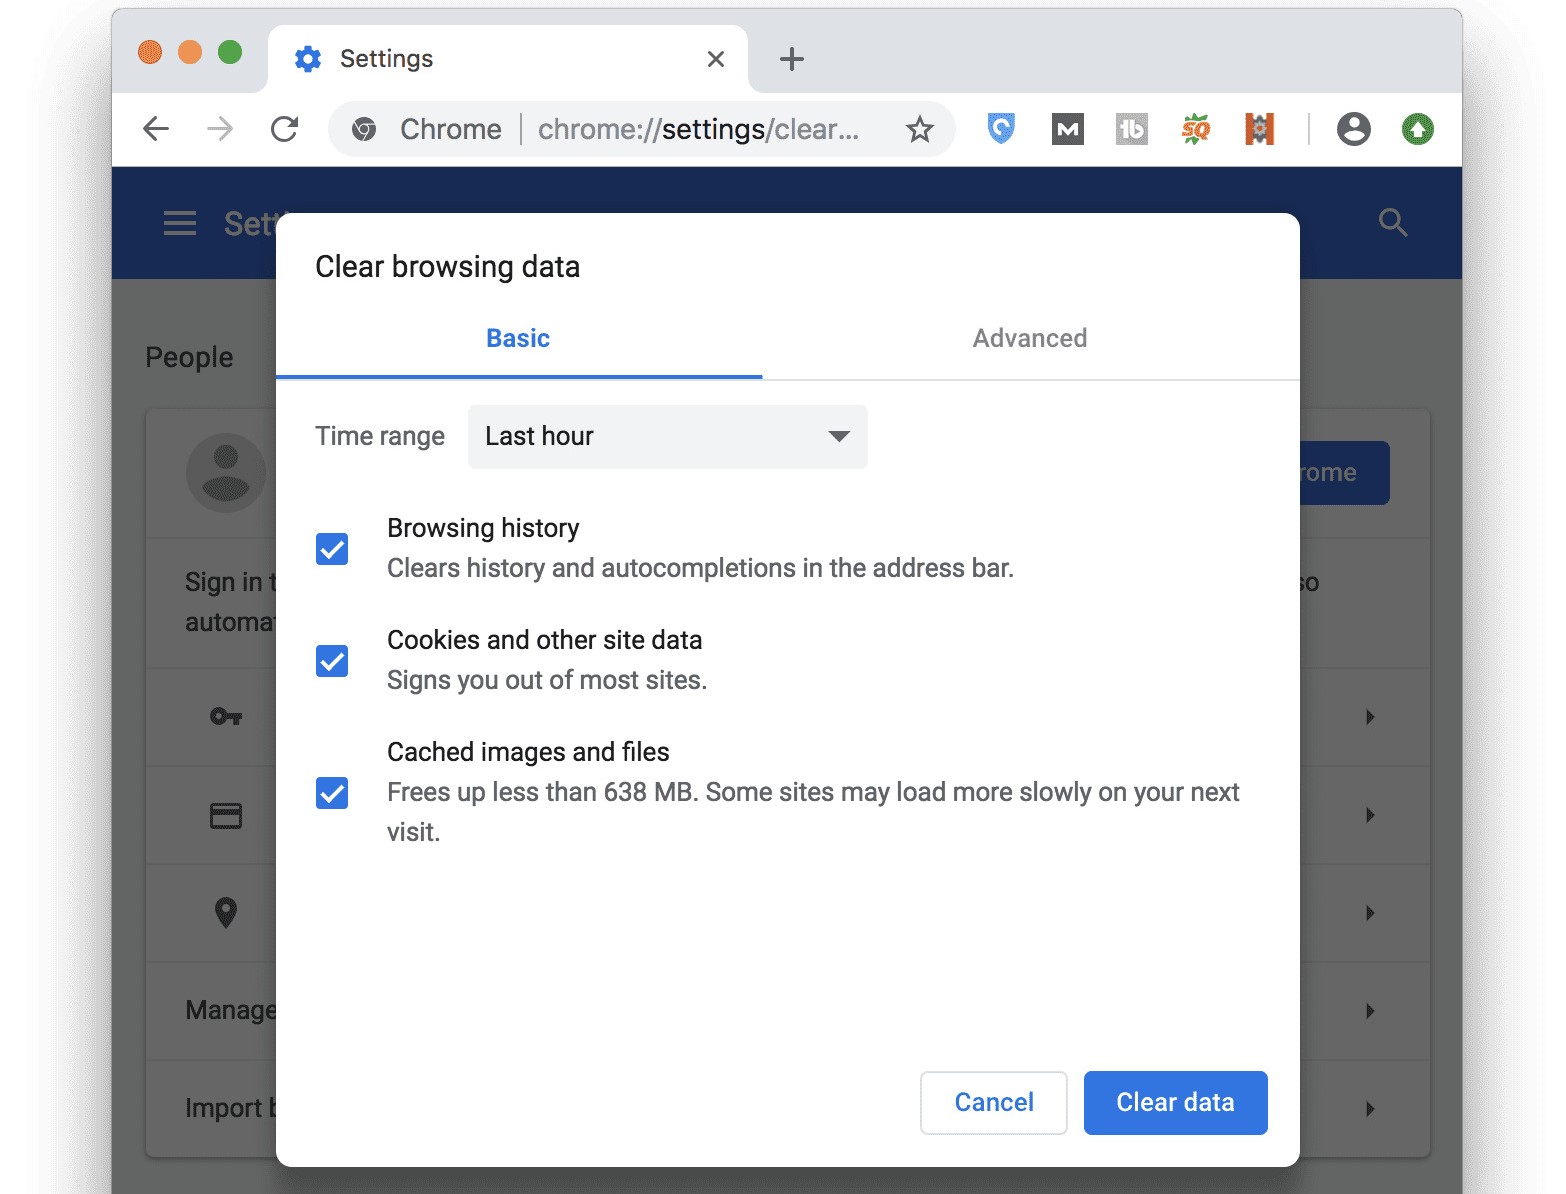
4. Click on “Clear Browsing Data.”
5. In the popup window, select the time range for which you want to clear the caches.
6. Check the box next to “Cached images and files.”
7. Click on the “Clear Data” button.
Firefox:
1. Open Firefox and click on the three horizontal lines in the top-right corner of the browser window.
2. From the dropdown menu, select “Preferences.”
3. In the Preferences window, click on “Privacy & Security” in the left-hand menu.
4. Scroll down to the “Cached Web Content” section.
5. Click on the “Clear Now” button.
By following these steps, you can clear the web browser caches on your Mac and enjoy a faster and more efficient browsing experience. Remember to clear your caches regularly to keep your browser running smoothly and prevent any issues caused by accumulated temporary files.
Clearing Cookies on Mac
Cookies are small files that websites store on your Mac to remember your preferences, login information, and browsing habits. While cookies can be useful, they can also accumulate over time and potentially compromise your privacy. Clearing cookies on your Mac can help protect your personal information and enhance your browsing experience. Here’s how to clear cookies on your Mac.
Safari:
1. Open Safari and click on “Safari” in the menu bar at the top of the screen.
2. Select “Preferences” from the dropdown menu.
3. In the Preferences window, click on the “Privacy” tab.
4. Click on the “Manage Website Data” button.
5. In the Website Data window, click on “Remove All” to delete all cookies, or select specific websites and click on “Remove” to delete cookies from those sites.
Chrome:
1. Open Chrome and click on the three dots in the top-right corner of the browser window.
2. From the dropdown menu, select “Settings.”
3. Scroll down and click on “Privacy and Security” in the left-hand menu.
4. Click on “Clear Browsing Data.”
5. In the popup window, select the time range for which you want to clear cookies.
6. Check the box next to “Cookies and other site data.”
7. Click on the “Clear Data” button.
Firefox:
1. Open Firefox and click on the three horizontal lines in the top-right corner of the browser window.
2. From the dropdown menu, select “Preferences.”
3. In the Preferences window, click on “Privacy & Security” in the left-hand menu.
4. Scroll down to the “Cookies and Site Data” section.
5. Click on the “Clear Data” button.
Opera:
1. Open Opera and click on “Opera” in the menu bar at the top of the screen.
2. Select “Clear Browsing Data” from the dropdown menu.
3. In the popup window, select the time range for which you want to clear cookies.
4. Check the box next to “Cookies and other site data.”
5. Click on the “Clear Data” button.
By clearing cookies on your Mac, you can protect your privacy and remove any stored information that websites may have collected. It’s a good practice to periodically clear cookies to ensure a clean browsing experience and maintain control over your personal data.
Clearing Safari Browser Caches on Mac
Clearing the browser cache in Safari on your Mac is essential for improving browsing performance and resolving issues related to cached data. The browser cache stores temporary files such as website data, images, and scripts, which help to load websites faster on subsequent visits. However, an overloaded cache can slow down Safari and cause various browsing issues. Here’s how to clear the Safari browser cache on your Mac.
Step 1: Open Safari on your Mac by clicking on the Safari icon in the Dock or searching for it in Spotlight.
Step 2: Go to the Safari menu located in the top-left corner of the screen and select “Preferences.”
Step 3: In the Preferences window, click on the “Advanced” tab.
Step 4: Enable the “Show Develop menu in menu bar” option at the bottom.
Step 5: Close the Preferences window and navigate to the menu bar. Click on the “Develop” menu.
Step 6: From the dropdown menu, select “Empty Caches.” This action will clear the cache stored by Safari.
Step 7: Wait for the process to complete, which may take a few seconds. Once finished, Safari’s cache will be cleared, and you’ll notice a boost in browsing speed.
It is worth noting that clearing the cache will remove saved website data, such as login information and preferences. However, it won’t affect other browsing history or bookmarks. Additionally, clearing the cache can fix certain issues, such as websites not loading correctly, outdated content, or unresponsive browsing behavior.
Regularly clearing the Safari browser cache on your Mac is recommended to optimize performance and ensure a smooth browsing experience. By periodically removing outdated and unnecessary cache files, you can keep Safari running efficiently and enjoy a faster browsing experience.
Clearing Safari Cookies on Mac
Clearing cookies in Safari on your Mac is crucial for maintaining your online privacy and managing the stored data by websites you visit. Cookies are small files that websites use to track your activities, remember your preferences, and store login information. However, over time, an accumulation of cookies can compromise your privacy and even lead to browsing issues. Here’s how to clear Safari cookies on your Mac.
Step 1: Launch Safari on your Mac by clicking on the Safari icon in the Dock or searching for it in Spotlight.
Step 2: In the top menu bar, click on “Safari” and select “Preferences” from the dropdown menu.
Step 3: In the Preferences window, navigate to the “Privacy” tab.
Step 4: Click on the “Manage Website Data…” button.
Step 5: A list of websites with stored cookies will appear. You can use the search bar to find specific websites or scroll through the list.
Step 6: To remove cookies for a particular website, select it from the list and click on the “Remove” button. You can also use the “Remove All” button to clear all cookies stored by Safari.
Step 7: Confirm your decision by clicking “Remove Now” when prompted.
Once you have successfully cleared Safari cookies on your Mac, any stored website data will be removed. This includes login credentials, preferences, and other personalized settings.
Clearing cookies can offer several benefits. It helps protect your privacy by erasing information that websites use to track your online activities. It also allows you to start fresh on websites, eliminating any saved login details or preferences.
Keep in mind that clearing cookies may require you to re-enter login credentials on some websites. Additionally, be aware that websites might store new cookies the next time you visit them, as they are commonly used for various purposes, such as identifying users and maintaining session data.
By periodically clearing Safari cookies on your Mac, you can maintain better control over your browsing data, safeguard your privacy, and ensure a more personalized and secure browsing experience.
Clearing Chrome Browser Caches on Mac
Clearing the browser cache in Google Chrome on your Mac is essential for improving browsing speed, resolving loading issues, and freeing up valuable storage space. The browser cache stores temporary files, including images, scripts, and website data, which help load websites faster. However, an overloaded cache can cause performance issues. Here’s how to clear the Chrome browser caches on your Mac.
Step 1: Open Chrome on your Mac by clicking on the Chrome icon in the Dock or searching for it in Spotlight.
Step 2: In the top menu bar, click on “Chrome” and select “Clear Browsing Data…” from the dropdown menu.
Step 3: In the popup window, you can choose the time range for which you want to clear the cache. Select “All time” to remove all cached files.
Step 4: Check the box next to “Cached images and files.” You can also choose other data types you want to clear, such as browsing history and cookies.
Step 5: Optionally, you can click on the “Advanced” tab to access additional options for clearing specific types of data.
Step 6: Once you have selected the desired options, click on the “Clear data” button.
Chrome will now clear the cached files and other selected data. The process may take a few moments, depending on the amount of data to be cleared. You will notice improved browsing speed and potential resolution of loading issues.
Clearing the Chrome browser caches regularly is recommended to optimize performance and ensure a smooth browsing experience. By removing outdated and unnecessary cached files, you can free up storage space and prevent potential conflicts between newer and older versions of website resources.
It’s important to note that clearing the cache will log you out of any websites you are currently logged in to, and you may need to re-enter your credentials. Additionally, clearing the cache does not delete saved bookmarks, passwords, or browser history. Only temporary website files will be removed.
By following these steps, you can easily clear the Chrome browser caches on your Mac and enjoy a faster and more efficient browsing experience.
Clearing Chrome Cookies on Mac
Clearing cookies in Google Chrome on your Mac is important for maintaining your online privacy, managing stored data, and ensuring a smooth browsing experience. Cookies are small files that websites use to track your activities, store login information, and personalize your browsing experience. However, an accumulation of cookies can compromise your privacy and potentially cause browsing issues. Here’s how to clear Chrome cookies on your Mac.
Step 1: Open Chrome on your Mac by clicking on the Chrome icon in the Dock or searching for it in Spotlight.
Step 2: In the top menu bar, click on “Chrome” and select “Clear Browsing Data…” from the dropdown menu.
Step 3: In the popup window, select the time range for which you want to clear cookies. Choosing “All time” will remove all cookies stored by Chrome.
Step 4: Check the box next to “Cookies and other site data.” You can also choose other types of data you want to clear, such as cached images and files or browsing history.
Step 5: Optionally, you can click on the “Advanced” tab to access additional options for clearing specific types of data.
Step 6: Once you have selected the desired options, click on the “Clear data” button.
Chrome will now clear the cookies and other selected data. The process may take a few moments, depending on the amount of data to be cleared. After the process is complete, any stored cookies will be removed from Chrome.
Clearing Chrome cookies helps protect your online privacy by deleting the information websites use to track your browsing behavior. It also allows you to start fresh on websites, eliminating any saved login details or personalized settings.
However, it’s essential to be aware that clearing cookies may log you out of websites you are currently logged in to, and you may need to re-enter your credentials afterward. It’s also worth noting that clearing cookies does not delete saved bookmarks, passwords, or browsing history. Only website-specific data stored in cookies will be removed.
By periodically clearing Chrome cookies on your Mac, you can maintain control over your browsing data, protect your privacy, and enjoy a more personalized and secure online experience.
Clearing Firefox Browser Caches on Mac
Clearing the browser cache in Mozilla Firefox on your Mac is essential for optimizing browsing performance, resolving loading issues, and ensuring a smooth user experience. The browser cache stores temporary files, including images, scripts, and website data, which help load web pages faster. However, an overloaded cache can cause performance problems. Here’s how to clear the Firefox browser cache on your Mac.
Step 1: Open Firefox on your Mac by clicking on the Firefox icon in the Dock or searching for it in Spotlight.
Step 2: In the top menu bar, click on “Firefox” and select “Preferences” from the dropdown menu.
Step 3: In the Preferences window, navigate to the “Privacy & Security” tab.
Step 4: Under the “Cookies and Site Data” section, click on the “Clear Data” button.
Step 5: Check the box next to “Cached Web Content.”
Step 6: You can also check the box next to “Cookies and Site Data” to clear cookies along with the cache. However, be aware that this will log you out of websites and remove any stored login information.
Step 7: Click on the “Clear” button to initiate the process.
Fox will now clear the browser cache and any selected data. The clearing process may take a few seconds.
Clearing the Firefox browser cache regularly can help optimize your browsing experience. It ensures that you are accessing the most up-to-date version of websites and can resolve issues related to outdated or corrupt cache files.
It’s important to note that clearing the cache will not remove your browsing history, bookmarks, or saved passwords. It will only remove temporary files stored by Firefox to improve page loading speed. Additionally, clearing cookies will log you out of websites and remove any personalized preferences.
By following these steps, you can easily clear the Firefox browser cache on your Mac and enjoy a faster and more efficient browsing experience. It’s a good practice to perform this task regularly to keep Firefox running smoothly and to ensure that you are accessing the latest content from websites.
Clearing Firefox Cookies on Mac
Clearing cookies in Mozilla Firefox on your Mac is important for protecting your privacy, managing stored data, and ensuring a smoother browsing experience. Cookies are small files that websites use to track your activities, store login information, and enhance personalization. However, an accumulation of cookies can compromise your privacy and potentially cause browsing issues. Here’s how to clear Firefox cookies on your Mac.
Step 1: Open Firefox on your Mac by clicking on the Firefox icon in the Dock or searching for it in Spotlight.
Step 2: In the top menu bar, click on “Firefox” and select “Preferences” from the dropdown menu.
Step 3: In the Preferences window, navigate to the “Privacy & Security” tab.
Step 4: Under the “Cookies and Site Data” section, click on the “Manage Data…” button.
Step 5: A list of websites with stored cookies will appear. You can search for specific websites or scroll through the list.
Step 6: To remove cookies for a particular website, select it from the list and click on the “Remove Selected” button. You can also click on the “Remove All” button to clear all cookies stored by Firefox.
Step 7: Confirm your decision by clicking “Save Changes” when prompted.
After you have successfully cleared Firefox cookies on your Mac, any stored website data will be removed. This includes login credentials, preferences, and other personalized settings associated with cookies.
Clearing Firefox cookies can provide several benefits. It helps protect your privacy by deleting information that websites use to track your browsing behavior. It also allows you to start fresh on websites, eliminating any saved login details or preferences.
It’s important to note that clearing cookies may log you out of websites you are currently logged in to, and you may need to re-enter your credentials afterward. Additionally, be aware that deleting cookies does not remove your browsing history, bookmarks, or other personalized data associated with your Firefox profile.
By periodically clearing Firefox cookies on your Mac, you can maintain control over your browsing data, enhance privacy, and enjoy a more personalized and secure online experience.
Clearing Opera Browser Caches on Mac
Clearing the browser cache in Opera on your Mac is essential for improving browsing performance, resolving loading issues, and freeing up storage space. The browser cache stores temporary files like images, scripts, and website data, which help load web pages faster. However, an overloaded cache can cause performance problems. Here’s how to clear the Opera browser cache on your Mac.
Step 1: Open Opera on your Mac by clicking on the Opera icon in the Dock or searching for it in Spotlight.
Step 2: In the top menu bar, click on “Opera” and select “Clear Browsing Data…” from the dropdown menu.
Step 3: In the popup window, you can choose the time range for which you want to clear the cache. Select “All time” to remove all cached files.
Step 4: Check the box next to “Cached images and files.”
Step 5: You can also check the box next to “Cookies and other site data” and “Cached images and files” to clear cookies along with the cache. However, be aware that this will log you out of websites and remove any stored login information.
Step 6: Click on the “Clear Data” button to initiate the process.
Opera will now clear the browser cache and any selected data. The clearing process may take a few moments, depending on the amount of data to be cleared. Once finished, you’ll notice improved browsing speed and resolved issues related to outdated or corrupt cache files.
Clearing the Opera browser cache regularly is recommended for maintaining optimal performance. It helps ensure that you are accessing the most up-to-date version of websites and can resolve issues caused by outdated cached files.
Keep in mind that clearing the cache will not remove your browsing history, bookmarks, or saved passwords. It solely removes temporary files stored by Opera to enhance page loading speed. Additionally, clearing cookies will log you out of websites and remove any personalized preferences.
By following these steps, you can easily clear the Opera browser cache on your Mac and enjoy a faster and more efficient browsing experience. It’s a good practice to perform this task periodically to keep Opera running smoothly and to ensure you are accessing the latest content available on the web.
Clearing Opera Cookies on Mac
Clearing cookies in the Opera browser on your Mac is essential for maintaining your online privacy, managing stored data, and optimizing your browsing experience. Cookies are small files that websites use to track your activities, store login information, and personalize your browsing experience. However, an accumulation of cookies can compromise your privacy and potentially cause browsing issues. Here’s how to clear Opera cookies on your Mac.
Step 1: Open Opera on your Mac by clicking on the Opera icon in the Dock or searching for it in Spotlight.
Step 2: In the top menu bar, click on “Opera” and select “Preferences” from the dropdown menu.
Step 3: In the Preferences window, navigate to the “Privacy & Security” tab.
Step 4: Under the “Cookies” section, click on the “Manage cookies…” button.
Step 5: A new window will open, displaying a list of websites with stored cookies. You can search for specific websites or browse through the list.
Step 6: To remove cookies for a particular website, select it from the list and click on the “Remove” button. You can also click on the “Remove All” button to clear all cookies stored by Opera.
Step 7: Confirm your decision by clicking “OK” when prompted.
After successfully clearing Opera cookies on your Mac, any stored website data, including login credentials, preferences, and other personalized settings, will be removed.
Clearing Opera cookies provides several benefits. It helps protect your privacy by deleting information that websites use to track your browsing behavior. It also allows you to start fresh on websites, eliminating any saved login details or preferences.
However, it’s important to note that clearing cookies may log you out of websites you are currently logged in to, and you may need to re-enter your credentials afterward. Additionally, clearing cookies does not remove your browsing history, bookmarks, or other personalized data associated with your Opera profile.
By periodically clearing Opera cookies on your Mac, you can maintain control over your browsing data, enhance privacy, and enjoy a more personalized and secure online experience.
Clearing Brave Browser Caches on Mac
Clearing the browser cache in Brave on your Mac is essential for optimizing browsing performance, resolving loading issues, and freeing up valuable storage space. The browser cache stores temporary files, such as images, scripts, and website data, which help load web pages faster. However, an overloaded cache can cause performance problems. Here’s how to clear the Brave browser cache on your Mac.
Step 1: Open Brave on your Mac by clicking on the Brave icon in the Dock or searching for it in Spotlight.
Step 2: In the top menu bar, click on “Brave” and select “Clear Browsing Data…” from the dropdown menu.
Step 3: In the popup window, you can choose the time range for which you want to clear the cache. Selecting “All time” will remove all cached files.
Step 4: Check the box next to “Cached images and files”.
Step 5: You can also check the box next to “Cookies and other site data” if you want to clear cookies along with the cache. Be aware that this will log you out of websites and remove any stored login information.
Step 6: Click on the “Clear Data” button to initiate the process.
Brave will now clear the browser cache and any selected data. The process may take a few seconds or longer, depending on the amount of data to be cleared. Once finished, you’ll notice improved browsing speed and resolve issues caused by outdated or corrupt cache files.
Clearing the Brave browser cache regularly is recommended to optimize performance and ensure a smooth browsing experience. It ensures that you are accessing the most up-to-date versions of websites and can prevent issues caused by outdated cache files.
Keep in mind that clearing the cache will not remove your browsing history, bookmarks, or saved passwords. It only removes temporary files stored by Brave to improve page loading speed. Additionally, clearing cookies will log you out of websites and remove any personalized preferences.
By following these steps, you can easily clear the Brave browser cache on your Mac and enjoy a faster and more efficient browsing experience. It’s good practice to perform this task periodically to keep Brave running smoothly and to ensure you are accessing the latest content available on the web.
Clearing Brave Cookies on Mac
Clearing cookies in Brave on your Mac is important for safeguarding your privacy, managing stored data, and ensuring a smooth browsing experience. Cookies are small files that websites use to track your activities, store login information, and personalize your browsing experience. However, an accumulation of cookies can compromise your privacy and potentially cause browsing issues. Here’s how to clear Brave cookies on your Mac.
Step 1: Open Brave on your Mac by clicking on the Brave icon in the Dock or searching for it in Spotlight.
Step 2: In the top menu bar, click on “Brave” and select “Clear Browsing Data…” from the dropdown menu.
Step 3: In the popup window, you can choose the time range for which you want to clear cookies. Select “All time” to remove all cookies stored by Brave.
Step 4: Check the box next to “Cookies and other site data”.
Step 5: You can also check the box next to “Cached images and files” if you want to clear the cache along with the cookies. Be aware that this will log you out of websites and remove any stored login information.
Step 6: Click on the “Clear Data” button to initiate the process.
Brave will now clear the cookies and any selected data. The process may take a few moments, depending on the amount of data being cleared. Once finished, any stored website data, including login credentials, preferences, and other personalized settings, associated with cookies will be removed.
Clearing Brave cookies provides several benefits. It helps protect your privacy by deleting information that websites use to track your browsing behavior. It also allows you to start fresh on websites, eliminating any saved login details or preferences.
However, clearing cookies may log you out of websites you are currently logged in to, and you may need to re-enter your credentials afterward. Additionally, clearing cookies does not remove your browsing history, bookmarks, or other personalized data associated with your Brave profile.
By periodically clearing Brave cookies on your Mac, you can maintain control over your browsing data, enhance privacy, and enjoy a more personalized and secure online experience.
Clearing Microsoft Edge Browser Caches on Mac
Clearing the browser cache in Microsoft Edge on your Mac is crucial for improving browsing performance, resolving loading issues, and freeing up storage space. The browser cache stores temporary files, such as images, scripts, and website data, which help load web pages faster. However, an overloaded cache can cause performance problems. Here’s how to clear the Microsoft Edge browser cache on your Mac.
Step 1: Open Microsoft Edge on your Mac by clicking on the Edge icon in the Dock or searching for it in Spotlight.
Step 2: In the top menu bar, click on “Edge” and select “Clear Browsing Data…” from the dropdown menu.
Step 3: In the popup window, you can choose the time range for which you want to clear the cache. Select “All time” to remove all cached files.
Step 4: Check the box next to “Cached images and files”.
Step 5: You can also check the box next to “Cookies and other site data” if you want to clear cookies along with the cache. Be aware that this will log you out of websites and remove any stored login information.
Step 6: Click on the “Clear” button to initiate the process.
Microsoft Edge will now clear the browser cache and any selected data. The process may take a few seconds or longer, depending on the amount of data to be cleared. Once finished, you’ll notice improved browsing speed and resolved issues related to outdated or corrupt cache files.
Clearing the Microsoft Edge browser cache regularly is recommended to optimize performance and ensure a smooth browsing experience. By removing unnecessary cached files, you can free up storage space and prevent potential conflicts between newer and older versions of website resources.
It’s important to note that clearing the cache will not remove your browsing history, bookmarks, or saved passwords. It only removes temporary files stored by Microsoft Edge to improve page loading speed. Additionally, clearing cookies will log you out of websites and remove any personalized preferences.
By following these steps, you can easily clear the Microsoft Edge browser cache on your Mac and enjoy a faster and more efficient browsing experience. It’s good practice to perform this task periodically to keep Microsoft Edge running smoothly and to ensure you are accessing the latest content available on the web.
Clearing Microsoft Edge Cookies on Mac
Clearing cookies in Microsoft Edge on your Mac is essential for maintaining your online privacy, managing stored data, and optimizing your browsing experience. Cookies are small files that websites use to track your activities, store login information, and personalize your browsing experience. However, an accumulation of cookies can compromise your privacy and potentially cause browsing issues. Here’s how to clear Microsoft Edge cookies on your Mac.
Step 1: Open Microsoft Edge on your Mac by clicking on the Edge icon in the Dock or searching for it in Spotlight.
Step 2: In the top menu bar, click on “Edge” and select “Settings” from the dropdown menu.
Step 3: In the Settings tab, scroll down to the “Clear browsing data” section.
Step 4: Click on the “Choose what to clear” button.
Step 5: Check the box next to “Cookies and saved website data”.
Step 6: You can also check the box next to other types of data you want to clear, such as browsing history, cache, and form data.
Step 7: Click on the “Clear” button to initiate the process.
Microsoft Edge will now clear the cookies and any selected data. The process may take a few moments, depending on the amount of data being cleared. Once finished, any stored website data, including login credentials, preferences, and other personalized settings associated with cookies, will be removed.
Clearing Microsoft Edge cookies provides several benefits. It helps protect your privacy by deleting information that websites use to track your browsing behavior. It also allows you to start fresh on websites, eliminating any saved login details or preferences.
However, clearing cookies may log you out of websites you are currently logged in to, and you may need to re-enter your credentials afterward. Additionally, note that clearing cookies does not remove your browsing history, bookmarks, or other personalized data associated with your Microsoft Edge profile.
By periodically clearing Microsoft Edge cookies on your Mac, you can maintain control over your browsing data, enhance privacy, and enjoy a more personalized and secure online experience.
Clearing Vivaldi Browser Caches on Mac
Clearing the browser cache in Vivaldi on your Mac is crucial for optimizing browsing performance, resolving loading issues, and freeing up storage space. The browser cache stores temporary files, such as images, scripts, and website data, which help load web pages faster. However, an overloaded cache can cause performance problems. Here’s how to clear the Vivaldi browser cache on your Mac.
Step 1: Open Vivaldi on your Mac by clicking on the Vivaldi icon in the Dock or searching for it in Spotlight.
Step 2: In the top menu bar, click on “Vivaldi” and select “Clear Private Data…” from the dropdown menu.
Step 3: In the popup window, you can choose the time range for which you want to clear the cache. Select “All time” to remove all cached files.
Step 4: Check the box next to “Cached images and files”.
Step 5: You can also check the box next to other types of data you want to clear, such as browsing history, cookies, and download history.
Step 6: Click on the “Clear Browsing Data” button to initiate the process.
Vivaldi will now clear the browser cache and any selected data. The process may take a few seconds or longer, depending on the amount of data to be cleared. Once finished, you’ll notice improved browsing speed and resolved issues related to outdated or corrupt cache files.
Clearing the Vivaldi browser cache regularly is recommended to optimize performance and ensure a smooth browsing experience. By removing unnecessary cached files, you can free up storage space and prevent potential conflicts between newer and older versions of website resources.
It’s important to note that clearing the cache will not remove your browsing history, bookmarks, or saved passwords. It only removes temporary files stored by Vivaldi to improve page loading speed. Additionally, clearing cookies will log you out of websites and remove any personalized preferences.
By following these steps, you can easily clear the Vivaldi browser cache on your Mac and enjoy a faster and more efficient browsing experience. It’s good practice to perform this task periodically to keep Vivaldi running smoothly and to ensure you are accessing the latest content available on the web.
Clearing Vivaldi Cookies on Mac
Clearing cookies in Vivaldi on your Mac is essential for maintaining your online privacy, managing stored data, and optimizing your browsing experience. Cookies are small files that websites use to track your activities, store login information, and personalize your browsing experience. However, an accumulation of cookies can compromise your privacy and potentially cause browsing issues. Here’s how to clear Vivaldi cookies on your Mac.
Step 1: Open Vivaldi on your Mac by clicking on the Vivaldi icon in the Dock or searching for it in Spotlight.
Step 2: In the top menu bar, click on “Vivaldi” and select “Preferences” from the dropdown menu.
Step 3: In the Preferences window, navigate to the “Privacy” tab.
Step 4: Under the “Cookies” section, click on the “Manage Website Data…” button.
Step 5: A list of websites with stored cookies will appear. You can search for specific websites or scroll through the list.
Step 6: To remove cookies for a particular website, select it from the list and click on the “Remove” button. You can also click on the “Remove All” button to clear all cookies stored by Vivaldi.
Step 7: Confirm your decision by clicking “OK” when prompted.
After successfully clearing Vivaldi cookies on your Mac, any stored website data, including login credentials, preferences, and other personalized settings associated with cookies, will be removed.
Clearing Vivaldi cookies provides several benefits. It helps protect your privacy by deleting information that websites use to track your browsing behavior. It also allows you to start fresh on websites, eliminating any saved login details or preferences associated with cookies.
However, clearing cookies may log you out of websites you are currently logged in to, and you may need to re-enter your credentials afterward. Additionally, note that clearing cookies does not remove your browsing history, bookmarks, or other personalized data associated with your Vivaldi profile.
By periodically clearing Vivaldi cookies on your Mac, you can maintain control over your browsing data, enhance privacy, and enjoy a more personalized and secure online experience.
Clearing Tor Browser Caches on Mac
Clearing the browser cache in Tor on your Mac is crucial for maintaining your privacy, improving browsing performance, and keeping sensitive information secure. The Tor browser uses a specialized network to preserve anonymity and protect your online activities. However, clearing the browser cache is still essential to prevent potential data leaks and maintain a clean browsing experience. Here’s how to clear the Tor browser caches on your Mac.
Step 1: Open the Tor browser on your Mac by clicking on the Tor icon in the Dock or searching for it in Spotlight.
Step 2: In the top menu bar, click on “History” and select “Clear All History” from the dropdown menu.
Step 3: In the popup window, select the time range for which you want to clear the cache. Choosing “Everything” will remove all cached files.
Step 4: Check the box next to “Cache” to clear the browser cache.
Step 5: You can also check other options, such as browsing history and cookies, if you want to clear additional data.
Step 6: Click on the “Clear Now” button to initiate the process.
Tor will now clear the browser cache and any selected data. The process may take a few moments, depending on the amount of data to be cleared. Once finished, you’ll notice improved browsing speed and enhanced privacy during your Tor browsing sessions.
Clearing the Tor browser cache regularly is crucial to maintain privacy and ensure a clean browsing experience. By removing cached files, you minimize the risk of leaving any trace of your online activities.
It’s important to note that clearing the cache will not remove your browsing history, bookmarks, or any other personalized settings. It solely removes temporary files stored by Tor to improve page loading speed and maintain privacy.
By following these steps, you can easily clear the Tor browser caches on your Mac and enjoy a more secure and private browsing experience. It’s recommended to perform this task periodically to minimize the risk of any potential data leaks and maintain a clean browsing environment.
Clearing Tor Cookies on Mac
Clearing cookies in Tor on your Mac is essential for maintaining your online privacy, managing stored data, and maximizing anonymity while browsing the internet. Cookies are small files used by websites to track your activities, store login information, and remember preferences. However, clearing cookies is necessary to prevent potential identification and maintain a clean browsing experience. Here’s how to clear Tor cookies on your Mac.
Step 1: Open the Tor browser on your Mac by clicking on the Tor icon in the Dock or searching for it in Spotlight.
Step 2: In the top menu bar, click on “History” and select “Clear All History” from the dropdown menu.
Step 3: In the popup window, select the time range for which you want to clear cookies. Choosing “Everything” will remove all cookies stored by Tor.
Step 4: Check the box next to “Cookies” to clear the browser cookies.
Step 5: You can also check other options, such as browsing history and cache, if you want to clear additional data.
Step 6: Click on the “Clear Now” button to initiate the process.
Tor will now clear the cookies and any selected data. The process may take a few moments, depending on the amount of data to be cleared. Once finished, any stored website data, including login credentials, preferences, and other personalized settings associated with cookies, will be removed.
Clearing Tor cookies is crucial for preserving anonymity and maintaining privacy while using the Tor browser. By removing cookies, you minimize the risk of websites tracking your activities or identifying you.
It’s important to note that clearing cookies may log you out of websites you are currently logged in to, and you may need to re-enter your credentials afterward. Additionally, clearing cookies does not remove your browsing history, bookmarks, or any other personalized settings.
By periodically clearing Tor cookies on your Mac, you can enhance your privacy, prevent potential identification, and ensure a clean browsing experience while using the Tor network.
Clearing Private Data on Other Apps and Services
In addition to clearing private data from web browsers, it’s important to clear private data from other apps and services on your Mac. Many applications and services store cache files, cookies, and other temporary data that can accumulate over time and impact performance or compromise your privacy. Here’s how to clear private data on other apps and services.
Email Applications: If you use email applications like Apple Mail or Microsoft Outlook, they store local copies of your emails and attachments. To clear private data, go to the application’s settings and look for options to delete cache files, attachments, or other temporary data. Remember to back up any important emails or attachments before clearing the cache.
Photos and Media Apps: Applications like Photos, iTunes, or multimedia players may store thumbnails, cached media files, or metadata. To clear private data, check the settings or preferences of these apps for options to clear cache or delete temporary files related to media content.
Messaging Apps: Messaging apps such as Skype, Slack, or WhatsApp may store chat histories, shared files, and other data. Review each app’s settings to find options for clearing chat messages or media files to maintain your privacy and optimize storage space.
Cloud Storage Services: If you use cloud storage services like Dropbox, Google Drive, or OneDrive, they may sync files and store local cache files. Visit the settings or preferences of these services to find options for clearing cached files or disconnecting and reconnecting your account to refresh the data.
Virtual Private Networks (VPNs): If you use VPN clients to protect your online privacy, they may store connection logs or temporary session data. Check the settings of your VPN client for options to clear or reset data to maintain your privacy and optimize performance.
Other Applications: Depending on the apps you use, they may store temporary or cache files. Look for settings or preferences related to privacy, cache, or temporary files to clear private data from these applications.
It’s important to note that clearing private data from other apps and services may log you out of certain accounts or delete specific data. Be mindful of the data you intend to remove and consider backing up any important files or data before clearing private data.
By regularly clearing private data on other apps and services, you can ensure better performance, protect your privacy, and maintain a clean and optimized experience across your Mac.
Additional Tips for Clearing Private Data on Mac
Clearing private data on your Mac is an essential step towards maintaining your privacy, optimizing performance, and ensuring a clean browsing experience. In addition to the specific instructions for clearing data from web browsers and various applications, here are some additional tips and best practices for clearing private data on your Mac.
1. Regularly Review Privacy Settings: Take the time to review the privacy settings of your applications and services. Many apps have built-in options to control what data is stored and how it is used. Adjust these settings to align with your privacy preferences and regularly check for any updates or changes in privacy settings.
2. Use Secure Erase Methods: For more sensitive data, consider using secure erase methods to ensure data removal. These methods overwrite data multiple times, making it more difficult to recover. Use these methods when deleting important files or before selling or disposing of your device.
3. Utilize Mac Cleanup Tools: There are various third-party tools available that can help automate the process of clearing private data on your Mac. These tools can quickly scan for and remove unnecessary files, caches, cookies, and more, optimizing your Mac’s performance and privacy in one go.
4. Implement Automatic Clearing Options: Some applications and services offer automatic clearing options. Take advantage of these features to regularly clear private data without manual intervention. Schedule automatic clearing to occur at specific intervals, ensuring that your data remains cleaned and your privacy is consistently maintained.
5. Keep Your Mac Operating System Up to Date: Keeping your Mac operating system up to date is crucial for security and privacy. Software updates often include bug fixes and improvements related to privacy settings and data management. Stay on top of software updates to ensure you have the latest privacy features and enhancements available.
6. Regularly Audit Installed Applications: Periodically review the applications installed on your Mac. Uninstall or disable any unnecessary apps to reduce the amount of private data being stored. This not only frees up storage space but also minimizes potential privacy and security risks associated with unused applications.
7. Educate Yourself on Privacy Best Practices: Stay informed about privacy best practices, both for your Mac and for online activities in general. Stay up to date with the latest privacy trends, security threats, and recommended privacy practices. This knowledge will help you make informed decisions about managing your private data effectively.
By implementing these additional tips alongside clearing private data from web browsers and other applications, you can maintain a heightened level of privacy, optimize performance, and enjoy a more secure and enjoyable experience on your Mac.