
Determine if Wi-Fi is enabled or disabled
Before troubleshooting any wireless network connectivity issues, it is important to first check if the Wi-Fi is enabled or disabled on the device. This step is crucial as a disabled Wi-Fi connection will prevent the device from connecting to any wireless networks. Here’s how you can determine the status of Wi-Fi on different devices:
1. Windows: On a Windows computer, click on the network icon located in the system tray at the bottom right corner of the screen. If the Wi-Fi is enabled, you will see the available Wi-Fi networks in the list. If it is disabled, you will see an option to enable Wi-Fi.
2. Mac: On a Mac computer, click on the Wi-Fi icon located in the menu bar at the top right corner of the screen. If Wi-Fi is enabled, you will see a list of available networks. If it is disabled, you will have an option to turn it on.
3. Android: On an Android device, go to the “Settings” menu and tap on “Wi-Fi.” If Wi-Fi is enabled, you will see the available networks. If it is disabled, you can toggle the switch to turn it on.
4. iOS: On an iPhone or iPad, go to the “Settings” app and tap on “Wi-Fi.” If Wi-Fi is enabled, you will see a list of available networks. If it is disabled, you can toggle the switch to turn it on.
Once you have confirmed that Wi-Fi is enabled on the device, you can proceed to the next steps to troubleshoot any network connection issues. Keep in mind that some devices may have additional settings or options related to Wi-Fi, so it’s always a good idea to explore the device’s user manual or online support resources for more specific instructions.
Check if the device is connected to a Wi-Fi network
After ensuring that Wi-Fi is enabled on the device, the next step is to verify if the device is successfully connected to a Wi-Fi network. Here’s how you can check the connection status on different devices:
1. Windows: On a Windows computer, click on the network icon in the system tray. Look for the name of the Wi-Fi network you are trying to connect to. If it shows “Connected” or displays the name of the network, it means that the device is connected to the Wi-Fi network. If it shows “No internet access” or “Limited connectivity,” there might be an issue with the network connection.
2. Mac: On a Mac computer, click on the Wi-Fi icon in the menu bar. You will see a checkmark next to the Wi-Fi network name if you are connected to it. If it shows “Connected” or “Connected, no internet,” it means that the device is successfully connected to the Wi-Fi network. If it shows “Wi-Fi: No hardware installed” or “Wi-Fi: No network configurations,” there might be a hardware or configuration issue.
3. Android: On an Android device, go to the “Settings” menu and tap on “Wi-Fi.” Look for the Wi-Fi network name you are connected to. If it says “Connected,” it means that the device is connected to the Wi-Fi network. If it shows “Saved” or “Secured,” the device has encountered an authentication issue or is trying to connect to the network.
4. iOS: On an iPhone or iPad, go to the “Settings” app and tap on “Wi-Fi.” Look for the Wi-Fi network name you are connected to. If it displays a checkmark next to the network name, it means that the device is connected to the Wi-Fi network. If it shows “Unable to join the network” or “Incorrect password,” there might be an authentication or configuration issue.
If the device is not connected to a Wi-Fi network, you can try selecting the desired network from the available list and entering the correct password if required. If you are still unable to connect, you may need to troubleshoot further or contact your internet service provider for assistance.
Verify the signal strength of the Wi-Fi connection
Once you have confirmed that your device is connected to a Wi-Fi network, it is essential to check the signal strength of the connection. A weak Wi-Fi signal can result in slow internet speeds or intermittent connectivity. Here’s how you can verify the signal strength on different devices:
1. Windows: On a Windows computer, click on the network icon in the system tray. Look for the Wi-Fi network name and check the signal strength bars next to it. More bars indicate a stronger signal, while fewer bars suggest a weaker signal. You can also click on “Network & Internet settings” and navigate to the Wi-Fi settings page to view the exact signal strength in percentage.
2. Mac: On a Mac computer, click on the Wi-Fi icon in the menu bar. The signal strength bars next to the network name indicate the strength of the Wi-Fi signal. More bars implies a stronger signal, while fewer bars indicate a weaker signal.
3. Android: On an Android device, go to the “Settings” menu and tap on “Wi-Fi.” The Wi-Fi network name will display the signal strength in the form of bars. More bars represent a stronger signal, while fewer bars indicate a weaker signal.
4. iOS: On an iPhone or iPad, go to the “Settings” app and tap on “Wi-Fi.” The Wi-Fi network name will indicate the signal strength with bars. More bars signify a stronger signal, while fewer bars mean a weaker signal.
To improve the signal strength, consider repositioning your device closer to the Wi-Fi router and away from any obstructions such as walls or appliances that may interfere with the signal. Alternatively, you may need to invest in a Wi-Fi range extender or upgrade to a higher-quality router for better coverage. Monitoring the signal strength regularly can help identify areas with poor connectivity and take appropriate measures to enhance your Wi-Fi experience.
Assess if the device is receiving an IP address
An IP address is a unique identifier assigned to each device on a network. Ensuring that your device receives a valid IP address is crucial for establishing a successful Wi-Fi connection. Here’s how you can assess if your device is receiving an IP address:
1. Windows: On a Windows computer, open the Command Prompt by pressing the Windows key + R, typing “cmd,” and hitting Enter. In the Command Prompt window, type “ipconfig” and press Enter. Look for the “IPv4 Address,” which should display a series of numbers separated by dots. If you see an IP address, it means that your device has successfully obtained an IP address from the Wi-Fi network. If it shows “Media disconnected” or “No IP address,” there might be an issue with the network configuration.
2. Mac: On a Mac computer, click on the Apple menu and select “System Preferences.” Click on “Network” and select the Wi-Fi connection on the left side. The “Status” tab will display the IP address next to “IP Address” or “IPv4 Address.” If you see an IP address, it means that your device has obtained a valid IP address. If it shows “Self-Assigned IP” or “No IP address,” there might be an issue with the DHCP server or network settings.
3. Android: On an Android device, go to the “Settings” menu and tap on “Wi-Fi.” Long-press on the connected Wi-Fi network and select “Manage network settings.” Tap on “Advanced” or “IP settings.” If it shows “DHCP” or “Obtain IP address automatically,” it means that your device is receiving the IP address from the router. If it shows “Static” or “Manual,” there might be an issue with the IP configuration.
4. iOS: On an iPhone or iPad, go to the “Settings” app and tap on “Wi-Fi.” Tap on the connected Wi-Fi network. If “DHCP” is selected under “Configure IP,” it means that your device is obtaining the IP address automatically. If “Static” is selected, there might be an issue with the IP configuration.
If your device is not receiving an IP address, you can try restarting the device, power cycling your router, or resetting the network settings on your device. If the problem persists, you may need to contact your internet service provider or network administrator for further assistance.
Test the device’s internet connectivity
Once you have confirmed that your device is connected to a Wi-Fi network and has obtained an IP address, the next step is to test the device’s internet connectivity. This will help determine if the device can establish a successful connection to the internet. Here are a few methods to test the device’s internet connectivity:
1. Web Browsing: Open a web browser on your device and try visiting a website. If the website loads successfully, it indicates that your device has internet connectivity. However, if the website does not load or displays an error message, there might be an issue with your internet connection or the website itself.
2. Ping: Open the Command Prompt (Windows) or Terminal (Mac) and type “ping www.google.com” (without quotes) and press Enter. If you receive responses showing the time it takes for a packet to travel from your device to Google’s servers and back, it indicates that your device can communicate with the internet. However, if you see an error message like “Request timed out” or “Destination host unreachable,” it suggests an issue with the network connection.
3. Speed Test: Use an online speed test tool to measure your device’s internet speed. These tools typically display your download and upload speeds. If the results show speeds close to your subscribed plan, it indicates that your device is successfully connected to the internet. However, if the speeds are significantly lower than expected, it could indicate network congestion or a service-related issue.
4. App Connectivity: Test the internet connectivity by using various apps on your device. For example, try streaming a video, checking email, or using social media apps. If these apps function properly and can access the internet, it indicates that your device has a stable connection. However, if the apps fail to load or show errors, there may be an issue with your internet connectivity.
If the device fails any of these connectivity tests, try restarting your device, power cycling your router, or contacting your internet service provider for further assistance. Additionally, ensure that your device’s software is up to date and that there are no conflicts with firewall or antivirus settings that may hinder internet connectivity.
Troubleshoot DNS resolution issues
DNS (Domain Name System) is responsible for translating human-readable website addresses into IP addresses that computers can understand. When your device encounters DNS resolution issues, it may have trouble connecting to websites or accessing the internet. Here are some steps to troubleshoot DNS resolution issues:
1. Flush DNS Cache: On a Windows computer, open the Command Prompt and type “ipconfig /flushdns” (without quotes) and press Enter. On a Mac, open Terminal and type “sudo killall -HUP mDNSResponder” (without quotes) and press Enter. Flushing the DNS cache can clear any outdated or incorrect DNS entries that may be causing issues.
2. Change DNS Servers: By default, your device uses the DNS servers provided by your internet service provider. However, you can try using alternative DNS servers such as Google DNS (8.8.8.8, 8.8.4.4) or OpenDNS (208.67.222.222, 208.67.220.220). On a Windows computer, go to Network and Sharing Center, click on your Wi-Fi connection, and go to Properties. Select “Internet Protocol Version 4,” click on Properties, and manually enter the preferred DNS server addresses. On a Mac, go to System Preferences, click on Network, select your Wi-Fi connection, click on Advanced, and go to DNS. Add the preferred DNS server addresses in the DNS tab.
3. Restart Router: Power cycle your router by unplugging it from the power source, waiting for a few seconds, and plugging it back in. This can help resolve any temporary issues with the router or its DNS settings.
4. Disable VPN or Proxy: If you are using a VPN (Virtual Private Network) or proxy service, temporary disable it and check if the DNS resolution issue is resolved. Some VPNs or proxies may interfere with DNS resolution, causing connectivity problems.
5. Check Firewall Settings: Make sure that your firewall settings are not blocking the DNS requests. Temporarily disable the firewall and check if the issue persists. If the issue is resolved after disabling the firewall, adjust the settings to allow DNS requests.
If the above steps do not resolve the DNS resolution issue, try contacting your internet service provider for further assistance. They may be able to identify and fix any network-related problems that could be affecting your device’s DNS resolution.
Examine the presence of network interference or congestion
Network interference or congestion can greatly affect the performance of your wireless connection. It can result in slow internet speeds, frequent disconnections, and overall poor network performance. Here are some steps to examine the presence of network interference or congestion:
1. Check for Interference Sources: Identify potential sources of interference that may be affecting Wi-Fi signals. Common sources include cordless phones, microwave ovens, baby monitors, Bluetooth devices, and neighboring Wi-Fi networks. Keep your device away from these sources or try to minimize their usage to reduce interference.
2. Switch to a Different Wi-Fi Channel: Routers can operate on different channels to avoid interference. Use a Wi-Fi analyzer tool to check which channels are congested in your area. Access your router’s settings and switch to a less congested channel to improve the Wi-Fi performance. Common channels to consider are 1, 6, and 11, as they do not overlap with each other.
3. Move Closer to the Router: If you are experiencing weak signals or poor network performance, try moving closer to the Wi-Fi router. Physical distance between your device and the router can impact signal strength and quality. By reducing the distance, you can minimize the chance of interference and improve the overall network experience.
4. Restart or Reposition the Router: Power cycle your router by unplugging it from the power source, waiting for a few seconds, and plugging it back in. This can help resolve any temporary issues or conflicts that may be causing interference. Additionally, reposition the router to a central location and elevate it from the ground to optimize signal distribution across your space.
5. Use Wired Connections: Consider using wired Ethernet connections for devices that require a stable and high-speed internet connection, such as desktop computers or gaming consoles. Wired connections are less susceptible to interference and can provide a more reliable network experience.
6. Limit Bandwidth-Intensive Activities: Heavy bandwidth-consuming activities, such as streaming high-definition videos or large file downloads, can contribute to network congestion. Limiting these activities or scheduling them during off-peak hours can alleviate congestion and improve overall network performance.
By examining the presence of network interference or congestion and taking appropriate steps to address it, you can optimize your Wi-Fi connection and ensure a smoother and more reliable internet experience.
Analyze the device’s network adapter settings
The network adapter settings on your device play a crucial role in establishing and maintaining a successful Wi-Fi connection. Analyzing these settings can help identify any potential configuration issues that may be affecting your network connectivity. Here are some steps to analyze the device’s network adapter settings:
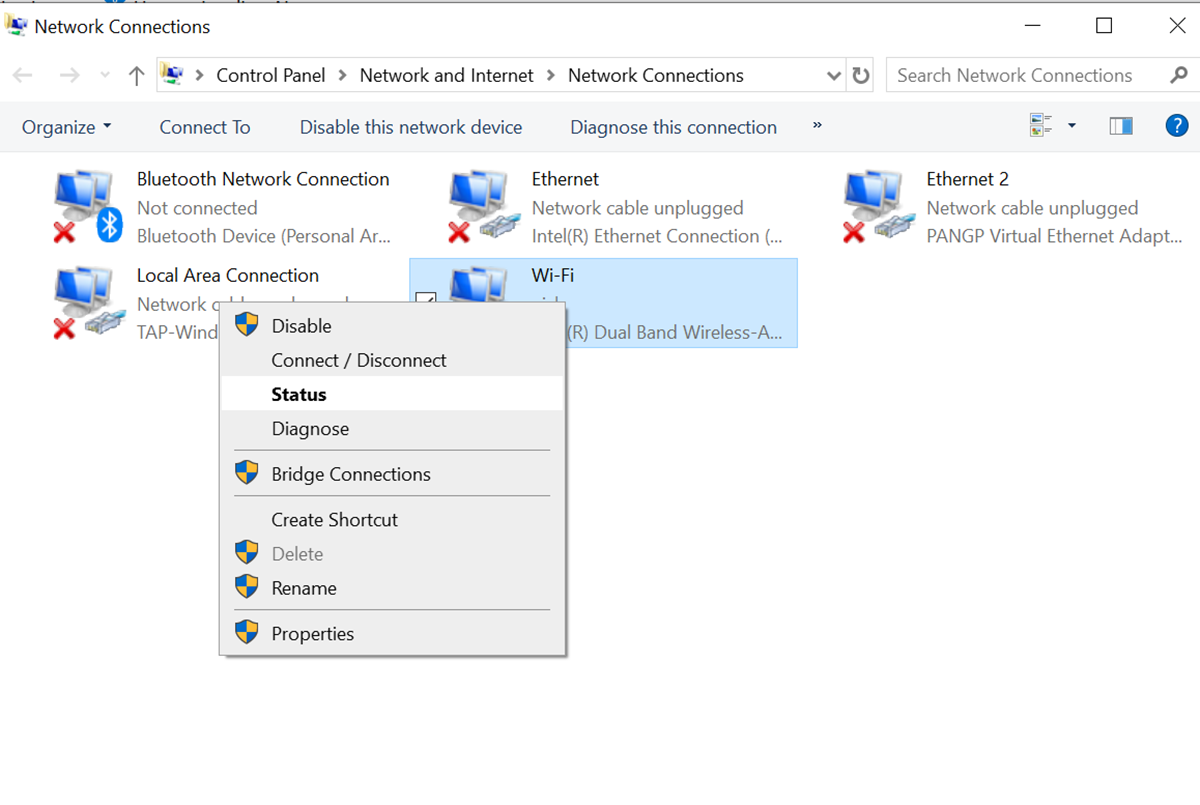
1. Check Wi-Fi Adapter Status: Ensure that the Wi-Fi adapter is enabled and functioning properly. You can check this by going to the “Network Connections” or “Network and Internet Settings” on your device and verifying that the Wi-Fi adapter is enabled and shows as “Connected” or “Enabled.”
2. Update Network Adapter Drivers: Outdated or incompatible network adapter drivers can cause connectivity problems. Visit the website of your device manufacturer or the network adapter manufacturer to download and install the latest drivers for your specific model. This can resolve compatibility issues and improve overall network performance.
3. Adjust Power Management Settings: Some devices have power management settings that can limit the performance of the network adapter to conserve battery life. Check the power management settings of your device and ensure that they are not set to automatically disable or reduce the power to the Wi-Fi adapter. Adjust these settings to allow maximum performance.
4. Reset Network Settings: If you are experiencing persistent network issues, resetting the network settings on your device can help. This will remove any custom network configurations and restore them to their default settings. You can usually find the option to reset network settings in the network or Wi-Fi settings menu of your device.
5. Disable Firewall or Antivirus: In some cases, firewall or antivirus software may interfere with the network connection. Temporarily disable these security software and check if the network connectivity improves. If it does, you may need to configure the settings of the firewall or antivirus software to allow network traffic.
6. Verify IP and DNS Settings: Ensure that your device is set to obtain IP and DNS settings automatically. Go to the network settings of your device and check that the IP and DNS settings are set to “Obtain automatically” or “DHCP.” Manually entering incorrect IP or DNS settings can prevent your device from connecting to the network.
By carefully analyzing and adjusting the device’s network adapter settings, you can resolve configuration issues that may be affecting your network connectivity. If the issues persist, it may be helpful to consult the user manual or online support resources for your specific device or contact the device manufacturer for further assistance.
Evaluate the compatibility of the device with the Wi-Fi network
Compatibility between your device and the Wi-Fi network is vital for establishing a successful connection. Incompatibility issues can lead to connectivity problems, slow speeds, or even the inability to connect at all. Here are some steps to evaluate the compatibility of your device with the Wi-Fi network:
1. Wi-Fi Standards: Check the Wi-Fi standards supported by your device’s wireless adapter. The most common standards are 802.11n, 802.11ac, and 802.11ax. Ensure that your device’s wireless adapter supports the same Wi-Fi standard as your router. Incompatible Wi-Fi standards might result in reduced speeds or an inability to connect to the network.
2. Wi-Fi Frequency Bands: Determine the frequency bands supported by your Wi-Fi device. The two primary frequency bands are 2.4 GHz and 5 GHz. Ensure that your device supports the same frequency band as your router. If your router operates on both bands, try connecting to the less crowded 5 GHz band for better performance and faster speeds.
3. Security Protocols: Verify that your device supports the security protocols used by your Wi-Fi network. The most common protocols are WEP, WPA, and WPA2. If your network uses advanced security protocols like WPA3, ensure that your device is compatible with them. Incompatible security protocols can prevent your device from connecting to the network or cause authentication issues.
4. Hidden SSID: If your Wi-Fi network has a hidden SSID, which means the network name is not broadcasted, ensure that your device supports manually connecting to hidden networks. Some devices may not have the option to manually enter the SSID, making it impossible to connect to hidden networks.
5. Firmware Updates: Check if there are any firmware updates available for your device. Firmware updates often improve device compatibility with various Wi-Fi networks and fix known compatibility issues. Visit the manufacturer’s website or check for firmware updates directly through your device’s settings or control panel.
6. Compatibility Lists: Consult compatibility lists provided by the device manufacturer or refer to user manuals and documentation. These resources may specify any known compatibility issues or limitations of the device in regards to Wi-Fi networks. It’s important to ensure that your device meets the necessary requirements to connect to the Wi-Fi network.
If after evaluating the compatibility of your device with the Wi-Fi network, you find that they are not compatible, you may need to consider alternative connectivity options, such as using an Ethernet cable, using a Wi-Fi extender, or upgrading your device to a model that supports the necessary Wi-Fi standards and protocols.
Consider potential software or firmware updates for the device
Keeping your device’s software and firmware up to date is crucial for maintaining optimal performance and compatibility with Wi-Fi networks. Software and firmware updates often include bug fixes, security enhancements, and improvements to network connectivity. Here are some reasons why you should consider updating your device’s software or firmware:
1. Bug Fixes and Performance Improvements: Software and firmware updates address known issues and bugs that may be affecting your device’s network connectivity. These updates can improve the stability and performance of your device, resulting in a smoother and more reliable wireless experience.
2. Enhanced Security: Updates often include security patches that protect your device from vulnerabilities and potential threats. By keeping your device up to date, you reduce the risk of security breaches and ensure that your device is equipped with the latest security features to safeguard your Wi-Fi network connectivity.
3. Compatibility Improvements: Software and firmware updates may include compatibility enhancements to ensure that your device can seamlessly connect to the latest Wi-Fi networks. Updates can address compatibility issues with various network standards, security protocols, or frequency bands, allowing for better interoperability between your device and the Wi-Fi network.
4. New Features and Functionality: Updates often introduce new features or functionality that can enhance your overall Wi-Fi experience. These may include improved network management tools, advanced security options, or additional connectivity options that can provide added convenience and control over your network connection.
5. Manufacturer Support: By keeping your device up to date, you can take advantage of ongoing support and assistance from the manufacturer. They can provide troubleshooting guidance specific to the updated software or firmware version, helping you resolve any network connectivity issues more efficiently.
To update your device’s software or firmware, check the manufacturer’s website or support portal for the latest updates. Follow the provided instructions and ensure that you backup your device’s data before initiating the update process. Additionally, consider enabling automatic updates, if available, to ensure that your device remains up to date with the latest software and firmware releases.