
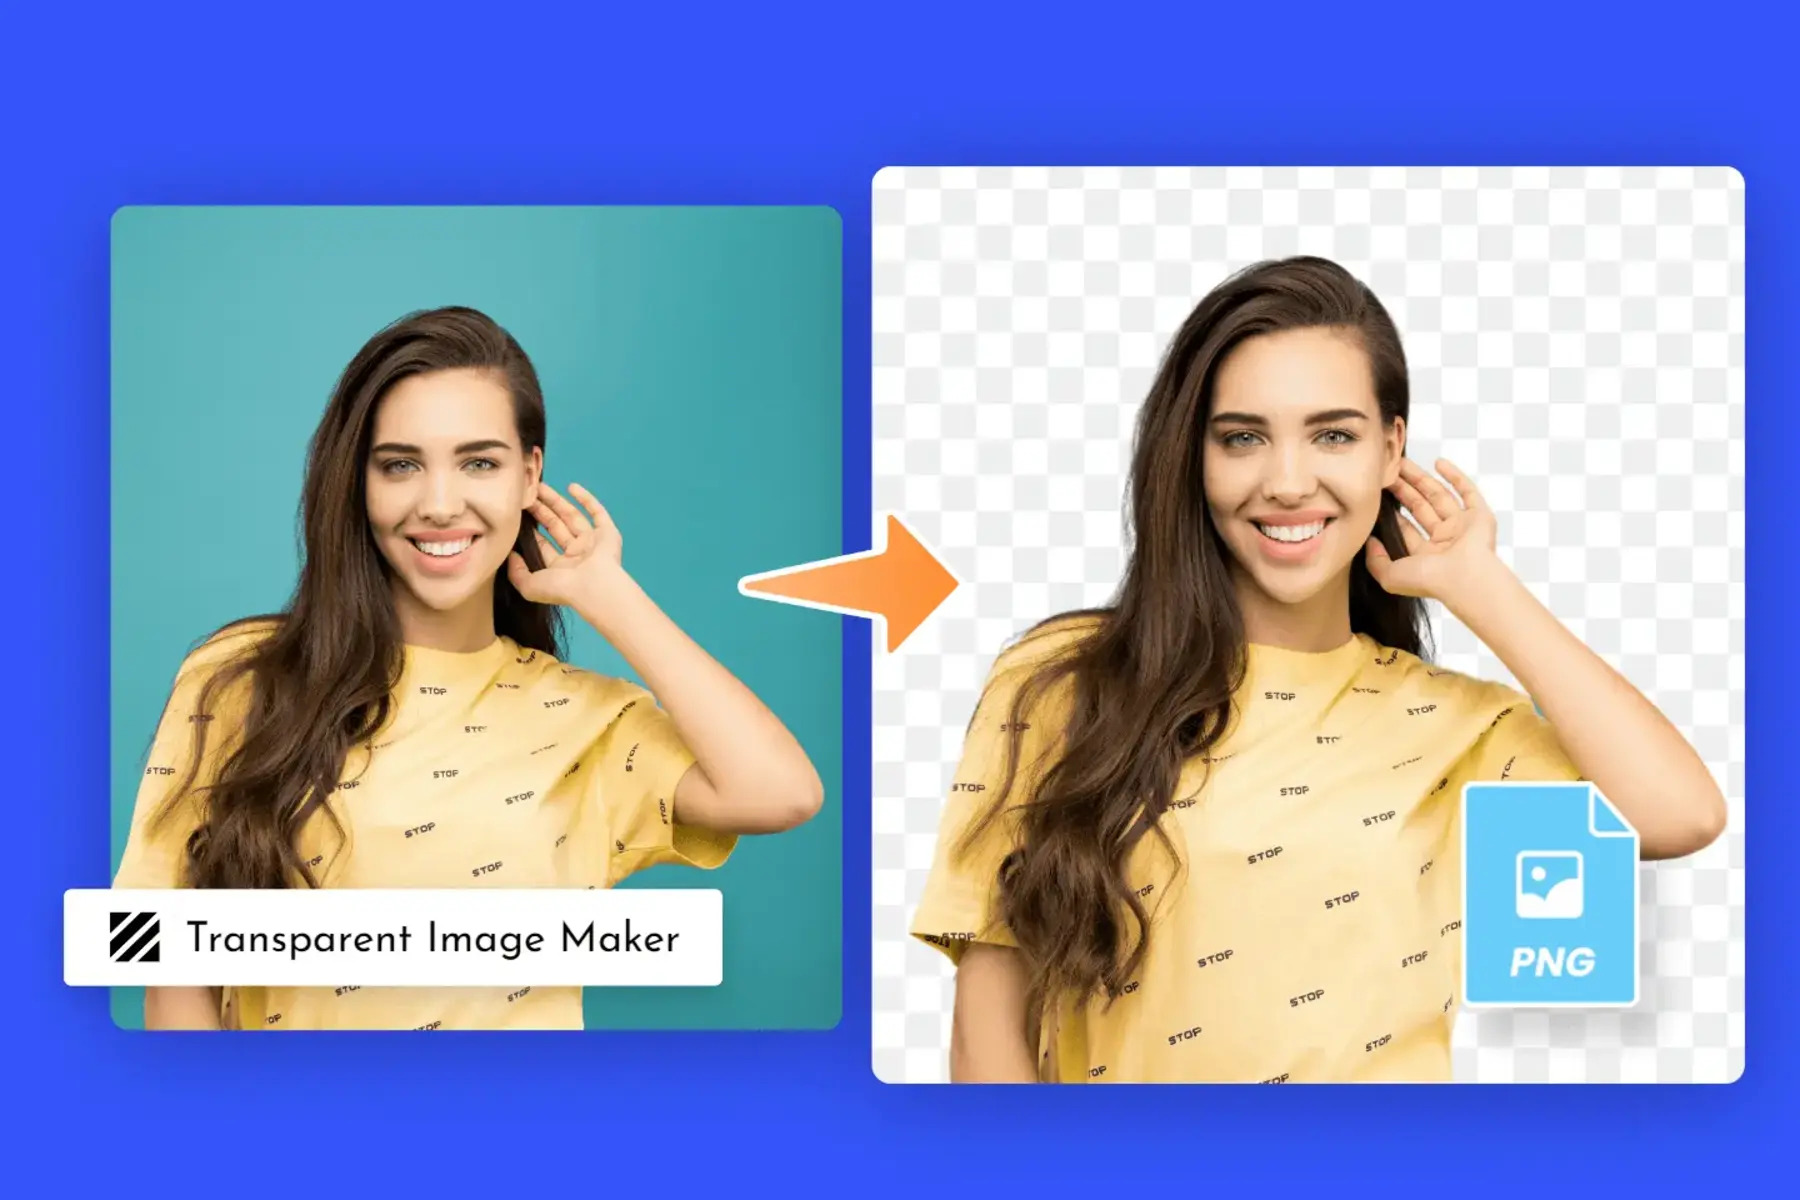
What are Transparent Images?
A transparent image is an image file format that allows the background of the image to be see-through, revealing whatever is behind it. Unlike traditional image formats, which have a solid background color, transparent images have pixels that are either fully transparent or partially transparent, allowing for a seamless integration into various design projects.
The transparency of an image is achieved by using the alpha channel, which determines the opacity or transparency level of each pixel. Pixels with a high alpha value appear opaque, while pixels with a low alpha value appear transparent.
Transparent images are widely used in graphic design, web development, and digital art. They offer tremendous flexibility and creative possibilities, allowing designers to blend images seamlessly into different backgrounds, combine multiple images or elements, and create unique visual effects.
One of the most common use cases for transparent images is in website design. By using transparent image elements, such as logos, icons, or buttons, web designers can create a more visually appealing and professional-looking website. The transparent background allows these elements to seamlessly blend with the website’s background color or pattern.
Transparent images are also essential in graphic design projects, such as creating digital banners, posters, or brochures. With transparent images, designers can overlay different elements, add depth and dimension to their designs, and create eye-catching visuals.
Another area where transparent images are frequently used is in photo editing and manipulation. By working with transparent images, photographers and digital artists can easily isolate objects from their backgrounds, creating composite images or adding them to different scenes.
Overall, transparent images are a powerful tool in the hands of designers and creatives. They not only enhance the aesthetics of various design projects but also provide flexibility and versatility in manipulating and integrating images into different contexts.
Why Use Transparent Images?
Transparent images offer numerous advantages that make them a valuable asset in design and digital projects. Let’s explore some of the reasons why transparent images are widely used:
- Seamless Integration: Transparent images allow for a seamless integration into different backgrounds. Whether it’s a website, a poster, or a social media graphic, transparent images can blend seamlessly with the surrounding elements, creating a cohesive and visually appealing design.
- Flexibility in Design: Transparent images provide designers with the flexibility to layer multiple elements and create intricate compositions. By using transparent images, designers can easily superimpose objects on top of each other, experiment with different arrangements, and achieve unique and captivating visuals.
- Improved Aesthetics: Using a transparent background for logos, icons, or other graphical elements can significantly enhance the overall aesthetics of a design. By eliminating the need for a solid background color, transparent images create a clean and polished look, allowing the focus to be on the content or the surrounding design elements.
- Enhanced User Experience: Transparent images play a vital role in web design, providing a more enjoyable user experience. By using transparent elements, designers can ensure that important information is easily readable and that the design seamlessly integrates with the overall website layout, enhancing the overall usability and visual appeal.
- Creative Possibilities: Transparent images open up a world of creative possibilities. Designers can play with transparency effects, such as blending images together, creating overlays, or adding depth and dimension to their designs. The ability to manipulate transparency allows for unique and eye-catching visual effects that can captivate the audience.
Overall, the use of transparent images empowers designers to create stunning visuals, enhance user experiences, and unlock endless creative opportunities. By harnessing the power of transparency, designers can bring their ideas to life and make a lasting impact on their audience.
Understanding Image Transparency
Image transparency refers to the degree to which an image or its background is visible or see-through. It is achieved through the use of an alpha channel, which determines the opacity or transparency level of each individual pixel within the image.
Transparency in an image can vary from fully opaque to fully transparent, with various levels of transparency in between. This transparency is denoted by an alpha value, typically ranging from 0 to 255, where 0 represents complete transparency and 255 represents complete opacity.
When an image has transparency, it means that the pixels within the image can have different levels of visibility. Pixels with a high alpha value appear solid and opaque, while pixels with a low alpha value appear transparent, allowing the background or underlying elements to show through.
Transparent images are generally saved in file formats that support transparency, such as PNG (Portable Network Graphics) or GIF (Graphics Interchange Format). These formats preserve the alpha channel information, allowing for accurate rendering of transparent pixels.
Understanding image transparency is crucial when working with design software or editing tools. Designers need to be able to manipulate the transparency levels to achieve the desired effect in their projects. By adjusting the transparency of specific elements or layers, designers can control how much of the background is visible, how different elements interact with each other, and create various visual effects.
It is important to note that not all file formats support image transparency. Formats such as JPEG (Joint Photographic Experts Group) do not support transparency and will flatten any transparent areas, filling them with a solid color when saved. This limitation makes it essential to choose the appropriate file format when working with transparent images to ensure that transparency is preserved.
Understanding image transparency is also crucial for developers and web designers. Transparent images are commonly used for creating responsive website designs, allowing the content to adapt to different screen sizes and backgrounds. They also play a significant role in creating visually appealing user interfaces, blending seamlessly with the website’s layout and providing a modern and sleek appearance.
Different File Formats for Transparent Images
When it comes to working with transparent images, it is essential to choose the right file format that supports and preserves transparency. Let’s explore some of the common file formats used for transparent images:
- PNG (Portable Network Graphics): PNG is the most widely used file format for transparent images. It supports full alpha channel transparency, allowing for accurate retention of transparent pixels. PNG files are lossless, meaning they do not lose quality when saved or compressed. This format is ideal for web graphics, logos, icons, and other graphic design elements.
- GIF (Graphics Interchange Format): GIF is another popular file format that supports transparency. It uses a limited color palette of up to 256 colors, making it suitable for simple graphics and animations. GIF files can have one specific color set as transparent, while the rest of the image remains solid. This format is commonly used for small animations, icons, and simple web graphics.
- SVG (Scalable Vector Graphics): SVG is a vector-based file format that supports transparency. As a vector format, SVG allows for scaling without losing quality. It is commonly used for illustrations, logos, and web graphics. Unlike raster image formats like PNG and GIF, SVG defines images using mathematical equations rather than individual pixels, making it scalable to any size without pixelation or loss of quality.
- TIFF (Tagged Image File Format): TIFF supports various types of image data, including transparency. It is a versatile format that is commonly used in professional photography and print designs. TIFF files can be lossless or lossy, depending on the compression settings chosen. While TIFF files tend to be larger in size compared to other formats, they offer high-quality color reproduction and transparency.
- WebP: WebP is a relatively newer file format developed by Google. It provides both lossless and lossy compression and supports transparency. WebP files tend to be smaller in size compared to other formats, making them suitable for web graphics and reducing website load times. However, it is important to note that WebP may not be supported by all web browsers and image editors.
Choosing the right file format depends on the specific requirements of your project, such as the level of transparency needed, file size considerations, and browser compatibility. It is important to ensure that the chosen file format supports transparency and aligns with the project’s goals and preferences.
How to Create a Transparent Image
Creating a transparent image involves using graphic design software or editing tools that support transparency. Here are the general steps to create a transparent image:
- Open or create an image: Start by opening an existing image or creating a new one in the design software of your choice. Ensure that the image has a background that you want to make transparent or that you are working on a blank canvas.
- Select the area: Use the selection tools available in your software to select the area you want to make transparent. This could be an object, a specific portion of the image, or the entire background. There are various selection tools, such as the marquee tool, lasso tool, or magic wand tool, depending on your software.
- Create a layer mask: Once the area is selected, create a layer mask. This mask will determine which parts of the image are transparent and which parts are visible. In most graphic design software, you can create a layer mask by clicking on the layer mask icon or using the “Layer” menu.
- Refine the transparency: Adjust the transparency of the selected area using the opacity or transparency settings. This will determine how see-through or solid the selected area appears. You can typically find the opacity or transparency settings in the layer properties or within the layer mask options in your software.
- Save the image: Once you are satisfied with the transparency, save the image in a file format that supports transparency, such as PNG. Make sure to keep the transparency intact when saving the image.
It is important to note that the specific steps may vary depending on the software or editing tool you are using. It is recommended to consult the software’s documentation or online tutorials for detailed instructions on working with transparency.
Additionally, it is also possible to find pre-made transparent images or elements online. Many websites offer free or paid resources that include transparent images in various categories. This can be a convenient option if you don’t have the time or expertise to create your own transparent images.
Tips for Working with Transparent Images
Working with transparent images requires attention to detail and careful consideration. Here are some tips to help you work effectively and efficiently with transparent images:
- Choose the right file format: Select a file format that supports transparency, such as PNG or GIF, to ensure that the transparency is preserved when saving and sharing your images.
- Use high-quality images: Start with high-resolution images to maintain the best possible quality when working with transparency. Images with a higher pixel count will yield sharper and more detailed results.
- Avoid complex backgrounds: If possible, choose images or design elements with simple or solid backgrounds. This will make it easier to isolate and manipulate the transparency without unwanted artifacts or color bleeding.
- Pay attention to anti-aliasing: Anti-aliasing refers to the smoothing of edges in an image. When working with transparent images, ensure that anti-aliasing is set appropriately to maintain smooth and clean edges, especially when placing your transparent image on different backgrounds.
- Experiment with blending modes: Blending modes in graphic design software can offer creative and visually interesting effects when working with transparent images. Try different blending modes to achieve desired results, such as overlay, multiply, or screen.
- Preview against different backgrounds: Test your transparent image against various backgrounds to ensure that it integrates well and maintains its intended appearance across different platforms or contexts. This is particularly important for web design or when sharing images on different devices.
- Organize layers and keep backups: When working with complex compositions or multiple layers in your design software, it is crucial to keep your layers well-organized and maintain backups of your work. This will make it easier to make adjustments or go back to previous versions, especially when dealing with transparency.
- Consider file size: Transparent images can sometimes result in larger file sizes compared to non-transparent counterparts. Pay attention to the file size and optimize your images if needed, striking a balance between quality and file size to ensure optimal performance.
- Keep an eye on accessibility: When designing websites or user interfaces, ensure that the transparency of your images does not compromise accessibility. Avoid using overly transparent elements that may hinder readability for individuals with visual impairments.
By following these tips, you can effectively work with transparent images and create visually stunning designs that seamlessly integrate with different backgrounds and platforms.
Using Transparent Images in Different Design Software
Transparent images can be used in a variety of design software to create stunning visual compositions. Here are some examples of how transparent images are utilized in popular design software:
- Adobe Photoshop: Photoshop is widely used in graphic design and photo editing. It provides various tools and features to work with transparent images. In Photoshop, you can create transparency by using layer masks, adjusting layer opacity, or using the eraser tool with a soft brush. The software also offers blending modes and opacity settings to achieve desired transparency effects.
- Adobe Illustrator: Illustrator is a vector-based software used for creating illustrations, logos, and graphic designs. It supports transparency settings for objects and layers, allowing you to create transparent elements within your designs. You can set the opacity of objects, use clipping masks, or apply blending modes to achieve different transparency effects.
- Sketch: Sketch is a popular design software used primarily by UI/UX designers. It offers built-in support for transparent images, allowing you to import PNG or GIF files with transparency. Sketch also provides opacity settings, layer masking, and blend modes to control transparency within your designs.
- Canva: Canva is a web-based design platform that can be accessed through a browser or mobile app. It provides a user-friendly interface for creating various designs, including social media graphics, posters, and presentations. Canva allows you to upload transparent images and overlay them on different designs, providing drag-and-drop functionality for easy customization.
- Figma: Figma is a collaborative design tool used for creating user interfaces, prototypes, and illustrations. It supports imported transparent images and offers features such as opacity settings, blending modes, and layer effects to control the transparency within your designs. Figma also allows for easy collaboration and sharing of transparent designs with team members.
These are just a few examples of the design software that can be used with transparent images. Many other design tools and editors, both online and offline, support transparency and offer similar functionality for working with transparent images.
When using transparent images in design software, it is essential to refer to the software’s documentation or online tutorials for specific instructions on how to utilize transparency features effectively. Each software may have its own unique workflows and settings, so understanding the tools available will help you make the most of transparent images in your designs.
Troubleshooting Common Issues with Transparent Images
Working with transparent images may sometimes come with challenges and issues. Here are some common problems that you may encounter when dealing with transparent images and potential solutions to troubleshoot them:
- Background color bleeding: Sometimes, transparent images may appear with a color fringing or bleeding around the edges when placed on different backgrounds. To fix this, ensure that the original image has a clean and smooth edge without any unwanted pixels. You can also refine the edges using anti-aliasing techniques in your design software.
- Poor quality after resizing: Transparent images may lose quality or appear pixelated when resized. To maintain the best quality, save your original transparent image in a high-resolution format. When resizing, use the appropriate interpolation method in your design software to preserve the image’s details and prevent distortion.
- Incompatibility with certain software or platforms: Some file formats or transparency effects may not be fully supported across all software or platforms. If you encounter compatibility issues with transparent images, consider using widely supported file formats like PNG and ensure that your software or platform is up to date.
- Unwanted artifacts or noise: Transparent images, particularly those with complex backgrounds or intricate details, may exhibit unwanted artifacts or noise. This can be due to compression or high contrast between the subject and background. To reduce artifacts, experiment with different compression settings when saving the image or use noise reduction techniques in your editing software.
- Unintended loss of transparency: If your transparent image loses its transparency or appears with a solid or colored background, double-check the file format you are using. Ensure you are saving the image in a format that supports transparency, such as PNG or GIF. Also, confirm that your design software or software settings are not flattening the transparency unintentionally.
- Performance issues with large transparent images: Transparent images with a large file size can impact the performance of your software, website, or application. To reduce file size, consider optimizing your images using compression techniques without compromising the quality. You can also experiment with lowering the resolution or cropping unnecessary parts of the image to optimize performance.
Remember, troubleshooting transparent image issues may require a combination of different approaches depending on the specific problem and the software you are using. If you encounter persistent issues, refer to the software’s documentation or seek support from online communities, forums, or tutorials where experts can provide targeted advice for resolving the problem.
Resources for Finding Transparent Images
Finding transparent images to use in your design projects can be a time-consuming task. Thankfully, several resources are available online that offer a wide variety of transparent images. Here are some popular platforms where you can find transparent images:
- Unsplash: Unsplash is a renowned platform for high-quality, royalty-free images. Although not all images on Unsplash are transparent, they have a dedicated section for transparent images, making it easy to find transparent elements like objects, icons, and textures.
- Freepik: Freepik is a popular resource for free vector graphics, illustrations, icons, and PSD files. They offer a vast collection of transparent images that can be easily customized and incorporated into your design projects.
- Flaticon: Flaticon is a popular icon resource that provides a vast collection of icons in various styles and formats. They have a section specifically for transparent icons that can be downloaded for use in web design, graphic design, and other creative projects.
- Pixabay: Pixabay is another popular platform that offers a large database of high-quality images, including transparent images. It is an excellent resource for finding photos, illustrations, vector graphics, and other visual content that can be used in both personal and commercial projects.
- Transparent PNG Images: Transparent PNG Images is a website dedicated to providing a collection of transparent PNG images across various categories. They offer a diverse range of transparent images, making it easy to find what you need for your design projects.
- Adobe Stock: Adobe Stock is a stock image platform that offers a vast library of images, illustrations, videos, and more. While not all images are transparent, they have a substantial collection of transparent images and elements available for licensing and use in your creative projects.
These resources provide a starting point for finding transparent images, but there are many other websites and platforms available that offer transparent images. Additionally, some design software, such as Photoshop and Illustrator, provide built-in libraries or marketplaces where you can access transparent images directly from within the software.
When using images from these resources, ensure that you review and comply with the specific licensing terms and attributions required by the website or the image creator. Always respect the intellectual property rights of others and give proper credit where necessary.