
Choosing the Right Time to Plant Moonflower Seeds
When it comes to planting moonflower seeds, timing is everything. These beautiful and fragrant flowers, known for their large and luminous blooms, require the right conditions to thrive. By selecting the optimal time to plant your moonflower seeds, you can ensure successful germination and a vibrant display of flowers.
One important factor to consider when deciding on the right time is your local climate. Moonflower seeds generally prefer warm temperatures, so it’s best to wait until the threat of frost has passed before planting. In most regions, this means waiting until spring. However, if you live in a warmer climate with mild winters, you may be able to plant your seeds as early as late winter.
Another factor to take into account is the length of your growing season. Moonflowers have a long growth cycle, typically taking around 100 days from planting to the first bloom. To ensure that your plants have enough time to mature and produce flowers, it’s crucial to start planting your seeds early enough in the season. Aim to plant them at least a couple of weeks before your average first frost date.
Furthermore, moonflowers are known for being night-blooming plants. They produce showy, fragrant blossoms that open in the evening and close by morning. If you want to enjoy their stunning beauty during the evening hours, it’s vital to consider the length of your summer nights. Moonflowers thrive in areas with longer nights, as this allows them to bloom for a longer duration. In regions with shorter nights, the blooms may be shorter-lived.
Lastly, it’s essential to keep in mind the specific growing requirements of moonflower seeds. These seeds need warmth and moisture to germinate successfully. Therefore, planting them when the soil temperature reaches around 60 to 70 degrees Fahrenheit (15 to 21 degrees Celsius) is advised. This typically coincides with the optimal time for other warm-season annuals in your area.
Factors to Consider Before Planting Moonflower Seeds
Before embarking on your moonflower planting journey, it’s important to consider a few key factors that can greatly impact the success of your garden. By taking these factors into account, you can ensure that your moonflower seeds have the best possible conditions for germination and growth.
The first factor to consider is the location where you plan to plant your moonflower seeds. Moonflowers thrive in full sun, so choose a spot in your garden that receives at least 6-8 hours of direct sunlight each day. This will provide the necessary energy for robust growth and abundant flowering.
Next, it’s important to pay attention to the soil quality and composition. Moonflowers prefer well-draining soil that is rich in organic matter. Before planting, amend the soil with compost or well-rotted manure to improve its fertility. This will help promote healthy root growth and overall plant vigor.
Water is another crucial element to consider. Moonflowers require consistent moisture, especially during the germination and early growth stages. Ensure that the soil is evenly moist but not waterlogged. Regular watering, especially during dry spells, will help support healthy growth and prevent the plants from wilting.
In addition to water, moonflowers benefit from regular fertilization. Prior to planting, incorporate a balanced granular fertilizer into the soil. This will provide the necessary nutrients for strong growth and vibrant blooms. As the plants continue to grow, monthly applications of a water-soluble fertilizer can help sustain their nutrient needs.
Another aspect to consider is the potential for pests and diseases. Moonflowers can be susceptible to certain pests like aphids, spider mites, and whiteflies. Regular monitoring and prompt action, such as spraying with insecticidal soap or using organic pest control methods, can help prevent infestations. Additionally, providing adequate air circulation and spacing the plants properly can reduce the risk of fungal diseases.
Lastly, it’s essential to consider the support structure for your moonflowers. These vigorous climbers need something to climb on, such as trellises, fences, or pergolas. Ensure that the support structure is sturdy enough to withstand the weight of the growing vines and the blooms.
By taking these factors into consideration before planting your moonflower seeds, you can create an ideal environment for these stunning flowers to thrive and fill your garden with their enchanting fragrance.
Understanding the Moonflower’s Growth Cycle
Before planting moonflower seeds, it’s important to have a good understanding of their growth cycle. This will help you anticipate the various stages of development and provide appropriate care to ensure healthy growth and abundant blooms.
The moonflower’s growth cycle can be divided into several distinct phases. The first stage is germination, which occurs when the seed absorbs water and begins to sprout. This usually takes about 7-10 days, but can vary depending on environmental conditions and seed quality.
Once the seed has germinated, the seedling stage begins. At this point, the seedling develops its first set of true leaves and begins to establish its root system. It’s crucial to provide adequate moisture and light during this stage to support proper growth.
As the moonflower plant continues to grow, it enters the vegetative stage. During this phase, the plant focuses on developing a strong and healthy structure. Leaves are produced, stems elongate, and the root system expands. Adequate nutrition through fertilization and proper watering is important to support vigorous growth during this period.
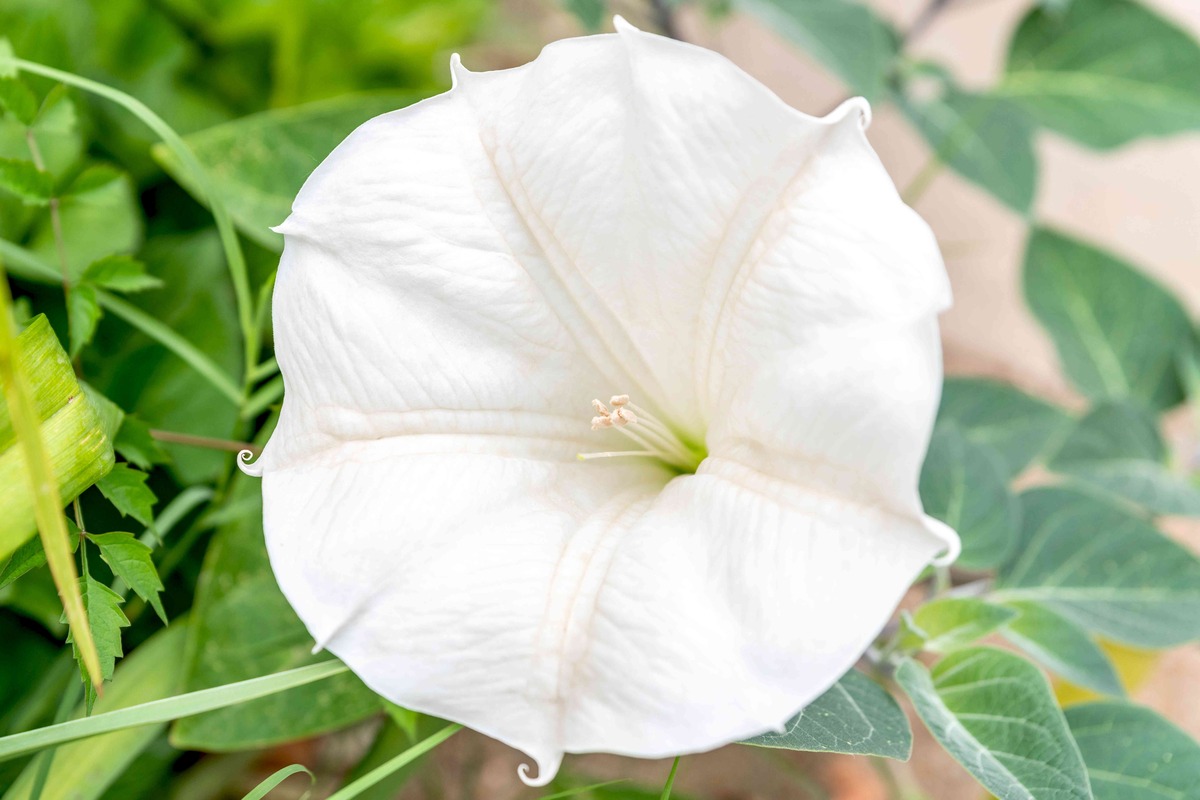
After a few weeks of vegetative growth, the moonflower transitions into the flowering stage. This is the most anticipated phase for gardeners as it is when the plant produces its stunning blossoms. Moonflowers are known for their large, trumpet-shaped flowers that open in the evening and emit a sweet fragrance. The duration of the flowering period can vary, but each bloom typically lasts for one night. Regular deadheading of faded flowers can encourage continuous blooming.
Once the flowering stage is complete, the moonflower enters the seed production stage. Fertilized flowers produce seed pods that contain the seeds for future generations. It’s important to allow the seed pods to fully mature and dry on the plant before collecting them for storage or future planting.
At the end of the growth cycle, the moonflower plant will naturally start to decline. As the days shorten and temperatures drop, the plant will eventually die back. It’s important to clean up the spent plant material and prepare the garden bed for the next growing season.
By understanding the moonflower’s growth cycle, you can better appreciate the different stages of development and provide the necessary care to support healthy growth, abundant blooms, and successful seed production.
Planting Moonflower Seeds Outdoors
Planting moonflower seeds outdoors is a great way to enjoy these stunning flowers in your garden or landscape. By following a few simple steps, you can ensure successful germination and the establishment of healthy moonflower plants.
The first step in planting moonflower seeds outdoors is selecting the right location. Moonflowers thrive in areas with full sun, so choose a spot in your garden that receives at least 6-8 hours of direct sunlight each day. This will provide the necessary energy for robust growth and abundant flowering.
Prepare the soil before planting by removing any weeds or debris. Moonflowers prefer well-draining soil that is rich in organic matter. If your soil is heavy or clay-like, amend it by mixing in compost or well-rotted manure. This will improve the soil’s fertility, drainage, and overall structure.
Once the soil is prepared, it’s time to sow the moonflower seeds. Make small holes in the soil about 1/2 inch (1.3 cm) deep and space them 6-12 inches (15-30 cm) apart. Drop one seed per hole and cover it with soil. Gently pat down the soil to ensure good seed-to-soil contact.
After sowing the seeds, water the area thoroughly to ensure the soil is evenly moist. Continue to water regularly, keeping the soil consistently moist but not waterlogged. Avoid overwatering, as excessively wet conditions can lead to rot and fungal diseases.
Germination typically occurs within 7-10 days, but can vary depending on environmental conditions. Once the seedlings emerge, thin them out if necessary, leaving the strongest plants with adequate spacing for optimal growth.
As the moonflower plants grow, they will need a support structure to climb on. Install trellises, fences, or other suitable structures near the planting area. Alternatively, you can plant moonflowers near existing structures like arbors or pergolas.
Throughout the growing season, it’s important to provide regular care for your moonflower plants. Monitor them for pests and diseases, such as aphids or powdery mildew, and take appropriate action if necessary. Water the plants deeply during dry periods and fertilize them with a balanced, water-soluble fertilizer every 4-6 weeks to support healthy growth.
With proper care and attention, your moonflower seeds will flourish outdoors, creating a stunning display of large, fragrant flowers that bloom from dusk until dawn.
Planting Moonflower Seeds Indoors
If you prefer to start your moonflower seeds indoors, you can get a head start on the growing season and ensure optimal conditions for germination. Planting moonflower seeds indoors allows you to control the temperature, moisture, and other environmental factors that can influence successful seedling establishment.
The first step in planting moonflower seeds indoors is to choose the right containers. Use seed trays, peat pots, or seedling cells with drainage holes to provide proper drainage and prevent waterlogging. Fill the containers with a high-quality, well-draining seed-starting mix.
Sow the moonflower seeds about 1/2 inch (1.3 cm) deep into the seed-starting mix. Space the seeds 6-12 inches (15-30 cm) apart to allow for adequate growth and development. Lightly cover the seeds with more seed-starting mix and gently press it down to ensure good seed-to-soil contact.
Water the containers thoroughly after sowing the seeds. The soil should be evenly moist but not waterlogged. Use a spray bottle or a gentle stream of water to avoid disturbing the seeds. Cover the containers with plastic wrap or place them in a propagation dome to create a humid environment that promotes germination.
Place the containers in a warm location with a temperature around 70-80 degrees Fahrenheit (21-27 degrees Celsius). Moonflower seeds require warmth to germinate successfully, and a consistent temperature within this range can stimulate germination within 7-10 days.
Once the seeds germinate and the seedlings emerge, remove the plastic wrap or propagation dome to improve air circulation and reduce the risk of damping-off disease. Place the containers near a source of bright, indirect light or under grow lights to provide the necessary light for healthy seedling growth.
Continue to monitor the soil moisture and water the seedlings as needed. Avoid overwatering, as this can lead to fungal diseases. Allow the soil to dry slightly between watering to prevent waterlogged conditions.
When the moonflower seedlings have developed a few sets of true leaves and are large enough to handle, transplant them into individual pots. Use a well-draining potting mix and gently lift the seedlings with a small trowel or spoon. Plant them at the same depth as they were in the containers and water them thoroughly after transplanting.
As the moonflower seedlings grow, gradually acclimate them to outdoor conditions by exposing them to increasing amounts of sunlight and outdoor temperatures. This process, known as hardening off, prepares the seedlings for transplanting into the garden.
By planting moonflower seeds indoors, you can ensure a successful start to the growing season and enjoy the beauty of these stunning flowers in your garden or containers.
Tips for Transplanting Moonflower Seedlings
Transplanting moonflower seedlings from indoor containers to the garden is an important step in their growth journey. To ensure a smooth transition and promote healthy establishment, consider the following tips when transplanting your moonflower seedlings.
Timing is key when transplanting moonflower seedlings. Wait until all risk of frost has passed and the soil has warmed up before moving the seedlings outdoors. Moonflowers are sensitive to cold temperatures and can be damaged or killed by frost. By transplanting them at the right time, you give them the best chance for success.
Choose a location in your garden that receives full sun and has well-draining soil. Moonflowers thrive in sunlight and require good drainage to prevent root rot. Prepare the planting area by removing weeds and loosening the soil with a garden fork or spade.
Prior to transplanting, water the moonflower seedlings thoroughly. This will help hydrate the plants and make it easier to remove them from their containers. Avoid transplanting under dry or hot conditions, as this can stress the seedlings.
Gently remove each seedling from its container, taking care not to damage its roots. If the seedlings are tightly packed or tangled together, carefully separate them without pulling or tearing the roots. Handle the seedlings by their leaves, as the delicate stems can be easily damaged.
Dig a hole in the planting area that is slightly larger than the root ball of the seedling. Place the seedling into the hole, making sure that the top of the root ball is level with the surrounding soil. Backfill the hole with soil and gently firm it around the seedling to eliminate any air pockets.
Water the newly transplanted seedlings immediately after planting. This will help settle the soil around the roots and promote root establishment. Provide regular watering as needed to keep the soil moist but not saturated. Consistent moisture is important for the seedlings to establish themselves in their new environment.
Consider using a protective barrier, such as a cloche or plant cover, to shield the newly transplanted moonflower seedlings from strong winds and excessive sun exposure. This can help reduce transplant shock and increase their chances of survival.
Monitor the transplanted seedlings for any signs of stress or issues such as wilting or pest infestations. Quickly address any problems that arise, such as providing additional water during dry spells or treating pests with appropriate methods.
Allow the transplanted moonflower seedlings some time to adjust and establish themselves in the garden before expecting vigorous growth or blooming. With proper care and attention, your transplanted seedlings will develop into healthy plants that produce beautiful, fragrant flowers.
Caring for Moonflower Plants During the Growing Season
Providing proper care during the growing season is essential for the health and vitality of your moonflower plants. By following a few key practices, you can ensure that your moonflowers thrive and produce an abundance of stunning blooms.
Regular watering is crucial for moonflower plants, especially during dry spells. Aim to provide them with 1-2 inches of water per week, either through rainfall or supplemental irrigation. Keep in mind that consistent moisture is important, but be cautious not to overwater, as this can lead to root rot and other issues.
Applying mulch around the base of your moonflower plants can offer several benefits. The mulch helps conserve soil moisture, suppress weed growth, and moderate soil temperature. Use organic materials like wood chips or straw, and spread a layer about 2-3 inches thick around the plants, leaving some space around the stem to avoid moisture accumulation.
Regular fertilization is important for nourishing your moonflower plants and promoting vigorous growth. Apply a balanced, slow-release granular fertilizer at the beginning of the growing season, following the package instructions for application rates. Additionally, supplement with a water-soluble fertilizer every 4-6 weeks during the growing season to provide a boost of nutrients.
Keep an eye out for pests that can potentially attack your moonflower plants. Common pests include aphids, spider mites, and whiteflies. Regularly inspect the plants for any signs of infestation, such as distorted leaves or sticky residue. If insect pests are present, consider using organic insecticidal soap or other natural pest control methods to mitigate the problem.
Moonflowers are vigorous climbers, so ensure that they have a suitable support structure to climb on. Install trellises, fences, or other vertical structures near the planting area. Regularly train the vines to grow up the support, gently tying them if necessary, to prevent tangling and provide optimal support for the growing plants.
Pruning can help maintain the shape and appearance of your moonflower plants. Remove any dead or damaged foliage or flowers promptly to prevent disease and encourage new growth. Additionally, you can prune the vines slightly if they become too long or start to overwhelm the support structure.
Deadheading, the removal of faded flowers, can extend the blooming period of your moonflower plants. By removing the spent blooms, you redirect energy towards the production of new buds and flowers. Deadhead regularly by pinching or snipping off the faded flowers just above a leaf or bud node.
Lastly, regular monitoring of your moonflower plants is essential. Watch for any signs of disease, such as leaf spots or wilting, and take appropriate action if necessary. Keep an eye out for any signs of stress or nutrient deficiencies, and adjust your care routine accordingly.
By providing consistent care and attention throughout the growing season, you can ensure healthy and vibrant moonflower plants that reward you with their breathtaking beauty and delightful fragrance.
Harvesting Moonflower Seeds
Once your moonflower plants have gone through their blooming phase, you can look forward to harvesting the seeds for future planting or sharing with fellow gardeners. Harvesting moonflower seeds can be an exciting and rewarding process, allowing you to preserve the beauty of these flowers and continue their growth in the seasons to come.
As the flowers fade and begin to dry out, they will develop seed pods. These elongated, green pods will eventually turn brown and harden as the seeds mature inside. Wait until the seed pods have fully matured and dried on the plant before harvesting them. This ensures that the seeds are fully developed and ready for storage or planting.
To harvest moonflower seeds, start by gently removing the dry seed pods from the plant. You can either pluck the pods by hand or use pruning shears or scissors to cut them off the vine. Place the harvested seed pods in a clean, dry container or paper bag to collect any seeds that may naturally fall out during the process.
Once you have gathered the seed pods, it’s time to extract the seeds. To do this, simply break open the dried pods carefully. Inside, you will find several small, flat, dark-colored seeds. Separate the seeds from the rest of the pod material and discard any debris or non-viable seeds.
It’s important to store the harvested moonflower seeds properly to maintain their viability. Place the cleaned seeds in an airtight container, such as a glass jar or a resealable plastic bag. Make sure the container is labeled with the date and the variety of moonflower. Store the seeds in a cool, dark, and dry place to preserve their quality and viability for the next planting season.
If you plan to share or exchange moonflower seeds with other gardeners, consider packaging the seeds in small envelopes or seed packets. Include pertinent information such as planting instructions, the date of harvest, and any specific details about the variety.
Remember that moonflower seeds have a relatively short shelf life, typically lasting for about 1-2 years. To ensure the best chances of successful germination, it’s advisable to use the seeds within this timeframe.
By harvesting and properly storing moonflower seeds, you can continue to enjoy these enchanting flowers year after year, and share their beauty with fellow gardening enthusiasts.
Troubleshooting Common Moonflower Planting Issues
While moonflowers are generally easy to grow, they can sometimes encounter certain issues during their growth and development. By being aware of common problems and knowing how to troubleshoot them, you can overcome challenges and ensure the success of your moonflower planting endeavors.
Slow or No Germination: If your moonflower seeds are slow to germinate or fail to germinate altogether, there may be several factors at play. Check the planting depth – if the seeds are buried too deep, they may struggle to emerge. Additionally, ensure that the soil temperature is within the optimal range for germination (around 60-70 degrees Fahrenheit or 15-21 degrees Celsius). If the soil is too cold, consider using a seedling heat mat to provide warmth.
Poor Growth or Stunted Plants: Insufficient light, nutrient deficiencies, or improper watering can lead to poor growth or stunted moonflower plants. Moonflowers thrive in full sun, so make sure they are receiving at least 6-8 hours of direct sunlight each day. Evaluate the soil fertility and consider applying a balanced fertilizer to provide necessary nutrients. Ensure that the plants are receiving enough water without being waterlogged, as both under and over-watering can impede their growth.
Yellowing or Wilting Leaves: Yellowing or wilting leaves can be a sign of various issues, including overwatering, underwatering, nutrient deficiencies, or pest infestations. Check the moisture levels of the soil and adjust your watering accordingly. Consider fertilizing with a balanced fertilizer to address any nutrient deficiencies. Examine the leaves for signs of pests, such as aphids or spider mites, and take appropriate measures to control them.
Lack of Blooms: Moonflowers require specific conditions to initiate blooming. If your plants are not producing flowers, evaluate the amount of sunlight they receive. Moonflowers need full sun to encourage blooming. Additionally, excessive nitrogen in the soil can result in lush foliage but few blooms. Avoid over-fertilizing with nitrogen-rich fertilizers and instead focus on balanced nutrition. Finally, ensure that the plants are not receiving artificial light at night, as this can disrupt their natural blooming cycle.
Pest and Disease Issues: Moonflowers can be susceptible to various pests and diseases. Some common pests that may affect moonflowers include aphids, spider mites, and whiteflies. Monitor your plants regularly and take prompt action if you notice any signs of infestation. Treat affected plants with organic insecticidal soap or other appropriate pest control methods. Proper plant spacing, good airflow, and well-draining soil can reduce the risk of fungal diseases such as powdery mildew.
Environmental Factors: Environmental factors, such as extreme heat, drought, or heavy rain, can impact the health and growth of moonflower plants. Provide shade or additional watering during periods of intense heat to prevent stress. Mulching around the plants can help retain moisture during dry periods. In the case of excessive rain, ensure that the soil has proper drainage to avoid waterlogged conditions that can lead to root rot.
By troubleshooting and addressing these common moonflower planting issues, you can overcome challenges and enjoy healthy and vibrant moonflower plants in your garden.