
Benefits of Bee Balm Seeds
Bee balm, also known as Monarda, is a versatile and beneficial flowering herb that offers numerous advantages to gardeners. The seeds of bee balm are highly prized for their medicinal properties, attractive flowers, and ability to attract pollinators. Let’s explore some of the key benefits of planting bee balm seeds in your garden.
1. Medicinal Properties: Bee balm seeds have been used for centuries in traditional medicine for their various healing properties. The leaves and flowers of the plant contain essential oils that have antimicrobial, antiseptic, and anti-inflammatory properties. They can be used to make herbal teas, infusions, or salves to treat digestive issues, headaches, colds, and fevers.
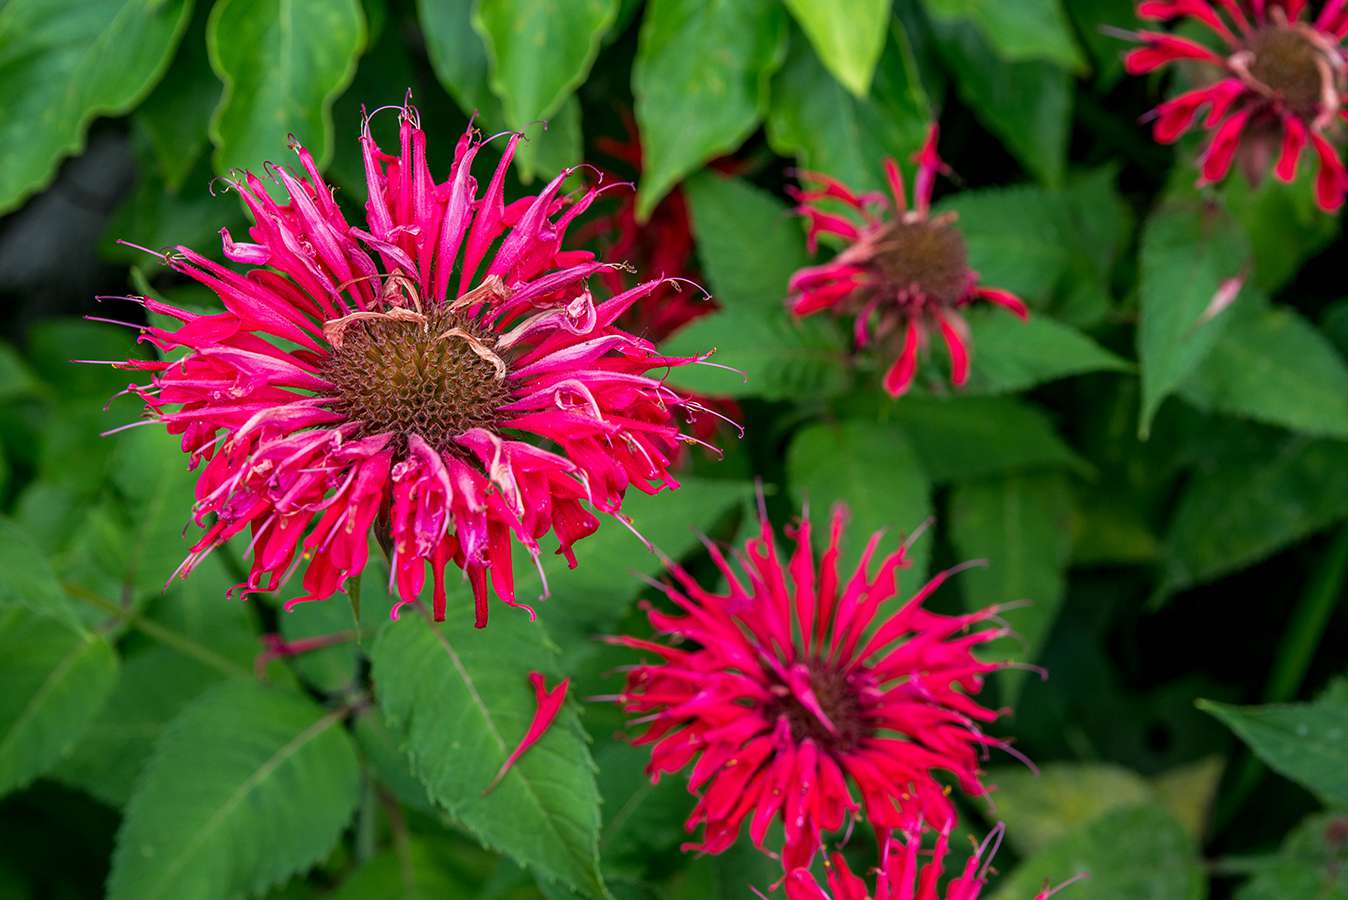
2. Attractive Flowers: Bee balm plants produce vibrant flowers in an array of colors, including red, pink, purple, and white. These colorful blooms not only add beauty to your garden but also attract butterflies, bees, and hummingbirds. The nectar-rich flowers serve as a valuable food source for these pollinators, aiding in the sustainability of local ecosystems.
3. Low Maintenance: Bee balm is a hardy plant that requires minimal care once established. It is drought-tolerant and can adapt to a variety of soil types, making it suitable for different gardening conditions. With regular watering and occasional pruning to promote airflow, bee balm plants can thrive without demanding much attention from you.
4. Companion Plant: Bee balm is known for its ability to attract beneficial insects like ladybugs and lacewings, which prey on garden pests such as aphids and caterpillars. By planting bee balm near your vegetable garden or fruit trees, you can naturally control pests without resorting to harmful chemical pesticides.
5. Culinary Uses: Bee balm leaves have a distinct minty flavor with hints of citrus and can be used to add a zesty touch to a variety of culinary creations. The leaves can be used in salads, marinades, and teas, providing a unique and refreshing taste to your dishes.
Overall, planting bee balm seeds in your garden offers a multitude of benefits. From its medicinal properties to its ability to attract pollinators and control pests, bee balm is a valuable addition to any garden. So why not give it a try and enjoy the beauty and benefits of this remarkable flowering herb?
Types of Bee Balm Seeds
When it comes to bee balm seeds, there are several varieties to choose from, each offering unique characteristics and colors. Whether you prefer a specific color scheme or have specific growing conditions, here are some popular types of bee balm seeds that you can consider planting in your garden.
1. Monarda Didyma: Also known as scarlet beebalm or Oswego tea, Monarda didyma is the most commonly grown species of bee balm. It produces vibrant red flowers that are irresistibly attractive to hummingbirds and butterflies. This variety typically grows to a height of 2-4 feet and is a great addition to any garden or flower bed.
2. Monarda Citriodora: Monarda citriodora, or lemon bee balm, stands out for its beautiful light pink to lavender flowers and its citrusy fragrance. As the name suggests, the leaves emit a pleasant lemon scent when crushed. Lemon bee balm is a shorter variety, usually reaching a height of 1-3 feet, making it a great choice for small gardens or containers.
3. Monarda Fistulosa: Monarda fistulosa, also called wild bergamot or horse mint, is a native perennial with pale purple flowers. This variety is known for its strong medicinal properties and is often used in herbal medicine. It can tolerate various soil conditions and attracts a wide range of pollinators to your garden.
4. Monarda Punctata: Monarda punctata, commonly known as spotted bee balm or horsemint, is a unique species with showy yellow and purple-spotted flowers. This drought-tolerant variety is well-suited for dry, sandy, or rocky soils. Spotted bee balm adds a striking and distinctive element to any garden or wildflower meadow.
5. Monarda Panorama Mixed: If you can’t decide on a specific type, Monarda panorama mixed is an excellent option. This variety offers a mix of colors, including shades of red, pink, and purple. Planting these seeds will create a stunning display of varied hues and attract a diverse range of pollinators to your garden.
These are just a few examples of the many types of bee balm seeds available. When selecting bee balm seeds, consider factors such as flower color, mature height, and growing conditions to choose the variety that best suits your preferences and garden environment. Experimenting with different types can add depth and visual interest to your garden while providing valuable habitat for pollinators.
Factors to Consider Before Planting Bee Balm Seeds
Before you plant bee balm seeds in your garden, there are several important factors to consider. These considerations will help ensure the success and longevity of your bee balm plants. Take a look at the following factors before you get your hands dirty and start planting.
1. Sunlight Requirements: Bee balm thrives in full sun to part shade conditions. Make sure to choose a planting location that receives at least 6-8 hours of direct sunlight per day. Insufficient sunlight can result in weak growth and fewer flowers.
2. Soil Type and Drainage: Bee balm prefers well-draining soil that is rich in organic matter. Sandy or loamy soils with a pH level between 6.0 and 7.5 are ideal. If you have heavy clay soil, consider amending it with compost or organic matter to improve drainage.
3. Watering Needs: Bee balm has average water requirements and does well with regular watering. However, it is important not to overwater, as this can lead to root rot. Water the plants deeply and allow the soil to dry slightly between waterings.
4. Space and Airflow: Bee balm plants can spread out and become bushy, so ensure you provide adequate spacing between each plant. This helps promote airflow and prevents the development of diseases caused by moisture buildup. Aim for a spacing of about 18-24 inches between plants.
5. Companion Planting: Consider the companion plants you have in your garden. Bee balm pairs well with other flowering herbs like lavender, thyme, and sage. These plants not only create a visually pleasing garden but also attract beneficial insects and pollinators.
6. Pests and Diseases: While bee balm is generally resistant to pests and diseases, it is susceptible to powdery mildew, which can affect its growth and appearance. To prevent powdery mildew, ensure good airflow, avoid overwatering, and space the plants properly.
7. Garden Size: Before planting bee balm, consider the available space in your garden. Some varieties of bee balm can spread rapidly and may require regular pruning to maintain their shape. If you have limited space, choose dwarf or compact varieties that stay more contained.
8. Local Growing Conditions: Research the specific growing conditions in your local area. Different regions have varying climates and soil types, so it’s important to know which bee balm varieties are best suited to your specific location.
By considering these factors before planting bee balm seeds, you can create an optimal environment for your plants to thrive. This will result in healthier growth, abundant flowers, and a garden buzzing with pollinators.
Best Time to Plant Bee Balm Seeds
The timing of planting bee balm seeds is crucial to ensure successful germination and healthy growth. While bee balm seeds can be sown directly in the garden or started indoors, there are specific times of the year that are better suited for different planting methods. Let’s explore the best times to plant bee balm seeds.
1. Direct Sowing: Bee balm seeds can be directly sown in the garden after the last frost date in your area. In most regions, this falls in the spring, typically between April and May. Sow the seeds on the prepared soil surface, lightly pat them down, and cover them with a thin layer of soil. Keep the soil moist until the seeds germinate.
2. Indoor Start: If you want to get a head start on your bee balm plants, you can start the seeds indoors 6-8 weeks before the last expected frost date. This is usually in late winter or early spring. Fill seed trays or pots with a well-draining potting mix, sow the seeds on the surface, and lightly cover them with a thin layer of soil. Place the containers in a warm location, mist the soil to keep it moist, and cover them with a plastic dome or plastic wrap to create a greenhouse effect. Once the seedlings have grown a few inches tall and the danger of frost has passed, transplant them outdoors.
3. Fall Planting: In some regions, bee balm seeds can be planted in the fall. This allows the seeds to experience a period of winter dormancy and naturally germinate in the spring. Fall planting is typically recommended for mild climate areas where winters are not extremely harsh. It’s important to research your specific location’s climate and frost dates before opting for fall planting.
Remember to check the specific planting recommendations for the bee balm variety you have chosen, as some may have specific planting requirements. Additionally, keep in mind that bee balm seeds can take a couple of weeks to germinate, so be patient and provide consistent moisture during the germination process.
By planting bee balm seeds at the appropriate time, you can ensure that they establish strong roots, produce vibrant flowers, and provide a beautiful addition to your garden for years to come.
How to Prepare Soil for Bee Balm Seeds
Preparing the soil properly before planting bee balm seeds is essential for the optimal growth and health of the plants. By providing the right conditions, you can help ensure successful germination and vigorous growth. Here are some steps to prepare the soil for planting bee balm seeds:
1. Choose the Right Location: Bee balm thrives in well-draining soil and requires a location that receives at least 6-8 hours of direct sunlight per day. Select a spot in your garden that meets these requirements to provide the ideal growing conditions for your bee balm plants.
2. Clear the Area: Remove any weeds, rocks, or debris from the planting area. This helps prevent competition for nutrients and ensures that the bee balm seeds have enough space to germinate and grow uninhibited.
3. Loosen the Soil: Use a garden fork, tiller, or a shovel to loosen the soil in the planting area. Bee balm prefers loamy soil, which has a good balance of sand, silt, and clay. Breaking up any compacted soil and removing large clumps will create a loose and friable texture that allows roots to penetrate easily.
4. Amend the Soil: Bee balm thrives in soil that is rich in organic matter. Incorporate well-aged compost or organic matter into the soil to improve its fertility, moisture retention, and drainage. This adds essential nutrients and encourages beneficial microbial activity in the soil, promoting healthy growth.
5. Test Soil pH: Bee balm prefers a slightly acidic to neutral soil pH ranging from 6.0 to 7.5. Use a soil testing kit to determine the pH level of your soil. If the pH is outside the optimal range, you may need to amend the soil with lime to raise the pH or sulfur to lower it, depending on the needs of your specific soil.
6. Level the Soil: Rake the soil surface to even it out and create a smooth planting bed. This helps provide a uniform surface for sowing the bee balm seeds and ensures even water distribution across the area.
7. Water the Soil: Before planting the bee balm seeds, thoroughly water the area to ensure the soil is moist. This provides a welcoming environment for the seeds and aids in their germination process.
By following these steps to prepare the soil for your bee balm seeds, you can create the ideal growing conditions. This will contribute to the healthy establishment and growth of your bee balm plants, allowing them to flourish and bring beauty to your garden.
Step-by-Step Guide to Planting Bee Balm Seeds
Planting bee balm seeds is a straightforward process that can be done both outdoors and indoors. By following these step-by-step instructions, you’ll be able to successfully sow your bee balm seeds and watch them grow into beautiful plants.
1. Choose the Planting Method: Decide whether you want to sow the bee balm seeds directly in the garden or start them indoors. Direct sowing is suitable for areas with a longer growing season, while starting seeds indoors allows for earlier planting and better control over seedling growth.
2. Prepare the Soil: Ensure your soil is well-prepared as described in the previous section. Loosen the soil, remove debris, and amend it with compost or organic matter to improve its fertility and drainage.
3. Outdoor Planting: If you choose to sow bee balm seeds directly outside, make small furrows about 1/4 inch deep in the prepared soil. Space the furrows 12-18 inches apart to provide enough room for the plants to grow. Place 2-3 seeds in each furrow, maintaining a spacing of about 6 inches between each seed.
4. Indoor Planting: To start bee balm seeds indoors, fill seed trays or pots with a well-draining potting mix. Make sure the containers have drainage holes. Sow 2-3 seeds in each container, pressing them gently into the soil surface. Cover the seeds with a thin layer of soil, about 1/8 inch deep.
5. Water the Seeds: After planting, water the soil gently to moisten it. Avoid excessive watering, as it can lead to rotting. Keep the soil consistently moist, but not waterlogged, until the seeds germinate.
6. Provide Light and Warmth: Place the containers or trays in a warm location where they will receive bright, indirect light. A temperature of around 70°F (21°C) is ideal for promoting germination. Consider using a seedling heat mat or providing bottom warmth to speed up germination.
7. Transplanting Seedlings: Once the seedlings have developed at least two sets of true leaves and the danger of frost has passed, they can be transplanted outdoors. Choose a location that meets the sunlight and soil requirements mentioned earlier. Space the seedlings 18-24 inches apart, gently removing them from their containers and planting them at the same depth they were in the pots.
8. Water and Mulch: After transplanting, water the seedlings thoroughly to help them establish in their new location. Apply a layer of organic mulch around the plants to retain moisture, suppress weeds, and regulate soil temperature.
9. Provide Maintenance: Water the plants consistently, ensuring they receive about 1 inch of water per week. Remove any weeds that may compete with the bee balm plants for nutrients and space. Deadhead the flowers as they fade to promote continuous blooming.
By following these steps, you can successfully plant bee balm seeds and nurture them into healthy and vibrant plants. Enjoy the process and the beauty of these eye-catching flowers in your garden!
Caring for Bee Balm Seedlings
Once your bee balm seedlings have been transplanted into the garden, it’s important to provide proper care to ensure their healthy growth and development. Following these guidelines will help your seedlings thrive and blossom into beautiful bee balm plants.
1. Watering: Seedlings have delicate root systems and require consistent moisture. Water the seedlings regularly, ensuring that the soil remains evenly moist. Avoid overwatering, as this can lead to root rot. Aim to provide about 1 inch of water per week, adjusting based on weather conditions.
2. Mulching: Apply a layer of organic mulch, such as straw or wood chips, around the base of the seedlings. This helps conserve soil moisture, suppress weeds, and regulate soil temperature. Maintain a mulch layer of around 2-3 inches, making sure to keep it a few inches away from the stems to prevent rotting.
3. Fertilizing: Bee balm generally doesn’t require heavy fertilization. However, if the soil is poor in nutrients, you can apply a balanced slow-release fertilizer in the spring, following the package instructions. Be cautious not to over-fertilize, as this can lead to excessive leaf growth and fewer flowers.
4. Pruning: Regular pruning helps maintain the shape and health of your bee balm plants. Pinch off spent flowers to encourage continuous blooming and prevent the plants from going to seed. In the fall, after the blooming season has ended, you can trim back the stems to a few inches above the ground. This promotes better airflow and helps reduce the risk of disease.
5. Provide Support: As your bee balm plants grow, they may become tall and top-heavy. To prevent them from bending or breaking, install stakes or use plant supports to provide support and prevent damage from wind or heavy rain. Place the support structures in the ground early in the growing season to avoid disturbing the roots later on.
6. Pest and Disease Control: Bee balm is generally resistant to pests and diseases. However, occasional issues with powdery mildew may arise, especially in humid conditions. To prevent powdery mildew, ensure good airflow between the plants, avoid overwatering, and consider applying a thin layer of organic fungicide as a preventive measure.
7. Support Pollinators: Bee balm is known for attracting pollinators such as bees, butterflies, and hummingbirds. Create a pollinator-friendly environment by planting other nectar-rich flowers nearby and avoiding the use of harmful pesticides. Supporting these beneficial creatures not only benefits your garden but also contributes to the overall health of the ecosystem.
By following these care guidelines, you can ensure the healthy growth and longevity of your bee balm seedlings. With proper watering, pruning, and attention to pests and diseases, your plants will reward you with an abundance of vibrant blooms and attract a buzz of pollinators to your garden.
Common Problems and Solutions for Bee Balm Seedlings
Although bee balm seedlings are generally robust and resistant to many pests and diseases, they can sometimes encounter problems that inhibit their growth and health. By being aware of common issues that can affect bee balm seedlings and their potential solutions, you can address these challenges promptly and ensure the success of your plants. Let’s explore some common problems and their solutions:
1. Powdery Mildew: Powdery mildew is a fungal disease that can affect bee balm leaves, causing a white powdery coating. To prevent powdery mildew, ensure good airflow around the plants by providing adequate spacing. Avoid overhead watering and water at the base of the plants instead. Apply organic fungicides early in the season as a preventive measure.
2. Aphids: Aphids are small insects that can infest bee balm plants, causing distorted growth and feeding damage. To control aphids, you can spray the affected plants with a strong stream of water to dislodge the pests. Introduce beneficial insects like ladybugs or lacewings, which are natural predators of aphids. If the infestation is severe, you can use insecticidal soap or neem oil as a natural control method.
3. Japanese Beetles: Japanese beetles are another common pest that feed on bee balm foliage. Handpicking the beetles off the plants early in the morning or late in the evening when they are less active can help control their population. You can also use insecticidal soap or apply organic insecticides specifically formulated for controlling Japanese beetles.
4. Floppy Stems: Bee balm plants can sometimes develop floppy stems that may require support. To prevent this, provide support for the plants using stakes or cages early in the growing season. This will help keep the stems upright and prevent them from bending or breaking under the weight of the flowers.
5. Insufficient Blooming: If your bee balm seedlings are not producing enough or any blooms, it may be due to insufficient sunlight. Bee balm plants thrive in full sun to part shade conditions and require a minimum of 6-8 hours of direct sunlight per day. Ensure that your plants are positioned in a location that receives adequate sunlight for optimal flowering.
6. Inadequate Watering: Inconsistent or inadequate watering can lead to stunted growth or wilted seedlings. Monitor soil moisture regularly and water your bee balm seedlings deeply when the top inch of soil feels dry. Avoid overwatering, as this can lead to root rot. Mulching around the plants can help retain soil moisture and regulate watering needs.
7. Soil Nutrient Deficiencies: Nutrient deficiencies in the soil can slow down the growth of bee balm seedlings and affect their overall health. Conduct a soil test to assess if any specific nutrients are lacking. If deficiencies are detected, you can address them by amending the soil with organic matter, applying balanced slow-release fertilizers, or using organic foliar sprays to provide necessary nutrients.
By recognizing and addressing these common problems, you can ensure the health and vitality of your bee balm seedlings. Regular monitoring, proper cultural practices, and timely intervention will help your plants thrive and showcase their vibrant blooms in your garden.
Harvesting Bee Balm Seeds
Harvesting bee balm seeds allows you to collect and preserve the seeds for future planting or sharing with fellow gardeners. This can be an exciting process and an opportunity to continue the cycle of growth from your bee balm plants. Here’s a step-by-step guide on how to harvest bee balm seeds:
1. Wait for Seed Pods to Develop: Bee balm plants produce small seed pods after flowering. Allow the flowers to fade and the seed heads to form. The seed heads will turn brown and dry out as they mature, indicating that the seeds are ready for harvest.
2. Check Seed Maturity: To check if the seeds are mature and ready for harvesting, gently squeeze a few seed heads. If the seed heads easily release the seeds, they are mature. If the seeds are still tightly attached to the seed head, give them a bit more time to mature fully.
3. Harvesting the Seeds: Once the seed heads are dry and the seeds are mature, it’s time to harvest them. Hold a paper bag or container under the seed head and carefully cut or snap off the entire seed head. Place the seed heads in the bag or container, ensuring they don’t spill out.
4. Removing the Seeds: To separate the seeds from the seed heads, gently crush and rub them between your fingers. The dry petals and chaff will be separated from the small, dark seeds. Alternatively, you can use a clean sieve or mesh screen to separate the seeds from the remaining plant material.
5. Cleaning the Seeds: After the initial separation, remove any remaining debris or chaff from the seeds. You can achieve this by gently blowing on them or using a fine-mesh sieve to sift out any residual material. This ensures you have clean, viable seeds for storage or planting.
6. Storing the Seeds: Store the bee balm seeds in a cool, dry place in a labeled envelope or airtight container. Be sure to include the seed variety and collection date on the label for future reference. Properly stored bee balm seeds can remain viable for several years.
7. Sharing or Planting: Once your bee balm seeds are harvested and properly stored, you can share them with other gardeners or use them for planting in future seasons. Bee balm seeds can be sown directly in the garden or started indoors, following the guidelines mentioned earlier in this article.
Harvesting bee balm seeds allows you to perpetuate the beauty and bounty of these remarkable plants. By following these steps, you can successfully collect and preserve bee balm seeds to enjoy the sight of these lovely flowers year after year.