
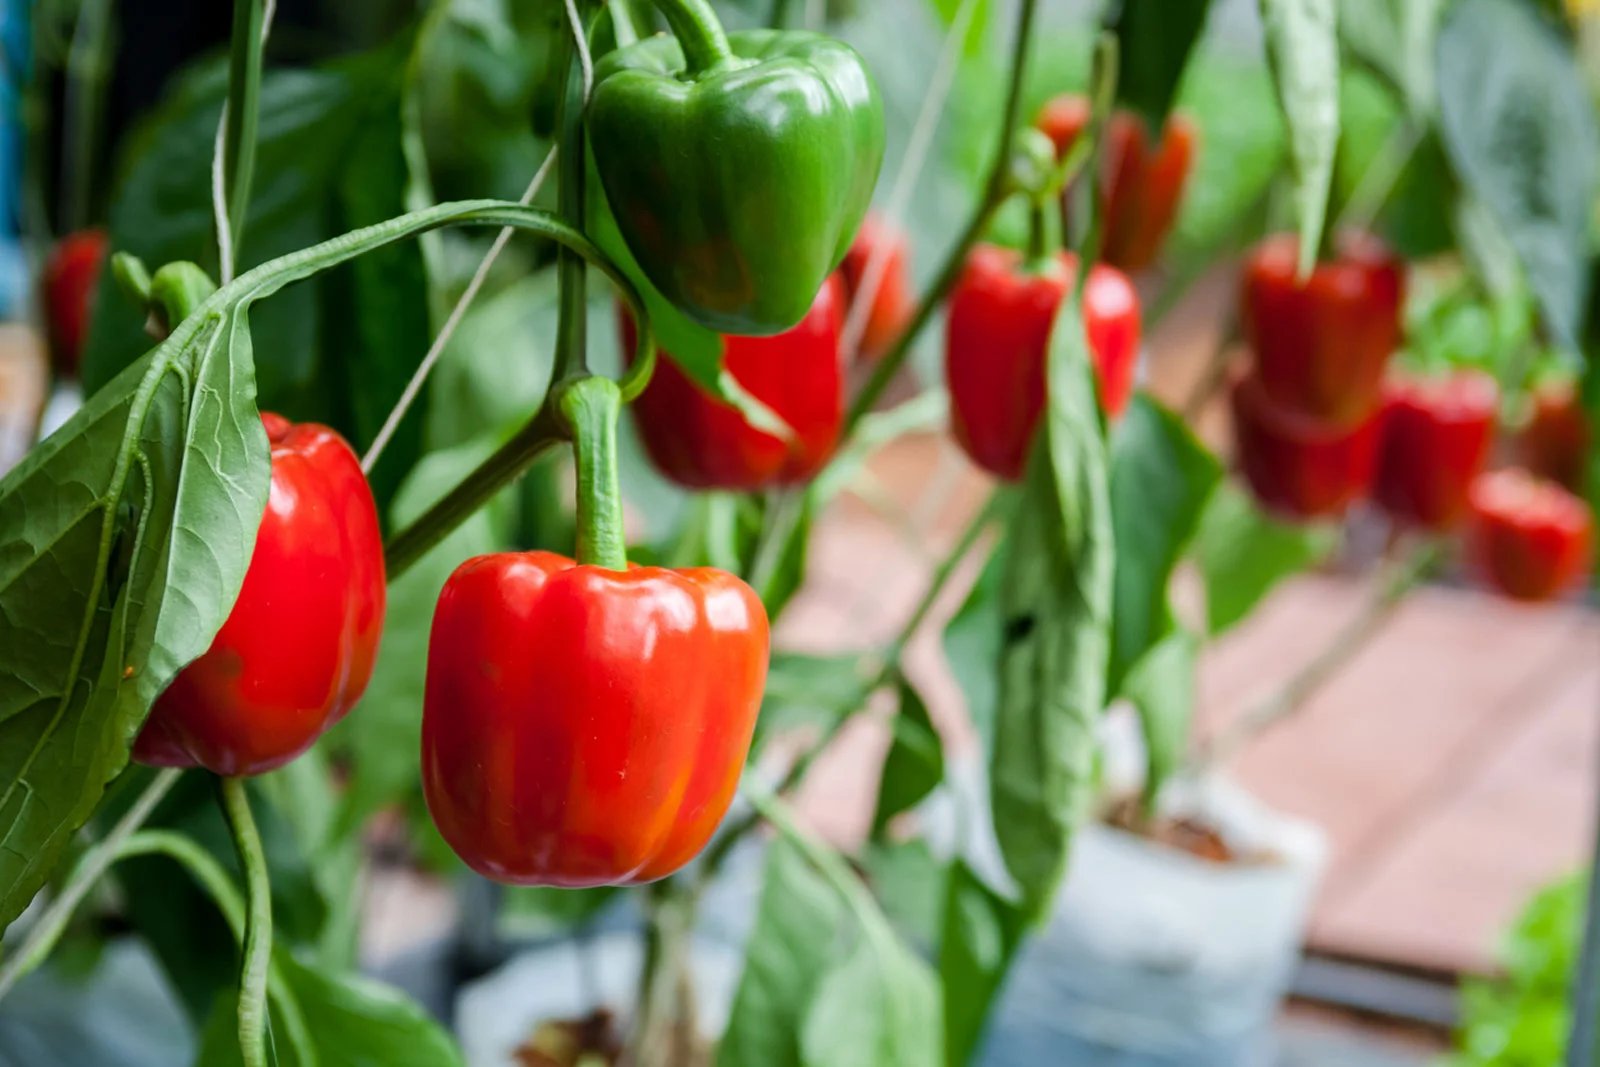
Selecting the Right Pepper
When it comes to planting pepper seeds, selecting the right pepper variety is essential. With so many different types of peppers available, it is important to choose one that suits your preference and growing conditions. Here are some factors to consider when selecting the right pepper for your garden:
- Heat Level: Peppers come in a range of heat levels, from mild to extremely spicy. Consider your tolerance for heat when choosing a pepper variety. Popular mild varieties include bell peppers and banana peppers, while habaneros and ghost peppers pack a fiery punch.
- Flavor: Peppers can have different flavors, ranging from sweet to smoky to tangy. Decide on the flavor profile you prefer and select a pepper variety accordingly. For a sweet taste, opt for sweet bell peppers, and for a smoky flavor, try chipotle peppers.
- Growing Conditions: Different pepper varieties thrive in different growing conditions. Some are more suited to warm climates, while others can tolerate colder environments. Check the recommended growing conditions for each pepper variety to ensure it aligns with your local climate.
- Size and Shape: Peppers come in various shapes and sizes, such as small cherry peppers, long jalapenos, or large bell peppers. Consider the intended use of the peppers, whether it be stuffing, slicing, or pickling, and choose a size and shape that works best for your culinary needs.
- Duration to Maturity: Pepper varieties have different maturation times, ranging from quick-maturing varieties that produce peppers within a few months to longer maturation periods. Consider how soon you want to harvest peppers and choose a variety accordingly.
By considering these factors, you can select the perfect pepper variety to grow in your garden. Whether you are looking for mild and sweet peppers for salads or heat-packed peppers for spicy dishes, there is a pepper variety out there that will suit your taste and growing conditions.
Preparing the Pepper for Seed Extraction
Before you can extract the seeds from a fresh pepper, it is important to properly prepare the pepper to ensure successful seed extraction. Here are the steps to follow:
- Ripe Pepper: Select a ripe and healthy pepper for seed extraction. Look for a pepper that is fully matured, with a vibrant color and firm texture. Avoid peppers that are overripe or have blemishes.
- Cutting the Pepper: Using a clean knife, cut the pepper lengthwise from top to bottom. Be careful to avoid cutting through the seeds, as this can damage them.
- Removing the Seeds: Carefully scoop out the seeds and the surrounding pulp from the pepper using a spoon or your fingers. Place the seeds and pulp in a clean container.
- Cleaning the Seeds: Fill the container with water and gently swirl it around to separate the seeds from the pulp. The healthy seeds will sink to the bottom, while the pulp and any bad seeds will float to the top. Discard the floating debris and repeat the process until the water is clear and only the good seeds remain.
- Drying the Seeds: Once the seeds are clean, spread them out on a paper towel or a fine mesh screen to dry. Place them in a well-ventilated area away from direct sunlight. Allow the seeds to dry completely for about a week or until they are hard and brittle.
Properly preparing the pepper for seed extraction ensures that you have clean and healthy seeds for planting. By following these steps, you can successfully extract and prepare the seeds from your fresh pepper, making them ready to be planted and grown into healthy pepper plants.
Extracting the Seeds from the Pepper
Once you have prepared the pepper, it’s time to extract the seeds. This process can be done easily by following these steps:
- Slice Pepper Open: Place the pepper on a cutting board and use a knife to make a lengthwise cut from stem to tip. Be careful to avoid cutting through the seeds, as this can damage them.
- Remove the Seeds: Gently scrape the seeds from the pepper using a spoon, your fingers, or a small food brush. Be sure to remove all the seeds, as even a few remaining seeds can lead to mold or other problems.
- Separate Seeds from Pulp: Once you have removed the seeds, place them in a bowl or a container. Use your fingers or a spoon to separate the seeds from any remaining pulp. If there is a lot of pulp, you can rinse the seeds under running water to help wash away any leftover residue.
- Drain and Dry the Seeds: Once the seeds are separated from the pulp, transfer them to a fine mesh strainer or a sieve. Rinse the seeds under cool water to remove any remaining pulp. Then, spread them out on a paper towel or a clean, dry surface and allow them to air dry for a few days. Make sure they are completely dry before storing them.
By following these steps, you can easily extract the seeds from a fresh pepper. It’s important to handle the seeds with care to avoid damaging them. Once the seeds are extracted, you can move on to the next step of cleaning and preparing them for optimal germination.
Cleaning the Pepper Seeds
Cleaning the pepper seeds is an essential step in preparing them for planting. It helps remove any debris, potential pathogens, or substances that could hinder germination. Here’s how you can clean your pepper seeds effectively:
- Separating Seeds from Pulp: After extracting the seeds from the pepper, transfer them to a bowl or container. Use your fingers or a spoon to separate the seeds from any remaining pulp. If there is a substantial amount of pulp, you can place the seeds in a fine-mesh sieve and rinse them under cool running water, gently swishing them around to remove any remaining pulp.
- Debris Removal: Inspect the seeds for any debris, such as small pieces of pepper flesh or stems. Remove any visible debris by hand or using tweezers.
- Seed Soaking: To further clean the seeds, you can soak them in a bowl of water for a few minutes. Swirl the seeds around to dislodge any dirt or remaining impurities. Skim off any floating debris, as these are likely to be non-viable seeds or unwanted materials.
- Drain and Dry: After soaking, drain the water and spread the seeds on a paper towel or a clean, dry surface. Allow them to air dry completely. Ensure that the seeds are dry before storing them, as any moisture can lead to mold or damage the seeds.
By properly cleaning the pepper seeds, you remove any potential barriers to healthy seed germination. This step ensures that your seeds are ready to be planted, increasing the chances of successful growth and the development of robust pepper plants.
Preparing the Soil for Planting
The success of growing healthy pepper plants starts with the preparation of the soil. Before planting your pepper seeds, it’s crucial to ensure that the soil is well-prepared and provides the right conditions for growth. Follow these steps to prepare the soil:
- Choose the Right Location: Select a sunny spot in your garden or yard for planting peppers. Peppers require at least 6-8 hours of direct sunlight daily for optimal growth.
- Test the Soil: Use a soil testing kit to determine the pH level of your soil. Peppers prefer slightly acidic to neutral soil with a pH ranging from 6.0 to 7.0.
- Amend the Soil: Based on the soil test results, adjust the pH if necessary. Add organic matter, such as compost or well-rotted manure, to improve soil structure, drainage, and fertility.
- Remove Weeds and Rocks: Clear the planting area of any weeds, rocks, or debris that may impede the growth of your pepper plants. This will also prevent competition for nutrients and water.
- Till the Soil: Use a garden fork or a tiller to loosen the soil to a depth of about 12 inches. This helps improve aeration, drainage, and root penetration.
- Incorporate Organic Fertilizer: Before planting, mix in a slow-release organic fertilizer rich in nutrients, such as nitrogen, phosphorus, and potassium, to provide a balanced nutritional foundation for your pepper plants.
- Level and Rake the Soil: Smooth out the soil surface with a rake, ensuring it is even and free from clumps. This will make it easier to plant the seeds at the right depth.
By properly preparing the soil, you create an optimal environment for your pepper seeds’ germination and subsequent growth. Well-drained, nutrient-rich soil sets the foundation for healthy, productive pepper plants, leading to a bountiful harvest.
Planting the Pepper Seeds
Once you have prepared the soil, it’s time to plant your pepper seeds. Follow these steps to ensure successful planting:
- Timing: Plant your pepper seeds indoors 6-8 weeks before the last frost date in your area. This will give them ample time to germinate and grow into sturdy seedlings before transplanting them outdoors.
- Container Selection: Choose shallow containers or seed trays with drainage holes. Alternatively, biodegradable peat pots or seedling cells can also be used.
- Seed Starting Mix: Fill the containers with a seed starting mix or a well-draining soilless mix specifically designed for seed germination. This ensures proper moisture retention and prevents the risk of soilborne diseases.
- Sowing the Seeds: Sow the pepper seeds about ¼ to ½ inch deep in the seed starting mix. Space the seeds about 2 inches apart to allow room for growth.
- Watering: Moisten the soil gently after sowing the seeds to ensure proper moisture. Be careful not to soak the soil, as excessive moisture can lead to root rot.
- Provide Warmth: Peppers require warmth for germination. Place a plastic cover or wrap the containers with plastic wrap to create a greenhouse effect and maintain a consistent temperature between 70-80°F (21-27°C).
- Lighting: Place the containers under grow lights or in a bright location where they can receive 12-14 hours of light daily. If using natural light, rotate the containers regularly to encourage even growth.
- Germination and Growth: Maintain the soil moisture by misting regularly or using a spray bottle. The seeds will germinate within 7-14 days, and the seedlings will develop their first true leaves within a few weeks.
By following these steps, you can successfully plant your pepper seeds and provide them with the ideal conditions for germination and healthy growth. Remember to keep track of your planting locations and provide proper care to your seedlings until they are ready for transplanting into the garden.
Providing Proper Care for Seedlings
Once your pepper seedlings have emerged, it’s crucial to provide them with proper care to ensure their healthy development. Here are some essential steps to follow:
- Light: Place the seedlings under grow lights or in a location where they can receive at least 12-14 hours of bright, indirect sunlight daily. This will promote strong, sturdy growth.
- Watering: Keep the soil consistently moist but not soggy. Water the seedlings when the top inch of soil becomes dry. Use a watering can or mister to avoid disturbing the delicate seedlings.
- Temperature: Maintain a moderate temperature between 65-75°F (18-24°C) during the day and slightly cooler at night. Avoid exposing the seedlings to extreme temperature fluctuations or drafts.
- Fertilization: Start feeding the seedlings with a diluted, balanced liquid fertilizer once they develop their second set of true leaves. Follow the package instructions for proper application rates.
- Thinning: If multiple seedlings emerge from the same container, thin them out by gently removing the weaker ones, keeping the strongest and healthiest seedlings to encourage robust growth.
- Transplanting: Once the seedlings have developed a strong root system and are about 6-8 inches tall, they are ready for transplanting outdoors. Harden them off gradually by exposing them to outdoor conditions for a few hours each day, gradually increasing the exposure time over a week.
- Pest and Disease Control: Monitor the seedlings for any signs of pests or diseases. If observed, take appropriate measures such as using organic insecticides or applying natural pest control methods to protect your seedlings.
- Support: As the seedlings grow taller, provide support in the form of stakes or cages to prevent them from bending or breaking under their own weight.
By providing proper care for your pepper seedlings, you create a strong foundation for healthy plant growth. Remember to adjust watering, fertilization, and other care practices based on the specific requirements of the pepper variety you are growing.
Transplanting the Pepper Seedlings
Transplanting your pepper seedlings from indoor containers to the outdoor garden is a critical step in their growth journey. Follow these steps to ensure a successful transplant:
- Timing: Wait until the danger of frost has passed and the soil temperature is consistently above 60°F (15°C) before transplanting your pepper seedlings. This usually occurs in late spring or early summer.
- Prepare the Soil: Choose a well-draining location with full sunlight for your pepper plants. Prepare the garden bed by removing any weeds and amending the soil with organic matter, such as compost or well-rotted manure.
- Spacing: Space the pepper seedlings 18-24 inches apart in rows, leaving enough space for them to grow and receive proper air circulation.
- Planting: Dig a hole slightly larger than the root ball of the seedling. Gently remove the seedling from its container, being careful not to damage the roots. Place the seedling in the hole, ensuring it is at the same depth as it was in the container. Backfill the hole with soil and gently firm it around the base of the plant.
- Watering: After transplanting, water the seedlings thoroughly to settle the soil and help reduce transplant shock. Ensure the soil is evenly moist but not waterlogged.
- Provide Support: If your pepper variety grows tall or produces heavy fruit, consider providing support such as stakes or cages to prevent the plants from bending or breaking.
- Mulching: Apply a layer of organic mulch, such as straw or wood chips, around the base of the plants. This helps conserve moisture, suppresses weed growth, and regulates soil temperature.
- Stake Placement: If you are using stakes for support, insert them into the ground soon after transplanting to avoid damaging the roots later.
- Monitor and Water: Keep a close eye on the newly transplanted seedlings and water them regularly. Be careful not to overwater, as excess moisture can lead to rot or fungal diseases.
By following these steps, you can ensure a smooth and successful transition for your pepper seedlings from indoor containers to their new outdoor home. Providing proper care and attention after transplanting will give your pepper plants the best chance to thrive and produce a bountiful harvest.
Caring for Mature Pepper Plants
Once your pepper plants have reached maturity, it’s important to continue providing proper care to ensure their health and productivity. Here are some essential care practices to follow:
- Watering: Pepper plants need consistent moisture, especially during dry spells. Keep the soil evenly moist but not waterlogged. Deep watering at the base of the plants is preferable to shallow, frequent watering.
- Fertilization: Feed your pepper plants with a balanced fertilizer every 4-6 weeks throughout the growing season. Choose a fertilizer specifically formulated for vegetables or peppers, or opt for organic options like compost or well-rotted manure.
- Weed Control: Regularly remove weeds from around your pepper plants to prevent competition for nutrients, water, and sunlight. Mulching can also help suppress weed growth.
- Pest and Disease Management: Monitor your pepper plants for common pests, such as aphids or pepper hornworms. Use organic pest control methods like handpicking, neem oil, or companion planting with insect-repelling herbs. Inspect regularly for signs of diseases like powdery mildew or bacterial spot, and take appropriate measures if detected.
- Pruning: Prune your pepper plants by removing any yellow or diseased leaves, as well as any suckers that form in the leaf axils. This improves air circulation and helps prevent disease buildup. Avoid excessive pruning, as it can reduce fruiting.
- Support: Provide support to your pepper plants, especially if they are heavy-bearing or prone to bending. Stake or cage the plants to keep them upright and support the weight of the pepper fruits.
- Harvesting: Monitor your pepper plants regularly for ripe peppers. Harvest them by cutting or gently twisting the fruits off the plant to avoid damaging the stems. Harvesting regularly encourages the production of more peppers.
- Rotate Crops: Avoid planting peppers in the same location year after year to prevent the buildup of pests and diseases. Practice crop rotation and wait at least two years before planting peppers in the same area again.
By providing proper care to your mature pepper plants, you ensure their continued health and productivity. Regular maintenance, including watering, fertilizing, pest management, and harvesting, will help you enjoy a bountiful harvest of flavorful peppers throughout the growing season.
Harvesting and Using Fresh Peppers
Harvesting your homegrown peppers at the right time ensures optimal flavor and texture. Here are some guidelines to follow when harvesting and using fresh peppers:
- Harvesting Time: Most peppers are ready for harvest when they have reached their full size and color. However, you can harvest them earlier if you prefer smaller or less ripe peppers. Refer to the specific variety’s maturity timeline for guidance.
- Harvesting Method: Use a pair of clean garden shears or scissors to cut the peppers off the plant. Be careful not to damage the branches or other peppers while harvesting.
- Handling and Storage: Handle the harvested peppers gently to avoid bruising or damaging them. Store them in a cool, dry place, such as the refrigerator, for up to two weeks. Alternatively, you can freeze, pickle, or dry the peppers for longer-term storage.
- Using Fresh Peppers: Peppers are versatile in the kitchen and can be used in a variety of dishes. They can add flavor, color, and heat to salads, stir-fries, salsas, sauces, and more. Experiment with different recipes and enjoy the distinct taste of fresh, homegrown peppers.
- Preserving Peppers: If you have an abundance of peppers, consider preserving them for later use. You can pickle them in vinegar, roast and freeze them, or dry them to make flavorful seasonings like chili flakes or powders.
- Seed Saving: If you wish to save seeds from your peppers for future planting, choose fully ripe and healthy peppers. Open the pepper, remove the seeds, and dry them thoroughly before storing them in a cool, dry place.
- Sharing the Harvest: If you have more peppers than you can use, consider sharing them with friends, family, or neighbors. Freshly harvested homegrown peppers make wonderful gifts and can be enjoyed by others.
By following these guidelines, you can harvest your peppers at the peak of their flavor and make the most of your homegrown bounty. Whether you use them immediately in your favorite recipes or preserve them for future use, fresh peppers add a delightful taste and vibrant colors to your culinary creations.