
Choosing the right pepper varieties
When it comes to planting peppers, one of the most important factors to consider is choosing the right pepper variety. With so many different types of peppers available, it can be overwhelming to decide which ones are best suited for your garden. Whether you prefer sweet, mild, or hot peppers, there are a few key factors to consider when making your selection.
1. Heat level: One of the first things to consider is the level of heat you desire in your peppers. You can choose from mild varieties like bell peppers, which have a sweet flavor and little to no heat, or go for hotter options like jalapenos or habaneros if you prefer a spicier kick.
2. Size and shape: Peppers come in various shapes and sizes, including bell-shaped, elongated, or even ornamental varieties. Consider the size of the peppers you prefer for cooking or stuffing purposes, as well as the shape that suits your culinary needs.
3. Color: Peppers come in a range of colors, including green, red, yellow, orange, and even purple or chocolate-colored varieties. Consider the visual appeal and flavor profile of the different colors when selecting your pepper varieties.
4. Disease resistance: Some pepper varieties are more resistant to common pests and diseases, which can help ensure a successful harvest. Look for varieties labeled as disease-resistant to minimize potential problems in your garden.
5. Growing conditions: Take into account the specific growing conditions in your garden, such as sunlight exposure and temperature. Some pepper varieties are better suited for hot climates, while others thrive in cooler environments. Choose varieties that are well-suited for your specific growing conditions to maximize success.
6. Culinary preferences: Consider how you plan to use your peppers in the kitchen. Some varieties are ideal for fresh eating, while others are better suited for drying, pickling, or cooking. Think about your culinary preferences and choose peppers that will complement your preferred cooking styles.
By considering these factors, you can narrow down the wide range of pepper varieties available and choose the ones that best align with your taste preferences and gardening conditions. Remember to make a selection that not only suits your needs but also allows you to experiment and enjoy the exciting flavors of different pepper varieties.
Preparing the soil
Before planting peppers, it is crucial to prepare the soil properly to create an optimal growing environment for your plants. By ensuring that the soil is nutritious, well-draining, and free from weeds, you give your peppers the best chance to thrive. Follow these steps to prepare the soil for your pepper garden:
1. Clear the area: Start by clearing the area where you plan to plant your peppers. Remove any existing vegetation, rocks, and debris to create a clean and tidy space for your plants.
2. Test the soil: Conduct a soil test to assess its composition and nutrient levels. This will help you determine if any amendments are necessary. Most peppers prefer a slightly acidic soil with a pH range of 6.0 to 6.8.
3. Add organic matter: To improve the soil structure and provide essential nutrients, incorporate organic matter such as compost or well-rotted manure. Spread a layer of organic matter over the planting area and work it into the soil to a depth of about 6 inches.
4. Amend the soil: Based on the results of your soil test, you may need to add specific amendments to adjust the pH or nutrient levels. Follow the recommendations provided by the testing facility or consult with a local gardening expert for guidance.
5. Improve drainage: Peppers prefer well-draining soil, so take steps to improve drainage if necessary. If the soil in your garden is heavy or clay-like, mix in some coarse sand or perlite to increase the drainage capacity.
6. Remove weeds: Before planting your peppers, ensure that the area is free from weeds. Weeds compete with your plants for nutrients and water, so it’s crucial to remove them to give your peppers the best chance to thrive.
7. Rake and level the soil: Use a garden rake to smooth and level the soil surface. This will provide a more even planting bed and help with water distribution.
8. Allow the soil to settle: Let the soil rest for a few days after preparing it. This will allow it to settle and stabilize before planting your peppers.
By properly preparing the soil, you create a favorable environment for your pepper plants to grow. The addition of organic matter, adjustment of nutrient levels, and improvement of drainage will ensure that your peppers have the best possible start and will lead to healthier plants and a bountiful harvest.
Starting pepper seeds indoors
Starting pepper seeds indoors is an excellent way to get a head start on the growing season and ensure strong, healthy plants. By following a few key steps, you can give your pepper seeds the ideal conditions they need to germinate and thrive. Here’s how to start pepper seeds indoors:
1. Timing: Start your pepper seeds indoors 8-10 weeks before the last frost date in your area. This will give the seeds enough time to germinate and develop into sturdy seedlings ready for transplanting.
2. Containers: Use clean, sterile containers with drainage holes to sow your pepper seeds. Small individual pots or seed trays work well. Ensure that the containers are at least 2-3 inches deep to allow for root growth.
3. Seed starting mix: Fill the containers with a well-draining seed starting mix. Avoid using regular garden soil, as it can be too heavy and may contain pathogens that can harm young seedlings.
4. Sowing the seeds: Plant 2-3 pepper seeds about ¼ inch deep in each container. Gently cover the seeds with a thin layer of seed starting mix and lightly press it down.
5. Provide warmth: Pepper seeds require warm temperatures to germinate. Keep the containers in a warm location, ideally around 70-80°F (21-27°C). Using a heating mat can help maintain consistent temperatures.
6. Moisture: Keep the soil evenly moist but not saturated. Water the containers from the bottom by placing them in a tray with water and allowing the soil to absorb the moisture. This helps prevent overwatering and promotes healthy seedling growth.
7. Lighting: Place the containers in a sunny location or provide artificial lighting using fluorescent grow lights. Pepper seedlings need at least 12-14 hours of light a day to grow strong and prevent them from becoming leggy.
8. Thinning: Once the pepper seedlings have developed their first set of true leaves, thin them by removing the weaker seedlings, leaving the strongest one in each container. This ensures that the remaining seedlings have ample space and resources to grow.
By starting pepper seeds indoors, you can control the growing conditions and ensure a successful germination rate. Remember to monitor the moisture levels, provide sufficient warmth and light, and thin out the seedlings as they grow. With proper care, your pepper seedlings will become robust and ready for transplanting in the garden once all risk of frost has passed.
Transplanting seedlings
After starting pepper seeds indoors and nurturing them into healthy seedlings, the next step is to transplant them into the garden. Transplanting allows the seedlings to continue growing in a more spacious environment and ultimately develop into productive pepper plants. Follow these steps to successfully transplant your pepper seedlings:
1. Timing: Wait until all danger of frost has passed and the soil has warmed up before transplanting your pepper seedlings. This is usually around 2-3 weeks after the last frost date in your area.
2. Harden off seedlings: Before transplanting, gradually expose the seedlings to outdoor conditions to acclimate them. Start by placing them outdoors in a sheltered, shady spot for a few hours each day, gradually increasing the time and intensity of exposure over the course of a week.
3. Prepare the planting holes: Dig small individual holes in the garden, spacing them about 18-24 inches apart. Each hole should be slightly larger than the root ball of the seedling.
4. Water the seedlings: Prior to transplanting, water the seedlings thoroughly to ensure the root ball is well hydrated. This will minimize stress on the plants during the transplanting process.
5. Gently remove seedlings from containers: Carefully remove the seedlings from their containers, taking care not to damage the delicate roots. Gently squeeze the sides of the container or use a small tool to ease the seedlings out.
6. Place seedlings in holes: Lower each seedling into its respective planting hole, making sure the top of the root ball is level with or slightly above the soil surface. Avoid burying the seedlings too deeply, as this can hinder growth.
7. Backfill and firm the soil: Fill the hole with soil, gently pressing it around the root ball to eliminate any air pockets. Use your hands or a small trowel to firm the soil around the base of the seedling.
8. Water thoroughly: After transplanting, water the seedlings deeply to help settle the soil and initiate root establishment. Provide enough water to thoroughly moisten the root zone but avoid overwatering, which can lead to root rot.
9. Mulch: Apply a layer of organic mulch, such as straw or wood chips, around the base of the seedlings. Mulching helps conserve moisture, suppress weeds, and regulate soil temperature.
By carefully transplanting your pepper seedlings, you give them the best chance to thrive and produce a bountiful harvest. Remember to choose a suitable planting location with adequate sun exposure and provide regular watering and maintenance as the plants continue to grow.
Planting pepper seeds directly in the garden
If you prefer to skip the indoor seed starting process or missed the ideal timing for transplanting seedlings, you can still plant pepper seeds directly in the garden. Planting seeds directly in the garden can be a rewarding and straightforward method for growing peppers. Here’s how to plant pepper seeds directly in the garden:
1. Timing: Wait until all danger of frost has passed and the soil has warmed up before planting pepper seeds directly in the garden. Pepper seeds require soil temperatures of at least 60°F (15°C) for germination.
2. Choose a sunny location: Select a sunny spot in your garden that receives at least 6-8 hours of direct sunlight daily. Peppers thrive in warm, sunny conditions, so providing adequate sunlight is crucial for their growth and fruit production.
3. Prepare the soil: Remove weeds and debris from the planting area. Loosen the soil using a garden fork or tiller, breaking up any compacted areas. Incorporate organic matter, such as compost or aged manure, to improve soil fertility and drainage.
4. Create furrows: Using the edge of a garden hoe or the handle of a rake, create shallow furrows in the soil. The furrows should be about ¼ to ½ inch deep and spaced 12-18 inches apart, depending on the variety of peppers you are planting.
5. Sow the seeds: Drop the pepper seeds into the furrows, spacing them according to the recommended planting distance for the specific pepper variety. Cover the seeds with soil, gently pressing it down to ensure good seed-to-soil contact.
6. Water the seeds: After planting, water the area thoroughly but gently to provide moisture for the seeds to germinate. Be careful not to flood the soil or wash away the seeds. Maintain consistent moisture until the seeds sprout.
7. Thin the seedlings: Once the pepper seedlings emerge, thin them to allow proper spacing and airflow. Leave the strongest seedling every 12-18 inches, depending on the variety’s growth habit and recommendations.
8. Mulch: Apply a layer of mulch, such as straw or wood chips, around the seedlings. Mulching helps suppress weeds, retain soil moisture, and regulate soil temperature.
9. Support for tall varieties: If you are planting tall pepper varieties that are prone to toppling over, consider providing support such as stakes or tomato cages. This will help keep the plants upright and prevent stem breakage.
By planting pepper seeds directly in the garden, you can enjoy the simplicity of growing peppers from scratch. Remember to monitor soil moisture, provide consistent care, and protect the young seedlings from pests and extreme weather conditions. With patience and proper maintenance, you will soon be rewarded with healthy pepper plants ready to produce a plentiful harvest.
Providing optimal growing conditions for peppers
Peppers thrive when provided with the right growing conditions. By ensuring they have access to optimal sunlight, soil nutrition, and water, you will encourage healthy plant growth and maximize their yield. Here’s how to provide the best growing conditions for your peppers:
1. Sunlight: Peppers are sun-loving plants and require at least 6-8 hours of direct sunlight per day. Choose a planting location that receives ample sunlight and is not shaded by tall structures or trees. Position the plants in your garden to maximize sun exposure.
2. Soil: Peppers prefer well-drained, fertile soil. Prepare the soil by incorporating organic matter, such as compost or aged manure, to improve nutrient content and soil structure. Aim for a slightly acidic soil pH level between 6.0 and 6.8, which is ideal for pepper growth.
3. Watering: Provide regular, consistent watering to peppers, especially during hot, dry periods. Aim to keep the soil evenly moist but not overly saturated. Water deeply, allowing the soil to dry slightly between waterings to promote healthy root growth and prevent waterlogging.
4. Mulching: Apply a layer of organic mulch, such as straw or wood chips, around the base of the plants. Mulching helps conserve soil moisture, suppress weed growth, and maintain a stable soil temperature. Ensure the mulch does not touch the stem of the plants to prevent rot.
5. Temperature: Peppers thrive in warm temperatures, ideally between 70-90°F (21-32°C). Avoid planting peppers outdoors until all danger of frost has passed, as they are sensitive to cold temperatures. Consider using row covers or planting peppers in containers that can be moved indoors during cooler weather.
6. Fertilization: Peppers benefit from regular feeding to ensure healthy growth and fruit production. Apply a balanced fertilizer, such as a 10-10-10 NPK formula, according to the package instructions. Avoid over-fertilizing, as excessive nitrogen can lead to lush foliage with fewer fruits.
7. Support: Some pepper varieties, especially those that produce large fruits, may require support to prevent branches from bending or breaking. Stake tall plants or use cages to provide support and promote upright growth.
8. Pest and disease management: Monitor your pepper plants regularly for signs of pests and diseases. Common pests include aphids, pepper weevils, and hornworms. Use organic pest control methods such as handpicking pests or applying insecticidal soap when necessary.
9. Pruning: While not necessary, pruning can be beneficial for increasing airflow and reducing the risk of disease. Remove any damaged or dead branches and prune back excessive foliage to promote better light penetration and airflow within the plant canopy.
By providing the optimal growing conditions for your peppers, you will set them up for success. Remember to adjust care routines based on specific pepper varieties and local climate conditions. With proper care and attention, you’ll be rewarded with healthy, thriving pepper plants that produce an abundant harvest.
Watering and fertilizing peppers
Watering and fertilizing are essential aspects of caring for pepper plants, as they contribute to their growth, health, and productivity. By ensuring proper watering and providing necessary nutrients, you can help your peppers thrive throughout the growing season. Here’s how to effectively water and fertilize your pepper plants:
Watering
1. Consistent moisture: Peppers require consistently moist soil, but it’s crucial to avoid overwatering. Water deeply and thoroughly, ensuring the entire root ball gets wet. Allow the soil to dry slightly between waterings to prevent waterlogged conditions, which can lead to root rot.
2. Watering frequency: The frequency of watering depends on various factors such as weather conditions, soil type, and size of the plants. As a general guideline, water peppers 1-2 times per week, providing enough water to moisten the top 6-8 inches of soil.
3. Mulching: Apply a layer of organic mulch around the base of the pepper plants to retain soil moisture and regulate temperature. Mulch also helps to suppress weed growth, reducing competition for water and nutrients.
4. Drip irrigation or soaker hoses: Consider using drip irrigation or soaker hoses to deliver water directly to the base of the plants. This method helps minimize water evaporation and reduces the risk of soil-borne diseases by keeping the leaves dry.
Fertilizing
1. Balanced fertilizer: Use a balanced fertilizer with equal or moderate amounts of nitrogen (N), phosphorus (P), and potassium (K). Look for a formulation labeled as 10-10-10 or a similar ratio. This will provide a good base of essential nutrients for the pepper plants.
2. Initial fertilization: Before planting, incorporate a slow-release, granular fertilizer into the soil according to the package instructions. This provides a steady supply of nutrients to the plants as they grow.
3. Side dressing: As the pepper plants grow, side dress them with additional fertilizer. Apply a small amount of fertilizer, following the package instructions, to the soil around the base of each plant, being careful not to touch the leaves or stems.
4. Frequency of fertilization: Repeat the side dressing every 4-6 weeks throughout the growing season. This helps replenish nutrients that may have been depleted due to plant growth and fruit production.
5. Organic alternatives: If you prefer organic fertilizers, opt for compost, well-rotted manure, or organic plant-based fertilizers. These alternatives provide slow-release nutrients and improve overall soil health.
6. Avoid excessive nitrogen: Peppers benefit from moderate levels of nitrogen, but excessive nitrogen can result in lush foliage growth with fewer fruits. Follow the fertilizer packaging instructions to avoid over-fertilization.
Remember to adjust watering and fertilizing practices based on specific weather conditions, pepper variety, and soil characteristics. Regularly monitor your plants for signs of nutrient deficiencies or water stress, and make necessary adjustments to ensure your peppers remain healthy and productive throughout the growing season.
Pruning pepper plants
Pruning pepper plants is an optional but beneficial practice that can help improve plant health, fruit production, and overall plant structure. By selectively removing certain branches and foliage, you can promote better airflow, reduce the risk of disease, and redirect the plant’s energy towards fruit development. Here are some tips on how to prune pepper plants effectively:
1. Timing: Start pruning pepper plants when they have reached a height of about 12-18 inches and have developed several sets of true leaves. Avoid pruning too early, as the plant needs time to establish a strong root system.
2. Identify suckers: Look for the secondary shoots or “suckers” that emerge from the leaf axils, which are the points where the leaves attach to the stem. These suckers can sap energy from the main stem and may be removed to promote better fruit production.
3. Remove suckers: Use clean pruning shears or sharp scissors to carefully remove the suckers by making a clean cut where they meet the main stem. Pinch or cut them off when they are small, about ¼ to ½ inch long. Be careful not to damage the main stem or other healthy branches.
4. Trim damaged or diseased branches: Regularly inspect your pepper plants for any damaged, diseased, or dead branches. Prune these branches back to healthy growth, ideally making a clean cut about ¼ inch above a leaf node or branch junction.
5. Maintain good airflow: Enhance airflow by selectively pruning branches that are crossing or densely packed. This reduces the risk of fungal diseases, such as powdery mildew, by allowing better air circulation around the plant.
6. Control plant size: Pruning can help manage the overall size and shape of pepper plants, especially if you have limited garden space. Trim back branches that are growing too wild or sprawling to keep the plant more compact and manageable.
7. Be cautious with hot pepper varieties: When pruning hot pepper plants, especially those with a high heat level, it is recommended to wear gloves and avoid touching your face or eyes. The capsaicin in hot peppers can cause skin and eye irritation.
8. Avoid excessive pruning: While pruning can be beneficial, be cautious not to excessively remove foliage, as this can limit the plant’s ability to produce energy through photosynthesis. A good rule of thumb is to remove no more than 20-30% of the plant’s foliage at a time.
When pruning pepper plants, always use clean and sharp tools to minimize the risk of introducing diseases. Regularly sanitize your pruning shears to prevent the spread of any potential pathogens from one plant to another.
By implementing proper pruning techniques, you can promote healthy growth, improve air circulation, and encourage higher yields from your pepper plants. Be mindful of the specific needs and growth habits of your pepper variety, and adjust your pruning practices accordingly.
Dealing with common pests and diseases
Pepper plants, like any other garden plants, are susceptible to pests and diseases. However, with proper monitoring and timely action, you can effectively manage and minimize the impact of these issues. Here are some common pests and diseases that affect pepper plants, along with strategies for dealing with them:
Pests:
1. Aphids: These small, sap-sucking insects can quickly multiply and damage pepper plants. Use a strong stream of water to knock them off the plants, or apply insecticidal soap or neem oil if their population becomes significant.
2. Pepper weevils: These beetles can cause significant damage by feeding on flowers and developing fruits. Remove and destroy infested fruits, and consider using sticky traps to catch adult weevils.
3. Hornworms: These large caterpillars can defoliate pepper plants. Handpick and remove them from the plants, or use biological control methods such as releasing beneficial insects like ladybugs or parasitic wasps.
4. Spider mites: These tiny arachnids can cause yellowing leaves and fine webbing on the plant. Spray affected plants with a strong jet of water, apply insecticidal soap, or introduce predatory insects like predatory mites to control their population.
Diseases:
1. Bacterial spot: This disease manifests as dark, water-soaked spots on leaves, stems, and fruits. Rotate crops, practice good sanitation, and apply copper-based fungicides preventively to manage bacterial spot.
2. Powdery mildew: This fungal disease results in a white powdery growth on the leaves, causing them to become distorted and stunted. Improve air circulation, avoid overhead watering, and apply fungicidal sprays to control powdery mildew.
3. Phytophthora root rot: This soil-borne disease can cause wilting, yellowing leaves, and eventual plant death. Ensure proper drainage and avoid overwatering. Additionally, practice crop rotation and consider using resistant pepper varieties.
4. Fusarium and Verticillium wilts: These fungal diseases cause yellowing, wilting, and eventual death of the plant. Unfortunately, there are no effective treatments once plants are infected. Prevent these diseases by planting resistant varieties and practicing good soil health management.
5. Blossom end rot: This physiological disorder appears as a sunken, darkened area on the blossom end of the fruit. Maintain consistent soil moisture, avoid over-fertilizing with nitrogen, and ensure sufficient calcium uptake to prevent blossom end rot.
Regularly inspect your pepper plants for signs of pests and diseases. Early detection and intervention are crucial in managing these issues effectively. Remember to practice good garden sanitation, such as removing debris and fallen leaves, and rotate your crops yearly to help prevent the buildup of pests and diseases.
When using any chemical controls, always follow the instructions on the label and consider using organic and environmentally friendly options whenever possible. Integrated Pest Management (IPM) techniques, which combine cultural, biological, and chemical controls, can help maintain a healthy balance in your garden while minimizing the use of pesticides.
Harvesting peppers
Harvesting peppers at the right time ensures that you enjoy the best flavor, color, and texture. Pepper varieties can vary in size, shape, and color, so it’s important to know when they are ripe and ready to be picked. Here are some guidelines for harvesting peppers:
1. Determine maturity: Refer to the seed packet or variety-specific information to get an idea of when the peppers should reach maturity. Different varieties take varying lengths of time to mature, typically between 60 to 90 days from transplanting.
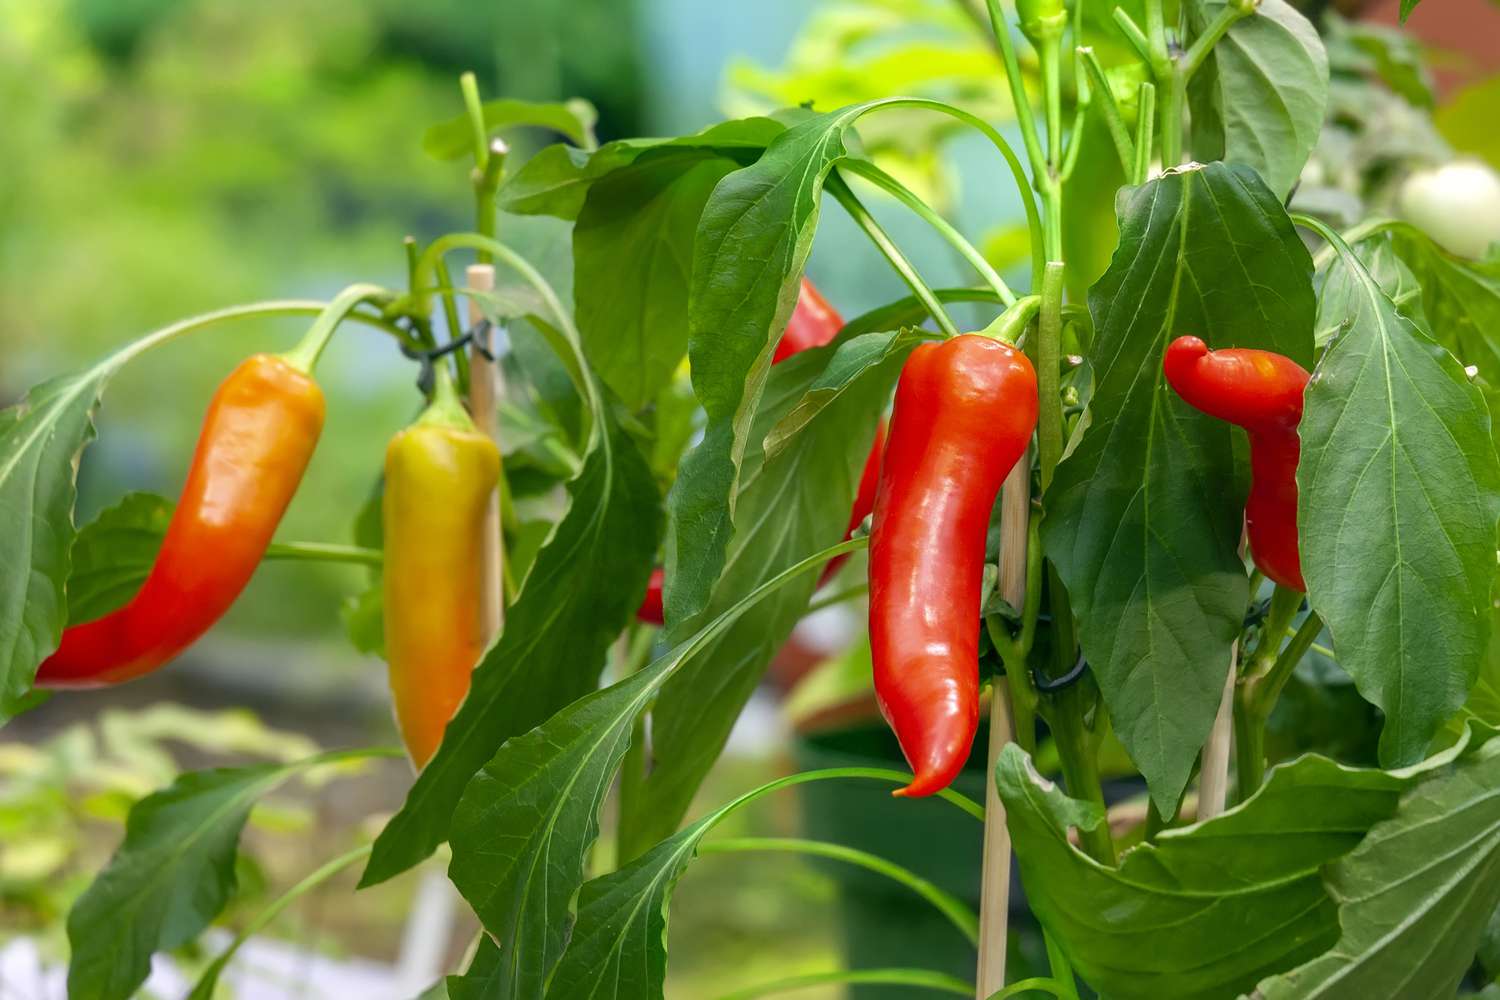
2. Size and color: Peppers are usually ready to harvest when they reach their mature size and color. This can vary depending on the variety, but generally, peppers are ready when they have reached full size and have developed their characteristic color (e.g., green, red, yellow).
3. Firmness: Gently squeeze the pepper with your fingers. Ripe peppers should feel firm, yet slightly give to gentle pressure. Avoid picking peppers that feel soft or have wrinkled skins, as they may be overripe or starting to rot.
4. Cutting or twisting: To harvest peppers, use a pair of sharp scissors or pruning shears to cut them from the plant. Alternatively, you can gently twist the pepper until it detaches from the stem. Avoid pulling the pepper forcefully, as this can damage the plant.
5. Harvesting sequence: Harvest peppers in stages as they ripen, rather than waiting for the entire crop to mature at once. This allows the plants to focus energy on producing more fruits and encourages continuous production throughout the season.
6. Handle with care: Handle harvested peppers carefully to avoid bruising or damaging the fruit. Place them into a basket or container gently, taking care not to stack or pile them on top of each other, which can cause bruising or deformation.
7. Storage and shelf life: Peppers are best when used fresh, but you can store them in the refrigerator for up to one to two weeks. Place them in a perforated plastic bag or vegetable storage container to maintain proper humidity and prolong their shelf life.
8. Saving seeds: If you are interested in saving seeds for future planting, allow a few peppers from your healthiest and most mature plants to fully ripen and develop their seeds. Cut open the pepper, remove the seeds, and let them dry fully before storing them in a cool, dry place.
Remember that peppers can continue to ripen even after being harvested. If you prefer a sweeter flavor, allow some of your peppers to ripen further off the plant. Enjoy the fruits of your labor by incorporating fresh peppers into your recipes, whether it be in salads, stir-fries, salsas, or as a vibrant addition to any dish.