
Tools and Materials Needed
Before you start removing the fringe from your rug, make sure you have the necessary tools and materials ready. Here’s a list of what you’ll need:
- Scissors or rug shears: These will be used to cut the fringe.
- Seam ripper: This handy tool will help you detach the fringe from the rug more easily.
- Vacuum cleaner: You’ll need a vacuum cleaner with a brush attachment to clean the rug after the fringe is removed.
- Mild detergent: To thoroughly clean the rug, you’ll need a mild detergent that is safe to use on the fabric.
- Clean cloth or sponge: This will be used to apply the detergent and clean any dirt or stains on the rug.
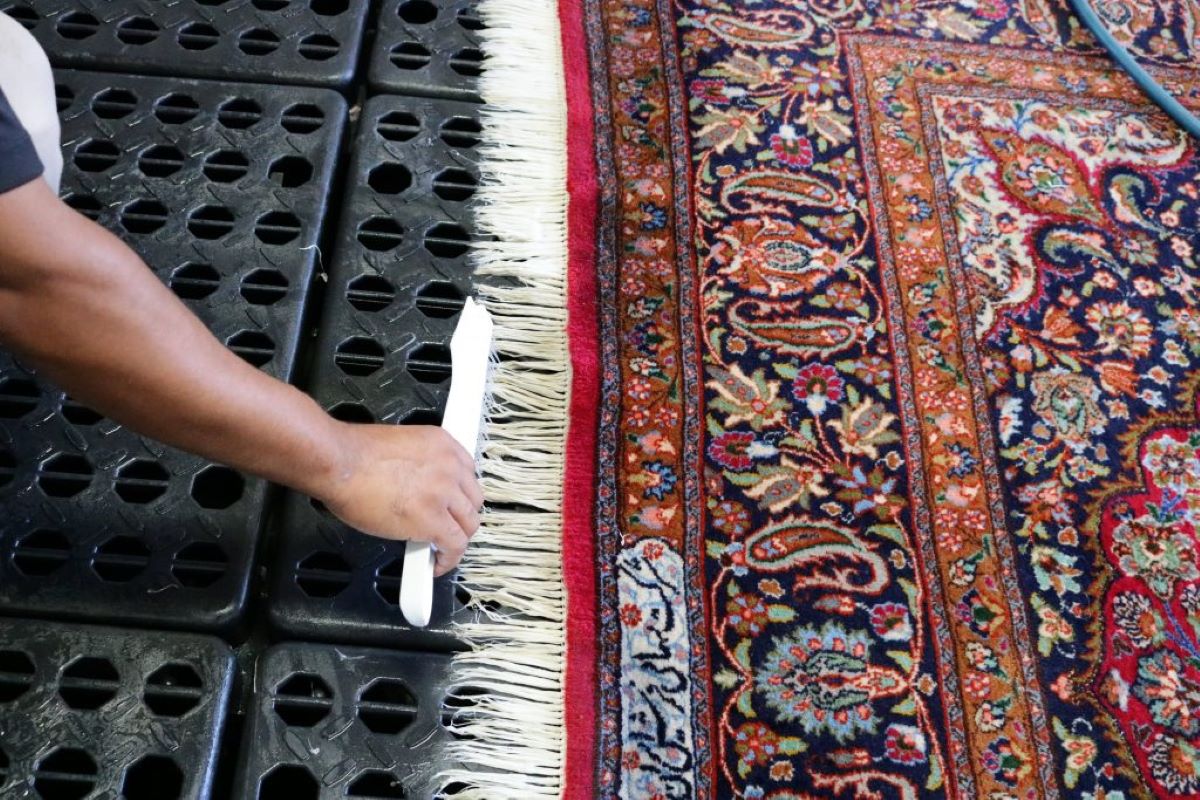
- Soft brush: A soft brush can help you gently remove any remaining debris or dirt from the rug.
It’s important to have these tools and materials on hand before you begin the process of removing the fringe from your rug. This will ensure that you can tackle the task efficiently and effectively.
Step 1: Preparing the Rug
Before you start removing the fringe from your rug, it’s essential to properly prepare the rug to avoid any damage or accidents. Follow these steps to ensure the rug is ready for the fringe removal process:
- Lay the rug on a clean and flat surface: Find a spacious area where you can easily work on the rug. Lay it down on a smooth surface, such as a clean floor or a large table, ensuring there are no wrinkles or creases.
- Inspect the rug for any damages: Take a close look at the rug and check for any noticeable tears, holes, or weak areas. If you spot any issues, it’s best to repair them before proceeding with the fringe removal.
- Secure the rug in place: To prevent the rug from shifting or sliding during the process, you can use heavy objects or clips to secure the corners. This will ensure that the rug stays in position while you work on it.
- Protect the rug edges: To safeguard the edges of the rug during the fringe removal, you can place a strip of masking tape along the edge. This will act as a protective barrier, preventing accidental cuts or damage to the rug itself.
By taking the time to prepare the rug properly, you are minimizing the risk of any unintentional harm and ensuring a smoother fringe removal process. Once you have completed these steps, you’re ready to move on to the next stage.
Step 2: Cutting the Fringe
Now that your rug is properly prepared, it’s time to start cutting the fringe. Follow these steps to accomplish this task:
- Select the starting point: Choose one corner of the rug as your starting point for cutting the fringe. It’s usually best to begin at a corner that is less visible, as any minor mistakes may be less noticeable in those areas.
- Decide on the fringe length: Determine the desired length for your fringe. You can use a ruler or measuring tape to ensure consistency. Keep in mind that shorter fringe is easier to maintain, while longer fringe can add a more dramatic effect.
- Cut vertical lines for the first set of fringe: Using scissors or rug shears, make vertical cuts along the edge of the rug, creating individual strips for the fringe. Make sure the cuts are evenly spaced and of the desired width, usually between ¼ and ½ inch.
- Repeat for the remaining sides: Move along each side of the rug, cutting vertical lines to create the fringe strips. Take your time and ensure that the lines are straight and evenly spaced.
As you cut the fringe, be cautious not to accidentally cut into the body of the rug. Take it slow and pay attention to each cut you make. If you’re unsure, consider practicing on a small, inconspicuous area of the rug first.
Once you have finished cutting the fringe, you’re ready to move on to the next step of removing it from the rug.
Step 3: Removing the Fringe
With the fringe cut, it’s time to remove it from the rug. Follow these steps to carefully detach the fringe:
- Locate the seam: Examine the rug to identify the seam that attaches the fringe to the rug. It is usually located at the base of each fringe strip.
- Use a seam ripper: Take a seam ripper and gently insert it under the seam to loosen the threads that connect the fringe to the rug. Slowly and carefully work your way along the seam, releasing the fringe as you go.
- Detach the fringe: Once the seam is undone, continue to detach the fringe from the rug. Take your time and ensure that you remove each strip completely without leaving any loose threads or remnants behind.
- Trim excess threads: After removing the fringe, inspect the rug for any lingering threads. Trim them close to the rug’s surface to create a clean and neat appearance.
Take extra care during this step to avoid any damage to the rug itself. Gently remove the fringe and be mindful not to pull or tug on the rug’s fibers.
Keep in mind that removing the fringe will alter the appearance of the rug, so make sure it aligns with your desired aesthetic before proceeding.
Once the fringe is completely removed, you’re ready to move on to the next step of cleaning the rug.
Step 4: Cleaning the Rug
After removing the fringe, it’s important to thoroughly clean the rug to eliminate any dust, dirt, or residue. Follow these steps to effectively clean your rug:
- Vacuum the rug: Start by using a vacuum cleaner with a brush attachment to remove any loose dirt or debris from the surface of the rug. Make sure to cover the entire rug, including the areas where the fringe used to be.
- Spot clean any stains: If there are any visible stains on the rug, use a mild detergent and a clean cloth or sponge to gently blot the affected area. Be careful not to scrub vigorously, as this may damage the rug’s fibers.
- Deep clean the rug: For a more thorough cleaning, you can either hire a professional rug cleaner or opt to clean the rug yourself. Follow the instructions on your chosen cleaning solution and use a gentle circular motion to clean the entire rug.
- Rinse and dry the rug: If using a cleaning solution, be sure to rinse the rug thoroughly to remove any remaining detergent. You can either rinse with clean water or use a wet-dry vacuum to extract the excess moisture. Allow the rug to air dry completely before placing it back in its intended location.
Properly cleaning the rug will help restore its appearance and ensure that it is free from any dirt or allergens. This step is crucial to maintain the rug’s longevity and prevent any potential damage.
Once the rug is thoroughly cleaned and completely dry, it’s time for the final step – adding the finishing touches.
Step 5: Finishing Touches
Now that your rug is clean and free from the fringe, it’s time to add the finishing touches to complete the transformation. Follow these steps to give your rug a polished look:
- Inspect the edges: Take a close look at the edges of the rug to ensure they are neat and even. Trim any stray fibers or uneven edges using sharp scissors. This will give the rug a tidy appearance.
- Gently brush the rug: Use a soft brush to gently brush the rug’s surface in the direction of the fibers. This will help fluff up the pile and restore its natural texture.
- Place a rug pad: Consider using a rug pad to provide extra cushioning and prevent slippage. A rug pad can also help protect your floors and extend the life of your rug.
- Reposition the rug: If you removed the rug from its original location during the process, carefully place it back in its intended spot. Adjust and straighten the rug as needed to ensure it aligns perfectly with the surrounding furniture and décor.
By paying attention to these final details, you can enhance the overall appearance of your rug and create a seamless integration with your living space.
Now that you’ve completed all the steps, take a step back and admire your rug’s new look. Removing the fringe and taking the time to clean and refine your rug will not only give it a fresh appearance but also a renewed sense of beauty and style.