
Choosing the Right Pot for Tomatoes
When it comes to growing tomatoes in pots, selecting the right container is crucial for the overall health and productivity of your plants. Here are a few key factors to consider when choosing a pot:
- Size: Tomatoes have extensive root systems, so opt for a pot that is at least 15-20 inches in diameter and depth to provide ample space for root development. This will ensure that your plants have enough room to grow and thrive.
- Material: While there are various materials available, such as plastic, clay, or fabric pots, it’s important to choose one that provides good drainage. Look for pots with holes at the bottom to prevent waterlogging and promote healthy root growth.
- Insulation: Consider the insulation properties of the pot. Dark-colored pots tend to absorb more heat, which can result in excessive soil temperature. Opt for lighter-colored pots or those with insulation features to maintain a moderate soil temperature.
- Mobility: If you plan on moving your pots to different locations to optimize sunlight exposure, choose lightweight pots that are easy to handle. This will give you the flexibility to position your tomatoes where they can receive the optimal amount of sunlight.
- Drainage: Adequate drainage is vital for the health of your tomato plants. Ensure that your pot has proper drainage holes to prevent water accumulation, which can lead to root rot and other moisture-related issues.
By considering these factors, you’ll be able to choose a suitable pot that provides a favorable growing environment for your tomatoes. Remember, the right pot can greatly contribute to the success of your container gardening endeavors.
Selecting the Ideal Tomato Variety for Container Gardening
When embarking on container gardening, it’s important to choose tomato varieties that are well-suited for growing in pots. Here are some key considerations when selecting the ideal tomato variety:
- Determinate or Indeterminate: Determinate tomato varieties are compact and bushy, making them a great choice for smaller pots. They typically grow to a fixed height and produce fruit within a specific timeframe. On the other hand, indeterminate varieties are more vining and require larger pots or trellises for support as they continue to grow and produce fruit throughout the season.
- Size and Yield: Consider the size of the tomato plant and the yield you desire. If you have limited space, opt for compact varieties that won’t overcrowd your container. Cherry or grape tomatoes are popular choices for small pots, as they produce an abundant crop on compact plants.
- Resistance to Diseases: Look for tomato varieties that have built-in resistance to common diseases like blight, fusarium wilt, or verticillium wilt. This can help ensure the longevity and health of your plants, especially in a confined container environment where diseases can spread more easily.
- Growth Habit: Consider the growth habit of the tomato variety. Some plants naturally have a more upright growth habit, while others tend to vine and sprawl. Choose a variety that is well-suited to your container size and support system.
- Taste and Culinary Uses: Don’t forget to consider the flavor profile and culinary uses of the tomato variety you select. Whether you prefer a sweet and juicy tomato for fresh salads or a tangy one for sauces, choose a variety that aligns with your taste preferences.
By considering these factors, you can select the ideal tomato variety for container gardening. Remember to read seed packets or plant labels for specific information on plant size, disease resistance, and growth habit. A thoughtful selection will lead to a bountiful harvest of delicious homegrown tomatoes.
Preparing the Potting Mix
The potting mix you choose plays a vital role in the success of growing tomatoes in containers. It provides the necessary nutrients, aeration, and moisture retention for the plants. Here are some essential steps for preparing the perfect potting mix:
- Container Fillers: Start by placing a few inches of container fillers, such as small rocks or broken pottery pieces, at the bottom of the pot. This helps improve drainage and prevents the potting mix from clogging the drainage holes.
- High-Quality Soil: Use a high-quality potting mix or soilless mix specifically formulated for container gardening. Avoid using garden soil as it tends to be heavy, compacted, and may contain disease pathogens. The potting mix should be well-draining yet able to retain moisture.
- Compost or Organic Matter: Incorporate organic matter, such as compost, into the potting mix to enhance its fertility and water-holding capacity. Compost adds valuable nutrients and improves the overall structure of the mix.
- Perlite or Vermiculite: Add perlite or vermiculite to the potting mix to improve aeration and prevent compaction. These materials help create air pockets in the soil, facilitating root development and nutrient absorption.
- Fertilizer: Consider integrating a slow-release fertilizer into the potting mix. This provides a steady supply of nutrients over time, supporting the tomato plants’ growth and fruit production.
- Moisture Control Crystals: Optionally, you can include moisture control crystals in the potting mix. These crystals absorb and release water as needed, helping to regulate moisture levels in the container.
To prepare the potting mix, thoroughly combine the ingredients, ensuring they are evenly distributed. Fill the container, leaving a few inches of space at the top for water retention. Avoid overpacking the mix, as adequate airflow is essential for healthy root development.
Remember to regularly monitor the moisture levels of the potting mix and adjust watering accordingly. Well-prepared potting mix provides a nutrient-rich and well-draining environment for your tomato plants, setting the foundation for their growth and productivity.
Planting Tomato Seedlings
Planting tomato seedlings properly is crucial for their healthy establishment and growth in containers. Follow these steps to ensure successful transplantation:
- Timing: Choose the right time to plant your tomato seedlings. Wait until all chances of frost have passed and the soil temperature is consistently above 60°F (15°C). This usually occurs in late spring or early summer.
- Preparing the Seedlings: Before transplanting, water the seedlings thoroughly to loosen the soil around the roots. Gently remove them from their containers, being careful not to damage the delicate roots.
- Digging the Hole: Dig a planting hole in the prepared potting mix that is deep enough to cover the seedling’s stem up to the first set of leaves. This promotes strong root development and stability for the plant.
- Planting: Place the seedling in the hole, ensuring that the root ball is covered with soil. Gently press the soil around the base of the plant to secure it. Avoid burying the leaves or any part of the stem as it may lead to rotting.
- Spacing: If planting multiple tomato seedlings, ensure adequate spacing between plants. This allows for proper air circulation, reduces the risk of disease spread, and provides room for each plant to grow and develop.
- Watering: Once the seedlings are planted, water them thoroughly. This settles the soil, ensures good root-to-soil contact, and helps the plants recover from transplantation shock. Maintain consistent moisture throughout the growing season.
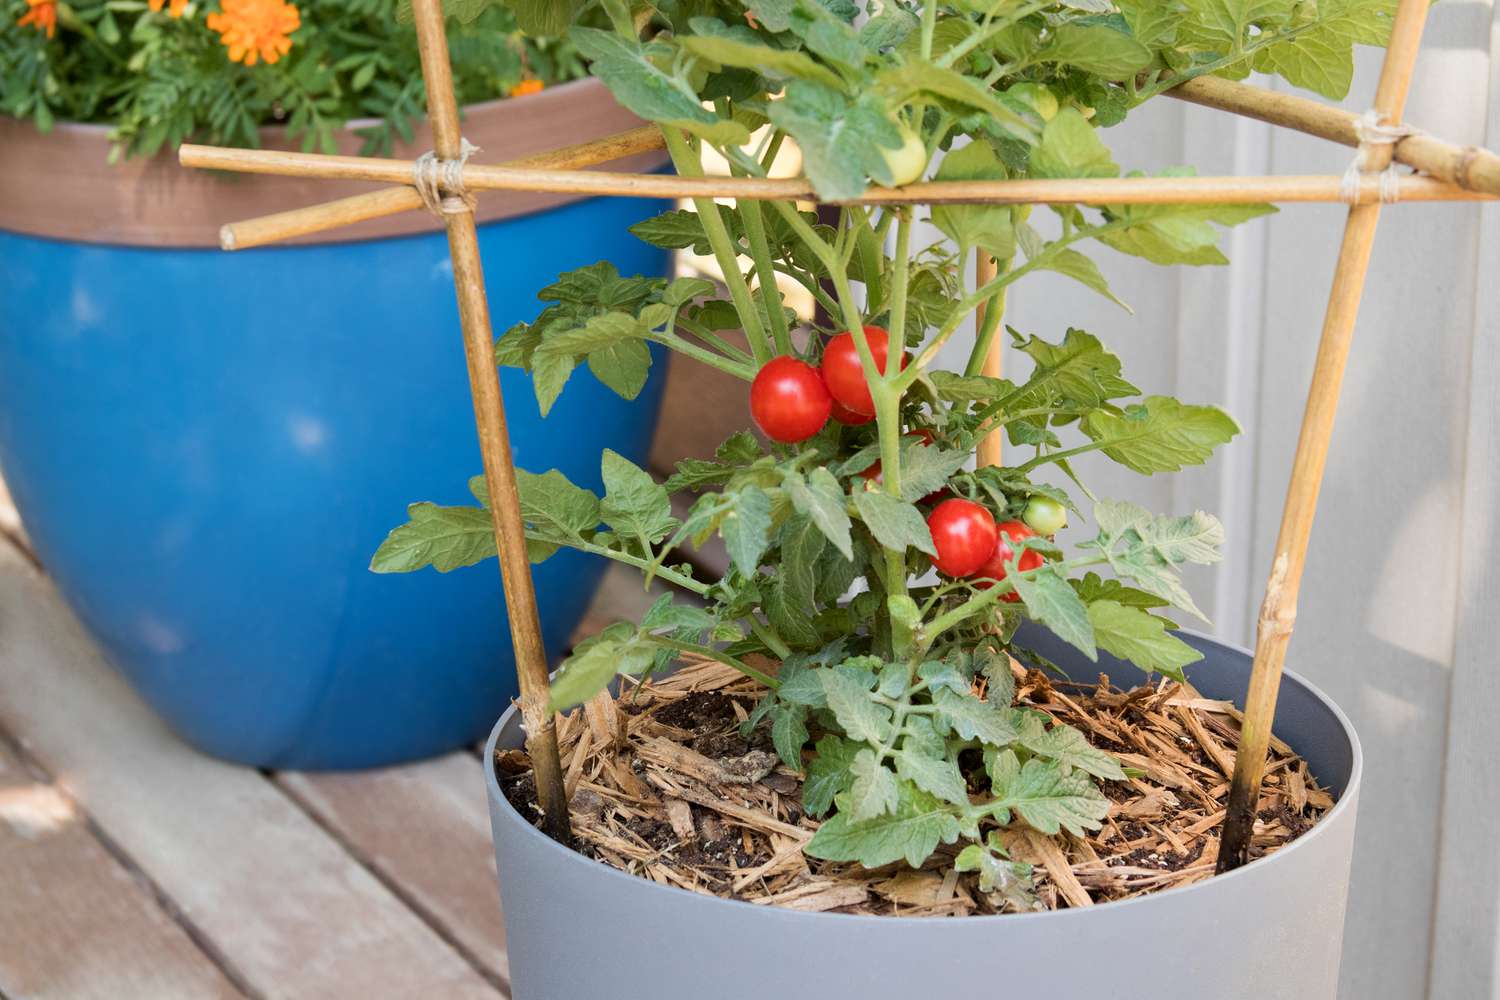
- Mulching: Consider applying a layer of organic mulch, such as straw or wood chips, around the base of the plants. Mulching helps conserve moisture, suppresses weeds, and regulates soil temperature.
After planting, monitor your tomato seedlings closely. Ensure they receive adequate sunlight, preferably 6-8 hours of direct sunlight per day. Regularly water the plants, keeping the soil evenly moist but not waterlogged.
By following these planting guidelines, you provide your tomato seedlings with a strong start and increase their chances of thriving and producing a bountiful harvest in containers.
Providing Adequate Watering for Tomato Plants
Proper watering is essential for the health and productivity of tomato plants grown in containers. Here are some guidelines to ensure your plants receive adequate moisture:
- Consistent Moisture: Tomatoes need consistent moisture, but it’s crucial to avoid overwatering. Monitor the moisture levels of the potting mix regularly and water the plants when the top inch of soil feels dry to the touch.
- Deep Watering: When you water your tomato plants, aim for deep watering. This encourages the roots to grow deeper into the soil, making them more resilient and better equipped to access water and nutrients.
- Watering Frequency: As a general guideline, tomato plants in containers may require watering every 2-3 days in hot and dry weather conditions. However, the frequency may vary depending on factors like container size, temperature, humidity, and the growth stage of the plants.
- Watering Technique: Water the soil directly around the base of the plant rather than soaking the entire container. This ensures that the roots receive the moisture they need without creating excess moisture that can lead to fungal diseases.
- Time of Day: Opt for early morning or late afternoon to water your tomato plants. Watering during these times helps reduce water loss from evaporation and allows the foliage to dry before nightfall, decreasing the risk of disease development.
- Monitoring Soil Moisture: Regularly check the moisture level in the potting mix by inserting your finger about an inch into the soil. If it feels dry, it’s time to water. If it feels moist, hold off on watering for a day or two.
- Deep Mulching: Applying a layer of organic mulch around the base of the plants helps retain moisture in the soil. It also helps regulate soil temperature and suppresses weed growth, reducing competition for water and nutrients.
Remember that container-grown tomato plants may require more frequent watering than those planted in the ground due to the limited soil volume. However, it’s essential to strike a balance and avoid waterlogging the soil, which can lead to root rot and other problems.
By providing adequate and consistent watering, you ensure that your tomato plants remain healthy, vibrant, and capable of producing a generous crop of delicious homegrown tomatoes.
Positioning the Tomato Pot for Optimal Sunlight
Proper sunlight exposure is crucial for the growth and development of tomato plants in containers. Follow these guidelines to ensure your plants receive optimal sunlight:
- Full Sun: Tomato plants thrive in full sun, which means they need at least 6-8 hours of direct sunlight per day. Choose a sunny location, such as a balcony, patio, or rooftop, that receives ample sunlight throughout the day.
- Avoiding Shade: Ensure that the chosen spot is free from obstructions that can create shade, such as nearby buildings, trees, or tall structures. Observe the area at different times of the day to determine if any shadows are cast on the spot during the peak sunlight hours.
- Rotate the Pot: If you notice that your tomato plant is not receiving uniform sunlight, rotate the pot every few days to ensure all sides of the plant receive adequate sun exposure. This will help prevent the plant from leaning or growing unevenly towards the light source.
- Reflective Surfaces: Consider placing light-colored or reflective surfaces, such as mirrors or aluminum foil, around the pot. These can help redirect sunlight towards the tomato plant, maximizing its exposure to sunlight.
- Consider Microclimates: Different areas of your outdoor space may have varying microclimates, which can affect sunlight exposure. Observe the amount of sunlight received in different parts of your balcony, patio, or garden to identify the best spot for optimal sunlight.
- Protection from Extreme Heat: While tomato plants enjoy warmth, extreme heat can be detrimental to their health. If your location experiences scorching temperatures, consider providing some shade during the hottest part of the day to prevent stress and sunburn.
- Monitoring Sunlight: Regularly assess the amount and quality of sunlight your tomato plants receive. If you notice signs of sunburn, wilting, or yellowing leaves, it may indicate too much or too little sunlight. Adjust the positioning of the pot accordingly to ensure the plants receive the right amount of sunlight.
Remember that consistent and sufficient sunlight is essential for the production of healthy and flavorful tomatoes. By positioning your tomato pots in a spot with optimal sunlight, you provide the plants with the energy they need for robust growth and abundant fruiting.
Tomato Plant Support and Staking Techniques
Supporting and staking tomato plants is important to ensure their upright growth, prevent breakage, and maximize fruit production. Here are some techniques to provide the necessary support:
- Choosing the Right Support: Select a sturdy support system that can withstand the weight of the tomato plants and their fruit. Some popular options include tomato cages, stakes, trellises, or even a combination of these support structures.
- Planting Near Support: Place the support structure in the ground or the pot before transplanting your tomato seedlings. This allows you to plant the tomato seedlings close to the support, minimizing root disturbance later on.
- Securing with Soft Ties: As your tomato plants grow, gently secure the main stem to the support using soft ties, such as gardening twine or Velcro plant ties. Be careful not to tie the stem too tightly to avoid damaging the plant.
- Pruning: Prune the lower branches and suckers of indeterminate tomato plants to focus growth energy on the main stem and upper branches. This improves airflow, reduces the risk of disease, and enhances the stability of the plant on the support structure.
- Training Vining Tomatoes: If you’re growing indeterminate tomato varieties or vining cherry tomatoes, guide the main stem along the support system as it grows. Use plant clips or ties to gently secure the stem to the support at regular intervals.
- Gardening Nets: Consider using gardening nets or trellis netting for sprawling tomatoes. These nets can be secured to stakes or frames, providing a grid for the tomato plants to climb and support themselves as they grow.
- Regular Maintenance: As the tomato plants continue to grow, check and adjust the ties or clips as needed to provide proper support. Prune any additional suckers that may develop and remove any suckers that may emerge below the first flower cluster.
- Supporting Heavy Fruit: As the tomato plants start to develop fruit, provide additional support for heavy clusters using soft ties or slings. This helps prevent the branches from breaking under the weight of the fruit.
- Supporting Container-Grown Plants: For tomato plants in containers, ensure that the support structure is securely anchored in the pot to prevent it from toppling over due to wind or heavy fruit. Consider using heavy pots to improve stability.
By implementing these support and staking techniques, you encourage vertical growth, improve airflow, and protect your tomato plants from damage. This results in healthier plants, higher fruit yields, and easier harvest and maintenance throughout the growing season.
Fertilizing Tomato Plants in Containers
Fertilizing is an essential aspect of growing healthy and productive tomato plants in containers. Here are some key considerations when it comes to fertilizing tomatoes:
- Choose the Right Fertilizer: Select a balanced fertilizer specifically formulated for vegetables or tomatoes. Look for products with a ratio like 10-10-10 or 14-14-14, which indicate the ratio of nitrogen (N), phosphorus (P), and potassium (K) present in the fertilizer.
- Follow Package Instructions: Read and follow the instructions on the fertilizer package carefully. Different brands and products may have specific guidelines for application rates and frequency.
- Initial Feeding: When transplanting tomato seedlings into containers, incorporate a slow-release fertilizer into the potting mix. This provides a steady supply of nutrients throughout the growing season.
- Regular Feeding: As the tomato plants grow, supplement the slow-release fertilizer with regular feedings to ensure a continuous supply of nutrients. This can be done using liquid or water-soluble fertilizers, following the manufacturer’s recommendations.
- Start Feeding When Flowers Form: Once the tomato plants start to produce flowers, it’s a good indication to begin regular feeding. Flowers indicate the start of fruit production, and the plants require additional nutrients to support healthy growth and development.
- Balancing Nitrogen and Phosphorus: Check the nitrogen (N) to phosphorus (P) ratio in your fertilizer. Too much nitrogen can lead to excessive foliage growth at the expense of fruit production. Aim for a balanced ratio to promote overall plant health and fruiting.
- Flowering and Fruit Development: During the flowering and fruiting stages, adjust the fertilizer to promote fruit set and development. Look for fertilizers with higher phosphorus (P) content to support flower and fruit production.
- Applying Fertilizer: Apply the fertilizer according to the package instructions. Typically, it’s best to dissolve water-soluble fertilizers in water and then apply the solution to the soil around the base of the plants, avoiding direct contact with the foliage.
- Monitoring Nutrient Deficiencies: Regularly monitor your tomato plants for signs of nutrient deficiencies, such as yellowing leaves or slow growth. Adjust the fertilization program accordingly to address any deficiencies and maintain optimal plant health.
- Organic Fertilizers: If you prefer an organic approach, use organic fertilizers or amend the potting mix with compost or other organic matter. These provide a slower release of nutrients and help improve the overall soil structure and fertility in the long term.
Proper fertilization ensures that your tomato plants receive the essential nutrients they need to grow vigorously and produce a bountiful harvest of flavorful tomatoes. Remember to strike a balance and avoid over-fertilization, as this can lead to nutrient imbalances and other issues. Regular monitoring and adjustment will help you maintain the optimal nutrition for your tomato plants.
Pruning and Training Tomato Plants
Pruning and training tomato plants are important techniques that promote proper airflow, reduce disease risks, and maximize fruit production. Here’s how to effectively prune and train your tomato plants:
- Remove Suckers: Tomatoes often produce small side shoots, known as suckers, that emerge between the main stem and the leaf branches. Pinch or snip off these suckers when they are small to allow the plant to focus its energy on the main stem and fruit production.
- Prune Lower Leaves: As the tomato plant grows, remove the lower leaves that come into contact with the soil. This helps prevent soil-borne diseases from splashing onto the foliage and improves airflow around the plant.
- Remove Diseased Foliage: Regularly inspect your tomato plants for any signs of disease. If you notice diseased foliage, promptly remove the affected leaves to prevent the spread of the disease to healthy parts of the plant.
- Single Stem vs. Multiple Stems: Decide whether you want to grow your tomato plants as single-stemmed or multiple-stemmed. Single-stemmed plants have a central main stem and require regular pruning to remove all other side shoots. Multiple-stemmed plants allow for more branching and may require less pruning.
- Supporting Vining Tomatoes: For indeterminate tomato varieties or vining types, provide support like stakes, trellises, or cages. As the plant grows, gently weave the main stem along the support structure, securing it with soft ties. Regularly prune and train side shoots to keep the plant focused and controlled.
- Avoid Over-Pruning: While pruning is beneficial, it’s important not to overdo it. Striking the right balance is key. Avoid excessive pruning, as it can hinder overall plant growth and reduce fruit production.
- Know When to Stop Pruning: As the growing season progresses, limit pruning as the plant begins to set and develop fruit. Pruning at this stage could remove potential fruit-bearing branches and impact overall yield.
- Maintain Vigilance: Regularly monitor your tomato plants for new suckers, diseased foliage, or overcrowding. Be proactive in pruning and training as needed throughout the growing season to maintain plant health and productivity.
Pruning and training tomato plants may take some practice, but it will lead to stronger, better-organized plants that are less prone to diseases and bear a heavier harvest of delicious tomatoes. Remember to adapt your approach based on the specific tomato variety you are growing and the desired growth habit you want to achieve.
Preventing and Managing Tomato Pests and Diseases
Tomato plants are susceptible to various pests and diseases that can impact their health and reduce fruit production. By practicing preventive measures and implementing appropriate management strategies, you can help keep your tomato plants thriving. Here’s how to prevent and manage common tomato pests and diseases:
- Start with Healthy Seedlings: Begin with healthy seedlings from reputable sources. Inspect them for any signs of disease or pest infestation before transplanting them into containers.
- Maintain Cleanliness: Keep your garden area or container clean and free from debris that can harbor pests and diseases. Remove any fallen leaves and plant debris regularly to prevent the buildup of potential sources of infection.
- Practice Crop Rotation: Avoid planting tomatoes in the same container or area of your garden where tomatoes, peppers, or other related plants have been grown in the past two to three years. Crop rotation helps reduce the risk of soil-borne diseases.
- Monitor Regularly: Regularly inspect your tomato plants for early signs of pests or diseases. Look for yellowing or spotted leaves, holes in leaves, webbing, or presence of insects. Early detection allows for prompt intervention.
- Handpick Pests: If you notice small numbers of pests, such as caterpillars or beetles, you can manually remove them from the plants. Wear gloves and drop the pests into a bucket of soapy water to kill them.
- Natural Predators: Encourage beneficial insects and natural predators, such as ladybugs, lacewings, or parasitic wasps, to control pests in your garden. Planting companion plants like marigolds or herbs can attract these beneficial insects.
- Organic Pest Control: Utilize organic pest control methods like neem oil, insecticidal soaps, or homemade sprays made from ingredients like garlic or chili peppers. Follow the instructions carefully and apply these treatments sparingly, especially when plants are flowering to avoid harming pollinators.
- Provide Proper Air Circulation: Proper airflow around tomato plants helps prevent the development and spread of fungal diseases. Avoid overcrowding plants and ensure adequate spacing between them.
- Watering Carefully: Water the soil, not the foliage, to minimize moisture conditions that are favorable for disease development. Water early in the day to ensure foliage has time to dry before the cooler evening temperatures arrive.
- Fungicides: If your tomato plants are prone to fungal diseases, you may consider using fungicides labeled for tomatoes. Follow the instructions carefully and apply as a preventative measure or at the first signs of disease.
- Regular Observation: Monitor your tomato plants regularly throughout the growing season. By staying vigilant, you can quickly identify and address any potential pest or disease issues before they become severe.
By implementing these preventive measures and timely interventions, you can safeguard your tomato plants from common pests and diseases. Healthy and thriving plants are more resilient and more likely to produce a bountiful harvest of tasty tomatoes.
Harvesting and Enjoying Homegrown Tomatoes
One of the most rewarding moments of container gardening is harvesting your homegrown tomatoes. To ensure that you enjoy the fruits of your labor to the fullest, follow these guidelines for proper harvesting and savoring your delicious tomatoes:
- Timing: Harvest tomatoes when they are fully ripe but still firm. Color alone may not be the best indicator of ripeness, so gently squeeze the fruit to check for a slight give. Each tomato variety may have a different maturity timeline, so refer to the seed packet or plant label for guidance.
- Harvesting Technique: To pick a tomato, use clean, sharp garden scissors or pruners to cut the stem rather than pulling or twisting the fruit. This helps prevent damage to the plant and ensures a clean cut.
- Storing Tomatoes: If you have more tomatoes than you can consume immediately, store them in a cool, well-ventilated area away from direct sunlight. Avoid refrigerating fully ripe tomatoes, as it can affect their flavor and texture. Instead, let them ripen fully and enjoy them at room temperature.
- Preserving Tomatoes: If you have an abundance of tomatoes, consider preserving them for future use. You can can them, make sauces or salsas, sun-dry them, or freeze them for later use. Each preservation method has specific instructions and guidelines, so choose the one that suits your needs.
- Savoring Flavors: There’s nothing quite like the taste of a freshly harvested tomato. Enjoy them simply sliced with a sprinkle of salt and a drizzle of olive oil, add them to salads, sandwiches, or pasta dishes, or use them as a base for homemade tomato sauces.
- Sharing the Harvest: If you have an abundant harvest, consider sharing your tomatoes with family, friends, or neighbors. The joy of sharing homegrown tomatoes can bring happiness to others and strengthen your community bonds.
- Saving Seeds: To continue growing your favorite tomato varieties, save the seeds from the ripest and healthiest fruits. Allow the seeds to ferment in a jar of water for a few days, then rinse and dry them before storing them in a cool and dry place for future use.
- Reflecting and Planning: Take some time to reflect on your container gardening experience and the joy of harvesting your own tomatoes. Make note of the varieties you enjoyed the most and any lessons learned. Use these insights to plan and improve your future tomato growing seasons.
Harvesting and savoring homegrown tomatoes is a delightful experience. Each bite of a ripe, flavorful tomato is a testament to your hard work, dedication, and love for gardening. So, take the time to savor and celebrate the fruits of your labor throughout the growing season.