
Choosing Tomato Seeds
When it comes to starting your tomato garden, selecting the right tomato seeds is crucial. With countless varieties available, each offering its own unique characteristics, it can be overwhelming to decide which ones to choose.
First, consider the type of tomato you want to grow. Are you looking for juicy slicing tomatoes, cherry tomatoes for snacking, or heirloom varieties packed with flavor? Determine your preferences and needs before making a selection.
Next, think about the climate and growing conditions in your area. Some tomato varieties thrive in warm climates, while others are more suitable for cooler regions. Check the recommended hardiness zone for each variety to ensure it matches your local climate.
Another factor to consider is disease resistance. Certain tomato varieties are bred to be resistant to common diseases, such as blight or nematodes. This can help ensure a healthier and more successful crop.
Additionally, take into account the maturity time of the tomato plants. Some varieties are early maturing, meaning they produce fruit quicker, while others take longer. If you’re anxious to harvest your tomatoes, opt for a variety with a shorter maturity time.
Lastly, consider the size and shape of the tomato plants. Determinate varieties grow to a fixed height, making them suitable for containers or limited space gardens. Indeterminate varieties, on the other hand, continue growing throughout the season and require staking or cages for support.
By carefully considering these factors, you can narrow down your choices and find the perfect tomato seeds for your indoor garden. Remember to read seed catalogs, consult with experienced gardeners, or research online to find reputable seed sources that offer a wide selection of quality tomato seeds. Happy tomato shopping!
Germinating Tomato Seeds
Before you can start planting tomato seeds, you need to germinate them. This process ensures that the seeds sprout and begin to grow into healthy seedlings. Follow these steps to successfully germinate your tomato seeds:
1. Start by soaking your tomato seeds in a bowl of warm water for 12-24 hours. This helps to soften the seed coat and encourages faster germination.
2. Prepare a germination medium by filling a seed tray or small pots with a mixture of seed-starting soil and perlite or vermiculite. This creates a well-draining environment for the seeds.
3. Moisten the germination medium with water until it is damp, but not soggy. Excess moisture can lead to seed rot or mold growth.
4. Place the soaked tomato seeds on top of the germination medium, spacing them out evenly. Lightly press the seeds into the soil, ensuring good seed-to-soil contact.
5. Cover the tray or pots with a plastic dome or plastic wrap to create a mini greenhouse effect. This helps to retain moisture and create a warm environment for germination.
6. Place the tray or pots in a warm location with indirect sunlight. The ideal temperature for germinating tomato seeds is between 70-80°F (21-27°C).
7. Check the moisture level of the germination medium regularly and mist with water as needed to keep it damp. Avoid overwatering, as this can cause the seeds to rot.
8. Within 7-14 days, you should start to see the tomato seeds germinate and tiny seedlings emerge from the soil. Remove the plastic cover at this point to allow for air circulation.
9. Once the seedlings have emerged, move them to a location with bright, direct sunlight or provide artificial grow lights to promote healthy growth.
Remember to label your seed trays or pots with the tomato variety and the date of germination. This will help you keep track of different varieties and their progress. With patience and proper care, your tomato seeds will sprout, giving you a promising start to your indoor tomato garden.
Preparing the Soil
Preparing the soil is a vital step in setting the foundation for healthy tomato plants. Since your tomato seeds will be germinated indoors, it’s important to ensure that the soil mixture provides the necessary nutrients and drainage. Follow these guidelines to prepare the soil for your tomato seedlings:
1. Choose a well-draining potting mix specifically formulated for seed starting or create your own by mixing equal parts of peat moss, perlite, and vermiculite. Avoid using garden soil, as it may contain diseases or pests.
2. Sterilize the soil mixture by baking it in the oven at 180°F (82°C) for 30 minutes. This helps to kill any potential pathogens or weed seeds that may be present.
3. Fill your seed trays or pots with the sterilized soil mixture, leaving a ½ inch (1.3 cm) gap at the top for watering.
4. Gently tamp down the soil to remove any air pockets, ensuring that it is evenly distributed in the containers.
5. Prior to planting the tomato seedlings, moisten the soil slightly by pouring water evenly over the surface. It should feel moist but not soggy.
6. If desired, you can add organic matter to the soil, such as compost or well-rotted manure, to further enhance its nutrient content. Mix it well into the top layer of the soil before planting.
7. Avoid over-fertilizing the soil at this stage. Too much nitrogen can result in excessive foliage growth at the expense of fruit production.
By preparing the soil properly, you are creating an optimal environment for your tomato seedlings to grow. The well-draining soil mixture allows the roots to breathe and prevents waterlogged conditions that can lead to root rot. The added organic matter provides essential nutrients, promoting healthy growth throughout the growing season. With the right soil preparation, you are well on your way to growing robust and productive tomato plants.
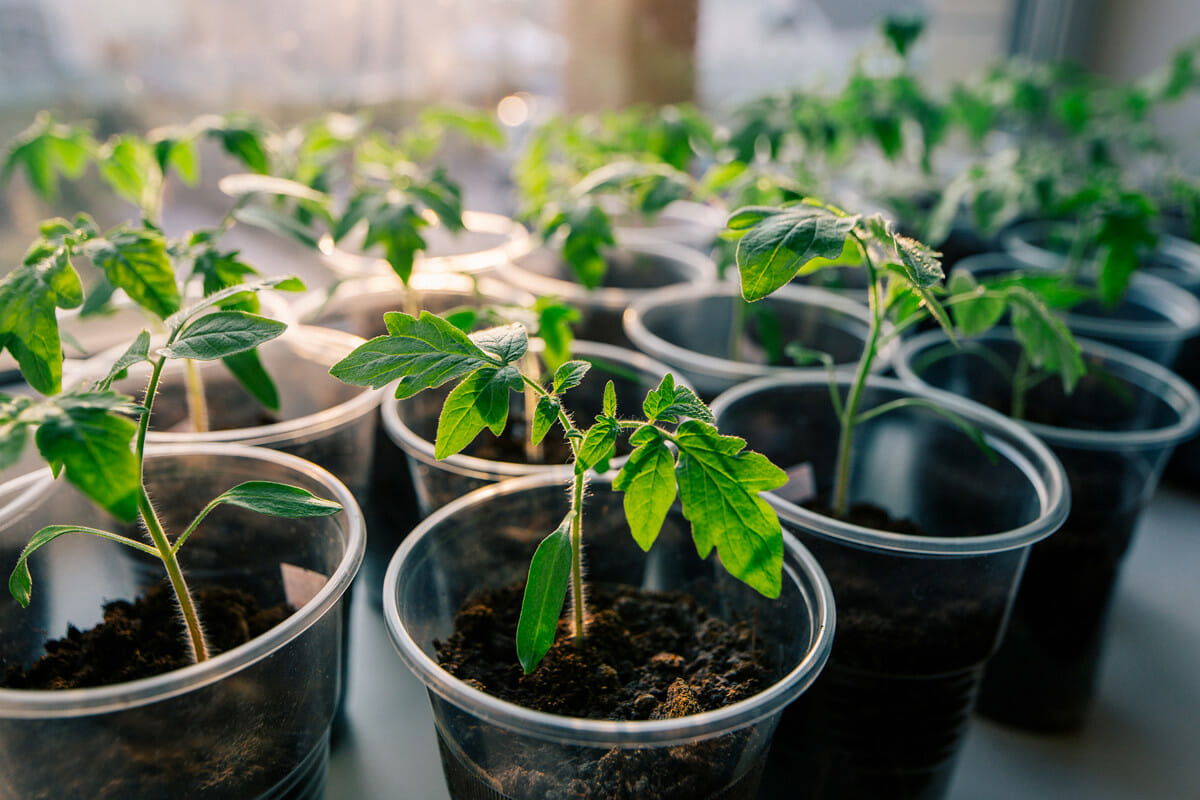
Selecting the Right Containers
Choosing the right containers for your tomato seedlings is essential for their growth and development. The containers you select should provide adequate space for the roots to grow, proper drainage, and stability. Here are some considerations when selecting containers for your indoor tomato garden:
1. Size: Tomato plants have a deep root system, so it’s important to choose containers that are at least 12-18 inches (30-46 cm) deep. This allows for sufficient soil volume and root growth. Additionally, consider the width of the container to provide enough space for the plant to spread its foliage.
2. Material: Opt for containers made of sturdy materials like plastic or ceramic that can withstand the weight of the soil and the growth of the tomato plant. Avoid containers made of metal, as they can heat up quickly in the sun and potentially damage the roots.
3. Drainage: Ensure that the containers have drainage holes at the bottom to prevent waterlogging, which can lead to root rot. If the container doesn’t have drainage holes, drill a few holes yourself to ensure proper drainage.
4. Reusability: Consider whether you want to reuse the containers for future planting or prefer disposable options. Reusable containers are not only more environmentally friendly but can also save you money in the long run.
5. Quantity: If you plan to grow multiple tomato plants, make sure you have enough containers to accommodate each seedling. Crowding plants in a single container can lead to competition for nutrients and limited growth.
6. Aesthetics: While not essential to the plant’s growth, choosing containers that complement your indoor space can enhance the visual appeal of your tomato garden. Select containers that match your decor or opt for decorative pots to add a touch of style.
Remember to clean and sterilize the containers before planting to remove any potential pathogens or residues. This will help ensure a healthy growing environment for your tomato seedlings. Providing the right containers sets a strong foundation for your indoor tomato garden, allowing the roots to establish and thrive as the plants grow. Choose wisely, and enjoy the rewarding experience of growing tomatoes indoors!
Planting the Tomato Seeds
Once your tomato seeds have germinated and the soil is prepared, it’s time to plant them in their designated containers. Follow these steps to ensure successful planting and early growth for your tomato seedlings:
1. Fill each container with the prepared soil mixture, leaving about an inch (2.5 cm) of space from the top to allow for watering.
2. Create individual planting holes in the soil, about ¼ inch (0.6 cm) deep. Space the holes at least 2 inches (5 cm) apart to give the tomato seedlings enough room to grow.
3. Carefully transfer each germinated tomato seedling into the planting holes, gently covering the roots with soil. Be cautious not to disturb the delicate roots during this process.
4. Lightly press down the soil around each seedling to secure it in place.
5. Water the newly planted seedlings, ensuring the soil is evenly moist. Avoid overwatering, as excessive moisture can lead to fungal diseases.
6. Place the containers in a location with bright, indirect sunlight or under grow lights if natural light is limited. Providing 10-12 hours of light daily is crucial for healthy growth and development.
7. Monitor the moisture level in the soil and water as needed to keep it consistently moist but not waterlogged. Avoid letting the soil dry out completely, as this can stress the seedlings.
8. As the seedlings start to grow, adjust the watering to meet the plant’s needs. Water deeply, allowing the soil to dry slightly between waterings. This promotes the development of a strong root system.
9. Keep a close eye on the seedlings for any signs of pests or diseases. Promptly address any issues to prevent them from spreading and affecting the overall health of the plants.
By carefully planting your tomato seedlings, you are providing them with the best possible start for successful growth. Proper handling and watering will help the plants establish themselves and prepare them for the next steps in their journey. Exciting times lie ahead as you watch your tomato seedlings transform into healthy, productive plants.
Providing Proper Light and Temperature
Proper light and temperature are crucial factors for the healthy growth of tomato seedlings. These conditions help facilitate photosynthesis, promote sturdy stem development, and ensure optimal plant growth. Follow these guidelines to provide the right light and temperature for your indoor tomato plants:
Light:
Tomato seedlings require bright light to thrive. Place them in a location where they will receive at least 10-12 hours of direct or indirect sunlight each day. If natural sunlight is limited, you can supplement it with artificial grow lights. Here are some tips for providing adequate light:
- Position the seedlings about 6-12 inches (15-30 cm) away from the grow lights.
- Adjust the height of the lights as the seedlings grow to maintain the recommended distance.
- Keep the lights on for 14-16 hours a day to mimic the ideal daylight length.
- Avoid placing the lights too close to the seedlings, as this can cause heat stress or burn the leaves.
Temperature:
Tomato seedlings thrive in warm temperatures, generally between 70-80°F (21-27°C) during the day and slightly cooler at night. Consistent temperatures within this range help with proper growth and prevent cold stress. Here’s how to maintain the right temperature for your tomato seedlings:
- Place the seedlings in a room or area where the temperature remains relatively stable.
- Avoid exposing the seedlings to extreme temperature fluctuations or drafts.
- Use a thermometer to monitor the temperature and make any necessary adjustments.
- If the room temperature is too cool, consider using a seedling heat mat to provide gentle bottom warmth.
- During hot weather, provide shade or move the seedlings away from direct sunlight to prevent overheating.
Remember, the right balance of light and temperature is key to healthy tomato seedling development. Providing adequate light and maintaining suitable temperatures will help your seedlings grow strong, vibrant, and ready for transplanting when the time comes. Keep a close eye on their progress, adjusting the light and temperature as needed to ensure their optimal growth.
Watering and Fertilizing the Seedlings
Proper watering and fertilization are essential for the healthy growth of tomato seedlings. These practices provide the necessary nutrients and hydration, ensuring robust development. Follow these guidelines to effectively water and fertilize your tomato seedlings:
Watering:
Consistent moisture is crucial for tomato seedlings, but overwatering can lead to root rot and other issues. Follow these tips for successful watering:
- Water the seedlings when the top inch (2.5 cm) of the soil feels dry to the touch.
- Use a gentle watering can or spray bottle to water the seedlings, aiming for the base of the plants rather than wetting the foliage.
- Ensure that the water reaches the roots, allowing it to penetrate the soil and provide hydration.
- Avoid overwatering, as it can result in waterlogged soil. Excess moisture can suffocate the roots and promote the growth of fungal diseases.
- Monitor the moisture level regularly and adjust the watering frequency based on the seedlings’ needs and environmental conditions.
Fertilizing:
As seedlings grow, they require a steady supply of nutrients to support their development. Consider the following tips when fertilizing your tomato seedlings:
- Begin fertilizing the seedlings when they develop their first true leaves, usually a few weeks after germination.
- Use a balanced liquid fertilizer with equal nitrogen (N), phosphorus (P), and potassium (K) ratios or a fertilizer specifically formulated for seedlings.
- Dilute the fertilizer as directed on the package, as seedlings are more delicate and require weaker concentrations compared to mature plants.
- Apply the fertilizer every two weeks, following the recommended dosage on the package.
- Avoid over-fertilizing, as excessive nutrient levels can lead to leaf burn or stunted growth. Stick to the recommended application rates.
- Consider using organic fertilizers, such as compost tea or fish emulsion, for a more natural and sustainable option.
Remember, watering and fertilizing should be done with care and in moderation. Consistency is key; ensure that your tomato seedlings receive the right amount of water and nutrients without going overboard. By following these practices, you will provide your seedlings with the support they need to develop into strong and healthy tomato plants.
Transplanting the Seedlings
Transplanting is a critical stage in the life of tomato seedlings as they transition from the indoor environment to the outdoors. This process requires careful handling to minimize transplant shock and ensure the continued growth and success of the plants. Follow these steps to transplant your tomato seedlings:
1. Timing: Wait until the seedlings have developed a strong root system and have at least two sets of true leaves before transplanting. This is typically around 6-8 weeks after germination.
2. Prepare the planting area: Choose a well-drained location in your garden that receives full sunlight for at least 6-8 hours a day. Clear the area of any weeds or debris, and enrich the soil with compost or organic matter to improve its fertility and texture.
3. Harden off the seedlings: Gradually acclimate the seedlings to outdoor conditions by placing them in a sheltered location outdoors for a few hours each day, gradually increasing the exposure time over the course of a week. This process helps the seedlings adjust to the temperature, light, and wind changes.
4. Dig the holes: Dig holes in the prepared soil that are slightly larger and deeper than the root ball of the seedlings. Space the holes according to the recommended spacing for the specific tomato variety.
5. Transplant the seedlings: Gently remove the seedlings from their containers, being careful not to damage the delicate roots. Place each seedling in the prepared hole, ensuring that the root ball is level with or slightly below the soil surface. Backfill the hole with soil, gently firming it around the base of the seedling.
6. Water thoroughly: Immediately after transplanting, give the seedlings a thorough watering to settle the soil around the roots and eliminate any air pockets. Ensure that the soil is evenly moist but not waterlogged.
7. Provide support: If you are growing indeterminate varieties that require support, insert stakes or install tomato cages near the seedlings. This will provide support as the plants grow taller.
8. Mulch the area: Apply a layer of organic mulch, such as straw or wood chips, around the base of the plants to help conserve moisture, suppress weeds, and regulate soil temperature.
9. Monitor and care for the transplant: Keep a close eye on the transplanted seedlings, checking for any signs of stress, nutrient deficiencies, or pests. Water regularly, providing about 1-1.5 inches (2.5-3.8 cm) of water per week, adjusting as needed depending on weather conditions.
By following these transplanting steps, you will ensure a smooth transition for your tomato seedlings. Properly transplanting them to a favorable outdoor environment sets the stage for healthy growth and bountiful harvests. With proper care and attention, your transplanted seedlings will thrive and flourish throughout the growing season.
Caring for the Seedlings
Proper care is essential to ensure the health and vitality of your tomato seedlings as they continue to grow. By providing the right conditions and addressing their needs, you can set the foundation for strong, productive plants. Here are some important aspects to consider when caring for your tomato seedlings:
Watering:
Consistent and appropriate watering is crucial for the well-being of your seedlings. Here are some tips to ensure optimal moisture levels:
- Water the seedlings regularly, keeping the soil consistently moist but not waterlogged.
- Avoid overwatering, as it can lead to root rot and other fungal diseases. Ensure proper drainage by using well-draining soil and containers with drainage holes.
- Water at the base of the plants, avoiding wetting the foliage to prevent the onset of diseases.
- Water deeply to encourage root growth, rather than light surface watering that promotes shallow roots.
Pruning:
Regular pruning helps promote airflow, reduce disease risk, and encourage stronger plant growth. Follow these pruning techniques for your tomato seedlings:
- Remove any diseased or damaged leaves as soon as you notice them. This prevents the spread of diseases and keeps the plant healthy.
- Pinch off the side shoots, also known as suckers, that form in the leaf axils of indeterminate tomato varieties. This directs the plant’s energy towards fruit production rather than unnecessary foliage.
- Trim the lower leaves that may touch the ground, as they are more susceptible to diseases and pests.
- Keep an open center by removing excess foliage that prevents adequate sunlight penetration and airflow.
Support:
As your tomato plants grow taller, providing proper support is crucial to prevent them from bending or breaking. Consider these support methods:
- Use stakes, cages, or trellises to support indeterminate varieties that grow tall and continue to produce fruit throughout the season.
- Secure the main stem of the plant to the support structure as it grows, using soft ties or twine. This prevents the plant from being damaged by wind or heavy fruit.
- Regularly check the ties and adjust them as needed to accommodate the plant’s growth.
Fertilizing:
To provide your seedlings with the necessary nutrients, fertilize them appropriately:
- Use a balanced fertilizer formulated specifically for tomatoes or vegetables.
- Follow the fertilizer package instructions for application rates and frequency.
- Avoid over-fertilizing, as excessive nitrogen can result in lush foliage growth at the expense of fruit production.
- Consider supplementing with organic fertilizers or compost to enhance soil nutrition naturally.
By implementing these care practices, you are nurturing your tomato seedlings and setting them up for success. Regular watering, pruning, providing support, and proper fertilization will promote the growth of healthy, vigorous plants with abundant yields. Stay attentive to their needs and make adjustments as necessary to ensure a thriving tomato garden.
Preparing for Outdoor Planting
Before transplanting your tomato seedlings into the outdoor garden, it is essential to adequately prepare the planting area to provide them with the best growing environment. By considering factors such as soil preparation, location, and timing, you can optimize the conditions for successful outdoor planting. Follow these steps to prepare for outdoor planting:
Choose the Right Location:
Select a location in your garden that receives full sun for at least 6-8 hours a day. Adequate sunlight promotes healthy growth and maximizes fruit production. Additionally, choose an area with good air circulation to reduce the risk of diseases.
Soil Preparation:
Prepare the soil in the planting area to provide optimal nutrition and drainage for your tomato plants:
- Remove any weeds, rocks, or debris from the planting area.
- Loosen the soil using a garden fork or tiller, breaking up any clumps and ensuring it is well-drained.
- Incorporate organic matter, such as compost or well-rotted manure, into the soil to improve its fertility and structure.
- Perform a soil test to assess nutrient levels and pH. Adjust the pH if necessary, aiming for a slightly acidic range of 6.0-6.8.
Timing:
Transplant your seedlings outdoors when the risk of frost has passed and soil temperatures have warmed up. The ideal soil temperature for tomato growth is around 60-70°F (15-21°C). This generally coincides with the spring season for most regions.
Amendments and Mulching:
Consider applying organic amendments or slow-release fertilizers, following the recommendations of your soil test results. This ensures that the soil is nourished with the necessary nutrients for the growing season. Additionally, apply a layer of organic mulch, such as straw or wood chips, around the base of the plants to conserve moisture, suppress weeds, and regulate soil temperature.
Support Structures:
Install support structures such as stakes, cages, or trellises before transplanting your tomato seedlings. This allows you to carefully position and secure the plants as they grow. Providing support helps maintain proper plant growth, prevents breakage, and ensures good airflow.
Watering:
Prior to transplanting, water the soil in the planting area thoroughly. This ensures the soil is adequately moist and helps to minimize transplant shock when placing the seedlings into the ground.
By taking the time to prepare the outdoor planting area, you are setting the stage for healthy growth and bountiful harvests. Proper soil preparation, selecting the right location, and timing the transplant correctly will maximize the potential of your tomato plants. With careful attention to these preparations, your tomato seedlings will thrive in their new outdoor environment.
Transferring the Seedlings Outdoors
Transferring your tomato seedlings from their indoor environment to the outdoors is an exciting step in the gardening process. This transition requires careful handling and consideration to ensure the successful establishment of your plants in the outdoor garden. Follow these steps when transferring the seedlings outdoors:
Choose the Right Timing:
Wait until the danger of frost has passed and the weather has sufficiently warmed up before transplanting your seedlings. Soil temperatures should be consistently above 60°F (15°C) for optimal growth. This timing generally aligns with the spring season for most regions.
Preparation:
Prior to transplanting, thoroughly water the seedlings and the surrounding soil. This helps to hydrate the roots and prepare them for the move. Make sure the soil in the planting area is well-prepared through proper cultivation, removal of weeds, and incorporation of organic matter.
Transplanting Technique:
Follow these steps to successfully transfer your seedlings outdoors:
- Choose a calm, overcast day to minimize stress on the seedlings.
- Dig a hole in the prepared soil that is slightly larger and deeper than the root ball of the seedling.
- Gently remove the seedling from its container, carefully holding it by the leaves to avoid damaging the stem or delicate roots.
- Place the root ball into the hole, ensuring that the plant sits at the same soil depth as it did indoors.
- Backfill the hole with soil, gently firming it around the roots to eliminate any air pockets.
- Water the newly transplanted seedling immediately, moistening the soil around it. This helps settle the soil and promotes root establishment.
Spacing:
Space the transplanted seedlings according to the recommended spacing for the specific tomato variety. Leave enough room between plants to allow for airflow and future growth. Proper spacing helps prevent diseases and allows each plant to access adequate sunlight and nutrients.
Protection and Support:
Provide protection and support to your newly transplanted seedlings:
- If there is a risk of cool nighttime temperatures or strong winds, consider using row covers, cloches, or temporary shields to protect the plants.
- Install support structures such as stakes, cages, or trellises to provide stability and keep the plants upright as they grow.
- Secure the seedlings to the support structures using soft ties or twine, ensuring they have proper support and space to grow.
Throughout the process of transplanting, handle the seedlings with care to avoid damaging the roots or foliage. By following these steps, you can successfully transfer your seedlings outdoors, giving them the opportunity to flourish and produce a bountiful harvest in the outdoor garden setting.