
Selecting the Right Tamarind Seeds
When it comes to planting tamarind, selecting the right seeds is essential to ensure a successful and productive harvest. Here are some important factors to consider when choosing tamarind seeds:
- Seed Source: Look for seeds from a reliable source, such as a reputable nursery or a trusted seller. This will help ensure the seeds are high-quality and viable for planting.
- Freshness: Opt for fresh tamarind seeds as they have a higher germination rate. Avoid seeds that are discolored, shriveled, or damaged.
- Variety: Tamarind trees can vary in size, taste, and growth characteristics. Consider the specific variety you want to grow and select seeds accordingly.
- Climate Compatibility: Take into account your climate zone and choose seeds that are suitable for your local weather conditions.
It’s important to note that tamarind seeds have a hard outer shell, which needs to be carefully removed before planting. This can be done by cracking the shell using a vice grip or gently tapping it with a hammer to create a small crack without damaging the inner seed.
Remember to select a sufficient number of seeds to account for potential seedling failures and to ensure a diverse genetic pool for healthier and more vigorous plants.
Preparing the Seeds for Planting
Before planting tamarind seeds, it’s important to prepare them properly to improve germination rates and ensure healthy seedlings. Here’s how to prepare tamarind seeds for planting:
- Soaking: Place the tamarind seeds in a bowl of warm water and let them soak for 24 hours. This helps soften the hard seed coat and speeds up the germination process.
- Scarification: After soaking, use a sharp knife or sandpaper to gently scrape the outer layer of the seed. This process, known as scarification, helps water penetrate the seed coat and encourages germination.
- Stratification (optional): Some gardeners recommend stratifying tamarind seeds, especially if they come from regions with a distinct dry period. To stratify the seeds, place them in a sealed plastic bag with a slightly moistened paper towel and refrigerate them for about a month.
By following these preparation steps, you can increase the chances of successful germination and ensure stronger seedlings.
Remember to handle the seeds with care during the preparation process to avoid damaging them. Discard any seeds that appear moldy, discolored, or have an unpleasant odor, as these are likely not viable for planting.
Choosing the Ideal Planting Location
Selecting the right planting location is crucial for the successful growth and development of tamarind trees. Here are some factors to consider when choosing the ideal spot:
- Sunlight: Tamarind trees thrive in full sun, so choose a location that receives at least 6-8 hours of direct sunlight per day. Avoid planting in areas with excessive shade as it can hinder the tree’s overall growth and fruit production.
- Soil Drainage: Tamarind trees prefer well-draining soil to prevent waterlogging, which can lead to root rot. Choose a location with soil that drains well, or consider amending the soil with organic matter to improve drainage if necessary.
- Space: Tamarind trees can grow quite large, with a spreading canopy, so choose a location that provides enough space for the tree to mature without overcrowding other plants or structures.
- Protection: If you live in an area with strong winds or storms, consider planting tamarind trees near a natural windbreak, such as a fence or existing trees, to protect them from wind damage.
Additionally, consider the proximity to a water source, as tamarind trees require regular watering, especially during the establishment phase. Having access to water nearby will make it easier to provide adequate irrigation.
Take your time to evaluate different areas of your garden or landscape to find the perfect spot that meets these criteria. Remember, choosing the right planting location sets the foundation for healthy and productive tamarind trees.
Creating the Perfect Planting Environment
Once you have selected the ideal location for planting your tamarind seeds, it’s important to create a favorable environment to ensure their successful growth. Here are some steps to create the perfect planting environment:
- Soil Preparation: Tamarind trees prefer well-drained soil with a slightly acidic to neutral pH range (around 6.0 to 7.0). Prior to planting, prepare the soil by loosening it and removing any rocks, weeds, or debris. Incorporate organic matter, such as compost or aged manure, to improve soil fertility and drainage.
- Spacing: Since tamarind trees can grow to be quite large, it’s important to provide them with ample space. Plant your tamarind seeds at a distance of at least 20-30 feet apart to allow for proper growth and development of the trees.
- Mulching: After planting, apply a layer of organic mulch around the base of the seedlings. This helps conserve moisture, suppress weed growth, and maintain consistent soil temperature. Use materials like wood chips, straw, or dried leaves for effective mulching.
- Watering: Proper watering is vital for the establishment of tamarind seedlings. Water the newly planted seeds thoroughly, and continue to provide regular watering to keep the soil moist, but not waterlogged, during the establishment phase. Once established, tamarind trees are drought-tolerant but still benefit from occasional deep watering.
- Fertilizing: Tamarind trees generally do not require heavy fertilization. However, you can provide some balanced organic fertilizer during the growing season to promote healthy growth. Avoid over-fertilizing, as it can lead to excessive foliage at the expense of fruit production.
By creating the perfect planting environment, you give your tamarind seeds the best possible start, setting them up for healthy growth and development.
Planting the Tamarind Seeds
Now that you have prepared the seeds and created the perfect planting environment, it’s time to plant the tamarind seeds. Follow these steps for successful planting:
- Digging the Hole: Dig a hole that is wide and deep enough to accommodate the tamarind seed, ensuring that the top of the seed will be level with the soil surface once placed in the hole.
- Placing the Seed: Gently place the prepared tamarind seed into the hole, with the scarified side facing upwards. Be careful not to damage the delicate root that may have started to emerge.
- Backfilling: Gradually backfill the hole with the excavated soil, gently pressing it down around the seed to ensure good soil-to-seed contact. Avoid compacting the soil too much, as it can hinder root growth.
- Watering: After planting, thoroughly water the newly planted seed to settle the soil and provide moisture to the seed. Maintain regular watering to keep the soil consistently moist during the germination period.
- Marking: To identify the planted area, consider placing a small marker or stake near the seedling to prevent accidentally disturbing or stepping on it.
It’s important to note that tamarind seeds may take several weeks to months to germinate, so be patient and continue to provide proper care. Keep the planting area free from weeds and monitor the moisture levels to ensure successful seedling emergence.
Once the tamarind seedlings have emerged and developed a few sets of leaves, you can start gradually reducing the watering frequency and transitioning to a regular watering schedule that allows the soil to partially dry out between waterings.
Remember, proper planting is the first step towards growing healthy and productive tamarind trees. With time and care, your tamarind seeds will sprout and begin their journey to becoming beautiful trees.
Caring for the Tamarind Seedlings
After planting the tamarind seeds and watching them sprout into seedlings, it’s important to provide ongoing care to ensure their healthy growth and development. Here are some essential care tips for tamarind seedlings:
- Watering: Tamarind seedlings require regular watering to keep the soil consistently moist but not waterlogged. Water deeply, allowing the water to reach the root zone, and adjust the frequency based on the environmental conditions and moisture levels in the soil.
- Mulching: Apply a layer of organic mulch around the base of the seedlings to help conserve moisture, suppress weeds, and regulate soil temperature. Keep the mulch a few inches away from the trunk to prevent moisture-related issues.
- Pruning: As the tamarind seedlings grow, monitor their growth and prune any dead, damaged, or overcrowded branches. Pruning helps promote better air circulation and encourages the development of a sturdy and well-shaped tree.
- Fertilizing: Tamarind seedlings benefit from occasional applications of a balanced organic fertilizer during the growing season. Follow the manufacturer’s instructions for proper application and avoid over-fertilization, which can lead to excessive foliage growth at the expense of fruit production.
- Protection: Protect the young seedlings from extreme weather conditions, such as strong winds or frost, especially during their first year. Consider using stakes or tree guards to provide support and shield them from potential damage.
- Weed Control: Regularly inspect the planting area and remove any competing weeds that may hinder the growth of the tamarind seedlings. Be careful not to disturb the roots of the seedlings while removing weeds.
Observing the tamarind seedlings closely is crucial to identify any signs of pests, diseases, or nutrient deficiencies. Promptly address any issues that arise using appropriate organic pest control methods or treatments.
Providing consistent care and attention to your tamarind seedlings will help them develop into healthy trees and increase the likelihood of a bountiful harvest in the future.
Transplanting the Tamarind Seedlings (Optional)
Transplanting tamarind seedlings is an optional step that can be done if you want to reposition them to a different location or if they have outgrown their original planting spot. Here’s a guide on how to transplant tamarind seedlings:
- Timing: Transplant the tamarind seedlings when they are still young, typically after they have developed a few sets of leaves. Avoid transplanting during extreme weather conditions or when the seedlings are under stress.
- Preparing the New Planting Hole: Dig a new hole in the desired planting location. Make the hole slightly larger than the root ball of the seedling to allow for proper root growth.
- Removing the Seedling: Carefully dig around the base of the seedling, taking care not to damage the roots. Gently lift the seedling, ensuring the entire root ball is intact.
- Placing in the New Hole: Transfer the seedling to the new planting hole, ensuring it is positioned at the same depth as it was in the previous location. Backfill the hole with soil, gently pressing it down to eliminate any air pockets.
- Watering and Mulching: After transplanting, give the tamarind seedling a thorough watering to help settle the soil around the roots. Apply a layer of mulch around the base to conserve moisture and protect the roots from temperature fluctuations.
- Care and Monitoring: Provide regular care to the transplanted seedling, including watering, fertilizing, pruning, and protection from extreme weather conditions. Monitor the seedling closely for signs of stress and make any necessary adjustments to ensure its successful establishment.
It’s important to note that transplanting can cause temporary stress to the seedlings, so it’s essential to minimize root disturbance and provide proper care during the transition period. Transplant shock is common, but with time and proper care, the seedlings will recover and continue their growth.
If you decide to transplant tamarind seedlings, ensure that the new planting location meets the same requirements as outlined in the previous section. This will help provide the best possible growing conditions for the transplanted tamarind seedlings.
Troubleshooting Common Tamarind Seedling Problems
While tamarind seedlings are generally resilient, they can sometimes encounter problems that hinder their growth and development. Here are some common issues you may encounter with tamarind seedlings and how to troubleshoot them:
- Poor Germination: If your tamarind seeds are not germinating or have a low germination rate, it could be due to old or non-viable seeds. Ensure you are using fresh, high-quality seeds from a reliable source. Additionally, make sure you have properly soaked and scarified the seeds before planting.
- Wilting or Yellowing Leaves: This can indicate over or under watering. Adjust your watering routine to meet the specific needs of your tamarind seedlings. Avoid overwatering, as it can lead to root rot, and ensure the soil is well-drained. If the issue persists, check for pests or diseases that may be affecting the roots.
- Pests and Diseases: Common pests that can affect tamarind seedlings include aphids, mealybugs, and fruit borers. Regularly inspect your seedlings for any signs of insect infestation, such as distorted leaves, sticky residue, or holes in the foliage. Use organic pest control methods, such as neem oil or insecticidal soap, to manage pest populations. Additionally, be on the lookout for fungal diseases, such as damping off or leaf spots, and treat them promptly with appropriate fungicides.
- Nutrient Deficiencies: Tamarind seedlings may exhibit nutrient deficiencies, such as yellowing leaves or stunted growth. Conduct a soil test to evaluate the nutrient levels and adjust your fertilization routine accordingly. If specific nutrient deficiencies are identified, apply organic amendments or foliar sprays to provide the necessary nutrients.
- Stunted Growth: If your tamarind seedlings are not growing as expected, consider environmental factors such as inadequate sunlight, poor soil conditions, or overcrowding. Ensure your seedlings are receiving sufficient light, well-draining soil, and adequate spacing for optimal growth.
Regular observation and diligent care are key to preventing and addressing any issues with your tamarind seedlings. By promptly addressing problems and providing appropriate care, you can help your seedlings thrive and develop into healthy tamarind trees.
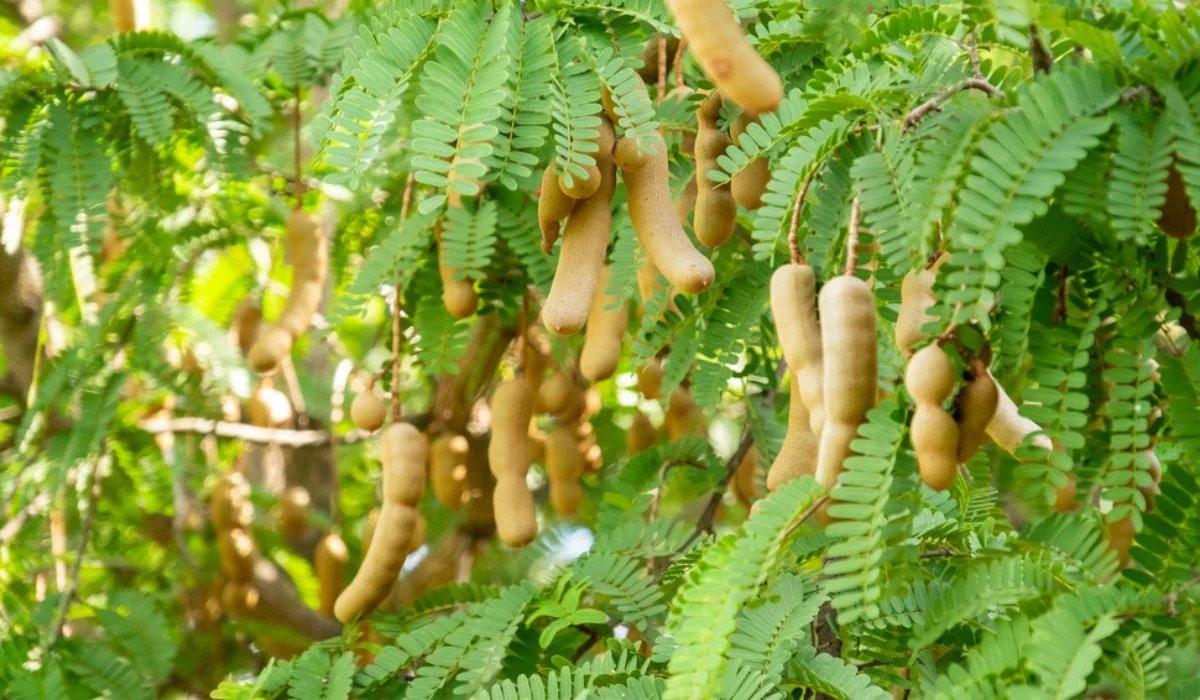
Harvesting Tamarind Fruits
After patiently nurturing your tamarind seedlings to maturity, it’s time to reap the rewards of your efforts by harvesting the delicious and tangy tamarind fruits. Here’s what you need to know about harvesting tamarind:
- Timing: Tamarind fruits are typically ready for harvest when they are fully mature and have reached their maximum size. This is usually during the dry season or towards the end of the rainy season, depending on your specific climate.
- Appearance: Mature tamarind fruits will have a brown, hard shell, which protects the sweet, tangy pulp inside. The shells may also start to crack or split as an indication of ripeness.
- Harvesting Method: To harvest tamarind, simply twist or gently pull the mature fruits from the tree. Be careful not to damage the branches or the tree itself. If necessary, use pruning shears or a sharp knife to cut the fruits from the stem.
- Post-Harvest Handling: After harvesting, carefully remove the hard shells from the tamarind fruits to reveal the edible pulp. The pulp can be used immediately or stored for future use.
Tamarind fruits can be consumed fresh or used in various culinary applications. They are often used in savory and sweet dishes, as well as in sauces, chutneys, beverages, and desserts.
It’s important to note that tamarind fruits may continue to ripen and develop their characteristic tangy flavor even after they are harvested. Therefore, you can allow some fruits to fully mature on the tree and harvest them as needed for a prolonged harvest period.
Enjoy the bountiful harvest of tamarind fruits and savor their unique flavor. Remember to save some seeds from the harvested fruits if you wish to continue growing tamarind trees from scratch.