
Checking the Potatoes
Before you begin planting sprouted potatoes, it’s important to thoroughly inspect them to ensure their quality. This step is vital as it will help you avoid wasting time and effort on potatoes that may not produce a successful harvest. Here are a few key factors to consider when checking your potatoes:
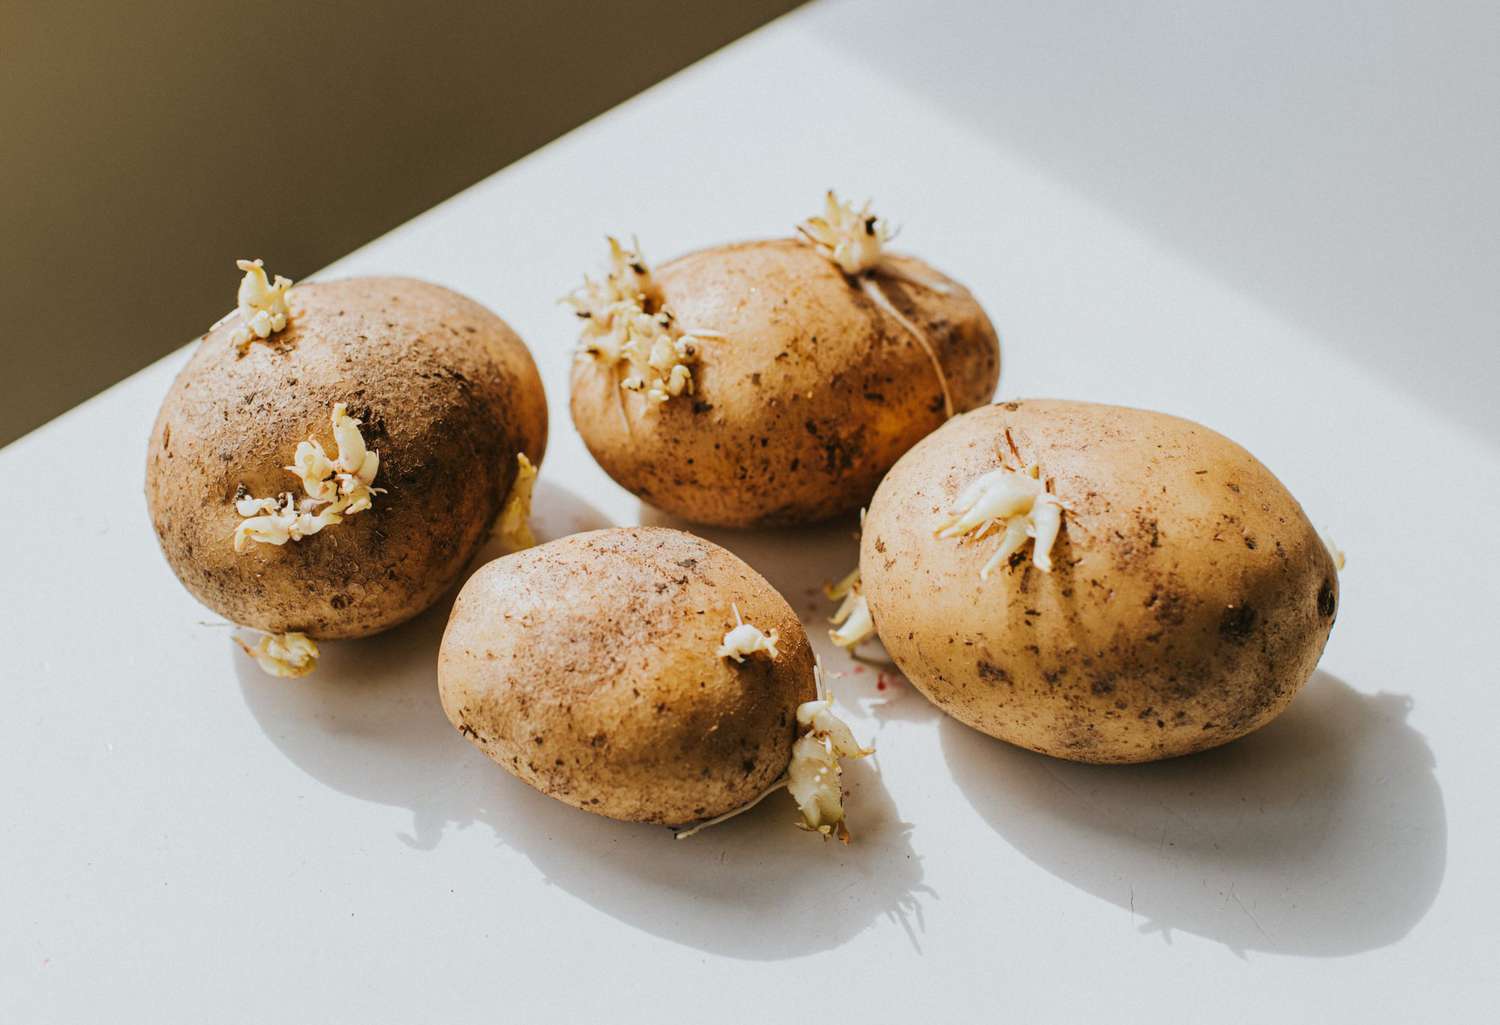
- Condition: Examine the sprouted potatoes for any signs of rot, disease, or damage. Potatoes with soft, mushy spots or discoloration should be discarded, as they may negatively affect the overall health of your potato plants. Select potatoes that are firm, with healthy-looking sprouts.
- Sprout Length: Take note of the length of the sprouts on the potatoes. Ideally, the sprouts should be between 1-2 inches long. Longer sprouts may indicate that the potatoes have been stored for a long time and may be less viable for planting.
- Number of Sprouts: Assess the number of sprouts on each potato. The more sprouts, the better, as this indicates a stronger and healthier potato plant. Aim for potatoes with at least three sprouts, evenly distributed around the potato’s surface.
Additionally, if you have different varieties of potatoes, make sure to separate them during the checking process. This will help you keep track of the specific characteristics and growth patterns of each variety.
By carefully checking your potatoes, you can ensure that you are starting with healthy and viable tubers. This will significantly increase your chances of a successful potato harvest. Remember, the quality of your initial seed potatoes plays a crucial role in determining the overall health, yield, and flavor of your final crop.
Preparing the Soil
Preparing the soil is a critical step in planting sprouted potatoes. The quality and condition of the soil will directly impact the growth, development, and yield of your potato plants. Follow these steps to ensure your soil is ready for planting:
- Clear the area: Start by removing any weeds, rocks, or debris from the planting area. This will help create a clean and clear space for your potato plants to thrive.
- Loosen the soil: Use a garden fork or a tiller to loosen the soil to a depth of at least 8-10 inches. This will improve the soil’s drainage and aeration, allowing the potato roots to grow freely.
- Add organic matter: Enrich the soil by incorporating organic matter such as compost or well-rotted manure. This will enhance the soil’s fertility, moisture retention, and nutrient content. Spread a layer of organic matter evenly over the planting area and mix it into the soil.
- Test the soil pH: It’s a good practice to test the soil pH before planting your potatoes. Potatoes prefer a slightly acidic soil with a pH range of 5.0 to 6.0. Use a soil testing kit to determine the pH level and make any necessary adjustments by adding amendments like lime or sulfur.
- Apply balanced fertilizer: Prior to planting, apply a balanced fertilizer with a ratio of 10-10-10 or similar. This will provide essential nutrients for the initial growth of your potato plants.
Remember to consider the specific needs of your potato variety when preparing the soil. Some potato varieties may prefer slightly different soil conditions, so it’s always a good idea to research the specific requirements for the variety you’re growing.
Properly preparing the soil will create an optimal growing environment for your sprouted potatoes, contributing to healthier plants and a bountiful harvest. Take the time to take care of your soil, and you’ll be rewarded with vigorous and productive potato plants.
Choosing a Planting Site
Choosing the right planting site for your sprouted potatoes is crucial to their overall success and productivity. Here are some important considerations to keep in mind when selecting a suitable location:
- Sunlight: Potatoes thrive in full sun, so look for an area in your garden that receives at least 6-8 hours of direct sunlight each day. Avoid shaded areas or spots that are partially blocked by trees or buildings.
- Soil Drainage: Potatoes prefer well-drained soil to prevent waterlogging, which can lead to rot and disease. Avoid low-lying areas or heavy clay soils that tend to hold water. If your soil doesn’t drain well, consider raising the beds or improving the drainage by adding organic matter.
- Space Requirements: Potatoes need ample space to grow and spread out. Choose a site that offers enough room for the potato plants to develop, with adequate spacing between rows. This will allow for good air circulation and easy access for maintenance and harvesting.
- Proximity to Water: Consider the proximity of a water source when selecting a planting site. Potatoes require regular and consistent moisture throughout the growing season. Having a water source nearby will make it easier to provide adequate irrigation.
- Crop Rotation: It’s important to practice crop rotation to avoid the buildup of pests and diseases in the soil. Avoid planting potatoes in the same spot where you grew them or other related plants (such as tomatoes or peppers) in previous seasons. Rotate your potato planting location every year or every few years.
By carefully choosing the right planting site for your sprouted potatoes, you can greatly increase their chances of success. A well-chosen location will provide the optimal growing conditions for your potato plants, resulting in healthier plants and a more abundant harvest.
Digging the Trenches
When planting sprouted potatoes, digging the trenches is an important step that prepares the soil and creates a suitable environment for the tubers to grow. Follow these guidelines to dig the trenches properly:
- Trench Depth: Start by determining the ideal depth for your potato trenches. The general guideline is to make the trenches around 6-8 inches deep. This allows for ample space for the potatoes to develop underground and helps prevent sunlight from reaching the tubers, which can cause them to turn green and become toxic.
- Trench Width: The width of the trenches can vary depending on the number of potato plants you plan to grow. However, a width of 12-18 inches is typically sufficient. This provides enough room for the potato plants to spread out as they grow.
- Trench Spacing: Space the trenches at least 2-3 feet apart to allow for good air circulation and easy access for maintenance. This spacing also helps prevent overcrowding, which can lead to competition for nutrients and stunted growth.
- Soil Removal: Use a shovel or a garden fork to carefully remove the soil from the trench. Place the excavated soil in a wheelbarrow or on a tarp nearby for easy backfilling later on.
- Smooth the Bottom: Smooth the bottom of the trench with a rake or your hands, removing any rocks, clumps of soil, or debris. This provides a level surface for the potato seedlings to rest on.
While digging the trenches, it’s important to maintain a consistent depth and width throughout the planting area. This will ensure an even and uniform planting environment for your sprouted potatoes.
Remember to keep the excavated soil nearby for covering the potatoes in the next step. Properly dug trenches set the stage for successful potato growth, enabling roots to establish and potatoes to develop under the soil’s surface.
Planting the Sprouted Potatoes
Now that you have prepared the soil and dug the trenches, it’s time to plant your sprouted potatoes. Follow these steps to ensure proper planting:
- Spacing: Place the sprouted potatoes into the trenches with the sprouts facing upwards. Space the potatoes around 12-15 inches apart within the trench. This provides enough room for the plants to grow and ensures adequate airflow between the plants.
- Planting Depth: Gently press the sprouted potatoes into the soil, ensuring they are covered to a depth of 3-4 inches. This depth encourages strong root development and prevents the potatoes from being exposed to sunlight, which can cause them to turn green and become toxic.
- Orienting the Sprouts: If you have potatoes with several sprouts, position them in the trench with the sprouts facing upwards and outwards. This helps distribute the growth evenly and promotes more vigorous plant development.
- Covering the Potatoes: Using the soil you dug out earlier, cover the planted potatoes completely. Gently firm the soil around them to provide support and stability to the growing tubers.
It’s important to note that the planting depth and spacing may vary slightly depending on the specific potato variety you’re growing. Refer to the instructions provided by the seed supplier or do some research on the recommended planting depths for your chosen potato variety.
Once you have planted all the sprouted potatoes, take a moment to water the trenches thoroughly. This will help settle the soil around the tubers and provide them with the initial moisture they need to start growing.
By properly planting your sprouted potatoes, you are setting the stage for healthy growth and a successful harvest. Pay attention to the depth, spacing, and orientation of the potatoes, ensuring they are well-covered and supported in the soil.
Covering the Potatoes
After planting the sprouted potatoes, the next step is to cover them properly. Covering the potatoes serves multiple purposes, including protecting them from sunlight, providing insulation, and promoting healthy growth. Follow these guidelines to effectively cover your planted potatoes:
- Add Soil: Using the soil you excavated earlier, gently add a layer of soil on top of the planted potatoes. Cover them until they are completely buried, ensuring there are no exposed tubers or sprouts. The layer of soil should be around 2-3 inches thick.
- Level the Surface: Use a rake or your hands to level the surface of the covered area. This helps to ensure an even and uniform planting bed, making it easier for the plants to grow and preventing water pooling.
- Mound the Soil: After covering the potatoes initially, create small mounds or ridges along the length of the trench. These mounds will provide additional insulation and help prevent water runoff during irrigation. The height of the mounds should be around 2-3 inches.
- Keep Foliage Exposed: While covering the potatoes, make sure to keep the foliage, particularly the sprouts, above the soil surface. This allows the leaves to receive sunlight and carry out photosynthesis, which is essential for plant growth and energy production.
- Monitor and Add Soil: As the potato plants grow, continue monitoring the soil level. If the tubers become exposed due to natural settling or rainfall, add additional soil to cover them again. This protects the tubers from sunlight and prevents greening.
Properly covering the potatoes not only shields them from potentially damaging factors but also helps maintain a consistent soil temperature and moisture level. Remember to avoid excessively compacting the soil during the covering process, as it can hinder root growth and water infiltration.
By diligently covering your planted potatoes, you are providing them with the ideal conditions for growth and ensuring a higher chance of a successful potato harvest.
Watering the Potatoes
Proper watering is essential for the healthy growth and development of your potato plants. Potatoes require consistent moisture throughout the growing season to ensure optimal tuber formation. Follow these guidelines to effectively water your potatoes:
- Initial Watering: Immediately after planting the sprouted potatoes, give them a thorough watering. This helps settle the soil around the tubers and provides them with the initial moisture they need to start growing. Ensure that the soil is evenly moist, but not waterlogged.
- Regular Watering: Once the potatoes have sprouted and are actively growing, continue to water them regularly. Aim to keep the soil consistently moist, but not soggy. Check the soil moisture by inserting your finger into the soil up to the second knuckle. If it feels dry, it’s time to water.
- Deep Watering: When watering, it’s important to provide deep and thorough irrigation. Water deeply, ensuring the moisture reaches the root zone of the plants. Shallow watering won’t encourage deep root growth and may result in weaker plants.
- Watering Frequency: The frequency of watering will depend on several factors, including the weather, soil type, and drainage. As a general guideline, aim to water your potatoes every 3-5 days, adjusting as needed based on the moisture levels of the soil.
- Mulching: Applying a layer of organic mulch, such as straw or shredded leaves, around the base of the potato plants can help retain soil moisture and reduce water evaporation. This can result in more efficient water usage and fewer watering sessions.
- Avoid Overwatering: While potatoes require consistent moisture, overwatering can be detrimental. It can lead to waterlogged soil and increase the risk of diseases. Make sure to monitor the soil’s moisture level and avoid excessive watering.
Keep in mind that specific watering needs may vary depending on your climate and weather conditions. During dry periods or hot summer months, you may need to water more frequently, while cooler and rainy periods may require less watering.
By providing your potato plants with regular and appropriate watering, you are ensuring they have the moisture they need to grow healthy leaves and develop robust tubers.
Protecting the Plants
Protecting your potato plants from potential threats is crucial for maximizing their growth and preventing damage. By implementing various protective measures, you can help ensure a successful and healthy potato harvest. Here are some key methods to consider:
- Pest Control: Regularly inspect your potato plants for signs of pests, such as aphids, Colorado potato beetles, or potato leafhoppers. If pests are detected, consider using organic pest control methods like neem oil or insecticidal soap to protect your plants. Additionally, practicing crop rotation and removing any infected plants can help prevent the spread of pests and diseases.
- Weed Management: Keep the area around your potato plants free from weeds. Weeds compete with your potato plants for nutrients, water, and sunlight. Regular weeding, mulching, or using a weed suppressant fabric can help minimize weed growth, allowing your potato plants to thrive.
- Supporting the Plants: As your potato plants grow, they may become top-heavy and prone to falling over. To prevent this, provide support by gently hilling or mounding soil around the base of the stems. This provides stability and helps anchor the plants. You can also use stakes or cages to support taller varieties.
- Protecting from Extreme Temperatures: Potatoes prefer cool, but not freezing temperatures. Monitor the weather and protect your plants from sudden frost by covering them with blankets or row covers. Similarly, during hot summer days, provide shade or use shade cloth to protect the plants from excessive heat.
- Regular Inspections: Take the time to inspect your potato plants regularly for any signs of diseases or nutrient deficiencies. Catching potential issues early on allows you to take necessary action and prevent further damage. Look for yellowing leaves, spots, wilting, or any other abnormal symptoms.
- Water Management: Proper watering practices play a crucial role in protecting your potato plants. Avoid overwatering, as it can lead to diseases such as rot. Additionally, ensure adequate drainage to prevent waterlogged soil, which can hinder root development and attract pests.
Remember that prevention is always better than treatment when it comes to plant protection. By implementing these protective measures, you can minimize the risk of pests, diseases, and other potential threats, ensuring that your potato plants stay healthy and productive throughout the growing season.
Harvesting the Potatoes
Harvesting your potatoes at the right time is essential to ensure that they reach their full maturity and have the best flavor and texture. The timing of the harvest will depend on the potato variety and your desired use. Here’s a guideline to help you determine when to harvest your potatoes:
- Foliage Yellowing: As the potato plants mature, the foliage will start to turn yellow and die back. This is an indication that the plants are reaching the end of their growth cycle. However, it’s important not to harvest immediately after the first signs of yellowing, as the potatoes may not have reached their full size yet.
- Plant Maturation: Wait for about 2-3 weeks after foliage yellowing before harvesting. During this time, the plants continue to divert energy to the tubers, allowing them to grow to their maximum size. Patience is key here to ensure that you’ll have fully developed potatoes.
- Test Dig: To confirm if your potatoes are ready for harvest, gently dig around the base of a few plants and carefully unearth a few tubers. Assess their size and skin maturity. Mature potatoes will have developed a thick skin that doesn’t easily scrape off. If the majority of the potatoes are still too small, give them more time to grow.
- Harvesting Process: To harvest, use a spade or digging fork to carefully lift the potatoes from the ground. Start at the outer edges of the plant and work your way inwards. Avoid stabbing or damaging the potatoes while digging. Gently shake off excess soil and remove any damaged or diseased tubers.
- Curing: After harvesting, lay the potatoes in a single layer in a cool, dry, and dark place for about 1-2 weeks. This curing period helps toughen the skin and improves their storage potential. Ensure good airflow during this time to prevent molding or rotting.
Keep in mind that if you prefer “new potatoes” with a small size and tender skin, you can harvest them earlier, even before the foliage has completely died back. However, if you’re aiming for larger and fully matured potatoes, wait for the foliage to yellow and follow the steps outlined above.
Harvesting at the right time ensures that you get the best quality potatoes from your garden. Enjoy the satisfaction of unearthing your homegrown potatoes and savor the delicious flavors they bring to your meals.
Storing the Potatoes
Proper storage is crucial to maximize the lifespan and quality of your harvested potatoes. With the right conditions and handling, you can enjoy a bountiful supply of fresh potatoes throughout the year. Follow these guidelines for storing your potatoes:
- Curing: After harvesting, allow the potatoes to cure for about 1-2 weeks in a cool, dry, and dark place. This period helps toughen the skin and heal any minor cuts or bruises.
- Sorting: Before storing, sort your potatoes and remove any damaged, bruised, or rotten tubers. Damaged potatoes can spoil quickly and affect the quality of the rest of the stored potatoes.
- Storage Location: Choose a storage area that is cool, dry, and well-ventilated. The ideal temperature for potato storage is around 45-55°F (7-13°C). Avoid storing them in areas that are too cold, too warm, or prone to fluctuations in temperature, such as near windows or heating vents.
- Avoid Light Exposure: Potatoes should be stored in complete darkness to prevent them from turning green and developing a bitter taste. Use storage containers or bins that are opaque or cover them with burlap sacks or thick paper bags.
- Proper Containers: Use breathable containers, such as mesh bags or wooden crates, for storing potatoes. These containers allow for proper airflow, reducing the risk of moisture buildup and rot. Avoid plastic bags or airtight containers that can trap moisture and lead to spoilage.
- Avoid Moisture: Moisture can cause potatoes to rot quickly. Keep them dry during storage by ensuring the storage area has low humidity and adequate ventilation. Avoid washing potatoes before storing, as this can introduce moisture.
- Regular Inspections: Periodically check your stored potatoes for any signs of decay or sprouting. Remove any sprouting or rotting potatoes promptly to prevent the spread of spoilage. A regular inspection helps ensure that your stored potatoes remain in good condition.
Remember that not all potato varieties have the same storage potential. Some varieties are better suited for long-term storage, while others are more suitable for immediate consumption. Research the specific storage characteristics of the potato variety you’re growing to maximize its shelf life.
By following proper storage techniques, you can extend the freshness and flavor of your harvested potatoes, allowing you to enjoy them throughout the year until the next growing season.