
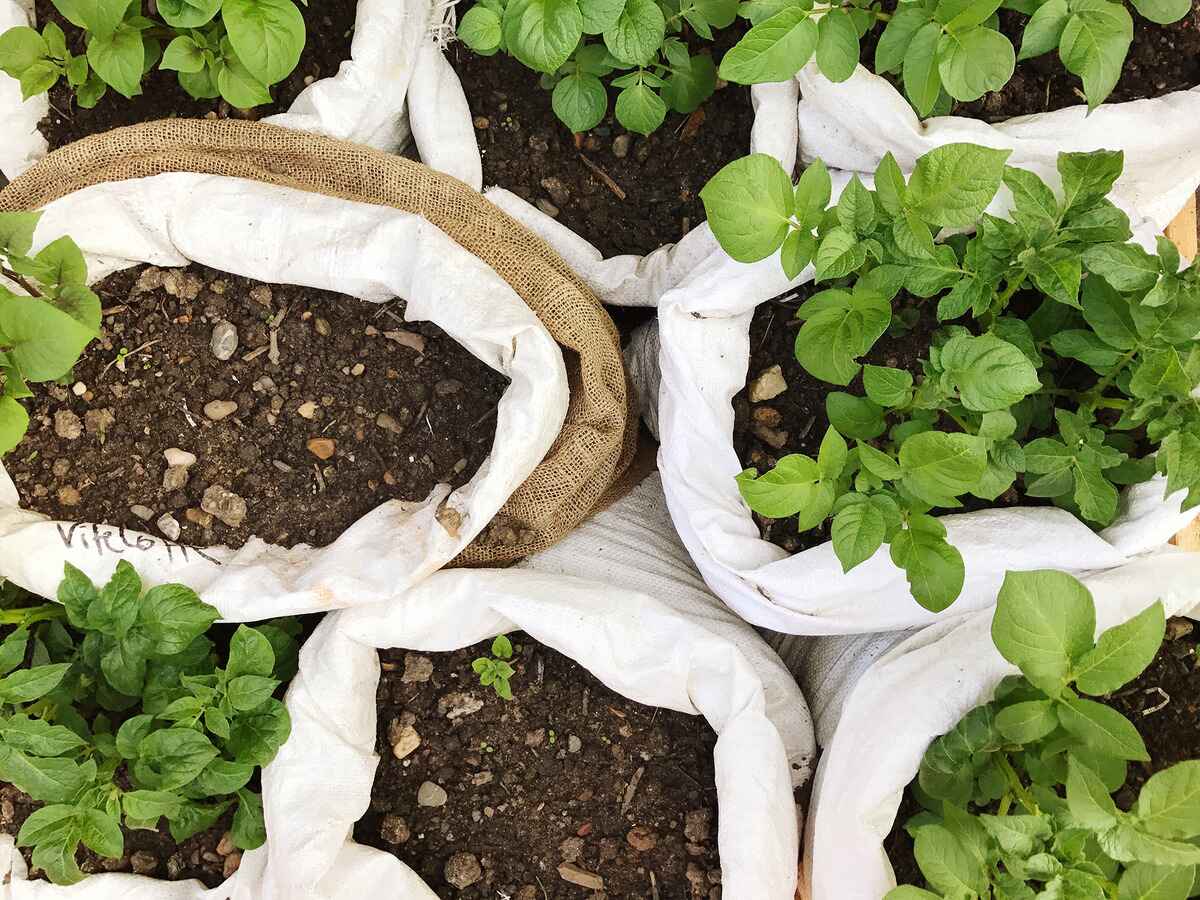
Choosing the Right Bag
When it comes to planting potatoes in bags, choosing the right bag is crucial for the success of your potato harvest. The ideal bag should provide enough space for the potatoes to grow, ensure proper drainage, and be made of durable materials that can withstand the weight of the soil. Here are some factors to consider when selecting the right bag for your potato planting:
Size: Opt for a bag that has a capacity of at least 10 gallons. This will allow the potatoes to develop a robust root system and have enough room to grow without being cramped.
Material: Choose a bag made of breathable materials such as burlap or fabric. These materials will help in air circulation and prevent the soil from becoming too compacted.
Handles: Look for a bag with sturdy handles that will make it easier to move the bag if needed. This is especially important if you plan on repositioning the bag to provide optimal sunlight or protection from extreme weather conditions.
Drainage: Ensure that the bag has ample drainage holes at the bottom. Excess water accumulation can lead to rotting and disease, so proper drainage is essential for healthy potato plants.
UV Protection: If you live in an area with intense sunlight, consider a bag with UV protection to prevent the bag from degrading over time.
By considering these factors, you can choose a bag that will provide the optimal growing conditions for your potato plants. It is also a good idea to invest in multiple bags, allowing you to stagger the planting and harvest times for a continuous supply of fresh potatoes.
Preparing the Potatoes
Before planting your potatoes in bags, it’s essential to properly prepare the seed potatoes to ensure successful growth. Here are the steps to follow when preparing the potatoes:
Selecting the Potatoes: Choose healthy, certified seed potatoes for planting. Avoid using grocery store potatoes, as they may be treated with growth inhibitors or prone to diseases.
Chitting the Potatoes: Place the seed potatoes in a cool, well-lit area for a few weeks before planting. This process, known as chitting, allows the potatoes to develop small sprouts, which will promote faster and more vigorous growth when planted.
Cutting the Potatoes (Optional): If your seed potatoes are larger than a golf ball, you can consider cutting them into smaller pieces. Ensure that each piece has at least one or two sprouts. Allow the cut potatoes to dry and form a protective callus before planting.
Treating the Potatoes (Optional): To prevent diseases, you can dust the cut sides of the potatoes with a fungicide or a mixture of cinnamon and sulfur powder before planting. This step is particularly important if you are dealing with wet and humid conditions.
Timing: Plant your potatoes when the soil temperature reaches around 45 to 55°F (7 to 13°C). Avoid planting too early in cold, wet soil as it can lead to rotting. If in doubt, check with your local agricultural extension office for the best planting times in your area.
Labeling: It’s crucial to label your seed potatoes according to the variety. This will help you keep track of different types and harvest times, especially if you are planting multiple bags.
By following these steps and properly preparing the potatoes, you will give your potato plants a head start for healthy growth and a bountiful harvest. Taking the time to prepare the potatoes correctly will increase the chances of successful potato cultivation in bags.
Preparing the Bag
Before filling the bag with soil and planting your potatoes, it’s essential to properly prepare the bag to create an optimal growing environment. Here are the steps to follow when preparing the bag:
Cleaning the Bag: If you are reusing an old bag, make sure to clean it thoroughly to remove any dirt or debris. Washing the bag with mild soap and water and allowing it to dry completely will ensure a clean and disease-free environment for your potatoes.
Sterilizing the Bag (Optional): If you have had issues with pests or diseases in previous seasons, it may be beneficial to sterilize the bag before planting. You can do this by soaking the bag in a solution of 10% bleach and water for 30 minutes, then rinsing thoroughly and allowing it to dry.
Adding Drainage Material: Line the bottom of the bag with some small rocks, pebbles, or a layer of coarse sand. This will improve drainage and prevent water from pooling at the bottom, reducing the risk of root rot.
Elevating the Bag: Place the bag on a pallet, wooden slats, or any other raised surface to provide enough air circulation and prevent the bag from sitting in water after rain or watering.
Securing the Bag: Ensure that the bag is secured and won’t tip over, especially when filled with soil. You can use stakes or clips to hold the bag in place and prevent soil spillage.
Positioning: Choose a suitable location for your potato bag, preferably a sunny spot with at least six to eight hours of direct sunlight. Proper positioning will ensure optimal growth and yield.
Labeling: It’s a good idea to label your bag, especially if you are planting multiple bags or different varieties. This will help you keep track of your potatoes and rotation schedule.
By following these steps and properly preparing the bag, you’ll create a suitable environment for your potato plants to thrive. Taking the time to prepare the bag will contribute to the success of your potato cultivation and result in a healthier and more productive harvest.
Filling the Bag with Soil
Once you have prepared the bag, it’s time to fill it with soil to provide a nutritious and supportive environment for your potato plants. Here are the steps to follow when filling the bag with soil:
Choosing the Soil: Select a high-quality, well-draining soil mix suitable for potatoes. Avoid using heavy clay soil as it retains too much moisture, leading to waterlogged roots.
Filling the Bag: Start by filling the bag about one-third full with soil. Gently pat down the soil to remove any air pockets and create a firm foundation for the potatoes.
Adding Organic Matter: Incorporate compost or well-rotted manure into the soil to provide additional nutrients for the growing potatoes. This will enrich the soil and improve its fertility.
Layering: As the potato plants grow, they will benefit from a technique called layering. Every time the plants reach a height of about 6 inches (15 cm), add more soil to cover the bottom portion of the stems, leaving only the top foliage above the surface. This encourages the formation of more tubers along the buried stems.
Avoiding Overfilling: Be mindful not to overfill the bag with soil. Leave enough space at the top to allow for hilling, which is the process of adding more soil around the base of the plants as they grow. This promotes root development and increases the yield of your potato plants.
Moistening the Soil: Give the soil a good watering before planting the potatoes. This helps settle the soil and provides a moist environment for the seed potatoes to establish roots.
By following these steps and properly filling the bag with soil, you create the foundation for healthy root development and encourage the growth of abundant potatoes. Remember to maintain proper moisture levels throughout the growing season and continue hilling the plants to maximize the yield of your potato harvest.
Positioning the Seed Potatoes
Now that the bag is filled with soil, it’s time to position the seed potatoes in the bag. Properly placing the seed potatoes will ensure optimal growth and yield. Follow these steps to position the seed potatoes:
Spacing: Space the seed potatoes evenly across the surface of the soil, leaving enough room for them to grow. Aim for a spacing of about 10-12 inches (25-30 cm) between each potato.
Orientation: Place the seed potatoes with the sprouts facing upwards. This ensures that the emerging shoots can easily push through the soil surface and receive adequate sunlight.
Depth: Plant the seed potatoes about 4 inches (10 cm) deep into the soil. This provides enough coverage to protect the sprouts and encourages the development of strong, sturdy stems.
Position: For larger bags, you can plant multiple layers of seed potatoes, with each layer separated by a layer of soil. This allows for maximum use of space and increases your potato yield.
Orientation: To optimize space and yield, you can also try a tower planting method. Stack several bags on top of each other, filling them with soil and positioning the seed potatoes in each bag. This vertical planting technique is ideal for small spaces and provides excellent aeration to the plants.
Labeling: It’s important to label the positions of the different varieties or layers of seed potatoes in the bag. This will help you keep track of the potato varieties and allow for easy harvesting when the time comes.
By following these steps and positioning the seed potatoes correctly in the bag, you provide the best conditions for successful potato growth. Remember to monitor the plants regularly, ensuring they receive adequate sunlight and water, and adjust their position as needed to promote healthy and vigorous potato plants.
Covering the Potatoes with More Soil
After positioning the seed potatoes in the bag, it’s important to cover them with more soil. This process, known as hilling, provides several benefits to the growing potatoes. Follow these steps to cover the potatoes with more soil:
Wait for Sprouting: Allow the seed potatoes to sprout and establish roots before covering them with additional soil. This usually takes around 2 to 3 weeks after planting.
Adding Soil: Once the sprouts have emerged, gently add more soil around the base of the plants, covering the lower stems by about 2 to 3 inches (5 to 7.5 cm). Be careful not to bury the foliage entirely.
Repeat Hilling: As the potato plants continue to grow, repeat the hilling process every 1 to 2 weeks. Add enough soil to cover any new growth, leaving a small portion of the upper foliage exposed.
Benefits of Hilling: Hilling provides several advantages for potato plants. It helps to protect and support the emerging tubers, prevents them from turning green and becoming inedible due to exposure to sunlight, and encourages the formation of more tubers along the buried stems.
Moistening the Soil: After each hilling, gently water the soil to ensure it is evenly moist. Avoid overwatering, as excessive moisture can lead to rotting and disease.
Stop Hilling: Stop hilling the plants once they reach their final height or when they start flowering. At this point, the potato plants will focus on producing tubers, and further hilling may interfere with this process.
By following the hilling process and gradually covering the potatoes with more soil, you promote healthy tuber development and maximize your potato harvest. Monitor the moisture levels in the soil and adjust watering accordingly to maintain proper growing conditions for your potato plants.
Watering and Caring for the Potatoes
Proper watering and care are essential for the health and productivity of your potato plants. Follow these tips to ensure your potatoes receive the care they need:
Watering: Consistent and adequate watering is crucial for potato plants. Keep the soil evenly moist, but avoid overwatering, as it can lead to waterlogged conditions. Water deeply, ensuring the moisture reaches the root zone. Aim for about 1 to 2 inches (2.5 to 5 cm) of water per week, either through rainfall or manual watering.
Monitoring Moisture Levels: Regularly check the moisture levels of the soil by inserting your finger or a moisture meter into the soil. Water when the top inch (2.5 cm) of the soil starts to dry out, but before it becomes completely dry.
Avoiding Drought Stress: In hot, dry weather conditions, provide extra water to prevent drought stress. Mulching the soil surface with organic materials, such as straw or grass clippings, can help retain moisture and regulate soil temperature.
Fertilizing: Feed your potato plants with a balanced, organic fertilizer when the plants have reached about six inches (15 cm) in height. Use a fertilizer low in nitrogen to promote tuber development. Follow the manufacturer”s instructions for the application rates and frequency.
Managing Weeds: Regularly remove weeds from around the potatoes to prevent competition for nutrients and water. Be careful when weeding so as not to damage the shallow roots of the potato plants.
Supporting the Plants: If your potato plants grow tall and start to lean or fall over, provide support by gently tying them to stakes. This will help prevent breakage and promote vertical growth.
Pest and Disease Management: Monitor your potato plants for any signs of pests or diseases, such as potato beetles or fungal infections. Address any issues promptly with organic pest control methods or consult with a local gardening expert for guidance.
Regular Inspections: Take the time to inspect your potato plants regularly. Look for any signs of stress, discoloration, or abnormalities, and take appropriate action to address any issues that arise.
By providing proper watering and care, you create a favorable environment for your potato plants to thrive and produce a bountiful harvest. Stay vigilant and address any problems promptly to ensure the best outcome for your potato crop.
Managing Pests and Diseases
As with any garden crop, potatoes are susceptible to pests and diseases that can impact their growth and yield. Implementing proper pest and disease management strategies is crucial to protect your potato plants. Here are some effective methods for managing pests and diseases:
Monitor Regularly: Conduct regular inspections of your potato plants to identify any signs of pest infestation or disease presence. Look for pest damage on leaves, stems, and tubers, as well as symptoms such as yellowing, wilting, or spotting.
Practice Crop Rotation: Rotate your potato plants with other non-solanaceous crops like legumes or brassicas. This prevents the build-up of pests and diseases specific to potatoes in the soil and helps maintain soil health.
Use Beneficial Insects: Introduce beneficial insects, such as ladybugs, lacewings, and parasitic wasps, to your garden. These insects can prey on common potato pests like aphids and caterpillars, naturally controlling their populations.
Handpicking: If you notice pests like potato beetles on your plants, manually remove them by handpicking them off and dropping them into a bucket of soapy water. This method can be effective, especially for small infestations.
Organic Pest Control: Employ organic pest control methods, such as neem oil or insecticidal soap, to treat pest infestations on your potato plants. Follow the instructions on the product labels and apply the treatments when the pests are most active.
Fungal Diseases: To prevent common fungal diseases like late blight or early blight, ensure proper spacing between your potato plants to improve air circulation and reduce humidity. Avoid overhead watering, as wet foliage can promote the spread of fungal spores.
Seed Potato Selection: Start with healthy, certified seed potatoes and avoid using diseased or damaged tubers. This reduces the chances of introducing pests or diseases into your garden.
Proper Storage: Store harvested potatoes in cool, dark, and well-ventilated conditions to prevent rot and discourage the development of diseases during storage.
Consult with Local Experts: If you encounter persistent pest or disease issues, seek advice from local gardening experts or agricultural extension offices. They can provide guidance specific to your region and help you identify effective control measures.
By implementing these pest and disease management strategies, you can minimize the impact of pests and diseases on your potato plants and ensure a healthy and successful harvest. Stay proactive, monitor your plants regularly, and take appropriate action at the first signs of trouble to protect your potato crop.
Harvesting the Potatoes
The time has finally come to harvest your potatoes and enjoy the fruits of your labor. Harvesting potatoes involves careful timing and handling to ensure proper maturity and preservation of the tubers. Here are the steps to follow for a successful potato harvest:
Check for Maturity: Potatoes are ready for harvest when the foliage starts to turn yellow and begin to die back. This usually occurs approximately 10 to 12 weeks after planting, depending on the variety.
Prepare for Harvest: Choose a dry day to harvest your potatoes. Gather some gardening tools such as a garden fork or a shovel, a pair of gardening gloves, and a few containers or baskets for storing the harvested potatoes.
Loosen the Soil: Gently loosen the soil around the base of the potato plants using a garden fork or a shovel. Be careful not to damage the tubers during this process.
Lift the Potatoes: Carefully lift the potatoes from the soil using your hands or a gardening tool. Start from the outer edges of the plant and work your way towards the center to avoid accidentally stabbing or injuring the potatoes.
Inspect and Sort: Examine each potato as you harvest them. Remove any damaged or diseased potatoes as well as those that are significantly undersized. Sort the harvested potatoes into different containers based on their size or variety.
Cure the Potatoes: To improve their storage life, cure the freshly harvested potatoes by placing them in a dry, well-ventilated area out of direct sunlight. Leave them for about one to two weeks to allow the skins to thicken and any minor cuts or bruises to heal.
Storage: Once the potatoes are cured, store them in a cool, dark, and well-ventilated area, such as a root cellar or a cool basement. Avoid storing them near fruits that release ethylene gas, as this can cause the potatoes to sprout prematurely.
Enjoy Your Harvest: Now it’s time to savor the delicious flavors of your freshly harvested potatoes. Whether you roast them, mash them, or cook them in a variety of dishes, your homegrown potatoes will surely be a highlight of your meals.
Remember, the harvest time may vary depending on the potato variety and growing conditions. It’s always a good idea to consult the specific guidelines for the variety you are growing.
By following these steps, you can ensure a successful and rewarding potato harvest. Enjoy the satisfaction of growing your own potatoes and relish in the flavors of your homegrown harvest!