
Choosing the Right Variety of Corn
Choosing the right variety of corn is essential for a successful and productive harvest. With so many options available, it’s important to consider factors such as climate, soil conditions, and intended use when selecting the right variety for your garden or farm. Here are some important points to keep in mind when choosing the right corn variety:
- Maturation Time: Corn varieties come in different maturity times, ranging from early to mid-season and late. Consider your growing season length and select a variety that will mature before the first frost in your area.
- Climate Adaptability: Different corn varieties are adapted to different climate zones. Determine the climatic conditions of your region and choose a variety that is known to thrive in those conditions.
- Plant Height: Corn varieties can vary in height, with some reaching towering heights while others remain shorter. Take into account factors such as access to sunlight, wind exposure, and ease of harvesting when deciding on the plant height that suits your needs.
- Seed Size and Kernel Type: Consider the intended use of the corn – whether it will be used for fresh consumption, roasting, canning, or grinding into flour. Different corn varieties have varying seed size and kernel types, which may affect the texture and sweetness of the corn.
- Disease Resistance: Check for corn varieties that have resistance to common diseases prevalent in your area, such as bacterial leaf blight or corn smut. This can help minimize the likelihood of disease outbreaks and improve overall plant health.
- Taste and Texture: While it may not be a crucial factor, taste and texture are important considerations for many corn enthusiasts. Read reviews, ask fellow gardeners or farmers, or attend local agricultural fairs to find out which varieties are renowned for their superior taste and desirable texture.
By carefully considering these factors, you can select a corn variety that aligns with your specific growing conditions and preferences. Remember to purchase seeds from reputable sources to ensure their quality and authenticity. Choosing the right variety of corn sets a strong foundation for a successful and satisfying corn-growing experience.
Preparing the Soil for Planting
Properly preparing the soil is key to providing your corn plants with a healthy environment to grow and thrive. The following steps will help ensure your soil is ready for planting:
- Clear the Area: Begin by removing any existing vegetation, rocks, or debris from the area where you plan to plant your corn. This will create a clean slate for your corn plants to establish themselves.
- Test the Soil: Conduct a soil test to determine its pH level and nutrient content. This will help you know if any amendments are needed. Most corn varieties prefer a soil pH between 6.0 and 6.8.
- Amendments: Based on the results of your soil test, make any necessary amendments to adjust the pH level or improve nutrient deficiencies. Common amendments include lime to raise pH and organic matter such as compost or well-rotted manure to improve soil fertility.
- Till the Soil: Use a tiller or garden fork to loosen the soil to a depth of at least 8-10 inches. This will create a loose, well-drained bed for the corn roots to establish and spread.
- Organic Matter: Incorporate organic matter, such as compost or aged manure, into the soil while tilling. Organic matter improves soil structure, moisture retention, and nutrient availability.
- Weed Control: Remove any remaining weeds or grasses in the area. This will help prevent competition for nutrients and space among your corn plants.
- Soil Moisture: Ensure the soil is evenly moist but not waterlogged before planting. Test the moisture level by squeezing a handful of soil; it should hold together but not be excessively wet.
By following these steps, you will create an optimal growing environment for your corn plants. Remember to regularly monitor the soil moisture levels throughout the growing season and make adjustments as necessary to ensure your corn plants have the best chance of success.
Planting Corn Seeds
Planting corn seeds properly is crucial for ensuring a successful and abundant crop. Follow these steps to plant your corn seeds:
- Timing: Plant corn seeds after the danger of frost has passed and the soil temperature has reached at least 50°F (10°C). This usually occurs when the air temperature consistently stays above 60°F (15°C).
- Spacing: Corn plants need space to grow and produce ears. Plant seeds in rows with a spacing of 12-24 inches apart, allowing for adequate airflow and sunlight penetration. Leave 2-3 feet between each row to provide ample room for the corn plants to grow and develop.
- Planting Depth: Plant corn seeds at a depth of 1-2 inches. Planting too shallow may expose the seeds to drying out, while planting too deep may hinder germination. Aim for a consistent depth to ensure even emergence.
- Seed Treatment: Consider treating corn seeds with a fungicide or inoculant before planting to protect them from potential soil-borne diseases. Follow the instructions provided by the manufacturer for the appropriate application method.
- Mounding: For better root development and stability, consider forming small mounds or hills at the planting site. This allows for improved soil drainage and prevents waterlogging, particularly in heavy clay soils.
- Multiple Plantings: To extend your harvest period, stagger the planting of corn seeds. Plant a new batch every 2-3 weeks until midsummer. This ensures a continuous supply of fresh corn throughout the growing season.
- Watering: After planting, water the soil thoroughly but gently. Be careful not to wash away the seeds or create compacted soil. Maintain consistent soil moisture throughout the germination and seedling stage.
- Thin and Weed: Once the seedlings emerge, thin them to a spacing of 8-12 inches apart. This allows for better airflow and prevents overcrowding. Regularly remove weeds to minimize competition for nutrients.
By following these planting guidelines, you give your corn seeds the best chance for successful germination and growth. Remember to monitor the moisture levels, provide adequate nutrients, and address any pest or disease issues promptly to ensure a bountiful harvest of delicious corn.
Caring for Corn Plants
Corn plants require proper care throughout the growing season to ensure healthy development and maximum yield. Here are essential tasks to consider when caring for your corn plants:
- Watering: Corn plants require consistent moisture, especially during dry periods. Water deeply, ensuring the soil is evenly moist but not waterlogged. Aim for 1-1.5 inches of water per week, including rainfall.
- Mulching: Apply a layer of organic mulch, such as straw or wood chips, around the base of the corn plants. This helps retain soil moisture, suppresses weed growth, and regulates soil temperature.
- Fertilizing: Corn plants are heavy feeders and benefit from regular fertilization. Apply balanced fertilizer with a ratio of nitrogen (N), phosphorus (P), and potassium (K) to promote healthy growth. Follow the recommended rates and timing specified for corn plants.
- Hilling: When the corn plants reach a height of 6-8 inches, gently mound soil around the base of the plants to improve stability. This hilling technique provides additional support and encourages the formation of additional roots.
- Pollination: Corn plants rely on proper pollination for successful ear development. To aid in pollination, ensure the planting area is not too windy, as this can interfere with the transfer of pollen. Consider planting corn in blocks rather than single rows to encourage cross-pollination by wind and insects.
- Weed Control: Regularly remove weeds from the corn planting area to minimize competition for nutrients and water. Be careful not to disturb the shallow corn roots while weeding.
- Disease and Pest Management: Monitor your corn plants for signs of common diseases such as rust, smut, or leaf blight. If detected, follow appropriate treatment measures specified for the particular disease. Additionally, implement pest control strategies to manage pests like corn borers or armyworms, which can significantly damage corn plants.
- Support: As corn plants grow taller, they may require additional support from strong winds. Consider staking or using supports, such as tomato cages, to prevent the plants from bending or breaking.
By providing diligent care to your corn plants, you encourage optimal growth, minimize the risk of pests and diseases, and increase the likelihood of a successful and abundant harvest.
Managing Pests and Diseases
Pests and diseases can pose significant threats to the health and productivity of corn plants. To effectively manage these potential problems, consider the following strategies:
- Inspect Regularly: Regularly monitor your corn plants for signs of pests or diseases. Check both the foliage and the ears for any visible symptoms such as discoloration, chewed leaves, holes, or unusual growths.
- Integrated Pest Management (IPM): Implement an integrated pest management approach, which combines various methods to control pests effectively. This may include cultural practices, biological controls, and minimal use of pesticides.
- Natural Predators: Encourage natural predators in your garden, such as ladybugs, lacewings, and birds, which help control pests like aphids or caterpillars. Avoid using broad-spectrum pesticides that may harm beneficial insects.
- Crop Rotation: Practice crop rotation, avoiding planting corn or related crops in the same area year after year. This helps prevent the buildup of pests and diseases that are specific to corn.
- Clean Garden Tools: Clean your garden tools after each use to prevent the spread of pests and diseases. Sterilize tools with a mix of 1 part bleach to 9 parts water or use rubbing alcohol.
- Early Detection: Catching and addressing pest or disease issues early is crucial. Promptly remove infected plant parts or treat affected plants to minimize the spread and damage to the rest of the crop.
- Organic Pest Control: Explore organic pest control options such as neem oil, insecticidal soaps, or botanical insecticides. These can be effective against certain pests while minimizing harm to beneficial insects and the environment.
- Resistant Varieties: Consider planting corn varieties that have been bred for resistance against common pests or diseases prevalent in your area. These varieties can provide an added layer of protection for your crops.
- Proper Sanitation: Practice good garden sanitation by removing and disposing of any infected or diseased plants promptly. This helps prevent the spread of diseases and reduces the likelihood of re-infestation in subsequent seasons.
By implementing these strategies, you can effectively manage pests and diseases in your corn plants, ensuring a healthier and more productive crop. Regular monitoring, early intervention, and a holistic approach to pest and disease management are key to maintaining the vitality of your corn plants.
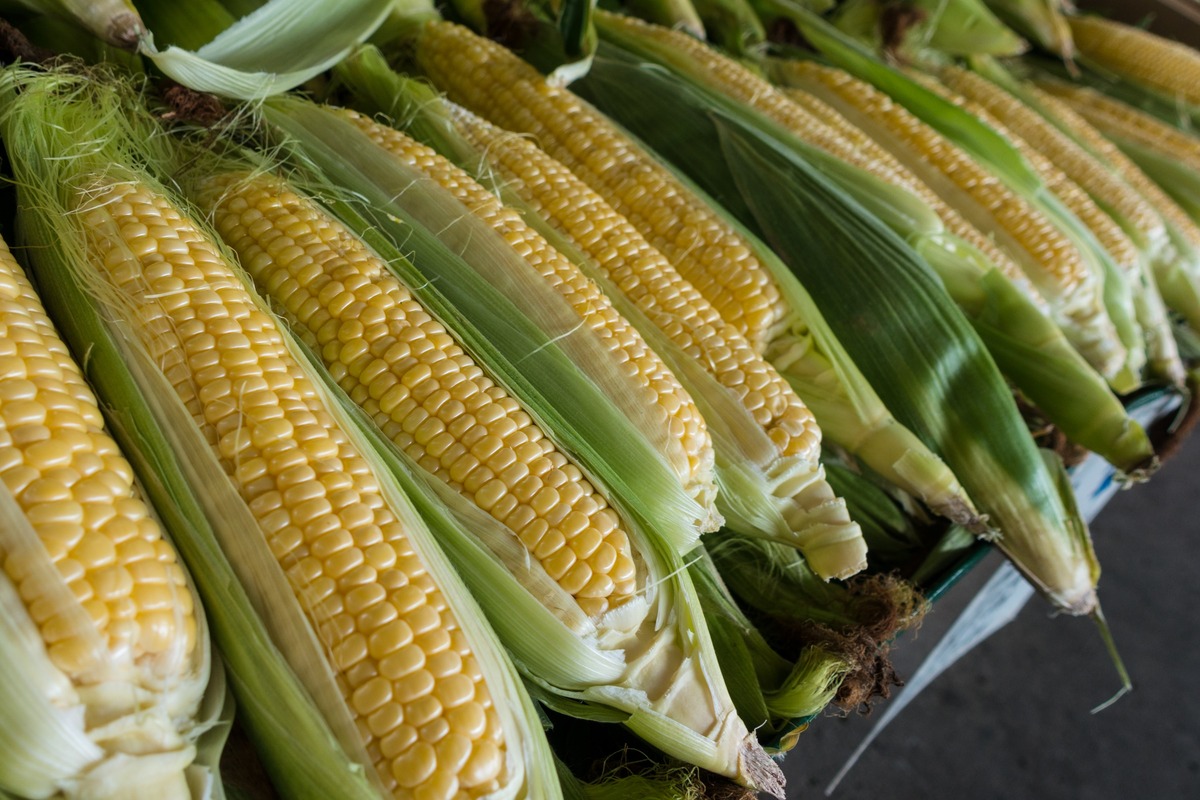
Harvesting Corn
Knowing when and how to harvest corn is vital to ensure the best flavor, texture, and nutritional value. Here are some essential steps to follow when it comes to harvesting your corn crop:
- Monitoring Maturity: Keep a close eye on the maturation time specified for the corn variety you planted. Corn is typically ready for harvest when the ears feel firm, the silks have turned brown, and the kernels are plump and well-developed.
- Harvest Time: Harvesting corn at the right time is crucial to achieve optimal flavor and sweetness. Early morning or late evening is the best time for harvesting, as the temperature is cooler and the sugar content of the corn is higher.
- Hand-Picking: Gently hold the stalk with one hand and pull the ear of corn downward with the other. Twist the ear until it detaches from the stalk. Avoid bending or tugging too forcefully, as this can damage the plant.
- Checking Ripeness: To determine if an ear of corn is ripe, peel back a small section of the husk and press your thumbnail against a kernel. If the liquid inside is milky and opaque, the corn is ready for harvest. If it is clear and watery, the corn needs more time to ripen.
- Storing Harvested Corn: After harvesting, it’s important to consume or store the corn as soon as possible to maintain its freshness and flavor. Keep the corn in a cool, shaded area and avoid exposure to direct sunlight or high temperatures.
- Removing Husks: When you’re ready to enjoy the corn, remove the husks and silk. Peel back the husks, starting at the top, and remove the silk carefully. Rinse the ears under cold water to remove any remaining silk strands.
- Cooking and Enjoying: Corn can be boiled, steamed, grilled, or roasted depending on your preference. Serve the freshly cooked corn with butter, salt, and pepper, or explore different seasonings and flavor combinations to enhance the taste.
- Preserving Corn: If you have an abundance of corn, you can preserve it by blanching and freezing. Blanch the corn in boiling water for a few minutes, cool it in an ice water bath, then cut the kernels off the cob and store them in airtight containers or freezer bags.
Remember, the sweetness and flavor of freshly harvested corn are at their peak, so try to enjoy it as soon as possible after harvest for the best taste experience. With proper harvesting techniques, you can savor the deliciousness of homegrown corn in its prime!
Storing and Using Fresh Corn
After harvesting fresh corn, it’s essential to properly store it to maintain its flavor and quality. Here are some important tips for storing and using freshly harvested corn:
- Keep it Cool: Fresh corn should be stored in cool temperatures to slow down the natural process of starch conversion to sugar. Ideally, keep it in the refrigerator at a temperature of around 40°F (4°C) until you’re ready to use it.
- Leave the Husks On: The husks act as a protective layer for the corn, helping to retain moisture and freshness. Keep the husks intact and only remove them right before cooking.
- Avoid Cross-Contamination: When storing corn, keep it separate from other fruits and vegetables with strong odors. Corn can easily absorb odors, which can affect its taste and quality.
- Use it Fresh: For the best flavor and texture, try to use fresh corn within a few days of harvest. The sugars in the kernels start converting to starch soon after picking, leading to a gradual decrease in sweetness.
- Cooking Methods: There are various ways to cook fresh corn, including boiling, grilling, steaming, or roasting. Determine the cooking method based on your preference and the recipe you’re using. Remember not to overcook it, as it can become mushy.
- Cut-off the Cob: If you have leftover cooked corn or want to use the kernels in recipes, you can cut them off the cob. Hold the cob upright on a cutting board and use a sharp knife to slice downward, close to the cob, to remove the kernels.
- Freezing Corn: If you have excess fresh corn, you can freeze it for later use. Blanch the corn by boiling it briefly and then plunge it into an ice water bath. Pat it dry and store the kernels in freezer bags, removing as much air as possible before sealing. Properly frozen corn can last for several months.
- Using Leftover Corn: Leftover cooked corn can be used in various dishes, such as salads, soups, salsas, or as a topping for pizza or tacos. The versatile nature of corn allows for plenty of creative culinary uses.
- Corn Salsa and Relish: Fresh corn makes a delightful addition to salsas or relishes. Combine corn kernels with diced tomatoes, onion, jalapeno peppers, lime juice, cilantro, and your choice of seasonings to create a delicious accompaniment for chips, tacos, or grilled meats.
By following these storage and usage tips, you can make the most out of your fresh corn harvest. Enjoy the natural sweetness and crunch of homegrown corn in a variety of culinary creations!
Saving Corn Seeds for the Next Season
If you’ve grown a particularly delicious or unique variety of corn, you may want to save the seeds to grow your own crop in the next season. Here’s how you can save corn seeds for future planting:
- Choose Open-Pollinated Varieties: To ensure the seed-saving process is successful, start with open-pollinated corn varieties. These varieties are pollinated by wind or insects and produce offspring that closely resemble the parent plants.
- Select Healthy Plants: Choose the healthiest and most productive corn plants in your garden for seed saving. Look for plants with robust stalks, good ear development, and resistance to common diseases and pests.
- Leave Ears on the Stalk: Allow a few of the chosen corn plants to mature fully and leave the ears on the stalks until they dry out completely. The husks will turn brown, and the kernels should feel hard and dry when gently squeezed.
- Harvest the Ears: Once dry, carefully harvest the ears of corn. Cut the stalks with a sharp knife or pruning shears, leaving a few inches of stalk attached to the ear for handling purposes.
- Remove the Husks: Remove the husks from the ears of corn and discard any damaged or discolored kernels. Inspect each ear for any signs of mold or disease and set aside only the healthy ones for seed saving.
- Thorough Drying: Properly dry the corn kernels to prevent mold or rot. Spread the selected ears of corn in a single layer on a clean, dry surface in a well-ventilated area. Allow them to dry for several weeks until the kernels are completely dry and hard.
- Separate the Kernels: Once dry, carefully separate the kernels from the cobs. You can use your hands, rubbing the ears together, or gently twist the cobs to release the kernels. Collect the kernels in a clean container.
- Store in a Cool, Dry Place: Place the dried corn kernels in airtight containers such as glass jars or sealable bags. Store them in a cool, dry place away from sunlight to maintain their quality. Adding a small packet of desiccant can help absorb any remaining moisture.
- Label and Date the Containers: Properly label each container with the corn variety name, the harvest date, and any additional information that may be helpful for future reference.
- Use within a Few Years: Corn seeds are best used within three to five years for optimal germination rates. As time passes, the viability of the seeds may decline, leading to reduced germination success.
By following these steps, you can successfully save corn seeds from your best plants and ensure a consistent supply of your favorite corn variety for seasons to come. Remember, proper labeling, storage, and using the seeds within their viability period will contribute to successful future plantings.