
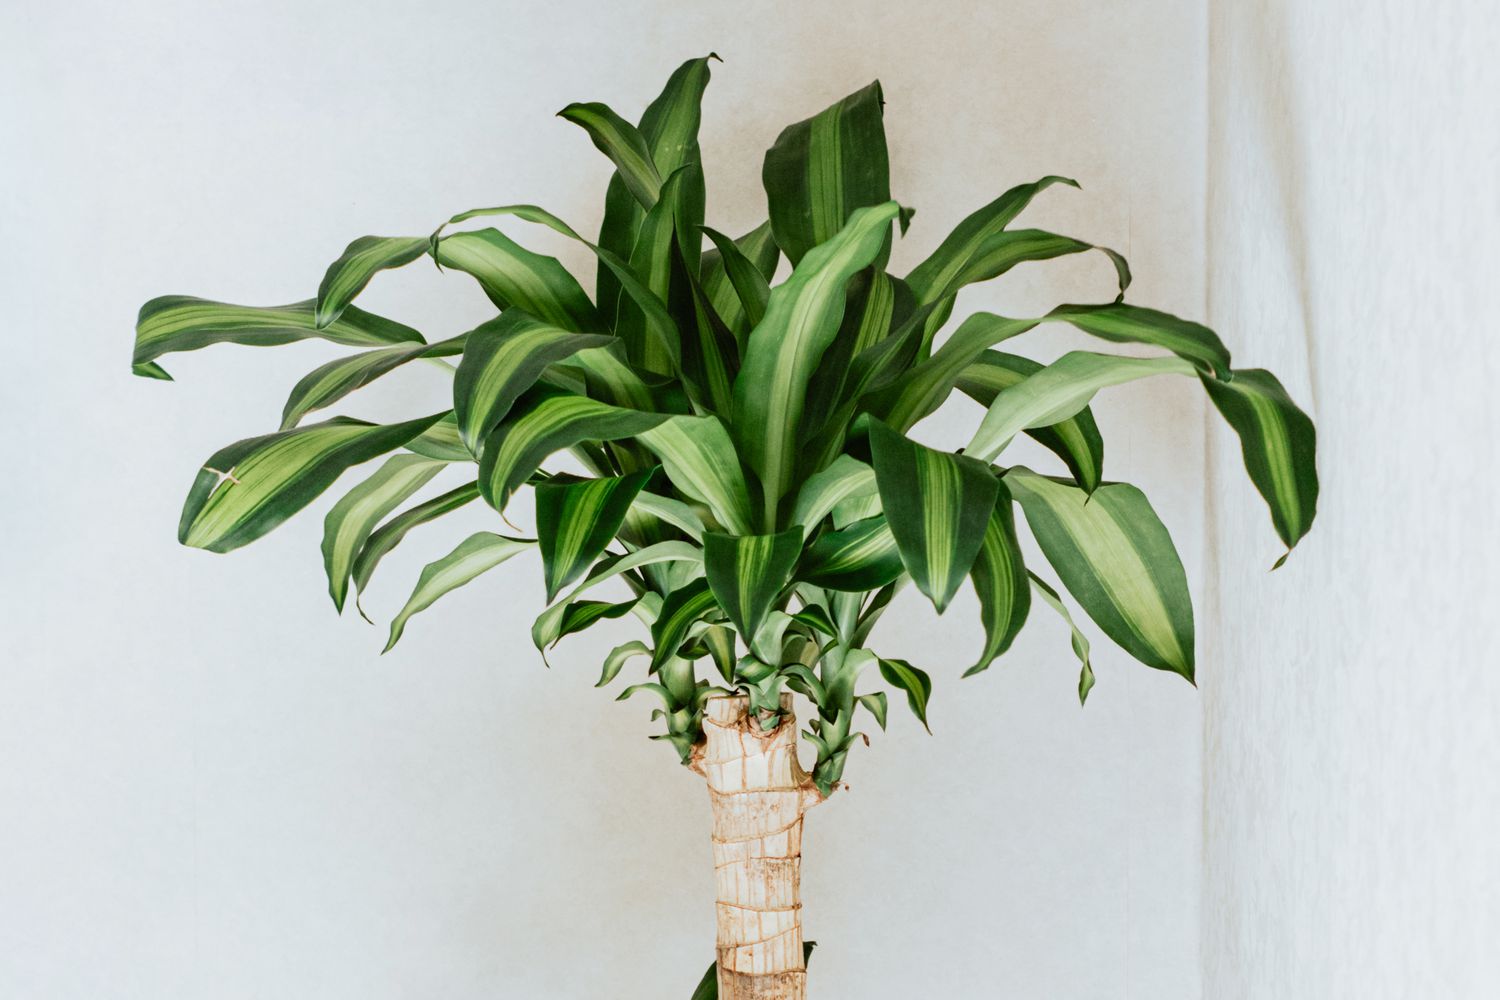
Signs that your corn plant is dying
It can be worrisome to see your corn plant struggling and showing signs of decline. However, recognizing the early indications of a dying corn plant is crucial in order to take appropriate measures and revive it. Here are some common signs to look out for:
- Wilting leaves: One of the first signs of a dying corn plant is wilting leaves. If the leaves appear droopy, limp, and lackluster, it is a sign that the plant is not receiving sufficient water or is experiencing root damage.
- Yellowing or browning leaves: When the leaves of your corn plant turn yellow or brown, it indicates a problem. This could be due to overwatering, underwatering, nutrient deficiencies, or even pests.
- Root rot: If you notice a foul smell coming from the soil and dark, mushy roots, it indicates root rot. Root rot is often caused by overwatering or poor drainage, leading to the decay of the plant’s root system.
- Stunted growth: A dying corn plant may exhibit limited or stunted growth. If your plant is not growing as expected or appears smaller than it should be, it could be an indication of underlying issues such as nutrient deficiencies or improper environmental conditions.
- Leaf discoloration: Discoloration of the leaves can also be a sign of a dying corn plant. Look out for leaves that turn yellow, brown, or develop patches of necrosis. This could be caused by nutrient deficiencies, insect infestation, or disease.
It is important to note that these signs can vary depending on the specific factors affecting your corn plant. By identifying these early signs, you can take swift action to diagnose the problem and implement the necessary steps to save your dying corn plant.
Assessing the cause of your dying corn plant
When faced with a dying corn plant, it is essential to assess the underlying cause in order to effectively address the issue. Here are some steps to help you determine the cause of your plant’s decline:
- Check watering practices: Evaluate your watering habits to ensure you are not over or under watering your corn plant. Too much or too little water can lead to root rot, nutrient deficiencies, and stress on the plant.
- Examine environmental conditions: Corn plants thrive in specific temperature and humidity ranges. Assess your plant’s environment to ensure it is receiving adequate light, appropriate temperature levels, and proper humidity. Inadequate light, extreme temperatures, and high or low humidity can all contribute to plant stress and decline.
- Inspect the soil: The quality and composition of the soil can greatly impact the health of your corn plant. Make sure your plant is planted in well-draining soil that is rich in nutrients. Test the soil pH and adjust if necessary to provide an optimal growing environment for your plant.
- Look for signs of pests and diseases: Common pests such as aphids, mites, and mealybugs can infest corn plants and cause damage. Examine your plant for any signs of pest infestation, such as visible insects, webs, or leaf damage. Additionally, watch for symptoms of diseases such as leaf spot or fungal infections.
- Consider nutritional deficiencies: Nutrient deficiencies can weaken your corn plant and contribute to its decline. Look for symptoms such as yellowing leaves, stunted growth, or leaf discoloration, which may indicate a lack of essential nutrients like nitrogen, phosphorus, or potassium.
By carefully assessing these factors, you can pinpoint the specific cause of your dying corn plant. This knowledge will guide you in implementing targeted solutions and nursing your plant back to health.
Providing proper lighting for your corn plant
Light is an essential factor in the growth and development of a corn plant. In order to ensure its health and prevent it from dying, it is important to provide the plant with proper lighting conditions. Here are some tips to consider:
1. Assess the lighting requirements: Corn plants thrive in bright, indirect light. They prefer a balance of light and shade rather than direct sunlight for long durations. Place your plant near a window with filtered light or use sheer curtains to diffuse the intensity of direct sunlight.
2. Observe light intensity: Corn plants require moderate to high light intensity to grow properly. Monitor the intensity of light reaching your plant by observing the brightness of the space where it is located. If the area is too dim, consider moving the plant closer to a well-lit window or use artificial grow lights to supplement the natural light.
3. Ensure consistent lighting: Consistency in lighting is important for the health of your corn plant. Avoid exposing it to fluctuating lighting conditions, as this can cause stress and hinder growth. Keep the plant in a location where it will receive consistent, evenly distributed light throughout the day.
4. Rotate the plant: To promote even growth and prevent the plant from leaning towards the light source, rotate it periodically. This will ensure that all sides of the plant receive adequate light and prevent any imbalances in growth.
5. Monitor for signs of inadequate lighting: Pay attention to your plant’s leaves. If they start to turn pale or yellow, it may be a sign that the plant is not receiving enough light. Conversely, if the leaves appear scorched or have dark spots, it may indicate that the plant is getting too much intense sunlight. Adjust the location and lighting conditions accordingly.
By providing the right lighting conditions for your corn plant, you can support its growth and prevent it from wilting or dying. Remember to regularly assess the lighting conditions and make adjustments as needed to ensure the plant receives the optimal amount of light.
Adjusting the temperature and humidity for your corn plant
Temperature and humidity play a vital role in the overall health and well-being of a corn plant. Improper levels of temperature and humidity can cause stress and contribute to its decline. Here are some tips for adjusting these factors to ensure your corn plant thrives:
1. Optimal temperature range: Corn plants prefer temperatures between 65°F and 75°F (18°C to 24°C). Avoid exposing your plant to extreme temperature fluctuations, as this can lead to leaf damage and hinder growth. Keep the plant away from air conditioning units, drafts, or heating vents that can cause sudden temperature changes.
2. Provide proper ventilation: While corn plants prefer moderate humidity levels, it is important to ensure good air circulation to prevent stagnant air. Proper ventilation helps reduce the risk of fungal growth and promotes healthy leaf development. Position your plant in a well-ventilated area or use a fan to maintain steady airflow.
3. Monitor humidity levels: Corn plants thrive in moderate humidity levels, ideally between 40% and 60%. If the air in your home is too dry, especially during winter months, consider using a humidifier to add moisture to the air. Alternatively, you can place the plant on a tray filled with water and pebbles to increase humidity around the plant.
4. Avoid excessive moisture: While humidity is important, excessive moisture can lead to problems such as root rot and fungal diseases. Ensure proper drainage in the pot and avoid overwatering your corn plant. If you notice excessive moisture in the soil or a humid environment, adjust watering practices accordingly to prevent waterlogged conditions.
5. Monitor for signs of temperature and humidity stress: Keep a close eye on your corn plant for any signs of stress caused by temperature or humidity. These signs may include wilting, yellowing leaves, and slow growth. Adjust the temperature and humidity levels as needed to provide the optimal growing conditions for your plant.
By adjusting the temperature and humidity levels for your corn plant, you can create an environment that supports its growth and overall well-being. Regular monitoring and making necessary adjustments are key to ensuring the plant stays healthy and vibrant.
Watering your corn plant correctly
Proper watering is essential for the health and survival of your corn plant. Overwatering or underwatering can lead to root damage, nutrient deficiencies, and eventually the death of the plant. Here are some guidelines to help you water your corn plant correctly:
1. Establish a watering schedule: Consistency is key when it comes to watering your corn plant. Establish a regular watering schedule and stick to it. Aim to water the plant when the top inch (2.5 cm) of the soil feels slightly dry to the touch.
2. Water deeply and thoroughly: When watering your corn plant, ensure that you provide enough water to thoroughly saturate the root ball. Water until it starts to run out of the drainage holes in the pot. This helps ensure that the roots receive adequate moisture without creating waterlogged conditions.
3. Avoid overwatering: Overwatering can lead to root rot and suffocate the plant’s roots. It is important to avoid leaving your corn plant sitting in standing water. Allow the top inch (2.5 cm) of soil to dry out between waterings to prevent waterlogged conditions and promote healthy root growth.
4. Adjust watering frequency: The watering needs of your corn plant may change depending on various factors such as temperature, humidity, and season. During hot summer months, you may need to increase the frequency of watering to compensate for increased evaporation. In the cooler months or during periods of low light, you may need to water less frequently.
5. Consider the pot material: The type of pot you use can affect the watering needs of your corn plant. Plants in terracotta or clay pots tend to dry out more quickly compared to those in plastic or glazed ceramic pots. Monitor the moisture levels closely and adjust your watering schedule accordingly.
6. Use room temperature water: When watering your corn plant, ensure that the water is at room temperature. Avoid using water that is too cold or too hot, as extreme temperatures can shock the plant roots and cause stress.
By following these guidelines, you can ensure that your corn plant receives the right amount of water and avoid common watering mistakes that could lead to its demise. Remember to observe the plant closely and adjust your watering routine as needed to ensure its continued health and vitality.
Choosing the right soil and pot for your corn plant
The choice of soil and pot for your corn plant is crucial for its overall health and growth. The right combination will provide proper drainage, adequate nutrients, and sufficient space for the plant’s root system. Here’s what you need to consider:
1. Well-draining soil: Corn plants prefer well-draining soil to prevent waterlogged conditions that can lead to root rot. Choose a high-quality potting mix that includes materials such as peat moss, perlite, or vermiculite to ensure adequate drainage.
2. Nutrient-rich soil: Corn plants require a nutrient-rich soil to thrive. Look for a potting mix that is specifically formulated for indoor plants and contains organic matter or slow-release fertilizers. This will provide your plant with a steady supply of nutrients for healthy growth.
3. Consider pH levels: Corn plants prefer slightly acidic to neutral soil with a pH range between 6.0 and 7.0. Test the pH level of your chosen potting mix and make adjustments if necessary. You can add amendments such as lime or sulfur to achieve the optimal pH range.
4. Appropriate pot size: Choose a pot that is proportionate to the size of your corn plant. A pot that is too small can restrict the growth of the roots, leading to stunted growth and nutrient deficiencies. On the other hand, a pot that is too large can retain excess moisture, causing root rot. Select a pot that allows for some room for the roots to grow and has drainage holes at the bottom.
5. Consider the pot material: The choice of pot material can impact moisture retention and aeration. Plastic pots retain moisture better, while clay or terracotta pots provide better air circulation. Consider the specific needs of your corn plant and choose a pot material that suits those requirements.
6. Evaluate the pot’s drainage: Proper drainage is essential to prevent waterlogging and root rot. Ensure that the chosen pot has drainage holes at the bottom to allow excess water to escape. You can also place a layer of gravel or small stones at the bottom of the pot to improve drainage.
By selecting the right soil and pot for your corn plant, you create an environment that promotes healthy root growth and provides the necessary nutrients for its vitality. Be mindful of the specific needs of your plant and choose materials that align with those requirements for optimal growth and development.
Fertilizing your dying corn plant
Fertilizing is a key aspect of caring for a dying corn plant as it provides essential nutrients that may be lacking in the soil. Proper fertilization can help revive the plant and restore its health. Here are some guidelines for fertilizing your corn plant:
1. Evaluate the nutrient deficiency: Before applying any fertilizer, it’s important to identify the specific nutrient deficiencies affecting your corn plant. Common deficiencies include nitrogen (N), phosphorus (P), and potassium (K). Look for signs such as yellowing leaves, stunted growth, or poor flowering to determine which nutrients your plant lacks.
2. Choose the right fertilizer: Select a fertilizer that matches the nutrient needs of your corn plant. Opt for a balanced, water-soluble fertilizer with equal or slightly higher amounts of nitrogen, phosphorus, and potassium (e.g., 10-10-10 or 20-20-20). Alternatively, you can use organic fertilizers such as compost or well-decomposed manure to provide nutrients naturally.
3. Follow the instructions: Carefully read and follow the instructions on the fertilizer packaging. Use the recommended amount for your corn plant’s size and adjust accordingly if the plant is smaller or larger than average. Overfertilizing can lead to fertilizer burn, while underfertilizing may not provide sufficient nutrients to rejuvenate the plant.
4. Timing of fertilization: The timing of fertilization depends on the specific needs of your corn plant and the type of fertilizer used. Typically, it is best to fertilize during the growing season, which is spring and summer. Avoid fertilizing during periods of dormancy, as the plant may not be actively taking up nutrients.
5. Application method: Apply the fertilizer evenly around the base of the corn plant. Avoid direct contact with the leaves or stem, as this can cause burning. Water the plant immediately after fertilization to ensure the nutrients penetrate the soil and reach the root system.
6. Monitor and adjust: Regularly monitor the progress of your corn plant after fertilization. Observe how the plant responds to the nutrients and make necessary adjustments to the fertilization regimen. If you notice any signs of fertilizer burn, such as leaf scorching or wilting, flush the soil with water to remove excess salts.
Fertilizing your dying corn plant can significantly contribute to its recovery and revitalization. By providing the necessary nutrients in the right amount and at the right time, you can help bring the plant back to a healthy state and promote its overall growth and vigor.
Pruning and trimming your corn plant
Pruning and trimming are important maintenance tasks that can benefit your corn plant in multiple ways. Pruning helps remove dead or damaged foliage, stimulates new growth, and improves the overall health and appearance of the plant. Here are some guidelines for pruning and trimming your corn plant:
1. Remove dead or yellowing leaves: Regularly inspect your corn plant for any dead or yellowing leaves. These leaves no longer contribute to the plant’s health and can attract pests or diseases. Gently trim them off using clean and sharp pruning shears, making cuts just above the base of the leaf stem.
2. Trim leggy or elongated stems: If your corn plant starts to grow leggy and develop elongated stems, it may benefit from trimming. Cut these stems back to a healthy node or just above a leaf junction. This helps promote bushier growth and prevents the plant from becoming lanky.
3. Remove any damaged or diseased parts: Prune away any stems or leaves that show signs of damage or disease. This includes spots, discoloration, or any signs of pest infestation. Removing infected parts helps prevent the spread of diseases and allows the plant to focus its energy on healthy growth.
4. Thin out crowded foliage: Over time, your corn plant may develop dense foliage that can restrict airflow and light penetration. To improve air circulation and reduce the risk of fungal growth, remove some of the excess foliage by selectively thinning out branches and leaves. Aim for an open and airy appearance.
5. Shape and control growth: Pruning can also be used to shape and control the growth of your corn plant. If the plant is becoming too large or unruly, trim back the outer stems to maintain a desired size and shape. Consider the natural form of the plant and aim for a balanced appearance.
6. Timing of pruning: The best time to prune your corn plant is during the spring or early summer months. This allows the plant to recover and regrow during its active growth phase. Avoid pruning during periods of dormancy or during the winter months when the plant’s growth is slower.
Remember to always use clean and sanitizied pruning tools to prevent the spread of diseases. Additionally, observe your corn plant after pruning to ensure it responds well and adjust your maintenance routine as needed. With proper pruning and trimming, your corn plant will flourish and maintain its health and beauty.
Pest control for your dying corn plant
Dealing with pests is a common challenge when trying to revive a dying corn plant. Insect infestations can weaken the plant, hinder growth, and contribute to its decline. Implementing effective pest control measures is crucial to save your plant. Here are some steps you can take to control pests:
1. Identify the pests: The first step in pest control is to accurately identify the type of pests infesting your corn plant. Common pests that affect corn plants include aphids, mites, mealybugs, and scale insects. Observe the plant closely for visible insects, webbing, or damage to leaves.
2. Manual removal: For small infestations, manually remove pests by using your fingers or a soft cloth to gently wipe them off the leaves. This method works well for larger insects like caterpillars. Make sure to dispose of the pests away from the plant to prevent reinfestation.
3. Wash with water: Use a spray bottle or hose to wash away pests from your corn plant. A strong stream of water can dislodge insects like aphids or mites. Repeat this process as needed to control the pests. Be sure to spray the undersides of leaves where pests may hide.
4. Natural remedies: Consider using natural pest control methods to protect your corn plant. Organic solutions like neem oil, insecticidal soap, or a mixture of water and dish soap can help control common pests. Follow the instructions on the product label and apply as directed.
5. Neem oil application: Neem oil is an effective organic insecticide that can help control a wide range of pests. Dilute the neem oil according to the instructions on the bottle, then apply it to the affected areas of your corn plant. Repeat the application every 7-10 days as necessary.
6. Consult a professional: If the pest infestation is severe or if you are unsure about the best course of action, consult a professional pest control service. They can accurately identify the pests and provide effective treatment options to save your dying corn plant.
Remember, prevention is key to avoiding pest infestations in the first place. Regularly inspect your corn plant, maintain proper cleanliness, and ensure good airflow around the plant to deter pests. By promptly addressing pest issues and implementing the appropriate control measures, you can restore your corn plant’s health and ensure its long-term survival.
Transplanting your corn plant
Transplanting your corn plant can be a necessary step to save it from further decline or provide it with a more suitable growing environment. Whether you want to move it to a larger pot or transfer it to a different location, proper transplantation techniques are essential. Here are some guidelines for successfully transplanting your corn plant:
1. Choose the right time: Spring or early summer is the best time to transplant your corn plant when it is in its active growth phase. Avoid transplanting during periods of dormancy or extreme weather conditions.
2. Select a new pot: If you are moving your corn plant to a larger pot, choose a container that is about 1 to 2 inches (2.5 to 5 cm) wider in diameter. Ensure the new pot has drainage holes to prevent waterlogging. Use fresh potting soil in the new container.
3. Prepare the new location: If you are transplanting your corn plant to a different location in your garden or home, prepare the new spot beforehand. Ensure it has the appropriate lighting conditions, proper temperature, and adequate space for the plant to grow.
4. Water the plant: Water your corn plant thoroughly a day or two before transplantation. Moist soil will hold the root ball together during the transplanting process and reduce the risk of transplant shock.
5. Gently remove the plant from its current pot: Carefully loosen the soil around the edges of the pot, then gently turn the pot upside down while supporting the base of the plant. Tap the pot or gently squeeze the sides to release the plant without damaging the roots.
6. Place the plant in its new location: In the new pot or location, create a hole that is slightly larger than the root ball of your corn plant. Carefully place the plant in the hole, making sure it sits at the same depth it was previously growing. Fill in the gaps with fresh potting soil, gently firming it around the roots.
7. Water and adjust: After transplanting, thoroughly water the corn plant to help settle the soil around the roots. Monitor the plant closely for the first few weeks to ensure it adjusts well to its new environment. Continue to provide the appropriate care in terms of watering, lighting, and fertilization.
Transplanting your corn plant can give it a fresh start and provide it with the necessary space and conditions to thrive. However, be mindful of the stress associated with transplanting, so it’s important to handle the process with care and provide proper aftercare to help the plant successfully establish itself in its new location.