
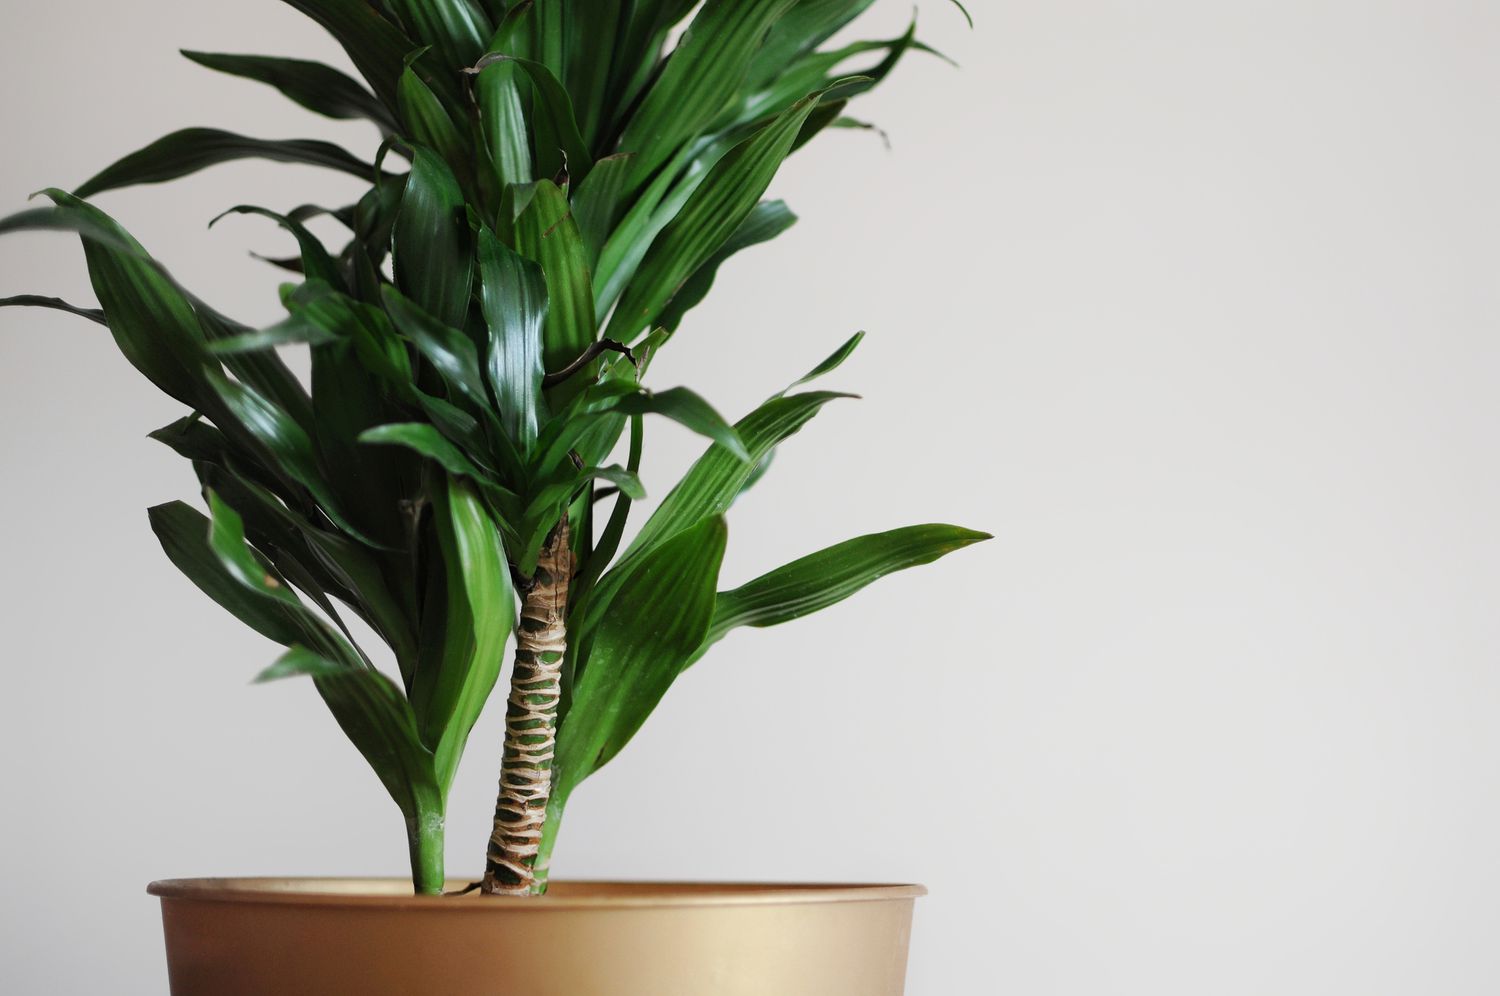
Choosing the Right Pot
When it comes to caring for a corn plant, one of the most important factors to consider is choosing the right pot. The pot you select plays a crucial role in the overall health and development of your plant.
First and foremost, it’s important to choose a pot that is the right size for your corn plant. A pot that is too small can restrict the growth of the plant’s root system, leading to stunted growth and nutrient deficiencies. On the other hand, a pot that is too large can cause excessive moisture retention, potentially leading to root rot.
In addition to the size, consider the material of the pot. Clay pots are known for their excellent drainage properties, allowing excess water to escape and preventing waterlogged soil. However, clay pots can also cause the soil to dry out more quickly, requiring more frequent watering. Alternatively, plastic pots retain moisture better but may not provide as much airflow to the roots.
Another important consideration is the presence of drainage holes in the pot. These holes allow excess water to drain away, preventing the roots from sitting in water and becoming waterlogged. Ensure that the pot you choose has plenty of drainage holes to promote healthy root development.
Furthermore, consider the aesthetics of the pot. Choose a pot that complements your home decor and enhances the overall visual appeal of your corn plant. Keep in mind that the pot should also be sturdy and stable, especially if you have a larger or taller corn plant that could potentially topple over.
Lastly, check the condition of the pot for any cracks or damage before purchasing. Cracked pots can not only be unsightly but can also lead to poor root growth and increased vulnerability to diseases and pests.
By taking the time to choose the right pot for your corn plant, you are setting a solid foundation for its growth and ensuring optimal conditions for a healthy and thriving plant.
Providing the Right Soil
When it comes to caring for a corn plant, providing the right soil is essential for its overall health and well-being. The soil you choose will directly impact the plant’s ability to absorb nutrients and water, as well as its overall growth and development.
First and foremost, corn plants thrive in well-draining soil. This means that the soil should not hold excess moisture, as it can lead to root rot and other fungal diseases. To achieve optimal drainage, you can mix organic matter, such as compost or peat moss, into the soil. This will help improve the soil’s texture and allow water to flow freely through it.
Additionally, corn plants prefer a slightly acidic to neutral soil pH. Aim for a pH level between 6.0 and 7.0. You can test the pH of your soil using a soil testing kit, which can be purchased at gardening centers or online. If the pH level is too high or too low, you can adjust it by amending the soil with lime (to raise pH) or sulfur (to lower pH).
Furthermore, ensuring that the soil is rich in nutrients is crucial for the proper growth of your corn plant. Incorporate a slow-release balanced fertilizer into the soil before planting, and periodically apply a diluted liquid fertilizer during the growing season to provide a steady supply of nutrients. This will help promote healthy foliage and vibrant growth.
When it comes to container-grown corn plants, using a high-quality potting mix specifically designed for indoor plants is ideal. These mixes are typically well-draining and enriched with nutrients to support the plant’s growth in a confined space.
Lastly, regularly monitoring the moisture levels in the soil and adjusting watering accordingly is important. Avoid letting the soil become completely dry or overly saturated. Stick your finger about an inch into the soil – if it feels dry, it’s time to water. It’s always better to slightly underwater than to overwater, as excessive moisture can lead to root rot.
By providing the right soil conditions for your corn plant, you are setting the stage for its success. The right soil will promote proper nutrient absorption, prevent root diseases, and ensure optimal growth and vitality.
Watering Properly
Proper watering is crucial for the health and well-being of a corn plant. Understanding the watering needs of your plant will help prevent underwatering or overwatering, both of which can lead to stress and damage. Here are some essential tips for watering your corn plant:
1. Establish a watering schedule: Corn plants prefer moist but not soggy soil. Develop a regular watering schedule based on the needs of your plant and the moisture retention properties of the soil. As a general guideline, water your corn plant when the top inch of soil feels dry to the touch.
2. Use the right watering technique: When watering your corn plant, pour the water into the soil around the base of the plant rather than directly onto the leaves. This will prevent the leaves from getting wet and reduce the risk of fungal diseases.
3. Avoid overwatering: Overwatering is one of the most common mistakes when caring for a corn plant. Excess moisture can lead to root rot, yellowing leaves, and wilting. Ensure that the soil has proper drainage and empty any excess water that collects in the pot’s saucer.
4. Monitor humidity levels: Corn plants prefer moderate humidity levels, so keep an eye on the humidity in your home. In dry environments, consider using a humidifier or placing the plant’s pot on a tray filled with water and pebbles to increase humidity around the plant.
5. Adjust watering according to the seasons: The watering needs of your corn plant may vary throughout the year. During the warmer months, when the temperature and light levels are higher, the plant may require more frequent watering. In colder months or lower light conditions, the plant may need less water. Pay attention to the plant’s response and adjust your watering accordingly.
6. Check for signs of dehydration or overwatering: Monitor your corn plant for signs of dehydration, such as drooping or wilted leaves, and adjust your watering schedule accordingly. Similarly, yellowing leaves or a foul smell could indicate overwatering, so reduce the frequency of watering and improve drainage if needed.
By following these watering tips, you can ensure that your corn plant receives the right amount of water to thrive and remain healthy. Remember, consistency and observation are key when it comes to watering your plants.
Providing Adequate Lighting
Proper lighting is essential for the growth and well-being of a corn plant. As a tropical plant, corn plants thrive in bright, indirect light. Here are some tips to ensure your plant receives adequate lighting:
1. Optimal light intensity: Corn plants prefer bright but indirect sunlight. Find a location in your home that offers bright, filtered light, away from direct sunlight. Direct sunlight can scorch the leaves and cause damage. A north or east-facing window is often an ideal spot.
2. Assess light levels: Observe the light levels in the area where your corn plant is located. If the light is too dim or low, consider supplementing with artificial lighting. LED grow lights are a great option as they provide the necessary spectrum of light for plant growth.
3. Rotate the plant: If your corn plant is not receiving uniform light, rotate it every few weeks to ensure all sides receive adequate light exposure. This will help promote even growth and prevent the plant from leaning toward one direction.
4. Monitor for signs of inadequate lighting: Pay attention to your plant’s response to the light conditions. If the corn plant starts stretching or leaning towards the light source, it may be an indication that it is not getting enough light. In such cases, adjust the location or increase the amount of artificial light.
5. Protect from intense heat: While corn plants prefer warmth, excessive heat can be detrimental. Keep your plant away from heat sources like radiators or heating vents, as well as windows that receive direct sunlight. The heat can cause the leaves to wilt, turn brown, or even burn.
6. Consider seasonal changes: Light intensity and duration vary throughout the year. During the winter months, when natural light levels are lower, you may need to provide additional artificial lighting or consider moving the plant closer to a window to meet its light requirements.
By providing your corn plant with proper lighting conditions, you will ensure that it thrives and maintains its vibrant and healthy appearance. Remember to monitor the light levels and adjust accordingly to meet the plant’s needs for optimal growth.
Controlling Humidity
Controlling humidity is an important aspect of caring for a corn plant. These tropical plants prefer moderate humidity levels to thrive and maintain their lush foliage. Here are some tips to help you control humidity for your corn plant:
1. Monitor humidity levels: Regularly check the humidity levels in the room where your corn plant is located. A humidity gauge, also known as a hygrometer, can be helpful for accurate measurements. Aim for a humidity level between 40% and 60%.
2. Use a humidifier: If the air in your home is dry, especially during the winter months when heaters are running, consider using a humidifier to increase the humidity around your corn plant. Place the humidifier near the plant or in the vicinity to maintain optimal humidity levels.
3. Mist the leaves: Misting the leaves of your corn plant can help increase humidity temporarily. Use a clean spray bottle filled with water to mist the leaves, especially during dry periods or if the humidity levels are consistently low.
4. Place the plant on a tray of water: Another effective method to increase humidity is to place your corn plant’s pot on a tray filled with water and pebbles. As the water evaporates, it will create a humid microclimate around the plant.
5. Avoid drafty areas: Corn plants are sensitive to drafts, which can dry out the leaves and reduce humidity. Keep your plant away from drafty windows, doors, or air conditioning vents that can cause fluctuations in temperature and humidity.
6. Group plants together: Grouping plants together can create a localized area of higher humidity as plants release moisture through transpiration. This can help increase humidity levels for your corn plant, especially if you have multiple plants in the same location.
7. Use humidity trays: Consider using humidity trays or pebble trays filled with water near your corn plant. The water evaporating from the tray will increase the humidity levels in the surrounding areas.
Remember that each plant may have slightly different humidity requirements, so it’s essential to pay attention to how your corn plant responds to the humidity levels. Adjust the humidity control methods accordingly to provide the optimal conditions for its growth and well-being.
Maintaining the Right Temperature
Maintaining the right temperature is vital for the health and growth of a corn plant. These tropical plants thrive in warm and consistent temperatures. Here are some tips to help you maintain the ideal temperature for your corn plant:
1. Ideal temperature range: Corn plants prefer temperatures between 60°F (15°C) and 75°F (24°C). Avoid exposing your plant to extreme temperature fluctuations, as this can cause stress and damage to the foliage.
2. Avoid cold drafts: Protect your corn plant from cold drafts, such as those near windows, doors, and air conditioning vents. Sudden drops in temperature can shock the plant and lead to leaf yellowing or wilting.
3. Find a suitable location: Place your corn plant in a location where it can receive consistent temperatures within the ideal range. Avoid areas that experience temperature extremes, such as near heating sources or drafty areas.
4. Monitor seasonal temperature changes: As the seasons change, adjust the temperature conditions accordingly. During the winter months, when indoor heating is common, make sure the plant is not exposed to excessive heat or dry air. On the other hand, during the summer months, protect the plant from direct sunlight or excessively hot temperatures.
5. Consider nighttime temperatures: Corn plants prefer slightly cooler temperatures at night, around 60°F (15°C) to 65°F (18°C). If your home becomes cooler during the night, it can be beneficial for the overall health of the plant.
6. Use temperature control devices: In situations where you have limited control over the temperature, such as in an office or apartment, consider using temperature control devices like thermostats or space heaters. These can help regulate the temperature around the plant and maintain a suitable environment.
7. Observe plant response: Pay attention to how your corn plant responds to temperature changes. If you notice any wilting, leaf discoloration, or slowed growth, it may indicate that the temperature is not within the plant’s preferred range. Adjust the location or provide additional temperature regulation as needed.
By maintaining the right temperature for your corn plant, you will create an environment that promotes healthy growth and foliage. Regular monitoring and adjustments will ensure that your plant remains comfortable and thrives in its surroundings.
Fertilizing on Schedule
Fertilizing is an essential aspect of caring for a corn plant. Providing the right nutrients on a regular schedule will promote healthy growth and vibrant foliage. Here are some guidelines for fertilizing your corn plant:
1. Choose the right fertilizer: Select a balanced, water-soluble fertilizer specifically formulated for houseplants. Look for a fertilizer with an N-P-K ratio (nitrogen, phosphorus, potassium) of around 10-10-10 or 20-20-20. This balanced ratio ensures that your corn plant receives a mix of essential nutrients.
2. Follow the package instructions: Carefully read and follow the package instructions for the fertilizer you choose. Dilute the fertilizer in water according to the recommended dosage. Over-fertilizing can lead to nutrient burn and damage to the plant, so it’s crucial to apply the fertilizer as directed.
3. Establish a fertilizing schedule: Corn plants benefit from regular feedings during the growing season, which is typically spring and summer. Generally, fertilize your corn plant every 2-4 weeks during this period. Reduce the frequency during the dormant period in fall and winter.
4. Avoid fertilizing newly potted plants: If you recently repotted your corn plant, wait for a few weeks before applying fertilizer. This allows the plant to adjust to its new environment and reduces the risk of root burn.
5. Apply the fertilizer properly: Slowly pour the diluted fertilizer solution onto the soil around the base of the corn plant until it is moist but not saturated. Avoid splashing the fertilizer onto the leaves, as it can cause damage.
6. Monitor the plant’s response: Observe your corn plant for any signs of nutrient deficiencies or excessive fertilization. Wilting, yellowing leaves, or browning edges may indicate a lack of nutrients, while stunted growth or leaf burn could be a sign of over-fertilization. Adjust the fertilizer dosage or schedule accordingly.
7. Consider organic alternatives: If you prefer an organic approach, you can use organic fertilizers such as compost or well-decomposed manure. Follow the package instructions for application, or create a diluted liquid fertilizer using organic materials.
Remember, proper fertilization provides the necessary nutrients for your corn plant’s health and growth. Following a regular and balanced fertilizing schedule will help ensure that your plant thrives and remains vibrant throughout the growing season.
Pruning and Shaping the Plant
Pruning and shaping your corn plant is an important aspect of its care and maintenance. Regular pruning helps promote healthy growth, prevents overcrowding, and maintains an aesthetically pleasing shape. Here are some guidelines for pruning and shaping your corn plant:
1. Remove dead or yellow leaves: Regularly inspect your corn plant for any dead or yellow leaves. Use clean and sharp pruning shears to remove these leaves at the base where they meet the stem. Removing dead foliage not only improves the plant’s appearance but also prevents the spread of diseases.
2. Trim overgrown or unruly branches: If you notice any branches that are growing excessively long or appear unruly, consider trimming them back. Make clean cuts just above a leaf node or bud to encourage new growth and maintain a more compact shape.
3. Shape the plant: If you prefer a specific shape or want to encourage a bushier appearance, you can selectively prune the tips of the branches. This will stimulate lateral growth and create a more balanced and lush plant. Avoid excessive pruning, as it can stress the plant and result in slower growth.
4. Manage height: Corn plants can grow quite tall, so if you want to control the height, you can prune the top of the plant. This will help maintain a desired height and prevent it from becoming too leggy. Remember to only remove a small portion of the top, allowing the plant to maintain its overall health.
5. Prune for rejuvenation: Over time, corn plants can become leggy and lose their lower foliage. To rejuvenate the plant, you can perform more drastic pruning by cutting it back to a lower height. This will encourage new growth from the base of the plant, resulting in a fuller and more compact appearance.
6. Sterilize pruning tools: Before and after each pruning session, sterilize your pruning tools with rubbing alcohol or a bleach solution. This helps prevent the spread of diseases or pests from one plant to another.
7. Monitor the plant’s response: After pruning, monitor how the plant responds. New growth should appear within a few weeks. If the plant shows signs of stress, such as wilting or browning leaves, ensure it is receiving proper light, water, and temperature conditions.
By regularly pruning and shaping your corn plant, you can maintain its health, appearance, and overall vigor. Remember to take your time and prune conservatively, allowing the plant to rejuvenate and thrive in its designated space.
Dealing with Pests and Diseases
Just like any other plant, corn plants are susceptible to pests and diseases. Being proactive and addressing these issues promptly is crucial for the plant’s health and survival. Here are some tips for dealing with pests and diseases that may affect your corn plant:
1. Prevention is key: Maintain proper plant care practices to prevent pests and diseases. This includes providing adequate lighting, proper watering, and optimal soil conditions. Healthy plants are less likely to attract pests and are more resilient to diseases.
2. Inspect your plant regularly: Routinely check your corn plant for any signs of pests or diseases. Look for abnormal leaf discoloration, spots, wilting, or pest activity, such as webs, holes, or small insects on the leaves or stems.
3. Identify the problem: If you notice any signs of distress, identify the specific pest or disease affecting your corn plant. Consult plant reference books, online resources, or seek advice from a local garden center to accurately identify the issue.
4. Use organic pest control methods: For minor pest infestations, start with organic solutions. Insecticidal soaps or neem oil sprays can be effective in controlling common pests like spider mites, aphids, or mealybugs. Apply the organic pest control solution as instructed on the product label.
5. Isolate the plant: If you discover a severe pest infestation or the presence of a contagious disease, isolate the affected corn plant immediately. This will prevent the problem from spreading to other plants in your home.
6. Seek professional help if needed: If the pest infestation or disease persists or worsens despite your efforts, consider seeking professional assistance. Consult a local arborist, horticulturist or certified plant specialist who can provide specialized advice and treatments.
7. Monitor and adjust: After treating your corn plant for pests or diseases, continue to monitor its condition. Retreat as necessary and adjust your care practices to promote recovery and prevent reoccurrence.
Remember, addressing pests and diseases promptly is crucial to the overall health and well-being of your corn plant. By staying vigilant and taking proper preventive measures, you can help ensure that your plant remains healthy and pest-free.
Repotting when Necessary
Repotting is an important aspect of caring for a corn plant and ensuring its continued growth and health. While corn plants don’t require frequent repotting, there are certain signs that indicate it’s time to repot. Here are some guidelines for repotting your corn plant:
1. Observe root-bound signs: If you notice roots growing through the drainage holes, emerging from the soil surface, or densely circling the inner edges of the pot, it’s a clear indication that your corn plant has outgrown its current container. Root-bound plants can suffer from nutrient deficiencies and become less resilient to stress.
2. Consider the pot size: Choose a new pot that is one size larger than the current one. Repotting into a much larger pot can lead to waterlogging and root rot, as the excess soil retains moisture for a longer time.
3. Use the right potting mix: Select a well-draining potting mix specifically designed for indoor plants. Avoid using garden soil, as it can be too heavy and can hinder proper drainage and aeration of the roots. You can also include some organic matter, such as compost or peat moss, to improve the soil’s structure.
4. Prepare the new pot: Ensure the new pot has drainage holes at the bottom to allow excess water to escape. Place a layer of small stones or a mesh screen over the drainage holes to prevent soil from clogging the holes.
5. Lift and replant: Gently lift your corn plant from its current pot, taking care not to damage the roots. Gently loosen the root ball and remove any dead or unhealthy roots. Place your plant in the new pot, ensuring it sits at the same level as before. Add fresh potting mix around the root ball, gently firming it to provide stability.
6. Water and adjust care: After repotting, give your corn plant a thorough watering to help settle the new soil. Adjust your watering schedule and other care practices to accommodate the plant’s recovery. Be mindful that newly repotted plants may need a bit of time to adjust, so avoid overwatering during this period.
7. Repot when growth has slowed: It is best to repot your corn plant during its active growing season, which is typically in the spring or early summer. This allows the plant to recover and establish new growth more readily.
Repotting your corn plant when necessary allows it to continue growing and thriving in a healthier environment. By being attentive to signs of root-bound conditions and following proper repotting techniques, you can provide your corn plant with the right space and soil, promoting vigorous growth and overall well-being.