
Choosing the Right Seeds
When it comes to planting a seed, one of the most crucial factors is selecting the right seeds for your garden or pot. The right choice of seeds can make a significant difference in the success of your gardening endeavor. Here are some important considerations to keep in mind:
- Determine your goal: Are you looking to grow vegetables, flowers, or herbs? Deciding on your goal will help you narrow down the types of seeds you should choose. Different plants have different growth requirements, so it’s essential to align your choice with your gardening aspirations.
- Consider your climate: Every plant has a preferred climate for optimal growth. Pay attention to your region’s climate and select seeds that are suitable for your particular conditions. Some seeds are better suited for cooler climates, while others thrive in warmer climates.
- Check the seed packet: Each packet of seeds will provide vital information that can guide your decision-making. Look for details such as the plant’s growth habits, recommended planting season, and instructions on care and maintenance.
- Research different varieties: Some plants have various varieties available, each with its own unique characteristics. Explore different varieties and choose the one that best suits your preferences and gardening needs.
- Budget considerations: Seeds vary in price, so consider your budget when selecting seeds. Ensure that you allocate enough funds for all the seeds you need, while still leaving room for any additional gardening supplies.
- Quality assurance: Purchase seeds from reputable sources to ensure their quality. Check for certification labels or look for reviews from other gardeners to ensure you are getting viable and healthy seeds.
By taking the time to choose the right seeds, you are setting yourself up for a successful gardening experience. Remember to plan ahead and consider the specific requirements of the plants you wish to grow. With the right seeds in hand, you’re ready to move on to the next step in the planting process.
Selecting the Proper Pot or Garden Bed
Once you have chosen the right seeds for your garden, the next step is to select the proper pot or garden bed to plant them in. Choosing the right container or bed is essential for providing the necessary space and conditions for your plants to grow and thrive. Here are some key considerations when selecting your container or garden bed:
- Size: Consider the size of your plants when selecting a pot or garden bed. Ensure that there is enough space for the roots to grow and for the plant to reach its full potential. Plants that require more space, such as large vegetables or fruit-bearing plants, will need larger containers or beds.
- Drainage: Proper drainage is crucial for preventing excess moisture that can lead to root rot and other issues. Look for containers with drainage holes or ensure that your garden bed has sufficient drainage in place.
- Material: Pots and garden beds come in various materials, including plastic, ceramic, wood, and metal. Each material has its pros and cons in terms of durability, insulation, and water retention. Consider the specific needs of your plants and the climate in your area when selecting the material.
- Location: Think about where you will place the container or garden bed. Consider factors such as sunlight exposure, accessibility for watering and maintenance, and the overall aesthetic appeal of the location.
- Support: Some plants, such as climbing vines or tall varieties, may require additional support. Ensure that your container or garden bed can accommodate stakes, trellises, or other support structures if needed.
Whether you choose a pot or a garden bed, ensure that it provides the appropriate space, drainage, and support for your plants. Remember to consider the specific needs and growth habits of your chosen seeds. With the right container or bed in place, you are ready to move on to the next step of preparing the soil for planting.
Preparing the Soil
Before planting your seeds, it’s important to prepare the soil to create an optimal environment for growth. Properly preparing the soil ensures that your plants receive the necessary nutrients and that the roots can penetrate easily. Here are the essential steps to prepare the soil:
- Remove weeds: Start by clearing the area of any weeds or unwanted vegetation. Weeds compete with your plants for nutrients and can hinder their growth. Remove weeds manually or use a garden hoe to loosen and uproot them.
- Loosen the soil: Use a garden rake or a tiller to loosen the soil. This helps create a loose, well-aerated texture that promotes root development. Avoid compacting the soil, as this can restrict root growth.
- Amend the soil: Assess the quality of your soil and make necessary amendments. Add organic matter such as compost or well-rotted manure to improve soil fertility and structure. This provides essential nutrients and enhances moisture retention.
- Test the pH: Consider testing the soil’s pH level to ensure it is within the appropriate range for your plants. Different plants thrive in different pH levels, so adjusting it accordingly can enhance their nutrient absorption.
- Break up clumps: Break up any large soil clumps with your hands or a rake to create a finer texture. This ensures that the roots can easily penetrate the soil and access the nutrients they need.
By taking the time to prepare the soil properly, you are setting the foundation for healthy, thriving plants. Remember to remove weeds, loosen the soil, amend it with organic matter, test the pH if necessary, and break up any clumps. With the soil ready, you can move on to the exciting step of planting the seeds.
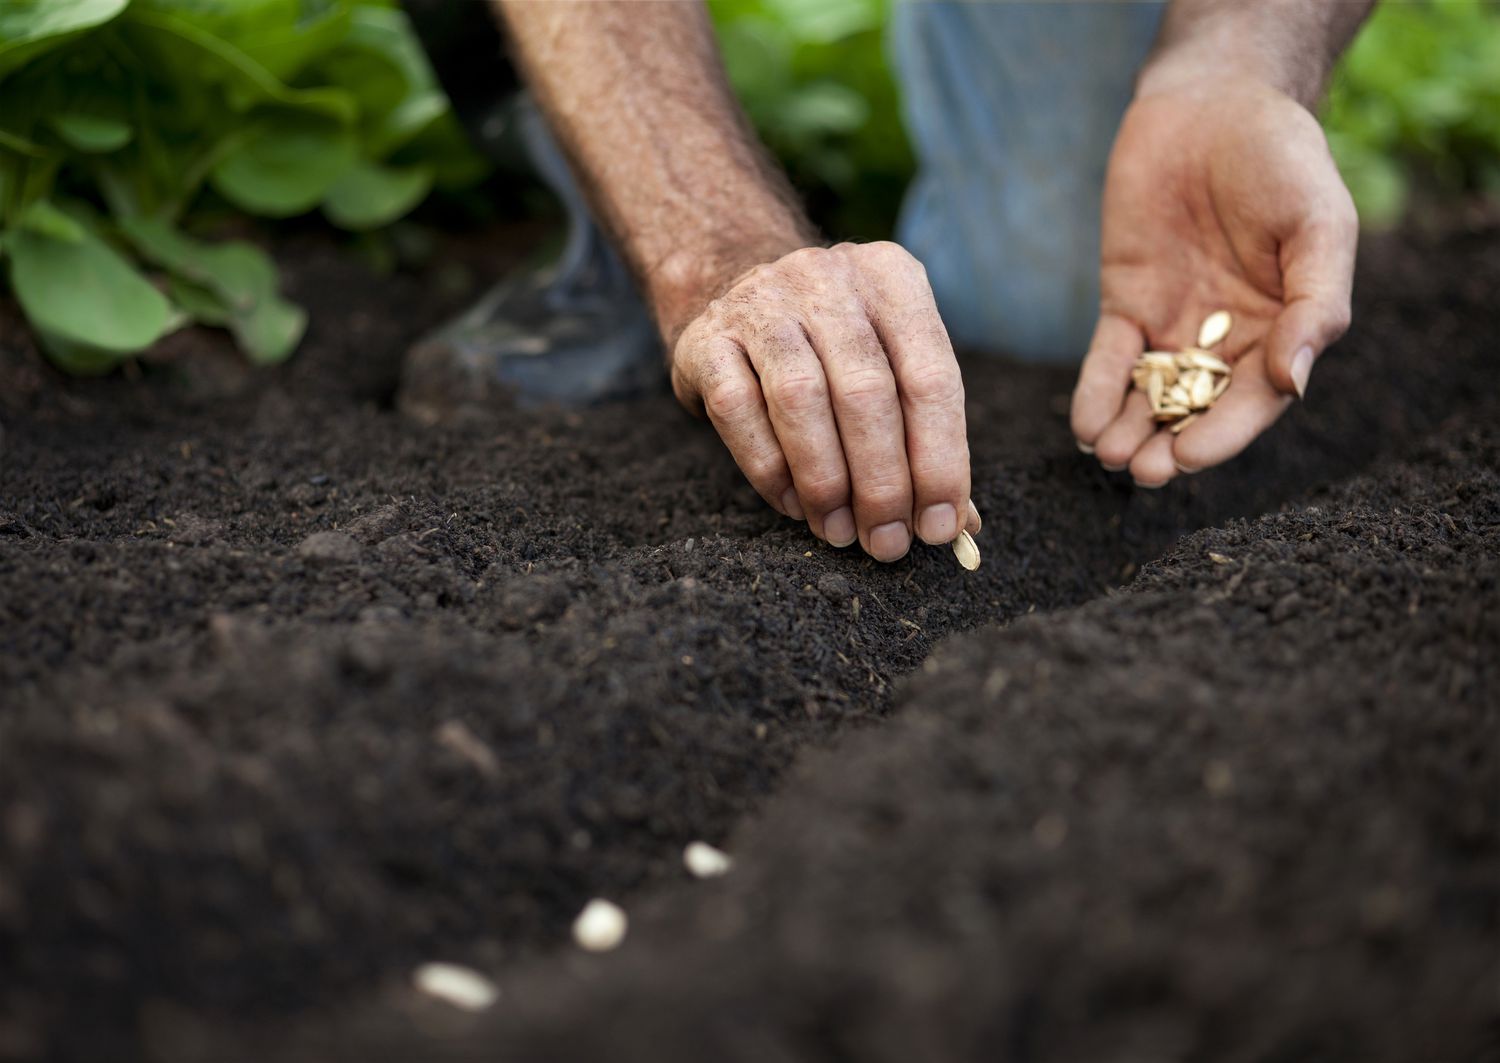
Planting the Seeds
Now that you have selected the right seeds, chosen the appropriate pot or garden bed, and prepared the soil, it’s time to plant the seeds. Proper planting ensures that the seeds have the best chance of germinating and growing into healthy plants. Follow these steps to plant your seeds:
- Read the seed packet: Review the instructions on the seed packet to understand the specific requirements for planting. Some seeds may require soaking or pre-treatment before planting, while others need to be sown directly into the soil.
- Space the seeds: Determine the recommended spacing for your seeds and ensure proper spacing between each seed. This prevents overcrowding and allows ample room for plants to grow and receive adequate nutrients and sunlight.
- Plant at the right depth: Plant the seeds at the recommended depth, usually indicated on the seed packet. Some seeds require shallow planting, while others need to be buried deeper in the soil.
- Gently cover the seeds: After placing the seeds in the soil, gently cover them with a thin layer of soil, following the recommended planting depth. Lightly pat down the soil to ensure good seed-to-soil contact.
- Water thoroughly: Give the newly planted seeds a generous watering to initiate germination. Use a gentle spray or a watering can to avoid displacing the seeds or creating uneven watering patterns.
- Label and keep records: Label the planted area with the name of the seeds and the planting date. Maintaining accurate records will help you track the progress of your plants and make adjustments if needed.
Properly planting your seeds sets them up for success right from the start. Remember to read the seed packet instructions, space the seeds appropriately, plant them at the right depth, cover them gently, water thoroughly, and keep records of your planting. With the seeds planted and watered, it’s time to move on to the next steps of providing adequate sunlight, water, and nutrients for your growing plants.
Watering and Fertilizing
Watering and fertilizing are essential aspects of plant care that ensure the proper growth, development, and overall health of your plants. Understanding the watering and fertilizing needs of your specific plants is crucial for their success. Follow these guidelines to effectively water and fertilize your plants:
- Watering: The frequency and amount of water required may vary depending on the type of plants, soil conditions, and climate. Check the moisture level of the soil regularly by sticking your finger into the soil up to the second knuckle. If it feels dry, it’s time to water. Provide a deep watering to encourage the roots to grow deeper into the soil. Avoid overwatering, as it can lead to root rot and other plant diseases. Water the soil at the base of the plants, rather than spraying water over the foliage, to prevent the risk of fungal diseases.
- Fertilizing: Plants need essential nutrients to thrive. Fertilizers provide these nutrients in a balanced form. Choose a fertilizer that is appropriate for your plants, whether it’s organic or synthetic. Follow the recommended application instructions on the fertilizer package. Over-fertilization can damage the plants, so it’s important to use the correct dosage. Apply fertilizers evenly to ensure that all plants receive the necessary nutrients. Regularly monitor your plants for signs of nutrient deficiencies or excesses and make adjustments to the fertilization routine as needed.
- Timing: Consider the timing of watering and fertilizing based on the specific needs of your plants. Watering in the morning allows the foliage to dry during the day, reducing the risk of fungal diseases. Fertilize at the beginning of the growing season or as indicated on the fertilizer package. Avoid fertilizing during periods of extreme heat or drought to prevent damage to the plant roots.
- Observation: Keep a close eye on the plants and observe their response to watering and fertilization. Look for any signs of overwatering, underwatering, nutrient deficiencies, or excesses. Adjust your watering and fertilizing schedule and amounts accordingly to meet the needs of your plants.
By providing proper watering and fertilizing, you are ensuring that your plants have the necessary resources to thrive and produce healthy growth. Remember to water at the right time and in the right amount, choose appropriate fertilizers, follow the recommended application instructions, and keep a close watch on your plants’ response. With the right care, your plants will flourish and reward you with a beautiful and bountiful garden.
Providing Adequate Sunlight
Sunlight is a vital element for plant growth and development. Providing adequate sunlight ensures that your plants can undergo photosynthesis, produce energy, and flourish. Here are some key considerations when it comes to sunlight requirements for your plants:
- Know your plants: Different plants have varying levels of sunlight requirements. Some plants thrive in full sun, while others prefer partial shade. Research and understand the sunlight needs of the specific plants you are growing.
- Observe the sunlight patterns: Spend some time in your garden or observing your indoor space to understand the sunlight patterns. Note the areas that receive direct sunlight, partial shade, or full shade. This will help you determine the best location for your plants.
- Provide the right location: Place your plants in areas that match their sunlight preferences. If a plant requires full sun, choose a spot that receives at least six hours of direct sunlight per day. For plants that prefer partial shade, find areas that receive a few hours of direct sunlight or dappled sunlight throughout the day.
- Consider light intensity: Some plants may require intense sunlight, while others thrive under indirect light. Assess the intensity of the sunlight in different areas of your garden or select appropriate areas indoors with suitable levels of light intensity.
- Utilize shading techniques: In areas with intense sunlight or during hot summer months, you can provide shade for plants that prefer partial shade. Use shade cloth, umbrellas, or strategically position taller plants to create shade and protect delicate plants from scorching sunlight.
- Rotate or reposition plants: If you notice that a specific plant is not receiving enough sunlight or is being deprived of sunlight due to nearby structures or plants, consider rotating or repositioning the plant to a more appropriate location.
- Monitor plant response: Observe how your plants respond to the sunlight they receive. Look for signs of sunburn, yellowing leaves, or stunted growth, which may indicate that your plants are not receiving the right amount or type of sunlight. Make adjustments as needed to ensure the best growing conditions.
By providing adequate sunlight, you are enabling your plants to undergo photosynthesis and thrive. Understanding your plants’ sunlight requirements, observing sunlight patterns, choosing appropriate locations, and making necessary adjustments will help your plants receive the right amount and type of sunlight they need. With proper sunlight exposure, your plants will grow healthy and vibrant.
Protecting the Seeds from Harmful Pests
When planting seeds, it’s essential to protect them from potential pests that can damage or destroy your precious plants. Garden pests, such as insects, rodents, and birds, can pose a threat to the seeds and seedlings. Implementing preventative measures and taking proactive steps can help safeguard your seeds. Here are some effective strategies for protecting your seeds from harmful pests:
- Clean planting materials: Before planting, ensure that your soil, pots, garden beds, and any gardening tools are clean and free from any debris or remnants of pests. This reduces the risk of introducing pests to the seeds or providing a favorable environment for their infestation.
- Use physical barriers: Physical barriers, such as row covers, netting, or fences, can help prevent pests from accessing your seeds and seedlings. Install these barriers over your garden beds or pots to create a protective shield against pests, including birds, insects, and larger animals.
- Implement companion planting: Certain plants have natural pest-repellent properties or attract beneficial insects that can prey on pests. By planting these companion plants alongside your seedlings, you can deter pests and create a healthier ecosystem in your garden.
- Apply organic pest control methods: Consider using organic pest control methods, such as homemade insecticidal sprays or natural predators, to combat pests. Ladybugs, praying mantises, and nematodes are examples of beneficial insects that can help control common garden pests.
- Practice proper watering techniques: Overwatering can create damp conditions that attract pests and promote fungal growth. Water your plants at the base, avoiding wetting the leaves unnecessarily, to reduce the risk of attracting pests.
- Regularly inspect and monitor: Regularly inspect your plants for any signs of pest infestations. Look for chewed leaves, wilting, or unusual discoloration. Promptly address any pest issues you identify to prevent further damage.
- Maintain garden hygiene: Keep your garden and surrounding areas clean by removing debris, fallen leaves, and weeds. These can provide hiding places for pests, so removing them reduces the chance of pest infestations.
- Use organic pest repellents: Certain organic pest repellents, such as garlic spray or neem oil, can be effective in deterring pests. Follow the product instructions and use them sparingly to avoid harming beneficial insects or overexposing your plants to the repellents.
By implementing these strategies, you can minimize the risk of pests damaging your seeds and seedlings. Clean planting materials, use physical barriers, incorporate companion planting, employ organic pest control methods, practice proper watering techniques, regularly inspect and monitor your plants, maintain garden hygiene, and consider organic pest repellents. With these measures in place, you can protect your seeds and help them grow into healthy and thriving plants.
Monitoring Growth and Maintenance
Once you’ve planted your seeds and they begin to sprout, it’s crucial to monitor their growth and provide necessary maintenance for their optimal development. Regular monitoring allows you to identify any issues early on and take appropriate action to ensure the health and success of your plants. Here are some important aspects to consider when monitoring the growth and providing maintenance:
- Observe growth patterns: Regularly observe the growth patterns of your plants. Look for signs of healthy growth, such as new leaves, increased height, or budding flowers. Monitor the growth rate to ensure progress is occurring as expected.
- Check for nutrient deficiencies: Nutrient deficiencies can hinder plant growth. Pay attention to signs of yellowing leaves, stunted growth, or discolored foliage, which may indicate a lack of essential nutrients. Supplement with appropriate fertilizers or organic matter to address any deficiencies.
- Control weeds: Weeds compete with your plants for nutrients, water, and sunlight. Regularly remove any weeds that appear in the vicinity of your plants. Consider mulching to suppress weed growth and retain moisture in the soil.
- Monitor irrigation: Keep track of your watering schedule and ensure that your plants are receiving adequate moisture. Adjust your watering routine as needed based on weather conditions, plant requirements, and the moisture level of the soil.
- Prune and trim: Pruning and trimming promote healthy growth and shape your plants. Remove any damaged, diseased, or overcrowded parts to enhance air circulation and prevent the spread of diseases.
- Support climbing plants: If you’re growing climbing plants, regularly check for adequate support and secure them using stakes, trellises, or other appropriate structures. This helps prevent damage to the plants and ensures proper growth.
- Watch for pests and diseases: Keep an eye out for any signs of pest infestations or diseases. Inspect the leaves, stems, and undersides of your plants regularly. If you notice any signs of pests or diseases, take immediate action to mitigate the damage.
- Remove spent blooms or fruits: Removing spent blooms or harvesting ripe fruits promotes continued flowering and fruit production. This redirects the plant’s energy towards new growth and ensures a tidy and well-maintained appearance.
By closely monitoring the growth and providing necessary maintenance, you can address any issues promptly and promote healthy development in your plants. Observe growth patterns, check for nutrient deficiencies, control weeds, monitor irrigation, prune and trim as needed, support climbing plants, watch for pests and diseases, and remove spent blooms or fruits. With proper monitoring and maintenance, your plants will flourish and reward you with a beautiful and thriving garden.
Transplanting the Seedlings
As your seedlings continue to grow and develop, there may come a time when they outgrow their initial containers or need to be moved to a different location. Transplanting seedlings is an important step in their journey towards maturity. Here are some key considerations and steps to follow when transplanting your seedlings:
- Choose the right time: Timing is crucial when it comes to transplanting seedlings. Wait until the seedlings have developed a strong root system and several sets of true leaves before transplanting. This ensures that they are robust enough to withstand the transplanting process.
- Select the appropriate location: Consider the specific sunlight requirements and spacing needs of your plants when selecting the new planting location. Ensure that the soil is well-prepared and suitable for the seedlings’ growth.
- Prepare the new planting hole or container: Dig a hole or prepare a new container that is slightly larger than the root ball of the seedling. Ensure that the new planting hole or container is filled with well-draining soil that has been adequately amended with compost or organic matter.
- Water the seedlings: Before transplanting, water the seedlings well. This helps hydrate the roots and make the transplanting process smoother and less stressful for the plants.
- Handle seedlings with care: Gently lift the seedlings from their current containers, being careful not to damage the delicate roots. Hold the seedlings by their leaves if possible, avoiding excessive handling of the stem or root area.
- Place seedlings in the new location: Carefully place the seedlings into the new planting hole or container, ensuring that they are positioned at the same depth as they were in their previous containers. Lightly pat down the soil around the seedlings to secure them in place.
- Water thoroughly after transplanting: Give the transplanted seedlings a thorough watering to help settle the soil and hydrate the roots. This promotes their recovery and helps them establish in their new environment.
- Protect from stress: After transplanting, provide some shade or protection from direct sunlight for a few days to help the seedlings recover from the transplanting stress. This reduces the risk of wilting and shock.
- Maintain care and monitoring: Continue to care for and monitor the transplanted seedlings as they adjust to their new environment. Ensure they receive adequate water, sunlight, and nutrients to support their growth.
Transplanting seedlings can be a critical step in their journey towards maturity. By choosing the right time, selecting an appropriate location, preparing the new planting hole or container, handling seedlings with care, placing them in the new location, watering thoroughly, protecting from stress, and maintaining care and monitoring, you can help ensure a successful transplanting process. With proper care, your transplanted seedlings will continue to thrive and progress towards becoming mature plants.
Harvesting the Fruits of Your Labor
After dedicating time and effort to nurture your plants from seeds to mature plants, the final reward comes when you can harvest the fruits of your labor. Harvesting is an exciting and satisfying process that allows you to enjoy the literal fruits, vegetables, or herbs that you have grown. Here are some essential tips to ensure a successful and rewarding harvest:
- Know the right time: Each plant has its specific harvesting time. Refer to seed packets or gardening resources to determine the optimal time to harvest. Factors such as size, color, and texture of the produce can indicate ripeness.
- Use the right tools: Use appropriate tools for different types of produce to avoid damage or injury. Pruning shears, scissors, or sharp knives can be handy for harvesting fruits, while gently pulling or twisting can work for certain vegetables or herbs.
- Harvest in the morning: Harvesting in the early morning when the plants are hydrated and temperatures are cooler can help maintain the freshness and flavor of the produce. Avoid harvesting in the heat of the day when vegetables and fruits can become limp or overripe quickly.
- Handle with care: Handle harvested produce with care to avoid bruising or damaging them. Place delicate fruits or vegetables in shallow baskets or containers to prevent them from being squashed or crushed.
- Enjoy at peak flavor: For the best flavor and nutritional value, consume freshly harvested produce as soon as possible. Some crops, such as leafy greens and herbs, are ideal for immediate use, while others, like certain fruits and root vegetables, can be stored for longer periods.
- Store properly: If you have an abundance of harvested produce, learn the proper storage methods for each type of crop. Some fruits and vegetables can be stored in a cool, dry place, while others may require refrigeration or freezing.
- Preserve your harvest: To enjoy the benefits of your harvest throughout the year, consider preserving your produce through methods such as canning, pickling, drying, or freezing. This allows you to savor the taste of your garden all year round.
- Share the bounty: If you have an abundant harvest, share the fruits of your labor with family, friends, or neighbors. It’s a wonderful way to spread joy and appreciation for the hard work that went into growing the produce.
- Reflect and plan: As you harvest and enjoy the fruits of your labor, take a moment to reflect on your gardening journey. Assess what worked well, what challenges you faced, and how you can improve for future seasons. Use this experience to plan and refine your gardening techniques.
Harvesting is a gratifying culmination of your gardening efforts. By knowing the right time, using the right tools, handling with care, enjoying at peak flavor, storing properly, preserving, sharing the bounty, and reflecting on your journey, you can fully enjoy the rewards of your hard work. Celebrate your harvest, savor the flavors, and let it inspire and motivate you for future gardening endeavors.